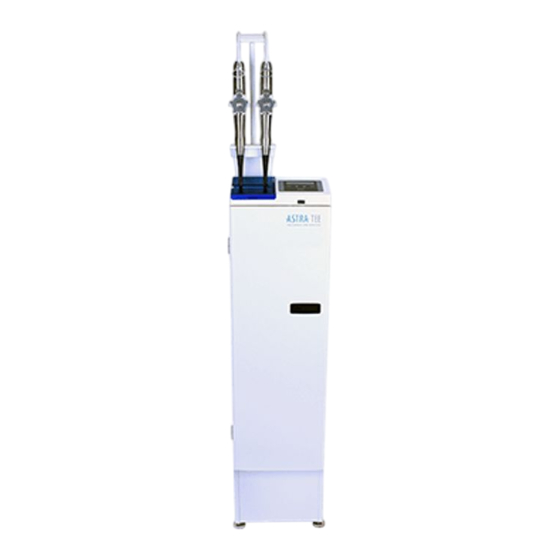
Civco ASTRA TEE Quick Start Instructions
Hide thumbs
Also See for ASTRA TEE:
- Installation manual (24 pages) ,
- Quick start instructions (6 pages) ,
- Operator's manual (93 pages)
Advertisement
Quick Links
At rest, the display reads:
Press ENTER.
Step 1:
Display will read:
Scan barcode on probe electrical connector
and place into the wall‐mounted Connector
Step 2:
Holder.
Display will read:
Open door and insert pre‐cleaned probe into
disinfection chamber, placing probe handle
into Probe Handle Holder. Loop probe cable
Step 3:
over cable strain relief.
Display will read:
Entering Exam ID is optional, but you must
scan ID or press ENTER to continue.
Step 4:
Display will read:
Install second probe (if required) following
same instructions or close door. Barcode
Step 5:
scanner will remain illuminated until door is
closed or a second probe is scanned.
Display will read:
ASTRA TEE (50229_E)
ASTRA TEE
QUICK START INSTRUCTIONS
Press Enter to Start
Scan Second Probe
Scan Operator ID
®
Ready for Use
Scan Probe
Insert Probe
Scan Exam ID
ENTER = skip
Close Door or
ENTER = Skip
Advertisement

Summary of Contents for Civco ASTRA TEE
- Page 1 ® ASTRA TEE QUICK START INSTRUCTIONS At rest, the display reads: Ready for Use Press Enter to Start Press ENTER. Scan Probe Step 1: Display will read: Scan barcode on probe electrical connector and place into the wall‐mounted Connector Step 2: Insert Probe Holder. Display will read: Open door and insert pre‐cleaned probe into disinfection chamber, placing probe handle ...
- Page 2 ® ASTRA TEE INSTRUCTIONS DE DÉMARRAGE Support du câble de la sonde Chambre de désinfection Lecteur de code à barres À l’état de veille, l’écran affiche: Ready For Use (Prêt à l’utilisation) Press Enter to Start (Appuyer sur Entrée ...
- Page 3 Scanning Operator ID or pressing ENTER to Filling chamber with Step 6: Skip will start the disinfection cycle. HLD, please wait…. Display will read: Once level is reached, open the disinfection chamber door and dip an MRC test strip into Test MRC Step 7: the HLD, holding it submerged for 2 seconds. PASS < > FAIL Remove the test strip and close door. Display will read: Compare test strip to color chart on manufacturer’s bottle. Display will read: Press PASS or FAIL using the corresponding Test MRC Step 8: arrows. PASS < > FAIL NOTE: Pressing FAIL requires a new bottle of HLD. If PASS is pressed, display will read: ONE PROBE: If desired, conduct leak testing Test Probe Leakage according to manufacturer’s instructions. PASS <‐ ‐> FAIL Press PASS or FAIL using corresponding arrows. Data will be logged. Step 9: TWO PROBES: If desired, selecting which Probe to test first? probe to test first using the corresponding ...
- Page 4 Le fait de scanner l’ID d’utilisateur ou Filling chamber with d’appuyer sur ENTER (ENTRÉE) pour passer à (Remplissage de la chambre avec) Étape 6: HLD, please wait…. (du désinfectant, l’étape suivante déclenchera le cycle de désinfection. L’écran affichera: veuillez attendre...) Quand le niveau est atteint, ouvrir la porte de la chambre de désinfection et tremper pendant Test MRC (Test CMR) deux secondes une bandelette de test CMR. PASS < > FAIL Étape 7: Retirer la bandelette et fermer la porte. (SUCCÈS < > ÉCHEC) L’écran affichera: Comparez la bandelette de test à la charte des couleurs sur la bouteille du fabricant. L'écran affichera: Test MRC (Test CMR) Appuyez sur PASS (Succès) ou FAIL (Échec) en PASS < > FAIL Étape 8: utilisant les boutons sous les flèches (SUCCÈS < > ÉCHEC) correspondantes. REMARQUE : Appuyez sur FAIL (Échec) requière une nouvelle bouteille de désinfectant radical. Si PASS (Succès) est appuyé, l'écran affichera: Test Probe Leakage (Essai d'étanchéité UNE SONDE: Si désiré, menez un essai de la sonde) ...


Need help?
Do you have a question about the ASTRA TEE and is the answer not in the manual?
Questions and answers