Table of Contents
Advertisement
Quick Links
Advertisement
Table of Contents

Subscribe to Our Youtube Channel
Related Manuals for Electrolux EOB 64150 X


Summary of Contents for Electrolux EOB 64150 X
- Page 1 User information Electric oven EOB 64150 X...
- Page 2 We were thinking of you when we made this product...
- Page 3 aÉ~ê=ÅìëíçãÉêI Regulations, norms and guidelines Please read these instructions for use carefully. Please note the safety instructions in section „Safety This appliance complies with the following norms: instructions“ on page 5. EN 60 335-1 and EN 60 335-2-6 in respect of the Store the instructions for use in a safe place for later safety of electrical appliances for domestic use and for reference and pass the manual on to any successor...
-
Page 4: Table Of Contents
Contents Safety instructions ..........5 Application tables ..........24 Electrical connection..........5 Guidelines for baking..........24 Child safety .............. 5 Recommended temperatures for roasting ....25 Safety during operation..........5 Recommendations for soufles and gratins ..... 25 Safety when cleaning..........5 Guidelines for grilling .......... -
Page 5: Safety Instructions
Safety instructions The safety of this appliance is in accordance with rec- It is essential that pan holders, oven cloths or ognised technical regulations and statutory law on oven gloves be used when hot food is being appliance safety as well as international safety regula- taken out of the oven. -
Page 6: Appliance Description
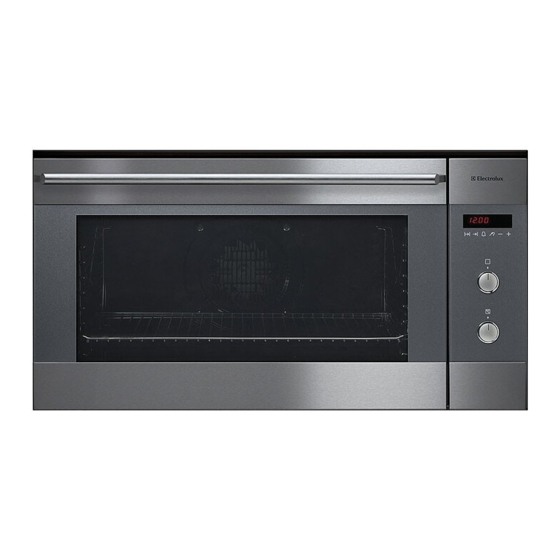
Appliance description Appliance illustration Oven door Shelf rack Hot air fan Top heat/grill (drop-down) Vapor panel Socket for roasting thermometer Control panel Control panel Indicator for the electronic timer Keys for electronic timer Operation signal lamp Oven selector Control light for the oven temperature Temperature control oven... -
Page 7: Before Using The Appliance For The First Time
Before using the appliance for the first time Setting the clock The oven will not function until the clock is set. 093 4 The clock must be set before the oven is used and whenever power has been disconnected to the appli- ance. -
Page 8: Control Knobs And Indicators
Control knobs and indicators Oven selector (4) The oven switch is turned clockwise or anti-clockwise into the required position. The dot on the knob shows the selected function. Light The oven lamps are switched on and the oven is not heating. The oven lamps light up for all of the other functions too. -
Page 9: The Oven
The oven Accessories Besides the accessories supplied, please use only suitable, heat-resistant baking and roasting tins. Please follow the manufacturer's instruc- tions carefully. The following are supplied: Baking tray For cakes and biscuits Gridiron: For cookware, baking tins and food for roasting and grilling Drip pan For moist cakes and roasts... -
Page 10: Electronic Minute Minder
Electronic minute minder You can find out on p. 17 how to use the roasting thermometer function. As well as providing a short-time alarm for reminders, the electronic timer controls the oven in several other ways. You can use it to set the cooking time, the finish time and the core temperature. -
Page 11: Adjusting The Minute Minder
Adjusting the minute minder The minute minder can be used independently of the switching functions. Press “ Q ”. The lamp will flash. The display will • read “0.00”. • Use “+”/“-” to set the timer in minutes and sec- 053 0 onds. -
Page 12: This Is How To Programme The Switching Operations
This is how to programme the switching operations Selecting the operation: • Press the selector button for the operation you wish to use. The lamp above the button you have pressed will start to flash and a number will appear in the display. Altering/adjusting the operation: •... -
Page 13: When The Cooking Time Is Finished
When the cooking time is finished the oven will switch off and “End” will appear in the display. A warning signal will sound. Both of the lamps next to the display will stop flashing. • Press any selector button to stop the alarm buzzer. -
Page 14: (Switch-Off Function)
Setting the finish time U (switch-off function) Use this function if you want the oven to switch off automatically after a certain time. • Press “U ”: the lamp will flash and the display will show the normal clock. • Use “+”/“-”... -
Page 15: Automatic Turn-On And Shut-Off
Automatic turn-on and shut-off If you wish use the oven’s time-delay feature, you may pre-select both cooking time and finish time. The automatic start time itself cannot be specified, but this is derived from both settings. It is impossible to set a finish time before the start time: you will hear a buzzer and the value in the display will not change. - Page 16 After approx. 3 secs. the lamps will stay on con- tinuously. The display will show “Auto” until the oven switches on. • Set the temperature and the operating mode. The oven will automatically switch on at the specified time and both lamps next to the dis- play will flash alternately.
-
Page 17: The Roasting Thermometer
The roasting thermometer The roasting thermometer measures the temperature inside the food. When the core temperature has reached a certain value, the roast is done just right: not too dry and not too bloody, roasted just right (see the chart on page 27. Once the preset core temperature is reached, the oven automatically switches off. -
Page 18: Setting The Roasting Thermometer Function
Setting the roasting thermometer function This function will only work when the roasting thermometer is inserted. The right display shows you the current core tempera- ture inside the roast and “70 °C” will appear in the left display. The two lamps next to the display will flash alternately. -
Page 19: Roasting Thermometer Function With Delayed Switch-On
Roasting thermometer function with delayed switch-on This allows you to delay the start of cooking when using the roasting thermometer. As no fixed cooking time is set, it is not possible to set a finish time. This function will only work when the roasting thermometer is inserted. -
Page 20: How To Take Food Out Of The Oven
The oven automatically switches on at the beginning of the cooking time. Both lamps will flash alternately. When the actual core temperature reaches the value you have set, the oven will switch itself off and “End” will appear in the display. A warning signal will sound. -
Page 21: Applications And Hints
Applications and hints Baking with Hot air mode Pre-heating the oven With the Hot air mode you can bake on up to 2 baking Most dishes do not require the oven to be pre-heated. trays at the same time. No pre-heating is required. We recommend pre-heating Rack levels •... -
Page 22: Roasting
Notes on the table game). The table contains a selection of cakes etc., the nec- Hint: If you use dishes/tins for roasting (particu- essary temperatures, cooking times and rack levels. larly for small roasts) your oven will stay cleaner! • A temperature range and times are given, since the optimum temperature depends on the rec- Roasting tins... -
Page 23: Large-Area Grilling
Large-area grilling Preserving Caution! Always keep the oven door closed Attention! During the preserving process a lot when grilling. Risk of burning! of moisture develops in the oven interior owing to the evaporation of water. This moisture • When grilling small portions use the oven mode emerges through the ventilator openings and as Infrared grill a result the control panel may become hot. -
Page 24: Application Tables
Application tables Guidelines for baking operating modes=are highlighted. Please refer to the notes on the table on p. 22. The recommended temperatures for the preferred Type of baked product Multi-hot air Top/Bottom heat Pizza mode Time Rack Temp. Rack Temp. Rack Temp. -
Page 25: Recommended Temperatures For Roasting
Recommended temperatures for roasting The recommended temperatures for the preferred operating modes=are highlighted. Please refer to the notes on the table on p. 22. Type of meat Turbo area grill Quantity Top/Bottom heat Hot air Time Weight Rack Temp. Rack Temp. -
Page 26: Guidelines For Grilling
Guidelines for grilling Type of meat Rack level Infrared grill Infrared large-area grill 1st side 2nd side 1st side 2nd side in minutes Pork chop/cutlet 10-13 8-10 10-15 10-12 Pork fillet 12-15 8-10 14-16 12-14 Frying sausages 10-12 8-10 15-20 10-15 Kebab 8-10... -
Page 27: Recommended Core Temperatures
Recommended core temperatures Dish Food probe temperature in °C Beef Roast beef/beef fillet, rare 40-45 Roast beef/beef fillet, medium 50-55 Roast beef/beef fillet, well-done 60-65 Joint of beef 80-85 Pork Loin of pork 65-70 Roast pork / jam 80-85 Neck, knuckle 80-85 Cutlet, saddle 75-80... -
Page 28: Cleaning And Care
Cleaning and care No heating elements may be switched on while Control panel and oven door the oven is being cleaned. Make sure that the Please ensure that seals on the door and in the oven has cooled down sufficiently for you to be door frame are kept clean. -
Page 29: Removing The Oven Door
Removing the oven door The oven door can be removed to facilitate cleaning the oven. • Open the oven door as far as it will go. • Fold up the clamps on the door hinges. • Take hold of the oven door on both sides and close it slowly. -
Page 30: What Is To Be Done If
What is to be done if… For reasons of safety repairs to the appliance, Please switch the safety fuses off or unscrew particularly repairs carried out on live parts, may them in the event of a failure or defect. Should only be carried out by qualified electricians or you not be able to rectify a failure or a defect with skilled customer service technicians, since such... -
Page 31: The Oven Lamp Needs To Be Replaced
... the oven lamp needs to be replaced Caution: danger of electric shock! Discon- nect the oven from the mains before you open the oven lamp cover. Switch off the fuse or pull out the mains plug! Allow the appliance and the lamp to cool before changing the lamp. -
Page 32: Installation Instructions
Installation instructions Instructions for electricians The appliance may only be connected by a The appliance is supplied ready to plug in. It qualified electrician. Confirmation of profes- should be connected only to a properly pro- sional connection must be provided on the tected wall socket. -
Page 33: Installing In A Fitted Kitchen Unit
Installing in a fitted kitchen unit Installing the appliance: • Insert the plug into the wall socket. • Slide the oven fully into the housing unit. Do not jam the cooker connection! Fastening in the appliance • Using the screws provided and slanting them outwards, fasten the appliance to the cabinet. -
Page 34: Disposal
Disposal Disposing of the packaging All of the parts used for packaging are recycla- ble; strips of wood are untreated and foil and rigid foam parts are indicated accordingly. PE for polyethylene (outer cover, or bag for accessories) PS for foamed polystyrene (padding). Please dispose of packaging material and old appliances properly. -
Page 35: Technical Data
Technical data Exterior dimensions of the appliance Power consumption: Width 892 mm Top heat 1.1 kW Height 480 mm Bottom heat 1.1 kW Depth 550 mm Rear wall heating element 2.4 kW Depth with the oven door open 900 mm Infrared grill 2.4 kW Large area grill... -
Page 36: Warranty/Customer Service
Warranty/Customer Service European warranty Electrolux grants a warranty on this appliance in the countries listed at the end of this user information for the period of time specified in the appliance warranty or for the period specified by law. Should you move... - Page 40 www.electrolux.com...
Need help?
Do you have a question about the EOB 64150 X and is the answer not in the manual?
Questions and answers