Table of Contents
Advertisement
Advertisement
Table of Contents

Subscribe to Our Youtube Channel
Related Manuals for Electrolux EOB53000


Summary of Contents for Electrolux EOB53000
- Page 1 Oven EOB53000...
-
Page 2: Table Of Contents
2 electrolux Electrolux. Thinking of you. Share more of our thinking at www.electrolux.com Contents Safety instructions........3 What to do if …........27 Description of the Appliance ....4 Electrical Connection......28 Before using for the first time ....6 Installation Instructions ...... -
Page 3: Safety Instructions
3 Safety instructions Electrical safety • Do not put any strain on the oven door when open. • This appliance must be connected by a qualified electrician only. • Never pour water directly into the oven when it is hot. This could cause damage •... -
Page 4: Description Of The Appliance
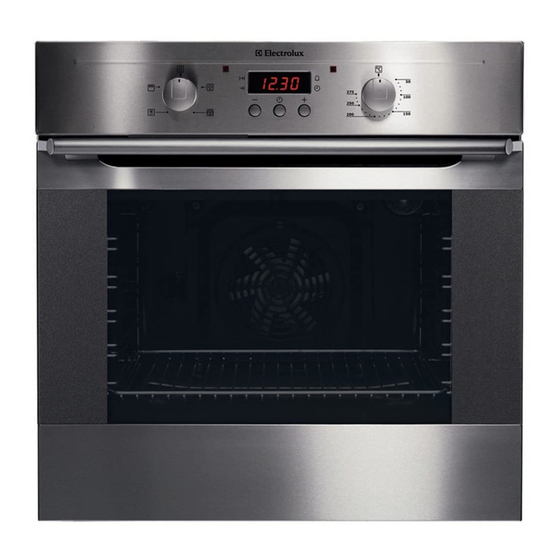
4 electrolux Description of the Appliance General Overview Control panel Door handle Full glass door Control Panel Oven Power Indicator Temperature Pilot Light Time display Clock function buttons Oven Functions Temperature selector... -
Page 5: Oven Features
5 Oven Features Top heat and heating elements Oven lighting Shelf positions Fan heating element Oven shelf runners, removable Oven Accessories Shelf Roasting Pan For dishes, cake tins, items for roasting and For baking and roasting or as a pan for col- grilling. -
Page 6: Before Using For The First Time
6 electrolux Before using for the first time Setting and changing the cur- After approx. 5 seconds, the flashing stops and the clock displays the time of day set. rent time The oven only operates when the time has been set. -
Page 7: Operating The Oven
7 Operating the Oven Switching the Oven On and Off Oven Power Indicator Temperature Pilot Light Oven Functions Temperature selector Turn the oven functions control knob to the desired function. Turn the temperature control knob to the desired temperature. -
Page 8: Oven Functions
8 electrolux Oven Functions The oven has the following functions: Oven function Light With this function you can light up the oven interior, e.g. for cleaning. Convection with ring For baking on up to three oven shelves at the same time. -
Page 9: Grill Set
9 Inserting the oven shelf and the roasting For roasting larger joints of meat or poul- pan together: try on one oven shelf. Inserting the grill tray on top: Lay the oven shelf on the roasting pan. Push the roasting pan between the guide bars of the selected oven level. -
Page 10: Clock Functions
10 electrolux Clock Functions Function Indicators Time display Function Indicators Selector Button Button Button • The desired oven function and tempera- Countdown ture can be selected before or after the To set a countdown. A signal sounds after clock functions Cook time and End the time has elapsed. - Page 11 11 Countdown When the time has elapsed, the function in- dicator flashes and an acoustic signal Press Selection button repeatedly, sounds for 2 minutes. until the function indicator Countdown flashes. Press any button to switch off the signal. Cook time...
- Page 12 12 electrolux After approx. 5 seconds, the display returns Using the button, set the re- to the current time. The function indicator quired switch-off time. Cook time will light up. After approx. 5 seconds, the display returns When the time has elapsed, the function in- to the current time.
- Page 13 13 Cook time and End time com- The function indicators Cook time bined End time light up and the time is shown in the display. Cook time and End time can be used simultaneously, if the oven is to be automatically switched on and off at a later time.
-
Page 14: Usage, Tables And Tips
14 electrolux Usage, Tables and Tips Baking 3 baking trays: Oven function: Convection with ring heating element Baking tins • For Convection with ring heating element bright metal tins are suitable. Oven levels oven level 1, 3 and 5 •... -
Page 15: Baking Tables
15 temperature setting. Different rates of With longer baking times, you can browning even out as baking progress- switch the oven off about 10 minutes before the end of the baking time, in or- • Your new oven may bake or roast differ- der to utilise the residual heat. - Page 16 16 electrolux Baking on more than one oven level Convection Convection with ring with ring heating heating Time element element Type of baking Hours: Mins. Shelf positions from bottom Tempe- rature in °C 2 levels 3 levels Cakes/pastries/biscuits on baking trays...
- Page 17 17 Baking results Possible cause Remedy Cake browns unevenly Oven temperature too high and baking Set a lower temperature and in- time too short crease baking time Dough/mixture is unevenly distributed Spread the dough/mixture evenly on the baking tray...
- Page 18 18 electrolux Table: Meat, roasting, casseroles Convection with ring heating Time element Meat Temperature Shelf position Hrs. : Min. ºC Pork 0:30-0:35 Shoulder; leg; rolled; boned 170-180 per 450 g/1 lb spare rib; loin of pork plus 30-35 mins Beef...
-
Page 19: Defrosting Table
19 Convection with ring Time heating element Poultry, Game, Fish, Quantity approx. Vegetables Shelf po- Tempera- Hrs. : Min. sition ture °C Meat Loaf 675 g/1.5 lbs 170-180 1:00-1:10 Poultry / Game Chicken 1 kg/2 lbs 170-180 0:50-1:10 Chicken 1.5 kg/3 lbs... -
Page 20: Grill Sizes
20 electrolux Defrosting Further de- Food time frosting time Comments Min. (mins.) Cream that is still slightly frozen in part can still Cream, 2 x 200g 80-100 10-15 be whipped Flan/gateau, 1400g Grill sizes • For grilling, place the shelf in the rec- ommended shelf position. -
Page 21: Cleaning And Care
21 Oven level Temperature in Time in hours Food to be dried °C (Guideline) 1 level 2 levels Vegetables Beans 60-70 1 / 4 Peppers (strips) 60-70 1 / 4 Vegetables for soup 60-70 1 / 4 Mushrooms 50-60... -
Page 22: Oven Lighting
22 electrolux Removing the shelf support rails To re-insert, first hook the rail into place at the back (1) and then insert the front and press into place (2). First pull the front of the rail away from the oven wall (1) and then unhook at the back (2). -
Page 23: Oven Roof
23 Oven Roof Repositioning the heating element The upper heating element can be folded down to make it easier to clean the oven roof. Folding down the heating element Move the heating element back up to- wards the oven roof. - Page 24 24 electrolux Removing the oven door from its hinges Lay the oven door with the outer side Open the oven door as far as it will go. facing downwards on something soft and level, for example, a blanket in order to prevent scratches.
-
Page 25: Oven Door Glass
25 Fold up the clamping levers (A) on both Undo the clamping levers (A) on both door hinges back into their original door hinges fully. positions. Close the oven door as far as the first position (approx. 45°). Close the oven door. - Page 26 26 electrolux Cleaning the door glass pushed between the outer door panel and the guide corner(D). Clean the door glass thoroughly with a solu- tion of water and washing up liquid. Then dry it carefully. Putting the door glass back...
-
Page 27: What To Do If
27 Fold up the clamping levers (A) on both Close the oven door. door hinges back into their original positions. What to do if … Problem Possible cause Remedy The oven does not heat up The oven is not switched on... -
Page 28: Electrical Connection
28 electrolux Electrical Connection The oven is designed to be connected to 230-240V~(50Hz) electricity supply. The oven has an easily accessible terminal block which is marked as follows: Letter L Live terminal Letter N Neutral terminal Earth terminal This oven must be earthed! -
Page 29: Installation Instructions
29 Installation Instructions Suitable separation devices include e.g. Attention: The new appliance may only cut-outs, fuses (screw fuses are to be be installed and connected by a regis- taken out of the holder), RCD’s and con- tered expert. tactors. - Page 30 30 electrolux...
- Page 31 31...
-
Page 32: Disposal
32 electrolux Disposal Packaging material The packaging materials are environ- mentally friendly and can be recycled. The plastic components are identified by markings, e.g. >PE<, >PS<, etc. Please dispose of the packaging materials in the appropriate container at your local waste disposal facilities. -
Page 33: Guarantee/Customer Service
• Appliances found to be in use within a commercial environment, plus those We, Electrolux, undertake that if within 12 which are subject to rental agreements. months of the date of the purchase this Elec- trolux appliance or any part thereof is proved •... - Page 34 Industriestrasse 10, CH-5506 Mägenwil Svizzera Electrolux Ljubljana d.o.o. Slovenija +38 61 24 25 731 Gerbièeva 98, 1000 Ljubljana Electrolux Slovakia s.r.o., Electrolux Domáce Slovensko +421 2 43 33 43 22 spotrebièe SK, Seberíniho 1, 821 03 Bratisla- Suomi www.electrolux.fi Electrolux Service, S:t Göransgatan 143,...
-
Page 35: Service And Spare Parts
35 Service and Spare Parts In the event of technical faults, please first check whether you can remedy the problem yourself with the help of the operating in- structions (section “What to do if…”). If you were not able to remedy the problem yourself, please contact the Customer Care Department or one of our service partners. - Page 36 387 996 837-A-270509-01...
Need help?
Do you have a question about the EOB53000 and is the answer not in the manual?
Questions and answers