Table of Contents
Advertisement
Advertisement
Table of Contents

Related Manuals for Electrolux EOB63100X


Summary of Contents for Electrolux EOB63100X
- Page 1 user manual Oven EOB63100...
-
Page 2: Table Of Contents
2 electrolux Share more of our thinking at www.electrolux.com Contents Safety instructions... 3 Description of the Appliance ... 4 Before using for the first time ... 6 Operating the Oven... 7 Usage, Tables and Tips... 14 Cleaning and care ... 24... -
Page 3: Safety Instructions
Changes in the colour of the oven’s enamel coating as a result of use do not affect the appliance’s suitability for normal and correct use. They therefore do not constitute a de- fect in the sense of the warranty law. electrolux 3... -
Page 4: Description Of The Appliance
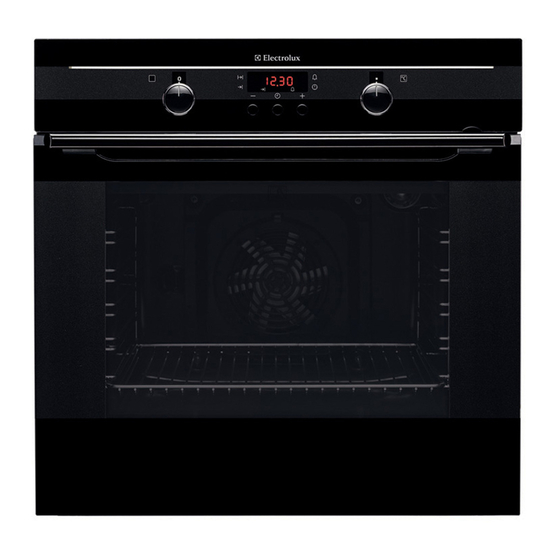
4 electrolux Description of the Appliance General Overview Door handle Control panel Oven door Light bar... -
Page 5: Control Panel
All of the interior walls of the oven are coated in a special enamel (catalytic coating). Shelf positions Time display Clock function buttons Temperature selector Top heat and heating elements Oven shelf runners, removable electrolux 5 Temperature Pilot Light Oven lighting Fan heating element Bottom heat... -
Page 6: Before Using For The First Time
6 electrolux Oven Accessories Shelf For dishes, cake tins, items for roasting and grilling. Before using for the first time Setting and changing the cur- rent time The oven only operates when the time has been set. When the appliance has been connect-... -
Page 7: Operating The Oven
Wash the floor of the oven in the same way using warm soapy water, and allow to dry. Wipe the front of the appliance with a damp cloth. electrolux 7... -
Page 8: Switching The Oven On And Off
8 electrolux Switching the Oven On and Off Oven power indicator Oven Functions Turn the oven functions control knob to the desired function. Turn the temperature control knob to the desired temperature. The power indicator is lit while the oven is on. -
Page 9: Roasting Pan
The high rim around the oven shelf is an additional device to prevent cookware from slipping. Inserting the oven shelf and the roasting pan together: Lay the oven shelf on the roasting pan. electrolux 9... -
Page 10: Grill Set
10 electrolux Push the roasting pan between the guide bars of the selected oven level. Grill set The grill set consists of grill and roasting pan. The grill can used on both sides. Warning: There is a risk of burning... -
Page 11: Clock Functions
• When the cooking time has ended, turn the oven function and temperature dial back to the OFF position. Countdown Press Selection until the function indicator Countdown electrolux 11 Function Indicators Button and End button repeatedly, flashes. - Page 12 12 electrolux Using the button, set the re- quired Countdown (max. 2 hours 30 minutes). After approx. 5 seconds, the display shows the remaining time. The function indicator Countdown When the time has elapsed, the function in- dicator flashes and an acoustic signal sounds for 2 minutes.
- Page 13 Press any button to switch off the signal and the programme. Cook time and End time bined Cook time and End time used simultaneously, if the oven is to be automatically switched on and off at a later time. electrolux 13 will light com- can be...
-
Page 14: Usage, Tables And Tips
14 electrolux Using the function Cook time period of time that the dish requires to cook. In this example, 1 hour. Using the function End time time at which the dish is to be ready. Usage, Tables and Tips Baking... - Page 15 10 minutes before the end of the baking time, in or- der to utilise the residual heat. Unless otherwise stated, the values giv- en in the tables assume that cooking is started with the oven cold. electrolux 15...
- Page 16 16 electrolux Type of baking Baking in tins Ring cake or brioche Madeira cake/fruit cakes Sponge cake Sponge cake Flan base - short pastry Flan base - sponge mixture Apple pie Apple pie (2tins Ø20cm, diagonally off set) Apple pie (2tins Ø20cm, diagonally off set) Savoury flan (e.
- Page 17 Convection with ring heating element Convection with ring heating element Convection with ring heating element Convection with ring heating element Conventional Convection with ring heating element Conventional electrolux 17 Temperature Time °C Hr: Mins. 160-180 0:40-1:20 180-200 0:30-1:00 200-220 0:10-0:25 200-220...
- Page 18 18 electrolux Baking on more than one oven level Type of baking Cakes/pastries/biscuits on baking trays Cream puffs/Eclairs Dry streusel cake Biscuits Short pastry biscuits Viennese whirls Biscuits made with sponge mixture Pastries made with egg white, me- ringues Macaroons...
-
Page 19: Table For Bakes And Gratins
Conventional Conventional Convection with ring heating element Shelf position Conventional Conventional Conventional electrolux 19 Remedy Set a lower temperature and in- crease baking time Spread the dough/mixture evenly on the baking tray Use a slightly higher temperature setting Shelf Temperature °C... - Page 20 20 electrolux Roasting Oven function: Conventional vection grilling Roasting dishes • Any heat-resistant ovenware is suitable for roasting. (Please read the manufac- turer's instructions.) • Large roasting joints can be cooked di- rectly in the tray or on the shelf with the tray placed below •...
-
Page 21: Grill Sizes
Always insert the tray for collecting the fat into the first shelf position from the bottom. • The grilling times are for guidance only. • Grilling is particularly suitable for flat pieces of meat or fish. electrolux 21 Temper- Time Shelf ature Hours position °C mins. -
Page 22: Grilling Table
22 electrolux Grilling table Food to be grilled Burgers Pork fillet Sausages Fillet steaks, veal steaks Fillet of beef, roast beef (approx. 1 kg) Toast Toast with topping 1) Do not pre-heat Defrosting Oven function: Defrost ture setting) Defrosting table... -
Page 23: Making Preserves
°C 1 level 60-70 60-70 60-70 50-60 40-50 60-70 60-70 60-70 60-70 electrolux 23 Time in hours (Guideline) 2 levels 1 / 4 1 / 4 1 / 4 1 / 4 1 / 4 1 / 4 8-10 1 / 4... -
Page 24: Cleaning And Care
24 electrolux Preserves table The times and temperatures for making pre- serves are for guidance only. Preserve Soft fruit Strawberries, blueberries, raspber- ries, ripe gooseberries Unripe gooseberries Stone fruit Pears, quinces, plums Vegetables Carrots Mushrooms Cucumbers Mixed pickles Kohlrabi, peas, asparagus... -
Page 25: Shelf Support Rails
Warning: Risk of electric shock! Prior to changing the oven light bulb: – Switch off the oven! – Disconnect from the electricity supply. Place a cloth on the oven floor to protect the oven light and glass cover. electrolux 25... -
Page 26: Oven Door
26 electrolux Changing the oven light bulb/cleaning the glass cover Remove the glass cover by turning it anti-clockwise and then clean it. If necessary: replace with 25 watt, 230 V, 300 °C heat-resistant oven lighting. Refit the glass cover. Oven door For easier cleaning of the oven interior, the oven door can be taken off its hinges. -
Page 27: Oven Door Glass
Close the oven door as far as the first position (approx. 45°). Take hold of the door trim(B) on the up- per edge of the door at both sides and press inwards to release the clip seal. electrolux 27... - Page 28 28 electrolux Then remove the door trim by pulling it upwards. Take hold of the door glass panels on their upper edge one after the other and take them out of the guide by pulling them upwards.. Cleaning the door glass panels Clean the door glass panels thoroughly with a solution of water and washing up liquid.
-
Page 29: What To Do If
Because of the cooler surface at the front of the cooker, opening the oven door during (or just after) baking or roasting may cause the glass to steam electrolux 29 Remedy Switch the oven on Set the current time on the clock... -
Page 30: Electrical Connection
30 electrolux Electrical Connection The oven is designed to be connected to 230-240V~(50Hz) electricity supply. The oven has an easily accessible terminal block which is marked as follows: Letter L Live terminal Letter N Neutral terminal Earth terminal This oven must be earthed! -
Page 31: Installation Instructions
The built-in unit must meet the stability requirements of DIN 68930. • Built-in ovens and built-in cooking sur- faces are fitted with special connection systems. For safety reasons, they must only be combined with appliances from the same manufacturer. electrolux 31... - Page 32 32 electrolux...
- Page 33 33...
-
Page 34: Disposal
34 electrolux Disposal Packaging material The packaging materials are environ- mentally friendly and can be recycled. The plastic components are identified by markings, e.g. >PE<, >PS<, etc. Please dispose of the packaging materials in the appropriate container at your local waste disposal facilities. -
Page 35: Guarantee/Customer Service
Guarantee/Customer Service Standard guarantee conditions We, Electrolux, undertake that if within 12 months of the date of the purchase this Elec- trolux appliance or any part thereof is proved to be defective by reason only of faulty work- manship or materials, we will, at our option... - Page 36 Str. Garii Progresului 2, S4, 040671 RO Industriestrasse 10, CH-5506 Mägenwil Electrolux Ljubljana d.o.o. Gerbièeva 98, 1000 Ljubljana Electrolux Slovakia s.r.o., Electrolux Domáce spotrebièe SK, Seberíniho 1, 821 03 Bratisla- Electrolux Service, S:t Göransgatan 143, S-105 45 Stockholm Tarlabaþý caddesi no : 35 Taksim Istanbul 129090 Ìîñêâà, Îëèìïèéñêèé...
-
Page 37: Service And Spare Parts
– Type of fault – Any error messages displayed by the appliance So that you have the necessary reference numbers from your appliance at hand, we recommend that you write them in here: Model description: PNC: S No: electrolux 37... - Page 38 38...
- Page 39 39...
- Page 40 387 996 841-A-280509-01...
Need help?
Do you have a question about the EOB63100X and is the answer not in the manual?
Questions and answers
cooling **** does not switch off i have to turn power off to stop it
what can i do
The cooling function on the Electrolux EOB63100X continues to run to cool the appliance down and switches itself off automatically once the oven has cooled sufficiently.
This answer is automatically generated