Table of Contents
Advertisement
Quick Links
Advertisement
Table of Contents

Related Manuals for Tacony Baby Lock Flare

Summary of Contents for Tacony Baby Lock Flare
- Page 3 Electrical Hazards: INTRODUCTION • This machine should be connected to an AC power Thank you for purchasing this machine. Before using this source within the range indicated on the rating machine, carefully read the “IMPORTANT SAFETY label. Do not connect it to a DC power source or INSTRUCTIONS”, and then study this manual for the inverter.
- Page 4 SAVE THESE • Switch the machine to the symbol “O” position to turn it off when making any adjustments in the INSTRUCTIONS needle area. • Do not use a damaged or incorrect needle plate, as This machine is intended it could cause the needle to break. for household use.
- Page 5 Baby Lock retailer to obtain Changes or modifications not expressly approved by the correct lead. Tacony Corporation could void the user’s authority to operate the equipment. Federal Communications This equipment complies with FCC/IC radiation...
- Page 6 For Users in Canada This device complies with Industry Canada’s licence-exempt RSSs. Operation is subject to the following two conditions: (1) This device may not cause interference; and (2) This device must accept any interference, including interference that may cause undesired operation of the device.
- Page 7 This Terms of Use (“Agreement”) is a legal agreement programs; between Tacony Corporation (“Company”) and you that 2.1.6 to include Company’s copyright notice governs your use of any Software, installed on or made and this Agreement on all entire and available by Company for use with sewing or craft products partial copies of the Software;...
- Page 8 Termination This Agreement is governed by the laws of Japan and Japanese Courts shall have exclusive Company shall have the right to terminate this jurisdiction with respect to this Agreement Agreement at any time by providing a written except with regard to enforcement in which notice to you if you commit a material breach case the jurisdiction of the Japanese Courts of any terms of this Agreement and fail to...
- Page 9 PRECAUTION FOR WIRELESS COPYRIGHT AND LICENSE CONNECTION This product includes software developed by the following vendor: Make sure you use a router or firewall when connecting ©2008 Devicescape Software, Inc. your machine to the Internet to protect it against unauthorized access from the Internet. TRADEMARKS IMPORTANT: READ BEFORE DOWNLOADING, COPYING,...
-
Page 10: Table Of Contents
CONTENTS CONTENTS Chapter 1 GETTING READY Updating Your Machine’s Software ....59 Index..............60 Names of Machine Parts........9 Included accessories ............11 Optional accessories ............12 Turning the Machine On/Off......13 LCD Operation ........... 14 Settings screen..............14 Adjusting input sensitivity for operation keys......15 Wireless Network Connection Functions.... -
Page 11: Chapter 1 Getting Ready
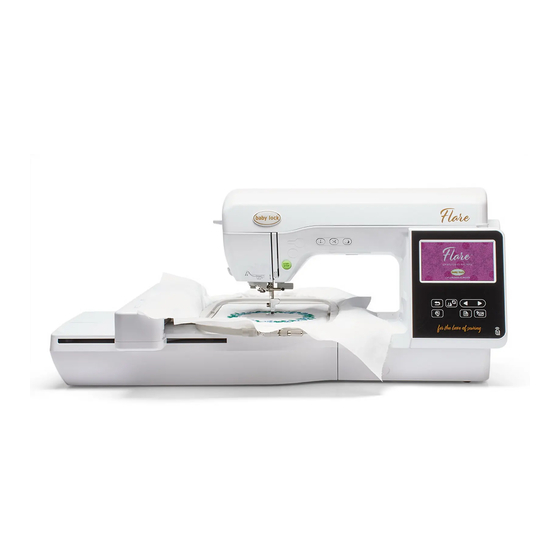
Names of Machine Parts GETTING READY Chapter C Needle threader lever (page 24) Note D Handwheel Turn the handwheel toward you (counterclockwise) to raise and • Be sure to install the latest software. lower the needle. Refer to “Updating Your Machine’s Software” on E Handle page 59. - Page 12 Names of Machine Parts ■ Embroidery Unit ■ Operation panel and operation keys 1 Embroidery frame holder (page 32) 2 Frame-securing lever (page 31) 3 Embroidery unit connection (page 27) 1 LCD (liquid crystal display) (touch panel) 4 Carriage (page 27) Selected pattern settings and messages are displayed.
-
Page 13: Included Accessories
Names of Machine Parts Included accessories After opening the carton, check that the following accessories are included. Part code for each item is listed under the part name. Embroidery foot “U” Needle set Bobbin (4) Seam ripper Scissors Cleaning brush XD0313-051 75/11 3 needles, (One bobbin is on machine.) -
Page 14: Optional Accessories
Names of Machine Parts Memo Optional accessories • To obtain optional accessories or parts, contact your authorized Baby Lock retailer. The following are available as optional accessories to be purchased separately. • All specifications are correct at the time of printing. Please be aware that some specifications may change without notice. -
Page 15: Turning The Machine On/Off
Turning the Machine On/Off • (For U.S.A. only) Turning the Machine On/Off This appliance has a polarized plug (one blade wider than the other). To reduce the risk of electrical shock, this plug is intended to fit in a WARNING polarized electrical outlet only one way. -
Page 16: Lcd Operation
LCD Operation B Select the size of pattern thumbnails. LCD Operation C Select the display units (mm/inch). ■ General settings Settings screen Press to change the default machine settings. Press , after you changed necessary settings. Memo • The latest version of software is installed in your machine. -
Page 17: Adjusting Input Sensitivity For Operation Keys
LCD Operation ■ Wireless LAN settings Adjusting input sensitivity for operation keys You can adjust the sensitivity of the operation keys to 5 levels. Display the settings screen to set desired level. Press to display the settings screen. Display page 6 by pressing Press [Start]. -
Page 18: Wireless Network Connection Functions
Wireless Network Connection Functions Enabling a wireless network connection Wireless Network Connection Functions The machine can be connected to your wireless network. Press to display the settings screen. Operations available with a wireless network connection Display page 8 by pressing This machine supports a wireless network connection. - Page 19 Wireless Network Connection Functions Press beside [Wireless LAN Setup Wizard]. When the following message appears, press A list of available SSIDs appears. When a connection is established, the following message appears. Select the SSID that was noted. Press to exit the setup.
-
Page 20: Winding/Installing The Bobbin
Winding/Installing the Bobbin ■ Setting the wireless LAN connection from the Winding/Installing the Bobbin [Others] menu The [Others] menu on page 9 of the settings screen contains the following items. CAUTION • Use the plastic bobbin that comes with this machine or bobbins of the same type. - Page 21 Winding/Installing the Bobbin Memo Memo • By placing the bobbin into the bobbin case in the • When using the spool as shown below, use the same orientation that it was on the bobbin winder thread spool insert (mini king thread spool). shaft, the bobbin can be installed with the correct Make sure that the thread spool insert is firmly winding direction of the bobbin thread.
- Page 22 Winding/Installing the Bobbin Pass the thread under the hook on the bobbin winding When the bobbin winding becomes slow, press the thread guide, and then wind it counterclockwise under “Start/Stop” button to stop the machine. the pretension disk. CAUTION • When the bobbin winding becomes slow, stop the machine, otherwise the machine may be damaged.
-
Page 23: Installing The Bobbin
Winding/Installing the Bobbin Insert the bobbin into the bobbin case so that the Installing the bobbin thread unwinds to the left. Install the bobbin wound with thread. You can begin embroidering immediately without pulling up the bobbin thread by simply inserting the bobbin in the bobbin case and guiding the thread through the slit in the needle plate cover. -
Page 24: Upper Threading
Upper Threading Memo Upper Threading • By guiding the thread around the tab of the needle plate cover, passing the thread as shown by 2 in this illustration, then lightly pulling the thread at 3, CAUTION the thread will enter the tension spring of the bobbin case to apply the appropriate tension to the bobbin thread during embroidering. - Page 25 Upper Threading Use the presser foot lever to raise the presser foot. While holding the thread near the spool, pass the thread through the thread guide cover. And then, pass the thread under the thread guide plate, and pull it up. Memo 1 Thread guide cover •...
- Page 26 Upper Threading Check that the needle and thread are compatible with Lower the needle threader lever on the left side of the the needle threader. If they are compatible, continue machine until it clicks, and then slowly return the lever with the next step.
-
Page 27: Replacing The Needle
Replacing the Needle Replacing the needle Replacing the Needle Use the screwdriver and a new needle that has been determined to be straight according to the instructions in CAUTION “Checking the needle” on page 25. Press (Needle position button) once or twice to •... - Page 28 Replacing the Needle CAUTION • Be sure to insert the needle until it touches the needle stopper and securely tighten the needle clamp screw with the screwdriver, otherwise the needle may break or damage may result. Follow steps “Replacing the embroidery foot”...
-
Page 29: Chapter 2 Embroidery
Embroidering Preparation EMBROIDERY Chapter Attaching the embroidery unit Embroidering Preparation Follow the steps below to prepare the machine for embroidery. CAUTION Step 8 • Before attaching the embroidery unit, be sure to turn off the machine. Otherwise, injuries may occur if one of the operation buttons is accidentally pressed and the machine starts embroidering. - Page 30 Embroidering Preparation Turn off the machine. Note • Make sure that there is no gap between the embroidery unit and the machine, otherwise the CAUTION embroidery pattern may not be embroidered correctly. Be sure to fully insert the connector into •...
-
Page 31: Embroidering Attractive Finishes
Embroidering Preparation Embroidering attractive finishes Hooping the fabric in the embroidery frame There are many factors that go into beautiful embroidery. Using the appropriate stabilizer (page 30) and hooping the CAUTION fabric in the frame (page 30) are two important factors mentioned earlier. - Page 32 Embroidering Preparation ■ Attaching iron-on stabilizers (backing) to the ■ Inserting the fabric fabric For best results in your embroidery projects, always use CAUTION stabilizer material for embroidery. • If you use a frame that is too small, the presser Press the iron-on stabilizer material to the wrong side foot may strike the frame during embroidering of the fabric.
-
Page 33: Attaching The Embroidery Frame
Embroidering Preparation Gently stretch the fabric taut, and tighten the frame Place the embroidery sheet on the inner frame. adjustment screw to keep the fabric from loosening after stretching. Line the mark on the fabric up with the base line on the •... - Page 34 Embroidering Preparation ■ Removing the embroidery frame Align the embroidery frame guide with the right edge of the embroidery frame holder. Press (Presser foot lifter button) to raise the presser foot. Raise the frame-securing lever. 1 Embroidery frame holder 2 Embroidery frame guide Slide the embroidery frame into the holder, making sure to align the embroidery frame’s arrow mark with the one on holder.
-
Page 35: Embroidering
Embroidering Press to display the desired pattern on the Embroidering screen. ■ Copyright information Select a desired embroidery pattern, and then press The patterns stored in the machine are intended for private use only. Any public or commercial use of copyrighted patterns is an infringement of copyright law and is strictly •... - Page 36 Embroidering ■ Selecting character patterns Memo • If [Embroidery Frame Identification View] in the Press settings screen is set to [ON], the pattern can be edited in the screen as if that embroidery frame is Press the key of the font you want to embroider. attached.
- Page 37 Embroidering Edit the pattern position. Press • The pattern can be selected with your finger and then moved by dragging it. Use to select patterns that • For details on editing the pattern, refer to “Editing are overlapping and cannot be selected by touching Patterns (Pattern Editing Screen)”...
-
Page 38: Embroidering A Pattern
Embroidering CAUTION CAUTION • Make sure the needle is up when the • Do not let hands or objects hit the carriage embroidery frame is moving. If the needle is while embroidering. The pattern may misalign. down, it could break and result in injury. •... - Page 39 Embroidering ■ If the bobbin runs out of thread Repeat the same steps for embroidering the remaining colors. When the bobbin begins to run out of thread during embroidering, the machine will stop and the message below will appear. Press and follow the directions below to replace the bobbin.
-
Page 40: Embroidery Foot Auto Down
Embroidering ■ Resuming embroidery after turning off the Press power The current color and stitch number are saved when embroidery is stopped. The next time the machine is turned on, you have the option to continue or delete the pattern. To return to the area in the pattern where you stopped embroidering, follow steps through... -
Page 41: Adjusting Thread Tension
Embroidering Adjusting thread tension Note • If the upper thread is not threaded correctly or the The upper thread tension is changed. bobbin is not installed correctly, it may not be possible to set the correct thread tension. If the Press correct thread tension cannot be achieved, rethread the upper thread and insert the bobbin... -
Page 42: Adjusting The Bobbin Case (With No Color On The Screw)
Embroidering Adjusting the bobbin case (with no color on CAUTION the screw) • When adjusting the bobbin case, be sure to The bobbin case (with no color on the screw) can be adjusted remove the bobbin from the bobbin case. when bobbin tension changes are required to accommodate •... -
Page 43: Using The Thread Trimming Function (Jump Stitch Trim)
Embroidering Using the Thread Trimming Function (Jump Embroidering the appliqué patterns Stitch Trim) When the color embroidering order display shows (APPLIQUE MATERIAL)], The thread trimming function will automatically trim any (APPLIQUE POSITION)] or excess thread jumps within the color. Embroidery frame (APPLIQUE)], follow the procedure below. -
Page 44: Using A Frame Pattern To Make An Appliqué
Embroidering ■ 2. Sewing the appliqué position on the base Finish embroidering the remainder of the pattern. fabric Using a frame pattern to make an appliqué Sew the appliqué position. You can use frame patterns of the same size and shape to create an appliqué. -
Page 45: Split Embroidery Patterns
Embroidering ■ Method 2 Split embroidery patterns Select a straight stitch frame pattern, and embroider the pattern onto the base fabric. Split embroidery patterns created with Palette Ver.7 or later can be embroidered. With split embroidery patterns, embroidery designs larger than the embroidery hoop are divided into multiple sections, which combine to create a single pattern after each section is embroidered. -
Page 46: Editing Patterns (Pattern Editing Screen)
Editing Patterns (Pattern Editing Screen) Display Editing Patterns (Pattern Editing Explanation Key Name Screen) Press this key to rotate the pattern. Press to return the pattern to its Rotate key When a pattern is selected in the pattern selection screen original position. - Page 47 Editing Patterns (Pattern Editing Screen) Display Display Explanation Explanation Key Name Key Name Press this key to change the size of the Press this key to edit each character pattern. separately. Size key Edit character key : Enlarges the pattern proportionately. : Decreases the pattern proportionately.
-
Page 48: Editing Patterns (Embroidery Settings Screen)
Editing Patterns (Embroidery Settings Screen) Aligning the pattern and the needle position Editing Patterns (Embroidery Settings Screen) Example: Aligning the lower left side of a pattern and the needle position When is pressed in the editing screen, the embroidery settings screen appears. After editing the pattern, press to continue to the embroidering screen. -
Page 49: Embroidering Linked Characters
Editing Patterns (Embroidery Settings Screen) Press to cancel the current character patterns. Embroidering linked characters Follow the procedure described below to embroider linked Select the character patterns for “DEF”, and then press characters in a single row when the entire pattern extends beyond the embroidery frame. -
Page 50: Thread Color Sorting
Using the Memory Function Thread color sorting Using the Memory Function This function allows you to embroider while replacing the ■ Embroidery data precautions thread spool a minimal number of times. Before starting to embroider, press in the embroidery CAUTION settings screen to rearrange the embroidery order and sort it by thread colors. -
Page 51: Saving Embroidery Patterns
Using the Memory Function Saving embroidery patterns Retrieving embroidery patterns You can save embroidery patterns that you have customized Retrieve embroidery patterns saved in the machine's memory, in the machine's memory, or on a USB flash drive. or on a USB flash drive, or transferred via wireless network. You can also transfer the patterns to your computer via When retrieving the embroidery patterns from a USB wireless network. - Page 52 Using the Memory Function Press Memo • When you press , the selected embroidery pattern will be deleted permanently. • When saving a retrieved pattern, press the following keys. 1. Press 2. Press the key for the desired destination. : Saves to the machine. : Saves to the USB flash drive.
-
Page 53: Chapter 3 Appendix
Care and Maintenance APPENDIX Chapter Cleaning the race Care and Maintenance Stitching performance will suffer if lint and dust collects in the bobbin case, therefore, it should be cleaned regularly. CAUTION Press (Needle position button) to raise the needle. • Unplug the power cord before cleaning the machine, otherwise injuries or an electric Turn off the machine. -
Page 54: Touch Panel Is Malfunctioning
Care and Maintenance Use the cleaning brush or a vacuum cleaner to remove Touch panel is malfunctioning any lint and dust from the race and bobbin thread sensor and the surrounding area. If the screen does not respond correctly when you touch a key (the machine does not perform the operation or performs a different operation), follow the steps below to make the proper adjustments. -
Page 55: Troubleshooting
Troubleshooting Use the included screwdriver to loosen the embroidery Troubleshooting foot screw, and then remove the embroidery foot. If the machine stops operating correctly, check the following possible problems before requesting service. You can solve most problems by yourself or visit us at www.babylock.com. - Page 56 Troubleshooting Symptom, Cause/solution Reference Symptom, Cause/solution Reference Embroidery foot is attached incorrectly. The operation keys do not respond, or the key response is too sensitive. Stabilizer is not attached to fabric being embroidered. A glove is worn when the keys are pressed. 10, 15 The keys are pressed with a fingernail.
- Page 57 Troubleshooting Symptom, Cause/solution Reference Symptom, Cause/solution Reference The carriage was moved while the embroidery High-pitched sound while embroidering frame was being removed or attached during Pieces of thread are caught in the race. embroidery. • If the carriage is moved during the process, the Upper threading is incorrect.
-
Page 58: Error Messages
Troubleshooting Error messages When erroneous operations are performed messages and advice on operation will be displayed on the LCD. Follow what is displayed. If you press or do the operation correctly while the error message is displayed, the message disappears. Error messages Cause/solution A malfunction occurred. - Page 59 Troubleshooting Error messages Cause/solution The authentication and encryption methods used by The authentication/encryption methods used by the selected wireless access the selected wireless LAN access point/router are point/router are not supported by your machine. not supported by your machine. For infrastructure mode, change the authentication and encryption methods of the wireless access point/router.
-
Page 60: How Can I Find The Wireless Security Information (Ssid And Network Key)
Troubleshooting Error messages Cause/solution The wireless security information (Authentication The wireless security information (authentication method/encryption method/ method, Encryption method, Network Key) is network key (password)) is incorrect. incorrect. Refer to the table for the [The authentication and encryption methods used by the selected wireless LAN access point/router are not supported by your machine.] error message, and reconfirm the wireless security information (authentication method/encryption method/network key (password)). -
Page 61: Updating Your Machine's Software
Specifications Specifications Updating Your Machine’s Software The machine’s software can be updated using USB flash Item Specification drive. Dimensions of Approx. 480 mm (W) × 250 mm (D) × 300 When an update program is available on our website at machine mm (H) www.babylock.com , please download the file(s) - Page 62 Index Index Optional accessories ..............12 Aligning the position ..............46 Appliqué ................41 Automatic thread cutting function ..........40 Power supply ................13 Presser foot replacement ............. 52 Bobbin ..................18 runs out of thread ..............37 Race .................... 52 Bobbin case .................
- Page 68 PANTONE 117 C English 888-G71 D01W38-001...
Need help?
Do you have a question about the Baby Lock Flare and is the answer not in the manual?
Questions and answers