Table of Contents
Advertisement
Quick Links
Advertisement
Table of Contents

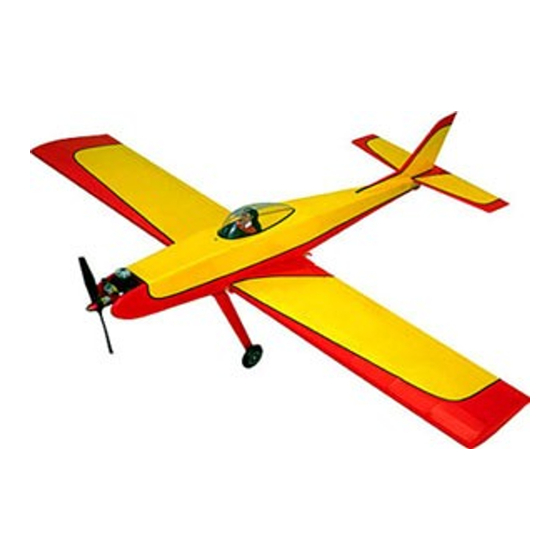
Summary of Contents for SIG HUMMER RC-50
-
Page 14: Radio Equipment
Recommended Glues The framework may be glued together using Sig-Bond resin glue, Sig Kwik-Set epoxy and cyanoacrylate "super" glues. With an airplane of this size it is important to keep the weight down so go easy on the glue and paint. Be sure to use epoxy... - Page 15 Sig Hummer SIGRC50 Instruction Manual Page 2 of 14 Some Rules To Follow Cut all long pieces of balsa first, followed by medium lengths before cutting up any full-length strips into short pieces. Remove die-cut pieces from the sheets carefully. If difficulty is encountered, do not force the part from the sheet. Use a modeling knife to cut it free.
-
Page 16: Fuselage Construction
2. Drill or cut out the 1/8" dowel holes in the fuselage sides. This will locate the holes after the balsa doublers have been glued in place. Balsa Doubler Gluing Notes Do not use Sig Bond, Tite Bond, Elmer's or other water based glues to glue the balsa doubler to the fuselage side. - Page 17 Sig Hummer SIGRC50 Instruction Manual Page 4 of 14 11. Cut out the fuselage sides with a knife. Cut just outside of the line. Save the excess wood for sheeting the center section of the wing. 12. Sand down to the final size.
- Page 18 Sig Hummer SIGRC50 Instruction Manual Page 5 of 14 20. Remove the 1/8" Lite-Ply landing gear plate from the die-cut sheet and epoxy glue in place on the bottom of the fuselage and F-2. 21. Glue and pin the forward fuselage bottom.
- Page 19 Sig Hummer SIGRC50 Instruction Manual Page 6 of 14 29. Using a 1/8" bit or round file (as shown here), drill out the 1/8 " holes through the balsa doublers. NOTE: Some builders prefer to leave off protrusions until after the model is covered.
-
Page 20: Tail Assembly
Sig Hummer SIGRC50 Instruction Manual Page 7 of 14 38. Mark in 1/8" from the outside line. Cut this piece out of the sheet using the inside lines just drawn. This will be the hatch doubler. a. Trim one of the 1/16"x1/2"x2-1/4" plywood pieces to fit the front of the hatch doubler. - Page 21 Sig Hummer SIGRC50 Instruction Manual Page 8 of 14 48. Sand off the ink lines and smooth both sides of the fin. 49. Mark a center line on top of the fuselage where the fin will go. 50. Cut out the slot in the top of the fuselage where the fin tab will go.
-
Page 22: Wing Construction
Sig Hummer SIGRC50 Instruction Manual Page 9 of 14 WING CONSTRUCTION 58. Remove the ribs from the die-cut sheets. Stack the W-l ribs together in one stack, and the W-2 ribs together in another stack. Use a sanding block to sand the ribs even. Do not oversand. - Page 23 Sig Hummer SIGRC50 Instruction Manual Page 10 of 14 69. Cut the jib tab off the bottom of the ribs. 70. Glue and pin the 1/16"x1" trailing edge bottom sheeting in place. 71. Cut pieces of 1/16" sheeting (excess from the fuselage sides) for the wing center section and spread glue over the ribs and along the spars.
- Page 24 Sig Hummer SIGRC50 Instruction Manual Page 11 of 14 80. Sand the wing tip flush with the end rib. 81. Cut the ailerons and center section trailing edge out of the shaped 1/4"x3/4" aileron stock. NOTE: The aileron horns are offset from the wing center line to allow extra radio room in the fuselage.
-
Page 25: Covering And Finishing
Position the canopy on the fuselage and cut away the covering material which will be in contact with the canopy flange. Glue the canopy on to the fuselage, using either Sig-Ment or "Super" cyanoacrylate glue. The joint may be covered with a piece of striping tape. -
Page 26: Tank Installation
Sig Hummer SIGRC50 Instruction Manual Page 13 of 14 Tank Installation NOTE: Engines such as the Cox Black Widow have the tank built as an integral part of the engine. If an engine such as this is used there is no need for a plastic clunk type fuel tank. - Page 27 LIMIT OF LIABILITY: In use of our products, Sig Manufacturing Co.'s only obligation shall be to replace such quantity of the product proven to be defective. User shall determine the suitability of the product for his or her intended use and shall assume all risk and liability in...


Need help?
Do you have a question about the HUMMER RC-50 and is the answer not in the manual?
Questions and answers