Table of Contents
Advertisement
Quick Links
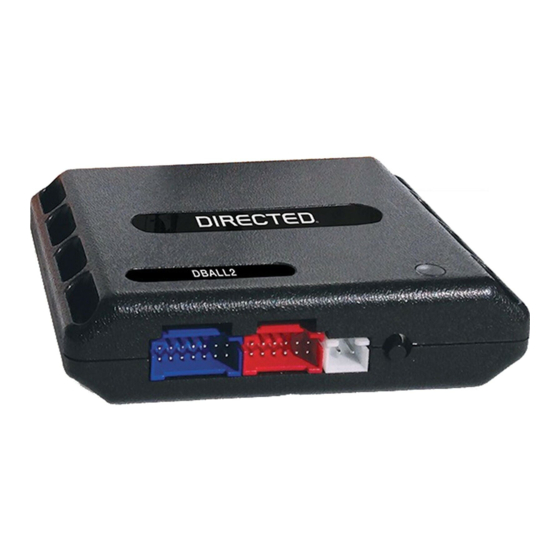
Platform: DBALL/DBALL2
Firmware:
CHRYSLER6 Range Extender Ready (RXT) Installation
Update Alert: Firmware updates are posted on the web on a regular basis. We recommend
that you check for firmware and/or install guide updates prior to installing this product.
Installation Guide
This guide supports the installation of a DBALL in Range Extender Ready (RXT) mode. This solution
offers two (2) configuration options to control your system: Optional RF Kits or SmartStart (both sold
separately).
The optional Plug & Play T-Harness THCHD3 (sold separately) provides simpler and faster installation.
Range Extender Ready (RXT) is used to dramatically increase the factory remote start activation range
compared to the factory transmitter. Refer to the Quick Reference Guide for more information.
Important!
This product is ONLY compatible with vehicles equipped with a factory-installed remote starter.
Index
Vehicle Application Guide......................................................................................................................................................................
Without T-Harness.................................................................................................................................................................................
With T-Harness THCHD3.....................................................................................................................................................................
SmartStart/XL202 Installation Notes.....................................................................................................................................................
Programming
Module Programming............................................................................................................................................................................
Feature and Option List.........................................................................................................................................................................
Feature Programming...........................................................................................................................................................................
LED Diagnostics and Troubleshooting..................................................................................................................................................
Limited One-Year Consumer Warranty..................................................................................................................................................
Quick Reference Guide ........................................................................................................................................................................
SmartStart is equipped with D2D, which means it can be connected to an interface module and used in Range
Extender Ready (RXT) mode without the use of a remote starter. See the Module Programming section for
more information.
® Dodge is a registered trademark and property of its respective company.
RAM
Rev.: 20150827
02
03
04
05
06
07
08
09
10
11
12
© 2015 Directed. All rights reserved.
Advertisement
Table of Contents

Related Manuals for Directed DBALL


Summary of Contents for Directed DBALL
-
Page 1: Table Of Contents
Installation Guide This guide supports the installation of a DBALL in Range Extender Ready (RXT) mode. This solution offers two (2) configuration options to control your system: Optional RF Kits or SmartStart (both sold separately). -
Page 2: Vehicle Application Guide
• • 3500 • • • • • • • • • • • • Legend: AV: Horn & Lights Controls DL: OE Door Lock & Alarm Controls RS: Remote Start & Engine Controls © 2015 Directed. All rights reserved. -
Page 3: Installation Without T-Harness
RFTD OR a SmartStart module. Refer to the SmartStart/XL202 Installation Notes for more information. [1] If grounded, the vehicle will NOT start. With the exception of the OBDII Diagnostic connector, all connectors are displayed from the wire side. © 2015 Directed. All rights reserved. -
Page 4: With T-Harness Thchd3
You can connect to either a XL202 RFTD OR a SmartStart module. Refer to the SmartStart/XL202 Installation Notes for more information. With the exception of the OBDII Diagnostic connector, all connectors are displayed from the wire side. © 2015 Directed. All rights reserved. -
Page 5: Smartstart/Xl202 Installation Notes
Button 1. Use the D2D Crossover (XOVER) cable that is provided with XL202, and NOT the one in the DBALL package. 2. The modules must be connected in a specific order. Refer to the Module Programming section for more information. -
Page 6: Module Programming
Note: Before connecting either the XL202 or SmartStart module to DBALL, it is important to ensure that the proper feature and function programming is selected using XpressVIP (version 4.5 or higher). Visit www.directechs.com to download the latest version of the application. -
Page 7: Module Reset & Hard Reset
Wait 3 seconds until the LED turns ON solid orange, and wait 10 more seconds & until the LED starts to flash orange and red. Solid Flashes & Release the programming button. The LED turns ON solid red. Release Solid © 2015 Directed. All rights reserved. -
Page 8: Feature And Option List
When Heated Seats are activated, they will be set to LOW. Level The OEM alarm will not be controlled by DBALL upon remote start. No disarm or arm command will be 1. Disabled executed at the beginning or end of the sequence; it must be controlled by the Remote Starter. -
Page 9: Feature Programming
No activity for 30 seconds; after 30 seconds, the LED will turn ON orange for 2 seconds to confirm the end of the programming sequence. Press and HOLD the programming button for 3 seconds. After 3 seconds, the LED will turn ON orange for 2 seconds to confirm the end of the programming sequence. © 2015 Directed. All rights reserved. -
Page 10: Led Diagnostics And Troubleshooting
If the bypass module fails to flash, it means the module did not receive the signal. Flashes Flashes orange x 2 UNLOCK command received. orange x 2 Go to the next page to see the rest of the LED Diagnostics & Troubleshooting. © 2015 Directed. All rights reserved. - Page 11 Refer to Feature feature is disabled. Programming section for more information. OEM RS RXT start not possible when Flashes Refer to the owner documentation to activate it. red x8 disabled. OEM system is disabled. © 2015 Directed. All rights reserved.
-
Page 12: Limited One-Year Consumer Warranty
Part was purchased from an authorized DIRECTED dealer; and the Part is returned to DIRECTED, postage prepaid, along with a clear, legible copy of the receipt or bill of sale bearing the following information: consumer’s name, address, telephone number, the authorized licensed dealer’s name and complete... -
Page 13: Quick Reference Guide
Quick Reference Guide DBALL/DBALL2-CHRYSLER6 Range Extender Ready (RXT) Installation Range Extender Ready (RXT) List of Available Commands Range Extender Ready (RXT) is used to amplify the distance covered Note that the information below is for Viper, Clifford and Python models. Icons and by factory remote starters, which are built into the BCM of the vehicle. -
Page 14: Smartstart Compatible
3.0 enables a "Cloud-Connected Car" like never before, providing an entirely new level of 2-way interaction with your vehicle. Connectivity is managed through the Directed Cloud Services (DCS) network linking car, app, end user, and the Internet. For more information, visit www.mysmartstart.com.
Need help?
Do you have a question about the DBALL and is the answer not in the manual?
Questions and answers