Directed Xpresskit DBALL2 Installation And Quick Reference Manual
Hide thumbs
Also See for Xpresskit DBALL2:
- Installation manual (36 pages) ,
- Manual (28 pages) ,
- Installation manual (13 pages)
Table of Contents
Advertisement
Quick Links
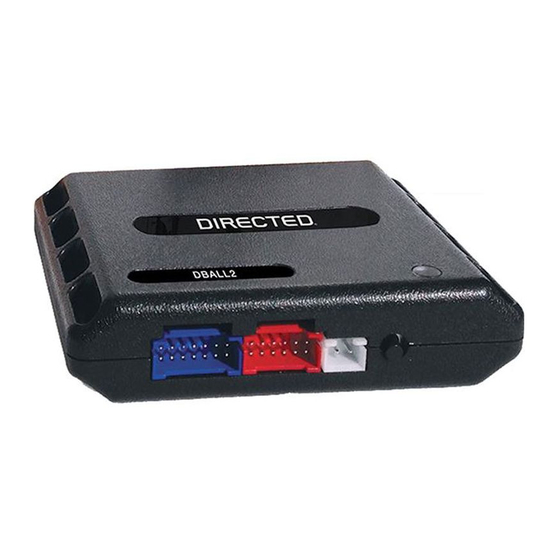
Platform: DBALL2
Firmware: GM6
Update Alert: Firmware updates are posted to the web on a regular basis. We recommend
that you check for firmware and/or install guide updates prior to installing this product.
Installation Guide
Door lock and transponder interface for many late model Cadillac, GM, Hummer, Pontiac, Saturn and
Suzuki vehicles. Features include RAP shutdown, door trigger sensing, and tach output.
RFLCHGM Loop is recommended and sold separately. Optional T-Harness THGM610 is
compatible with some vehicles (check VAG) but not compatible with RFLCHGM.
Important:
This guide is compatible with the GM6 firmware version 4.06 and higher.
We recommend using the Wiring Diagram (
Diagrams (
without
RFLCHGM) will draw 15-20mA more on the vehicle, when it is parked and the engine is turned off.
Using the Wiring Diagrams (
due to the accessory wire opening. To preserve OEM remote starter functionality, use the Wiring Diagram (
page 3.
Index
Vehicle Application Guide................................................................................................................................................
Type 1 (with RFLCHGM)................................................................................................................................................
Type 2 (without RFLCHGM)..........................................................................................................................................
Type 3a, T-Harness THGM610 T-01 (without RFLCHGM).............................................................................................
Type 3b, T-Harness THGM610 T-01 (without RFLCHGM).............................................................................................
Type 3c, T-Harness THGM610 T-02 (without RFLCHGM).............................................................................................
Type 3d, T-Harness THGM610 T-02 (without RFLCHGM).............................................................................................
Vehicle Wiring Reference Chart.......................................................................................................................................
Programming
Module Programming......................................................................................................................................................
Module Reset & Hard Reset............................................................................................................................................
Feature and Option List...................................................................................................................................................
Feature Programming......................................................................................................................................................
LED Diagnostics and Troubleshooting............................................................................................................................
Limited One-Year Consumer Warranty............................................................................................................................
Quick Reference Guide...................................................................................................................................................
® Buick, Cadillac, Chevrolet, GMC, Hummer, Pontiac, Saturn and Suzuki are registered trademarks and property of their respective companies.
with
RFLCHGM) on page 3, especially if the vehicle is not used daily. The Wiring
without
RFLCHGM) can deactivate OEM remote starter functionality, OEM fob and smart phone,
Rev.: 20151221
with
RFLCHGM) on
© 2015 Directed. All rights reserved.
02
03
04
05
06
07
08
09
13
14
15
16
17
18
19
Advertisement
Table of Contents

Subscribe to Our Youtube Channel
Related Manuals for Directed Xpresskit DBALL2


Summary of Contents for Directed Xpresskit DBALL2
-
Page 1: Table Of Contents
Feature and Option List..............................Feature Programming..............................LED Diagnostics and Troubleshooting..........................Limited One-Year Consumer Warranty..........................Quick Reference Guide..............................® Buick, Cadillac, Chevrolet, GMC, Hummer, Pontiac, Saturn and Suzuki are registered trademarks and property of their respective companies. © 2015 Directed. All rights reserved. -
Page 2: Vehicle Application Guide
PK: Transponder & Immobilizer Override AV: Horn & Lights Controls CC: Comfort & Convenience Controls DL: OE Door Lock & Alarm Controls RS: Remote Start & Engine Controls SS: Integrated Security & Monitoring ST: Function/Feature Status © 2015 Directed. All rights reserved. -
Page 3: Installation Type 1 (With Rflchgm)
(Green/Black, pin 2/12) to the driver door sense trigger (Gray/Black) to avoid this issue. RAP Off: Refer to page 9 for wire color and location. With the exception of the OBDII Diagnostic connector, all connectors are displayed from the wire side (unless specified otherwise). © 2015 Directed. All rights reserved. - Page 4 (Green/Black, pin 2/12) to the driver door sense trigger (Gray/Black) to avoid this issue. RAP Off: Refer to page 9 for wire color and location. With the exception of the OBDII Diagnostic connector, all connectors are displayed from the wire side (unless specified otherwise). © 2015 Directed. All rights reserved.
- Page 5 If the RAP Off wire is not connected, the radio will turn OFF but some lights will remain ON in the central console for 10 minutes. Connect this wire (Green/Black, pin 2/12) to the driver door sense trigger (Gray/Black) to avoid the issue. RAP Off: Refer to page 9 for wire color and location. Only required if no OEM hood pin. © 2015 Directed. All rights reserved.
- Page 6 If the RAP Off wire is not connected, the radio will turn OFF but some lights will remain ON in the central console for 10 minutes. Connect this wire (Green/Black, pin 2/12) to the driver door sense trigger (Gray/Black) to avoid the issue. RAP Off: Refer to page 9 for wire color and location. Only required if no OEM hood pin. © 2015 Directed. All rights reserved.
- Page 7 If the RAP Off wire is not connected, the radio will turn OFF but some lights will remain ON in the central console for 10 minutes. Connect this wire (Green/Black, pin 2/12) to the driver door sense trigger (Gray/Black) to avoid the issue. RAP Off: Refer to page 9 for wire color and location. Only required if no OEM hood pin. © 2015 Directed. All rights reserved.
- Page 8 If the RAP Off wire is not connected, the radio will turn OFF but some lights will remain ON in the central console for 10 minutes. Connect this wire (Green/Black, pin 2/12) to the driver door sense trigger (Gray/Black) to avoid the issue. RAP Off: Refer to page 9 for wire color and location. Only required if no OEM hood pin. © 2015 Directed. All rights reserved.
-
Page 9: Vehicle Wiring Reference Chart
Please note that pin numbers may vary from vehicle to vehicle. * For vehicles not equipped with "Express window up/down” feature, hook up the Green/Black (pin 2 of 12-pin connector on DBALL) to the driver door trigger wire of the vehicle. © 2015 Directed. All rights reserved. -
Page 10: Module Programming
Turn the key to the ignition position. The LED turns ON green & for 3 seconds then shuts off. START Solid 3 sec. Key OUT Remove the key from ignition. START You have successfully completed the module programming sequence. © 2015 Directed. All rights reserved. - Page 11 Wait 3 seconds until the LED turns ON solid orange, and wait 10 more seconds & until the LED starts to flash orange and red. Solid Flashes & Release the programming button. The LED turns ON solid red. Release Solid © 2015 Directed. All rights reserved.
-
Page 12: Feature And Option List
A remote starter, for which the Safelock feature is active, will work perfectly with this option and will make it invisible to the user. © 2015 Directed. All rights reserved. -
Page 13: Feature Programming
No activity for 30 seconds; after 30 seconds, the LED will turn ON orange for 2 seconds to confirm the end of the programming sequence. Press and HOLD the programming button for 3 seconds. After 3 seconds, the LED will turn ON orange for 2 seconds to confirm the end of the programming sequence. © 2015 Directed. All rights reserved. -
Page 14: Led Diagnostics And Troubleshooting
If the bypass module fails to flash, it means the module did not receive the signal. Flashes orange TRUNK command received. Commands can come from RF, D2D or W2W. Flashes orange AUX1 command received. Flashes orange AUX2 command received. © 2015 Directed. All rights reserved. -
Page 15: Limited One-Year Consumer Warranty
Part was purchased from an authorized DIRECTED dealer; and the Part is returned to DIRECTED, postage prepaid, along with a clear, legible copy of the receipt or bill of sale bearing the following information: consumer’s name, address, telephone number, the authorized licensed dealer’s name and complete... -
Page 16: Quick Reference Guide
3 times, then to activate x3 + the panic mode. Press once, then to reset the x1 + remote starter runtime. * This output is configurable. see your authorized installation center for more information. © 2015 Directed. All rights reserved.
Need help?
Do you have a question about the Xpresskit DBALL2 and is the answer not in the manual?
Questions and answers