Table of Contents
Advertisement
Quick Links
! $Instruments Inc.
Address: Lanlin Dangnan Industrial Park,
Changzhou, Jiangsu, China (PRC)
Post Code: 213014
Telephone (Sales):
0086-0519-88805550 / 89966117/89966227
Fax:0086-0519-89966550
sales@applent.com
Sales Email:
tech@applent.com
Tech Email:
http://www.applent.com
©2005-2011 Applent Instruments Inc.
English
Revision B3
FIRMWARE REVISIONS
This manual applies directly to instruments that
have the firmware Rev. B2.x
[
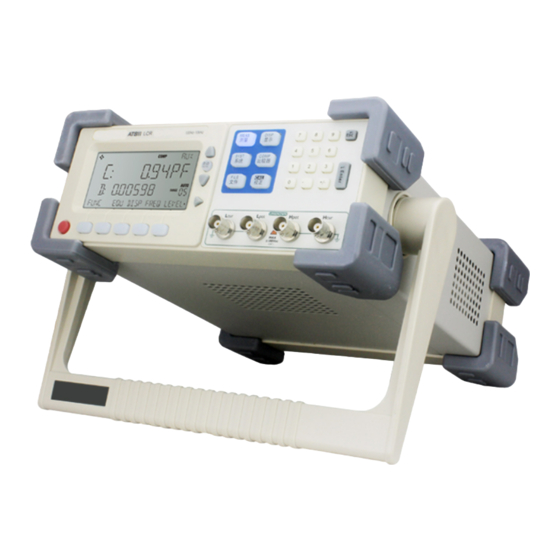
User's Manual
AT811 LCR Meter
]
Advertisement
Table of Contents

Subscribe to Our Youtube Channel
Related Manuals for Applent Instruments AT811


Summary of Contents for Applent Instruments AT811
- Page 1 Post Code: 213014 Telephone (Sales): 0086-0519-88805550 / 89966117/89966227 Fax:0086-0519-89966550 sales@applent.com Sales Email: tech@applent.com Tech Email: http://www.applent.com ©2005-2011 Applent Instruments Inc. English Revision B3 FIRMWARE REVISIONS This manual applies directly to instruments that have the firmware Rev. B2.x User’s Manual AT811 LCR Meter...
-
Page 2: Safety Summary
When you notice any of the unusual conditions listed below, immediately terminate operation and disconnect the power cable. Please Contact Applent Instruments Incorporation sales representative for repair of the instrument. If you continue to operate without repairing the instrument, there is a potential fire or shock hazard for operators. -
Page 3: Certifiaction, Limited & Limitation Of Uability
CERTIFIACTION, LIMITED & LIMITATION OF UABILITY Applent Instruments, Inc. (shortened form Applent)certifies that this product met its published specifications at the time of shipment from the factory. Applent further certifies that its calibration measurements are traceable to the People’s Republic of China National Institute of Standards and Technology, to the extent allowed by the Institution’s calibration facility or by the calibration facilities of other International Standards Organization members. -
Page 4: Table Of Contents
AT811 User’s Manual Contents Safety Summary ................................ 2 CERTIFIACTION, LIMITED & LIMITATION OF UABILITY ..............3 Contents ................................4 Unpacking and Inspection ..........................5 Packing List ............................5 Power Supply ............................5 Setup Fuse .............................. 5 Operating Environment ......................... 6 Cleaning .............................. -
Page 5: Unpacking And Inspection
2.Check all the packaged items supplied with the meter have been provided as pert the specified optioned. If it is damaged or less accessories, pls contact Applent Sales or Distributors. Power Supply Confirm that the power supplied to the AT811 meets the following requirements Voltage: 90V-260VAC Frequency: 47-440Hz Power: Max10VA WARNING:... -
Page 6: Operating Environment
Technique Humidity: <70%RH Cleaning To prevent electrical shock, disconnect the AT811 power cable from the receptacle before cleaning. Use a dry cloth or a cloth slightly dipped in water to clean the casing. Do not attempt to clean the AT811 internally. -
Page 7: How To Remove The Handler
Unpacking and Inspection How to Remove the Handler Figure 1-2 A handle kit is attached to AT811 Instrument Handle 1 Retracted 2. Extended Carrying Position Remove Handler (Lift the handle perpendicular to the unit while pulling it in the diredtion of 1) -
Page 8: General
The AT811 can output comparison/decision results for sorting components into 5 bins. Main Specifications AT811 specifications include all the basic technique data & range of testing. All these can be reached before put in market. Complete technique parameters please reference addendum A ... - Page 9 General Comparator (sorting) Function: 5-bins sorting result: 3-bins GD、1-bin AUX & 1-bin UG Automatic Parameters Selection Selecting the Parameters automatically according to the DUT...
-
Page 10: Start-Up
AT811 User’s Manual 3 Start-up This chapter provides the following information: A tour of front panel——including key, VFD & Test terminal introduce A tour of rear panel—— power & interface introduce Power up—— Self-checking & preheated time introduce ... -
Page 11: Main Menu Key
Start-up 3.1.2 Main Menu Key Figure 3-2 Main Menu Key Disp Meas Comp Syst File Function Test function menu. Including the following items: Meas 1. FUNC Parameters Selection 2. EQU Equivalent Selection ∆% Display 3. DISP 4. FREQ Frequency Selection 5. -
Page 12: Function Key
AT811 User’s Manual Up and Down key are used to select range 3.1.4 Function Key Figure 3-4 Function Key Function Key: Used to select menu items, and performed operation order. :Used to turn page 3.1.5 Figure 3-5 ID/No. Function ... -
Page 13: Real Panel
Comparator Setting Beep Setting 3.2.2 Warm-up Time AT811 is ready to use as soon as the power-up sequence has completed. However, to achieve the accuracy rating, warm up the instrument for 30 minutes. 3.2.3 Connect to the Unknown Terminals If you use the Kelvin Test Clip which together with the instruments to test, please according to the following steps to connect. - Page 14 AT811 User’s Manual Warning: Do not apply DC voltage or current to the UNKNOWN terminal. Applying DC voltage or current may lead to device failure. The capacitors should be discharged before connected to the terminals.
-
Page 15: Configuration
Configuration 4 Configuration This chapter provides the following information: How to configure the instruments. Meas Key Meas Press key, a measurement menu bar will be displayed, and Meas key is lighted. The following settings are included: 【MEAS MENU】 FUNC Test Parameters R-Q, AutO... -
Page 16: Testing Parameters【Func
A real impedance component may be represented by ideal resistors and ideal reactors (inductors or capacitors) used to simulate the form of series or parallel. AT811 can be used in the mathematical formula to convert, but the two forms are different. The inconsistency depends on the quality factor Q (or loss D) Table 4-1 Transformational relation between series &... -
Page 17: Display Mode【Disp
If DUT does not have requirements about the test level, please setting1.0V 4.1.6 Test Speed【RATE】 AT811provides two speeds: SLOW & FAST 4.1.7 Source Resistance【SRES】 AT811 provides two kinds source resistance: 30Ω & 100Ω In general, 30Ω source resistance will be a better choice. -
Page 18: Syst Menu
AT811 User’s Manual SYST Menu Syst ,SYST menu will be displayed in menu bar, SYST Key light is lit. Following Press Table 4-2 [SYST] Menu list settings are included in the system menu. 【SYST MENU】 BEEP Beep Setting BIN1 GD... -
Page 19: Turn On The Aux Sorting【Aux
Turn Off, displayed OUT while the sub parameters are unqualified. Turn On, displayed AUX while the sub parameters are unqualified. 4.2.4 Volume Control【TONE】 The volume of AT811 can be adjusted, there are four choices: Low volume Middle volume 1 Middle volume 2... -
Page 20: Input Value
Press the corresponding function key (the first or the fourth key of each page), enter input box. D,Q, P1, P2, P3 with no units, press Enter to complete the input. 4.3.2 Sorting Mechanism Figure 4-2 Sorting Flow Chart Concerning the sorting mechanism of AT811, please reference the following pictures:... -
Page 21: File] Menu
AUX NG Display AT811 Enhanced sorting judgment mechanism P1, P2, P3 To indicate the NG/GD of main parameters, NG mark will be displayed in the sorting line while it is unqualified, after the sorting, if GD, P1-P3 will be displayed in the sorting line, continuously perform sub-parameters comparator. -
Page 22: Cal Menu
AT811 User’s Manual File menu is used to save the amended data recently, and these settings can be saved while the next turn on. Note: Your settings will not be saved automatically, except the “file” menu perform “save” command, but zero-clearing value will be saved automatically after clearing. -
Page 23: Disp Key
Configuration Figure 4-3 Zero-setting operation is in progress Short sweep frequency clear-zero: Please connect the test terminal in short, press SHORT -> OK to perform short zero-setting. Zero-setting value will be saved in file automatically. DISP Key Display key is used to show the current setting value in the menu bar, not choice name, for example: Figure 4-4 In measuring menu, choice is displayed in name: Function Name... -
Page 24: Range Selection
AT811 User’s Manual Range Selection Table 4-6 Ranges There are six ranges: Range NO. Range Resistance 100kΩ 10kΩ 1kΩ 100Ω 31.6Ω 10Ω Automatic range: AUTO indicator light is ON, meanwhile, AUTO displayed in the LCD means current range is automatic. -
Page 25: Specification
Specification 5 Specification In Appendix A, you will learn the following content: Technique Data General Specifications Appearance & Dimension Technique Data The following accuracy can be reached while in the circumstances: Temperature: 23℃±5℃ Humidity: ≤65% R.H. Zero value adjustment: Open & Short circuit zero-setting before testing. Warm-up time: >60 Mins Calibration Time: 12 Monthes Average accuracy of testing level: 10%... -
Page 26: General Specifications
AT811 User’s Manual 5.1.1 General Specifications: Screen: LCD display Testing Parameters: L, C, R, Z, D, Q Testing Level: 0.3Vrms, 1Vrms Basic Accuracy: 0.25% 100/120Hz 1µH – 9.999kH 1kHz 0.1µH - 999.9H 10kHz 0.01µH – 99.99H 100/120Hz 1p – 9.999mF... -
Page 27: Dimension
Specification 5.1.2 Dimension 106.00 266.00 286.50... -
Page 28: Model
AT811 User’s Manual 6 Model In Appendix B, You will learn the difference of AT810 & AT811: 6.1.1 Model Comparation AT810 AT811 Parameters L,C,R,Z,D,Q L,C,R,Z,D,Q,θ(deg),θ(rad) Note Basic Accuracy 0.l% 0.25% Frequency 100Hz, 120Hz, 1kHz, 10kHz 100Hz, 120Hz, 1kHz, 10kHz Level 0.1Vrms, 0.3Vrms, 1Vrms...
Need help?
Do you have a question about the AT811 and is the answer not in the manual?
Questions and answers