Table of Contents
Advertisement
Quick Links
! $
Applent Instruments Inc.
Baolong International FL3,Chahua Road, Zhonglou
district ,Changzhou City, Jiangsu Province,
China[213023]
Tel: 0519-88805550 / 81285550/89966227/85528880
Fax: 0519-86922220
http://www.applent.com
Sales Email:
sales@applent.com
Tech Email:
tech@applent.com
©2005-2016 Applent Instruments, Inc.
Rev.A6
[
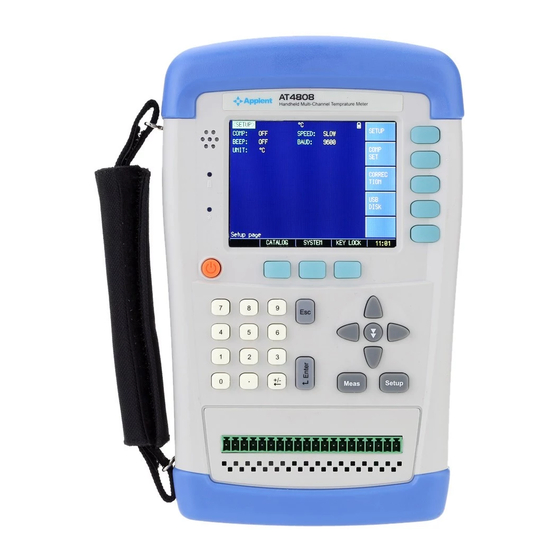
AT4808 Handheld Multi-channel Temperature Meter
User's Manual
]
Advertisement
Table of Contents

Related Manuals for Applent Instruments Anbai AT4808


Summary of Contents for Applent Instruments Anbai AT4808
- Page 1 Applent Instruments Inc. Baolong International FL3,Chahua Road, Zhonglou district ,Changzhou City, Jiangsu Province, China[213023] Tel: 0519-88805550 / 81285550/89966227/85528880 Fax: 0519-86922220 http://www.applent.com Sales Email: sales@applent.com Tech Email: tech@applent.com ©2005-2016 Applent Instruments, Inc. Rev.A6 AT4808 Handheld Multi-channel Temperature Meter User’s Manual...
-
Page 2: Safety Summary
Failure to comply with these precautions or with specific WARNINGS elsewhere in this manual may impair the protection provided by the equipment. In addition it violates safety standards of design, manufacture, and intended use of the instrument. The Applent Instruments assumes no liability for the customer's Disclaimer failure to comply with these requirements. -
Page 3: Certifiaction, Limited & Limitation Of Uability
Unpacking and Inspection CERTIFIACTION, LIMITED & LIMITATION OF UABILITY Applent Instruments, Inc. (shortened form Applent)certifies that this product met its published specifications at the time of shipment from the factory. Applent further certifies that its calibration measurements are traceable to the People’s Republic of China National Institute of Standards and Technology, to the extent allowed by the Institution’s calibration... -
Page 4: Table Of Contents
AT4808 User's Guide Content Safety Summary ................................ 2 CERTIFIACTION, LIMITED & LIMITATION OF UABILITY ................3 Content ..................................4 1.Unpacking and Inspection Packing List ............................. 6 Power Supply ........................... 6 Operation Environment ........................6 Cleaning ............................6 Battery Change..........................7 Adjusting Tilt Stand ......................... -
Page 5: Unpacking And Inspection
Unpacking and Inspection Terminator ............................27 Notation Conventions and Definitions ................... 27 Command Structure ........................27 Header and Parameters ........................28 Command Reference ........................29 9.5.1 MEAS SUBSYSTEM ......................29 9.5.2 SYST SUBSYSTEM......................30 9.5.3 FETCH SUBSYSTEM ......................31 9.5.4 FETCH?... -
Page 6: Unpacking And Inspection
AC Adapter Input Voltage: 90V-260VAC,49Hz~62Hz Power: Max 10VA Warning: Other model AC Adapter is forbidden. Only Applent Instruments Inc. L909 and L801 rechargeable Li-battery can be used. Operation Environment Ensure the operation environment meets the following requirements Temperature Range: 0℃~55℃,... -
Page 7: Battery Change
Unpacking and Inspection Battery Change Build-in rechargeable Li-battery, battery has been installed in the instruments before factory. Change the battery according to the following steps: Figure 1‑1 Battery Change 1. Use the screwdriver to loosen the screw in the battery cover and remove the cover. 2. - Page 8 AT4808 User's Guide Figure 1‑3 Position of Degree 45...
-
Page 9: General
General General This chapter provides the following information: Index Main Specification Main Function Index Thank you for purchasing AT4808 Multi-channel Handheld Temperature Meter AT4808 Multi-channel Handheld Temperature Meter adopts high-performance ARM microprocessor control, collects multi-channel temperature data simultaneously. The AT4808 can be extended to 128 channels, compatible with a variety of temperature sensors, fast response, data stability while with the burnout detection function. -
Page 10: System Setting
AT4808 User's Guide 2.3.5 System Setting 1. Keypad Lock Function 2. Switch both in English and Chinese 3. Date and Time Setting 4. Administrator and user accounts, password is available to the administrator 5. Backlight setting 6. Automatic screen-off time setting 2.3.6 Remote Control Support Max 115200bps baud rate, compatible with SCPI protocol, ASCII transfer... -
Page 11: Start Up
Start Up Start Up This chapter provides the following information: A tour of front panel A tour of interface panel Use an external power supply Power up Connection of the test terminal A tour of front panel Figure 3‑1 description of front panel Front panel Item... -
Page 12: Use An External Power Supply
AT4808 User's Guide USB Interface, used to save data Mini-USB Communication Interface, used to realize telecommunications RS485 extended interface External power and charger interface Use an External Power Supply Configured AC Adaptor ATL909 In addition to provide power to the instrument, it also charges to Li-Battery of the instruments. Please use our Configured AC Adapter L909, do not replace. -
Page 13: Connection Of The Thermocouple
Start Up While charging, the indicator is lighted, even the instrument is turn off. Note! Connection of the thermocouple Figure 3‑5 Thermocouple Terminals PIN 1 Channel 1, positive pole of the thermocouple PIN 2 Channel 1, negative pole of the thermocouple PIN 3 PIN 4 Channel 2, positive pole of the thermocouple... -
Page 14: Meas] Page
AT4808 User's Guide [Meas] Page This chapter provides the following information: <Measurement Display> Page <Measurement Display> Page Whenever what page, just press the shortcut key [Meas] to enter <measurement display> interface. <Measurement Display> mainly highlights the measurement results, and current sorting results will be displayed in different font and color. -
Page 15: Model]
[Meas] Page Font 6x9 Display 4.1.1 [MODEL] The instrument supports 8 types thermocouple: T,K,J,N,E,S,R,B Steps to Set Sensor Model Step 1 Press shortcut[Meas]to enter <MEASURE DISPLAY> main interface Step 2 Use the cursor keys to select[TC-T]field Step 3 Use function keys to select Function Key Function TC-T... - Page 16 AT4808 User's Guide Step 2 Use the cursor keys to select[001]field Input the channel number you wanted to display in current position by pressing Step 3 numeric keys, press [Enter]to end. The same steps to close or open other channels Figure 4‑1 Icon Function Icon Function...
-
Page 17: Setup] Page
[Setup] Page [Setup] Page This chapter provides the following information: <Setting Display> Page Temperature Correction Temperature Reset <Setup> Page At any time, press [Setup] key to enter <Setup> page <Setup> page can complete all settings concerned with the measurement, measurement and sorting results will not displayed and the instrument is in waiting state. -
Page 18: Beep] Setting
AT4808 User's Guide Set the sampling speed in middle FAST Set the sampling speed in fast 5.1.3 [Beep] Setting Beep Settings includes: OFF and ON Steps to set Beep Step 1 Press shortcut [Setup] to enter < FUNCTION > page Step 2 Use cursor keys to select[BEEP]field Step 3... -
Page 19: User Correction
[Setup] Page 5.2.1 [001] Steps to set LOW limit for 001 Channel Press[Setup]to enter <FUNCTION> page Step 1 Step 2 Press[COMP SET]to enter <COMP SETUP> page Step 3 Use cursor keys to select [-200.0] field Use numeric key to set low value, then press[Enter]to end Step 4 ... -
Page 20: Udisk
AT4808 User's Guide Step 3 Use cursor keys to select [0.0] field Step 4 Use function key to select Step 5 Function Key Function INPUT AMEND Input correction temperature value in selected channel, using numeric key to input data, press [Enter]to end DELETE Delete all the channels correction temperature values AMEND... -
Page 21: Recording Time]
[Setup] Page Step 4d Use function key to select Function Key Function CREAT FILE Create new file, use numerical key to input the file name, press[Enter]to end with format *.csv。 5.4.2 [Recording Time] Steps to Set Recording Time Step 1 Press[Setup] to enter[FUNCTION]page Step 2 Press function key[U-DISK SETUP]to enter <UDISK SETUP>... -
Page 22: System Configuration
AT4808 User's Guide System Configuration This chapter provides the following information: System Configuration Page System Information Page System Service Page <System Configuration> Page In any place, just press shortcut [Meas] or [Setup] and select taskbar key [SYSTEM] to enter <SYSTEM CONFIG>... -
Page 23: Account]
System Configuration Function Key Function YEAR INCR+ +1 year YEAR DECR- -1 year MONTH INCR+ +1 month MONTH DECR- -1 month DAY INCR+ +1 day DAY DECR- -1 day Steps to set time Step 1 Press shortcut [Meas] or [Setup] Step 2 Select bottom soft key [SYSTEM], enter <SYSTEM CONFIG>... -
Page 24: Close Led]
AT4808 User's Guide Bright 0% Bright 25% Bright 50% Bright 75% default light Bright 100% 6.1.5 [CLOSE LED] The instrument will automatically turn off the screen to save power if long time no operations Steps to Turn Off the Power Press 1 Press shortcut [Meas] or [Setup] Press 2... -
Page 25: Files Operation
Files Operation Files Operation This chapter provides the following information Files Management Page < CATALOG > Page When press the [Meas] or [Setup] key followed by [FILE] bottom soft key, the <CATALOG> page appears. <CATALOG> page includes the following settings ... -
Page 26: Remote Control
AT4808 User's Guide Remote Control This chapter provides the following information to remotely control the FM8116R via the RS-232C or USB interface.This chapter provides the following information Select Baud Rate. About SCPI To Select Baud Rate Before you can control the FM8116R by issuing RS-232 commands from built-in RS-232 controller connected via its DB-9 connector, you have to configure the RS-232 baud rate. -
Page 27: Command Reference
Command Reference Command Reference This chapter contains reference information on programming FM8116R with the SCPI commands. Terminator Notation Conventions and Definitions Header and Parameters Command Reference This chapter provides descriptions of all the FM8116R's available RS-232 commands which correspond to Standard Commands for Programmable Instruments (SCPI) command sets, listed in functional subsystem order. -
Page 28: Header And Parameters
AT4808 User's Guide Example: ROOT:COMmand3:COMmand5 ppp ROOT Subsystem Command COMmand3 Level 2 COMmand5 Level 3 Parameter The basic rules of the command tree are as follows. Letter case (upper and lower) is ignored. For example, ROOT:COMMAND3 root:command3 Spaces (_ used to indicate a space) must not be placed before and/or after the colon (:). -
Page 29: Command Reference
Command Reference Definition Mnemonic 1E18 (EXA) 1E15 (PETA) 1E12 (TERA) 1E9 (GIGA) 1E6 (MEGA) 1E3 (KILO) 1E-3 (MILLI) 1E-6 (MICRO) 1E-9 (NANO) 1E-12 (PICO) 1E-15 (PEMTO) 1E-18 (ATTO) Command Reference All commands in this reference are fully explained and listed in the following functional command order. -
Page 30: Syst Subsystem
AT4808 User's Guide <fast,med,slow><NL> Query Response SEND> MEAS:RATE?<NL> Example RET> fast<NL> 9.5.1.3 MEAS:KEYLOCK The :KEYLOCK command sets the KEYPAD. MEAS:KEYLOCK <on,off> Command Syntax Example SEND> MEAS:KEYLOCK off<NL> //Set to close Keypad MEAS:KEYLOCK? Query Syntax <on,off><NL> Query Response SEND> MEAS:KEYLOCK?<NL> Example RET>... -
Page 31: Fetch Subsystem
Command Reference Example SEND> SYST:beep on <NL> //Set to open beep MEAS:beep? Query Syntax <on,off><NL> Query Response SEND> SYST:beep?<NL> Example RET> on<NL> 9.5.2.3 SYST:UNIT The :UNIT command sets the unit feature. MEAS:UNIt <cel,kel,fah> Command Syntax <cel,kel,fah> Parameter cel: Degrees Celsius kel: Degrees Kelvin fah: Fahrenheit Example... -
Page 32: Appendix
AT4808 User's Guide Appendix This chapter provides the following information: RS485 Connection method 10.1 RS485 Connection method You can use a dedicated ATL106 mini USB-232 communication cable to connect an external acquisition board , bringing the total to 128 channel expansion. The ATL106 mini USB connector into INTERFACE A- B interface or interfaces The ATL106 232 collector into boxes BUS <1>... -
Page 33: Specification
Specification Specification This chapter provides the following information: Basic Technology Index Specifications 11.1 General Specification The Data is Achieved under the Following Conditions: Temperature: 23℃± 5℃ Humidity: 65% R.H. Warm-up Time: > 60 minutes Calibration Time:12 months Test Environment: ... -
Page 34: Accuracies
AT4808 User's Guide 11.2 Accuracies Instrument Accuracy does include standard contact compenstation Precision. Model Range(℃) Accuracy(℃) -150℃ to 0℃ ±1.0℃ 0℃ to 400℃ ±0.8℃ -100℃ to 0℃ ±1.2℃ 0℃ to 1350℃ ±0.8℃ -100℃ to 0℃ ±1.0℃ 0℃ to1200℃ ±0.7℃ -100℃ to 0℃ ±1.5℃... - Page 35 Compatible SCPI Instruction Set 8.4V,Li,2200mAh Rechargeable Battery Charging Time: <5 hours Max Power: ≤5W Longest continuously working time: ≥8h Length*Width*Height: 210.76mm*130.23mm Weight: 650g Applent Instruments -AT4808 User’s Manual English Edition ©2005-2016 All Right Reserved. Applent Instruments Inc.
Need help?
Do you have a question about the Anbai AT4808 and is the answer not in the manual?
Questions and answers