Table of Contents
Advertisement
! $Instruments Inc.
Address: Lanlin Dangnan Industrial Park,
Changzhou, Jiangsu, China
Post Code: 213014
Telephone (Sales):
0086-0519-88805550/
89966117/89966227/89966337
Fax: 0086-0519-89966550
Sales Email:
Tech Email:
http://www.applent.com
©2005-2012 Applent Instruments Inc.
English
Revision A0
FIRMWARE REVISIONS
This manual applies directly to instruments that
have the firmware
Rev. A1.x and B1.x
[AT824/825/826 Handheld LCR
User's Guide
sales@applent.com
tech@applent.com
Meter]
Advertisement
Table of Contents

Subscribe to Our Youtube Channel
Related Manuals for Applent Instruments AT826


Summary of Contents for Applent Instruments AT826
- Page 1 Telephone (Sales): 0086-0519-88805550/ 89966117/89966227/89966337 Fax: 0086-0519-89966550 Sales Email: sales@applent.com Tech Email: tech@applent.com http://www.applent.com ©2005-2012 Applent Instruments Inc. English Revision A0 FIRMWARE REVISIONS This manual applies directly to instruments that have the firmware Rev. A1.x and B1.x [AT824/825/826 Handheld LCR Meter]...
-
Page 2: Safety Summary
AT824/825/826 Handheld LCR Meter Safety Summary Warning Dangerous Disclaimer Applent Instruments assumes no liability for the customer's failure to comply with these requirements. Do not operate the instrument in the presence of DO NOT Operate In inflammable gasses or fumes. Operation of any... -
Page 3: Certification, Limited Warranty, & Limitation Of Liability
CERTIFICATION, LIMITED WARRANTY, & LIMITATION OF LIABILITY Applent Instruments, Inc. (shortened form Applent) certifies that this product met its published specifications at the time of shipment from the factory. Applent further certifies that its calibration measurements are traceable to the People’s Republic of China National Institute of Standards and Technology, to the extent allowed by the Institution’s calibration facility or by the calibration... -
Page 4: Table Of Contents
AT824/825/826 Handheld LCR Meter Contents Safety Summary ......................2 CERTIFICATION, LIMITED WARRANTY, & LIMITATION OF LIABILITY ..3 Contents .........................4 Figure Contents ......................7 Table Contents .......................8 Unpacking and Preparation ...................9 Incoming Inspection ................9 Power Requirements ................9 Environmental Requirements ..............9 Cleaning ....................10 Replace the battery ................10 Adjust the support................ - Page 5 Unpacking and Preparation <MEAS DISPLAY> ................21 4.1.1 Measurement Function [FUNC A] [FUNC B] ......21 4.1.2 Test Signal Frequency [FREQ] ............22 4.1.3 Impedance Range [RANGE] ............23 4.1.4 Measurement Speed [SPEED] .............24 4.1.5 Equivalent Circuit [EQU] ............24 [SETUP] Page .....................25 <SETUP> Page ..................25 5.1.1 Comparator [COMP] ..............26 5.1.2...
- Page 6 AT824/825/826 Handheld LCR Meter 8.4.11 Error Subsystem ................45 Command List ..................46 Specification ......................47 General Specification ................47 Accuracy ....................48 9.2.1 C and D ..................48 9.2.2 L and Q ..................50 9.2.3 Z and θ ..................51 9.2.4 ESR ....................51 Demensions ..................52...
- Page 7 Unpacking and Preparation Figure Contents Figure 1-1 Replace the battery ..............10 Figure 1-2 60 Degrees Supporting ..............11 Figure 1-3 45 Degrees Supporting ..............11 Figure 3-1 Front Panel...................16 Figure 3-2 LCD Screen .................17 Figure 3-3 Interface panel ................18 Figure 3-4 Power Adapter ................19 Figure 3-5 Charging LED (Orange) ..............19...
- Page 8 Equivalent Circuit ................13 Table 2-2 AT824 Measurement Range ............14 Table 2-3 AT825 Measurement Range ............14 Table 2-4 AT826 Measurement Range ............14 Table 3-1 Description of the Front Panel .............17 Table 3-2 LCD Screen descriptions .............17 Table 3-3 Interface panel description ............18 Table 4-1 Primary Parameters ..............22...
-
Page 9: Unpacking And Preparation
Unpacking and Preparation 1. Unpacking and Preparation This chapter describes how to set up and start the AT824/825/826 Handheld LCR Digital Meter. Incoming Inspection Power Requirement Operation Environment Cleaning Incoming Inspection 1. Referring to <Packing List> in the packing box, check that all packaged items supplied with the meter have been provided as listed 2. -
Page 10: Cleaning
AT824/825/826 Handheld LCR Meter Cleaning Do not clean the inside of the equipment. Warning: Do not use the cleaning solvent (alcohol or gasoline, etc.) on the instrument. Please use a clean cloth dipped in some water to do the case and panel cleaning. -
Page 11: Adjust The Support
Unpacking and Preparation Adjust the support The support has two positions: 60 degrees and 45 degrees. 45 degrees, makes the instrument more stable. Figure 1-2 60 Degrees Supporting Figure 1-3 45 Degrees Supporting... -
Page 12: Overview
Introduction Thank you for purchasing AT824/825/826 Handheld LCR Digital Meter AT826, 825, 824 series handheld LCR Digital electric bridge adopts high performance 32-bit ARM microprocessor. True-color TFT liquid crystal display, keypad and touch screen double control. Use Li- battery supply power and USB communication. -
Page 13: Equivalent Circuit
Overview 2.2.2 Equivalent Circuit Table 2-1 Equivalent Circuit Serial(Subscript s),Parallel(Subscript p)。 。 Dissipation Factor D Circuit Conversion Ls=Lp/(1+D Rs=RpD /(1+ D=2πFLp/Rp=1/Q Lp=(1+D Rp=(1+D D=Rs/2πFLs=1/Q Cs=(1+D Rs=RpD /(1+ D=1/2πFCpRp=1/Q Cp=Cs/(1+D D=2πFCsRs=1/Q Rp=Rs(1+D Q=Xs/Rs,D=Rs/Xs,Xs=1/2πFCs=2πFLs Typically, for low impedance components (such as high-value capacitance and capacitance and low inductance), use the series equivalent circuit. -
Page 14: Basic Accuracy
0.0001Ω ~ 99.99MΩ R、X、Z 0.0001 ~ 9.999 0.0001 ~ 999.9 θd -179.99°~179.99° θr -3.1416 ~ 3.1416 Table 2-4 AT826 Measurement Range -999.9% ~ 999.9% Parameter MMeasurement Ranger 0.001µH ~ 999.9H 0.001pF ~ 999.9mF 0.0001Ω ~ 99.99MΩ R、X、Z 0.0001 ~ 9.999... -
Page 15: Test Signal
Test Signal 2.3.1 Test Signal Frequency AT824: 100Hz, 120Hz and 1 kHz AT825: 100Hz, 120Hz, 1 kHz and 10 kHz AT826: 100Hz, 120Hz, 1 kHz, 10 kHz and 100 kHz Frequency: Accuracy: 0.02% 2.3.2 Test Signal Level 0.6Vrms Accuracy: ±10%±2 mV 2.3.3 Output Impedance... -
Page 16: Startup
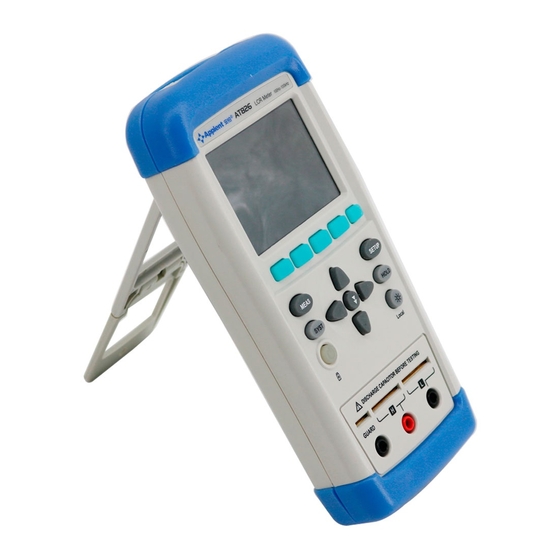
AT824/825/826 Handheld LCR Meter 3. Startup This chapter describes: Front Panel Summery LCD Screen Interface Slot and Cables Front Panel Figure 3-1 Front Panel... -
Page 17: Lcd Screen
Table 3-1 Description of the Front Panel Startup TFT-LCD Screen Select Keys MEAS Measurement Key——Enter Measurement Page (Page 22: Measurement Page) SYST System Key ——Enter System Setting Page (Page 30: System Setting Page) Power On/Off Battery Charging Indicator 5-Terminal Test Slot 3-Terminal Test Slot Background Brightness——30%,50%,70%, 100% Unlock the Keypad Lock... -
Page 18: External Power And Battery
AT824/825/826 Handheld LCR Meter Green and P: Pass, Red and F: Fail If the comparator was turned off, there’s nothing displayed. Battery Percentage and Keypad Lock Indicators Interfaces Figure 3-3 Interface panel Table 3-3 Interface panel description Remote Control Interface(USB-HID) Beep Power Adapter Jack(+9VDC) External Power and Battery... -
Page 19: Charge Li Battery
Startup Figure 3-4 Power Adapter 3.4.1 Charge Li Battery When the battery power is low, you could use the power adapter to charge Figure 3-5 Charging LED (Orange) the battery. The Power key is orange indicating while charging the battery. The key is also orange which charging even when the LCR Attention! meter is off previously.) -
Page 20: Unknown Terminals Slot
AT824/825/826 All Equipped with L501C Kelvin Clip Figure 3-6 Unknown Terminals AT826 also equipped with L508B SMD Clip. 1 The test terminal can NOT be connected into a live circuit 2 The capacitor must be discharged. 3.6.1 Clips and Cables:... -
Page 21: Meas Display] Page
• Equivalent Mode – Auto, Serial and Parallel 4.1.1 Measurement Function [FUNC A] [FUNC B] The AT826/825/824 simultaneously measure 2 components of the complex impedance (parameters) in one measurement cycle. These include primary parameter and secondary parameter USB Command: FUNC:MAIN <C|L|R|Z|AUTO>... -
Page 22: Test Signal Frequency [Freq]
Use the select keys to select measurement function. 4.1.2 Test Signal Frequency [FREQ] AT824: 100Hz, 120Hz and 1 kHz AT825: 100 Hz, 120 Hz, 1 kHz and 10 kHz AT826: 100 Hz, 120 Hz, 1 kHz, 10 kHz and 100 kHz... -
Page 23: Impedance Range [Range]
[MEAS DISPLAY] Page Frequency Accuracy: 0.02% 120 Hz accurate frequency is 120.048 Hz, frequency accuracy is Tips 0.05% USB Command: FREQ <100|120|1k|10k|100k> Procedure of setting test frequency: Step 1 Press[MEAS]key to enter <MEAS DISPLAY> page Step 2 Use the cursor key to select[FREQ]field Step 3 Select the frequency by soft key Table 4-4... -
Page 24: Measurement Speed [Speed]
INCR+ Increase DECL- Decline 4.1.4 Measurement Speed [SPEED] SLOW and FAST can be selected for AT826/825/824 SLOW mode will result in more stable and accurate measurement result. USB Command: APER <SLOW|FAST> Procedure for setting measurement speed Step 1 Press[MEAS]key to enter <MEAS DISPLAY > page... -
Page 25: Setup] Page
[SETUP] Page 5. [SETUP] Page This section includes all setup functions At any time, press [SETUP]to enter <SETUP> page. USB-HID Command :DISP:PAGE SETUP <SETUP> Page In < SETUP> page, the Instrument does not display any results, testing is not in progress. The setup includes •... -
Page 26: Comparator [Comp]
AT824/825/826 Handheld LCR Meter 5.1.1 Comparator [COMP] Comparator formula: − ⋅ Rx: Test Value Nom: Nominal Value USB Command: COMP <ON | OFF | 0 | 1> Procedure to turn[COMP]on: Step 1 Press[SETUP]to enter setup page; Step 2 Select[Auto Parameters]; Step 3 Comparator off Comparator on... -
Page 27: Input Tolerance Value [Tol]
Figure 5-2 To input nominal by touch screen [SETUP] Page Step 1 Press [Keypad Input] key Step 2 Input the nominal value by touch the screen button Step 3 Select the unit for the nominal value Touch Screen is still available even it is turned off in system Tips setting. -
Page 28: User Correction
AT824/825/826 Handheld LCR Meter User Correction There are two corrections: Open correction and Short Correction. Press [SETUP] key and choose OPEN CORR or SHORT CORR by soft key. It is necessary to execute open correction and short correction. After replacing the test fixture or test cables, you should execute Tips open correction and short correction again. -
Page 29: Short Correction
Figure 5-3 Stray Admittance [SETUP] Page [OPEN CORR] function will correct all frequencies. The frequency points may be different in different versions. Procedure of open correction Step 1 Press [SETUP] to enter <SETUP> page Step 2 Keep test clip or cable open circuit. Step 3 Press [OPEN CORR] soft key Press [OK] to execute. -
Page 30: System Config] Page
AT824/825/826 Handheld LCR Meter 6. [SYSTEM CONFIG] Page This section includes all system information. USB-HID Command: DISP:PAGE SYSTEM At any time, press [SYST] key to enter [SYSTEM CONFIG] page. <SYSTEM CONFIG> page Following information can be configured in the <SYSTEM CONFIG> page. -
Page 31: File]
[SYSTEM CONFIG] Page Step 1 Press [SYST] key to enter <SYSTEM CONFIG> page. Step 2 Select[LANGUAGE] Step 3 中文 Switch into Chinese (CHS) ENGLISH Switch into English 6.1.2 [FILE] Procedure of file setting Step 1 Press [SYST] key to enter <SYSTEM CONFIG> page. Step 2 Select [FILE] field AUTO... -
Page 32: Brightness]
AT824/825/826 Handheld LCR Meter Step 4 Use a screen pen to click screen softly to start calibration Step 5 Tap the middle of the circle with a pen on Left-Up corner. Then tap the middle of the circle with a pen on the Right-Bottom corner to finish the calibration. -
Page 33: Dim Display [Dim]
[SYSTEM CONFIG] Page 70% of full brightness 100% Full brightness 6.1.5 DIM DISPLAY [DIM] Procedure to dim display: Step 1 Press [SYST] key to enter <SYSTEM CONFIG> page. Step 2 Select [DIM DISPLAY] Step 3 5 minutes 5 minutes later, brightness becomes 30% 10 minutes 10 minutes later, brightness becomes 30% 20 minutes... -
Page 34: Examples
This chapter covers basic measurement procedures as well as basic L, C, and R measurement theory. It also offers various measurement hints. After the descriptions of basic measurement procedures, practical measurement examples are shown using AT826 Warning: Do not connect the unknown terminal into a live circuit! -
Page 35: Example
EXAMPLES If you are using test cables, then connect them together. If you are using test slot, insert the jumper to shorten the circuit. Press [SHORT CORR], press [OK] to start. Step 5 Press[MEAS]key to enter <MEAS DISPLAY> page Step 6 Connect capacitor to test cables or insert it into test slot. -
Page 36: Remote Control
AT824/825/826 Handheld LCR Meter 8. Remote Control This chapter provides the following information to remotely control the AT826/825/824 via the USB interface. USB-HID The USB-Serial Interface allows you to connect AT824/825/826 to a USB port on you PC. You needn’t to install a driver in Windows system. -
Page 37: Command Set
Remote Control SetupDiGetInterfaceDeviceDetail. ReadFile( hDev, recvBuffer, IN_REPORT_LEN, &recvBytes, &ol); Use ReadFile to read HID equipment. Report based on the data fransferred from IN. WriteFile( hDev, reportBuf, OUT_REPORT_LEN, &sendBytes, &ol); WriteFile is used to transfer an output report to HID equipment. ... -
Page 38: Notation Conventions And Definitions
Instrument response pack is 64 bytes, not sufficient for 0x00 fill out. (Not ASCII “0”) A response pack (from instrument): ASCII format: AT826, REV A1.0, 00000000, Applent Instruments Inc. To test instrument USB-HID, we have free “Applent HID communication tester” software, you can download from:www.applent.com 8.3.2 Notation Conventions and Definitions... -
Page 39: Parameter Types
Table 8-2 Notation Conventions and Definitions Remote Control <> Name of a parameter The content is optional Select from several options 8.3.3 Parameter types Table 8-3 Available data type Parameters may be of four types as follows. Format Samples <NR1> Integer 100,+100,-100 <NR2>... -
Page 40: Disp Subsystem
AT824/825/826 Handheld LCR Meter COMP Comparator subsystem CORR Correction subsystem SYST System setting subsystem IDN? Version check subsystem RST Hot start subsystem ERR Error subsystem 8.4.1 DISP Subsystem DISP:PAGE <meas|setup|system> To change screen page sHeader DISP:PAGE sPara... - Page 41 Remote Control FUNC:MAIN:FACT? To check main factor when primary parameter is set Auto sHeader FUNC:MAIN:FACT? sPara Response <C|L|R|Z> FUNC:SUB <OFF|AUTO|D|Q|ESR|THR|THD|X> To set primary parameter sHeader FUNC:SUB sPara <OFF|AUTO|D|Q|ESR|THR|THD|X> FUNC:SUB? To check current primary parameter sHeader FUNC:SUB? sPara Response <OFF|AUTO|D|Q|ESR|THR|THD|X>...
-
Page 42: Freq Sub System
Frequency can accept any numeric format, but the data must be the frequency value of the meter. Illege value will be replaced by a close legal value as follows: 100,120,1k (AT824) 100,120,1k,10k (AT825) 100,120,1k,10k,100k (AT826) FREQ? To check current frequency sHeader FREQ? -
Page 43: Aper Speed Sub System
Remote Control 8.4.4 APER Speed Sub System APER <SLOW|FAST> To set test speed sHeader APER sPara <SLOW|FAST> APER? To query current test speed sHeader APER? sPara Response <slow|fast> 8.4.5 FETC? Sub System FETC? To query test result sHeader FETC? sPara... -
Page 44: Correction Subsystem
AT824/825/826 Handheld LCR Meter COMP:BEEP? To query status of beep sHeader COMP:BEEP? sPara Response <off | pass | fail> COMP:NOM <NR1|NR2|NR3|NR4> To input nominal value under current parameters sHeader COMP:NOM sPara <NR1|NR2|NR3|NR4> COMP:NOM? To query nominal value under current parameters sHeader COMP:NOM? sPara... -
Page 45: Syst System Sub System
This command is only available on <MEAS DISPLAY> page. 8.4.9 IDN? Subsystem IDN? To check version information sHeader IDN? sPara Response AT826,REV A1.0,<Serial Number>,Applent Instruments Inc. 8.4.10 RST Subsystem RST To start in heat sHeader sPara 8.4.11 Error Subsystem ... -
Page 46: Command List
AT824/825/826 Handheld LCR Meter 2, Parameter error 3, Missing parameter 4, Invalid multiplier 5, Numeric data error 6, Value too long 7, Invalid command Command List Table 8-6 All USB Commands sHeader sPara Response DISP:PAGE MEAS | SETUP | SYSTEM Change display page DISP:PAGE? Query current display page... -
Page 47: Specification
Specification 9. Specification This chapter describes the specifications and supplemental performance characteristics of the AT826/825/824: Specifications Dimension General Specification Specification Primary Parameters C, L, R, Z, AUTO Sub Parameters OFF, AUTO, D, Q, ESR, θr,θ°,X Display 50000 readers Basic Accuracy 0.2%... -
Page 48: Accuracy
AT824/825/826 Handheld LCR Meter 8h @100% brightness Battery working 11h @ 50% brightness: time 14h @ 30% brightness Charge time About 2h 5min/10min/20min/30min/OFF Lower brightness *Power by battery 5min/10min/20min/30min/OFF Auto power off *Powered by battery General Temperature 0°C~40°C Humidity ≤ 90%RH Altitude 2000m Storage Temperature... - Page 49 Specification Range Display range Accuracy Ce Accuracy De 20mF 5.0000mF - 20.000mF 5.0%+5bit 0.0500 1.0%+3bit 0.0100 500.0µF - 4.9999mF 0.3%+2bit 0.0030 500µF 50.00µF - 499.99µF 0.2%+2bit 0.0020 50µF 5.000µF – 49.999µF 0.2%+2bit 0.0020 5µF 500.0nF – 4.9999µF 500nF 50.00nF – 499.99nF 0.2%+2bit 0.0020 50nF...
-
Page 50: L And Q
AT824/825/826 Handheld LCR Meter 9.2.2 L and Q 100Hz/120Hz Range Display Range Accuracy Ce Accuracy De 1000H 500.0H – 1000.0H 1.0%+3bit 0.0100 500H 50.00H - 499.99H 0.3%+2bit 0.0030 5.000H – 49.999H 0.2%+2bit 0.0020 500.0mH – 4.9999H 0.2%+2bit 0.0020 500mH 50.00mH –... -
Page 51: Z And Θ
Specification 9.2.3 Z and θ 100Hz, 120Hz, 1kHz, 10kHz Range Display Range Accuracy Ze Accuracy θe 5.000MΩ 3.0%+5bit 10MΩ 1.7° 10.000MΩ 1.2%+3bit 5MΩ 500.0kΩ - 4.9999MΩ 0.7° 0.3%+3bit 500kΩ 50.00kΩ - 499.99kΩ 0.2° 0.2%+2bit 50kΩ 5.000kΩ - 49.999kΩ 0.1° 0.2%+2bit 5kΩ... -
Page 52: Demensions
AT824/825/826 Handheld LCR Meter Demensions @ Instruments -AT824/825/826 User’s Guide- English ©2011 Applent Instruments Inc.
Need help?
Do you have a question about the AT826 and is the answer not in the manual?
Questions and answers