Table of Contents
Advertisement
Quick Links
"TO BE REMOVED FOR USE BY THE OCCUPANT."
Jason International, Inc.
8328 MacArthur Drive
North Little Rock, AR 72118
www.jasoninternational.com
MADE IN THE U.S.A.
InsTallaTIOn, OPeraTIOn, anD MaInTenanCe
If the carton shows sign of damage, inspect
the product before accepting and describe the
problem on the Bill of lading.
InsPeCTIOn
Inspect the unit prior to installation. In the event of a
problem, DO NOT install the unit.
All components are factory assembled to the bath and the
unit is water tested and inspected prior to leaving Jason
International, Inc.
If the carton shows sign of damage, inspect the product
before accepting and describe the problem on the Bill of
Lading.
NOTE: Transportation and insurance from Jason's
factory are the buyer's responsibility.
Damage sustained in transit is the responsibility of
the carrier. If damage is discovered, the carrier must
be immediately notified in writing with a request for a
representative to inspect the unit. Failure of the carrier
to respond should be reported to the seller and carrier.
Always file a freight claim promptly.
The installer is responsible for insuring that the unit is
free from defects or shipping damage. In the event of a
problem, DO NOT install the unit.
Owner's reCOrD
Dealer:
Date Purchased:
Date Installed:
Installer:
Jason International, Inc. • 501.771.4477
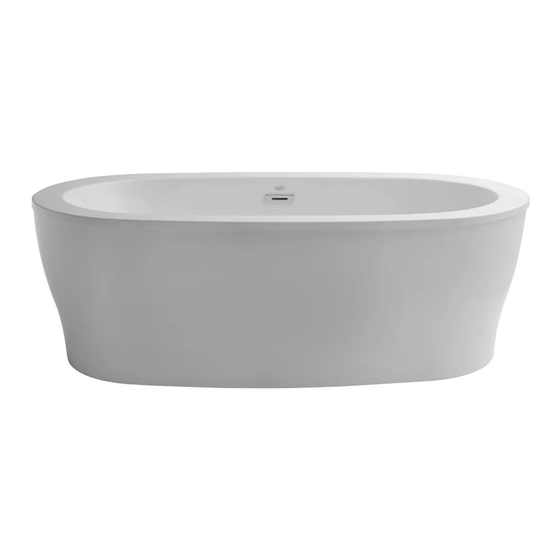
Owner's Manual
aC635Ps & aC553Ps forma ®
soaking, airmasseur ® & Microsilk ® Baths
Jason International is not responsible for damage that
might have been avoided by inspection or testing prior to
installation.
Damage to the unit during installation will not be covered
by warranty and is the responsibility of the installer.
ALL WARRANTY CLAIMS ON ACRYLIC SURFACE
DAMAGE MUST BE MADE PRIOR TO INSTALLATION.
Inspect plumbing and bath surface for missing or damaged
components. Alert your dealer of any discrepancies.
To protect the unit from damage keep the bath in the
carton until ready for installation.
eQuIPMenT aCCess
In accordance with Building Codes, service access
to all therapy bath equipment, controls and electrical
connections must be provided during installation
(Recommended minimum 28" x 17" [71 x 43 cm]).
Insufficient access will hinder repair and maintenance.
Warranty service will not cover costs of providing
equipment access.
The Specification Sheet for this bath contains additional
technical information. This sheet can be provided by your
dealer or accessed online at www.jasoninternational.com.
PlaCe serIal nuMBer CarD wITh
PrODuCT COnfIguraTIOn In ThIs BOx
Page 1 of 26
49-1011-009
Date 05/2014
Customer Service : 800.255.5766
Copyright © 2014 Jason International, Inc.
Advertisement
Table of Contents

Related Manuals for JASON Hydrotherapy AC635PS


Summary of Contents for JASON Hydrotherapy AC635PS
- Page 1 North Little Rock, AR 72118 www.jasoninternational.com MADE IN THE U.S.A. Owner’s Manual aC635Ps & aC553Ps forma ® soaking, airmasseur ® & Microsilk ® Baths InsTallaTIOn, OPeraTIOn, anD MaInTenanCe If the carton shows sign of damage, inspect Jason International is not responsible for damage that...
-
Page 2: Installation Instructions
System kit and electronics from the separate blower carton. Set aside to be installed later. For baths with the AEC Equipment Cabinet, set the AEC carton aside to be installed later AC635PS AC553PS Jason International, Inc. • 501.771.4477 Page 2 of 26 Customer Service : 800.255.5766... - Page 3 INSTALLATION INSTRUCTIONS (cont.) 8. After the finished floor is installed, position the installation 12. Dry fit the drain and overflow to the bath. template on the finished floor. Place the template to line up with the existing floor drain location and orient the template Dry fit the drain and overflow to the bath.
- Page 4 INSTALLATION INSTRUCTIONS (cont.) Figure 5 Figure 6 17. Attach faucet accessories to the bath (if applicable). Place bath and skirt assembly on raised blocks approxi- CAUTION: There is not enough room to mount a deck mately 8" tall. mounted diverter valve on the deck of the bath. 22.
- Page 5 INSTALLATION INSTRUCTIONS (cont.) eleCTrICal 25. Drain and overflow. Complete the installation of the drain and overflow per the instructions included with Electrical Power Supply: These instructions are written the drain and overflow. assuming 60Hz, 120V power supply. Special notations are Test bath controls.
- Page 6 INSTALLATION INSTRUCTIONS (cont.) ® ® 4. AirMasseur Equipment 120V Electrical Service - AirMasseur Control Box. ® The AirMasseur equipment may be shipped separately The blower control box must be plugged into a dedicated from the bath. The blower is prewired to the control box. 120V, 15A, 60Hz, GFCI protected circuit.
- Page 7 INSTALLATION INSTRUCTIONS (cont.) ® 5. MicroSilk Equipment 240V Electrical Service - MicroSilk Control Box. The The MicroSilk equipment will be shipped separate from MicroSilk control must be plugged into a dedicated 240V, the bath with the AEC Equipment Cabinet. Follow the 15A, 60Hz, GFCI protected circuit.
- Page 8 INSTALLATION INSTRUCTIONS (cont.) reMOTe MOunTIng Of aIr BlOwer 3. Attach hose. Attach one end of the blower hose to the bath connection with the included clamp. ® The Jason AirMasseur system has been factory installed 4. Pipe stub out. Extend piping stub-out through the floor following E.T.L.
- Page 9 INSTALLATION INSTRUCTIONS (cont.) aCrYlIC eQuIPMenT CaBIneT InsTallaTIOn CAUTION: Do not allow the cabinet to touch the bath or the skirt. This could produce excessive noise. The Jason Acrylic Equipment Cabinet (AEC ) can be The PVC trim, around the opening in the cabinet, has a flexible used to house the bath equipment that cannot be remote sweep and is used to help obscure the plumbing between mounted away from the bath.
- Page 10 INSTALLATION INSTRUCTIONS (cont.) Figure 13b 5. For MicroSilk baths, clamp the plumbing lines to the appropriate barb using the clamp provided. Assure the line will allow proper drainage to the bath fitting. The hose must have a continuous drop from the barb to the fitting.
-
Page 11: Water Testing
INSTALLATION INSTRUCTIONS (cont.) CleanIng waTer TesTIng 1. Remove all loose debris. Construction plaster or excess Before finishing the installation, it is recommended that the grout can be removed with the use of a wood (edge) bath be water tested and the plumbing tested for leaks. trowel. -
Page 12: Control Box Connections
INSTALLATION INSTRUCTIONS (cont.) AIRMASSEUR ContRol box ConnECtIonS ® sTanDarD eDITIOn aIrMasseur ® The AirMasseur® Control Box The blower and keypad must be plugged into the proper Jason’s Standard Edition AirMasseur ® system features receptacles for correct operation of the AirMasseur ®... - Page 13 INSTALLATION INSTRUCTIONS (cont.) PreMIer eDITIOn aIrMasseur ® The AirMasseur® Control Box The blower, keypad, LED light, and Ozone Sanitation Unit ® Jason’s Premier Edition AirMasseur system incorporates must be plugged into the proper receptacles for correct all the features of the Standard Edition system and ®...
- Page 14 INSTALLATION INSTRUCTIONS (cont.) sIgnaTure eDITIOn aIrMasseur ® The AirMasseur® Control Box The blower, keypad, LED light, Ozone Sanitation Unit and Jason’s Signature Edition AirMasseur ® system is the most Water Level/Temperature Sensor must be plugged into the advanced bath manufactured by Jason International, Inc. ®...
- Page 15 INSTALLATION INSTRUCTIONS (cont.) mICROSILK CONTROL bOx CONNeCTIONS ® sTanDarD eDITIOn MICrOsIlK ® ® The MicroSilk Control Box Jason’s Standard Edition MicroSilk ® system features the The MicroSilk ® unit and keypad must be plugged into the best in luxury bathing for the leisure bath industry. To proper receptacles for correct operation of the MicroSilk ®...
- Page 16 INSTALLATION INSTRUCTIONS (cont.) PreMIer eDITIOn MICrOsIlK ® ® The MicroSilk Control Box Jason’s Premier Edition MicroSilk ® system incorporates all ® The MicroSilk unit, keypad, LED light, and Ozone Sanita- the features of the Standard Edition system and includes tion Unit must be plugged into the proper receptacles for the benefits of an ozone sanitation system and an LED ®...
- Page 17 CONTROL bOx CONNeCTIONS (cont.) ® sIgnaTure eDITIOn MICrOsIlK ® The MicroSilk Control Box ® The MicroSilk unit, keypad, LED light, Ozone Sanitation Unit ® Jason’s Signature Edition MicroSilk system is the most and Water Level/Temperature Sensor must be plugged into advanced bath manufactured by Jason International, Inc.
- Page 18 OPeRATING INSTRUCTIONS, FeATUReS, & CONTROLS INTRODUCTION Signature Touchpad A main control touchpad mounted on the bath deck features a This manual contains all of the information needed for the LCD readout which alternately indicates the water temperature proper installation and operation of your Jason bath. The (+/- 5°F) and time remaining.
- Page 19 opERAtInG InStRUCtIonS, FEAtURES, AnD ContRolS (cont.) StAnDARD EDItIon AIRMASSEUR toUChpAD ® Figure 21 Mode Blower Speeds ® Option AirMasseur ® On/Off OPeraTIng InsTruCTIOns ® Blower Speeds Icon AirMasseur On/Off Icon ® The Blower Speeds icon is used to increase or decrease The AirMasseur icon is used to activate the blower and the blower speed once the blower is On.
- Page 20 opERAtInG InStRUCtIonS, FEAtURES, AnD ContRolS (cont.) SIGnAtURE EDItIon AIRMASSEUR toUChpAD ® Figure 22 AirMasseur ® On/Off, Mode Blower Speeds LED Light IR for Remote OPeraTIng InsTruCTIOns Customized Settings The 12 character LCD display can be customized by pressing AirMasseur ® On/Off and Mode Icon ®...
-
Page 21: Led Light
opERAtInG InStRUCtIonS, FEAtURES, AnD ContRolS (cont.) STANDARD AND PRemIeR eDITION mICROSILK TOUChPAD ® Figure 23 ® ® MICROSILK ® LED Light MicroSilk On/Off OPeraTIng InsTruCTIOns LED Light Icon The LED Light icon is used to operate an LED light (if MicroSilk ®... - Page 22 opERAtInG InStRUCtIonS, FEAtURES, AnD ContRolS (cont.) SIGNATURe eDITION mICROSILK TOUChPAD ® For Diagnostic Functions Figure 24 For Diagnostic Functions LED Light ® MicroSilk On/Off IR for Remote OPeraTIng InsTruCTIOns Menu Instructions Use the top Diagnostic Function icon to scroll through the ®...
-
Page 23: User Maintenance Instructions
USER MAINTENANCE INSTRUCTIONS huMIDITY surfaCe MaInTenanCe Areas with minor scratches or dull surfaces can be restored WARNING: Avoid high humidity levels in your home. by applying commercially available plastic polish (i.e. Novus Mold, mildew, fungi and bacteria which may be harmful Plastic Polish No. -
Page 24: Troubleshooting Guide
TROUbLe ShOOTING GUIDe If you believe the unit to be within the warranty period, you must contact Jason Customer service: 1-800-255-5766 with the bath’s Product and Serial numbers before work is started. all warranTY rePaIrs MusT Be auThOrIZeD BY JasOn BefOre wOrK Is sTarTeD. FOR SERVICE, ALWAYS CONTACT YOUR DEALER OR AUTHORIZED SERVICE CENTER WARNING: Always turn off power at the mail electrical service panel when servicing the bath. -
Page 25: Warranty
troubleshooting Guide (cont.) If you believe the unit to be within the warranty period, you must contact Jason Customer service: 1-800-255-5766 with the bath’s Product and Serial numbers before work is started. all warranTY rePaIrs MusT Be auThOrIZeD BY JasOn BefOre wOrK Is sTarTeD. FOR SERVICE, ALWAYS CONTACT YOUR DEALER OR AUTHORIZED SERVICE CENTER WARNING: Always turn off power at the mail electrical service panel when servicing the bath. -
Page 26: Important Safety Instructions
IMPORTANT SAFETY INSTRUCTIONS InsTruCTIOns PerTaInIng TO The rIsK Of fIre, eleCTrIC shOCK, Or InJurY TO PersOns. This manual contains information and instructions for proper operation and maintenance of your therapy bath. Failure to follow these instructions could result in personal injury, electrical shock, or fire. warnIng: when using this unit, basic precautions should always be followed, including the following: reaD anD fOllOw all InsTruCTIOns CarefullY Danger:...
Need help?
Do you have a question about the AC635PS and is the answer not in the manual?
Questions and answers