
Subscribe to Our Youtube Channel
Related Manuals for GLP YPOC 575 COLOR


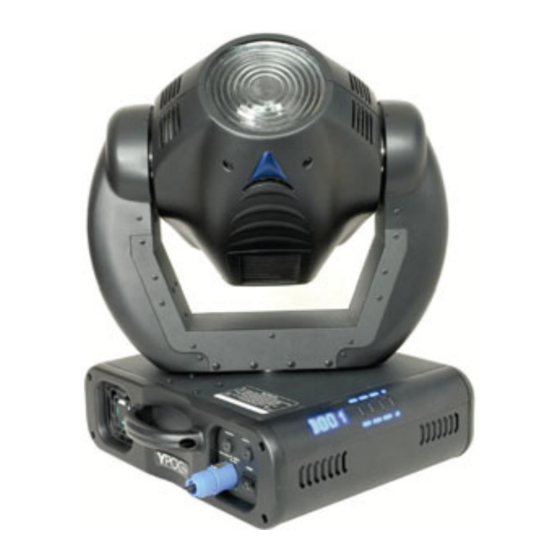
Summary of Contents for GLP YPOC 575 COLOR
- Page 1 Instruction Manual from software version 1.0 (instruction version 1.0) e-mail: service@glp.de Internet: http://www.GLP.de...
- Page 2 This side is intentionally unlabelled. German Light Production (1.0)
-
Page 3: Table Of Contents
Table of contents Description of Device ..................... 5 1.1 Safety Instructions.................... 6 Preparation and Installation .................. 7 2.1 Mounting ......................7 2.1.1 Clamps ....................7 2.2 Secure the R ................ 8 2.3 Connections ..................... 9 2.3.1 Mains supply..................9 2.3.2 DMX....................... 9 2.4 Fuses ....................... - Page 4 Change the Lamp....................21 5.1 Safety Regulations ..................21 5.2 Realize the Lamp Change ................21 Maintenance and Cleaning the R ..........21 6.1 Safety Regulations ..................22 6.2 Circumference and Interval (rule-of-thumb)............ 22 6.3 Cleaning the Optical System ................22 Technical Specification ..................
-
Page 5: Description Of Device
1 Description of Device 1. Moving Head 2. Carrying handles 3. LED- Display 4. Arm 5. Camlock system 6. Software-Update connector D M X IN D M X OU T 7. Microphone- Intensity 1 .Groun d 2 .Data - 3 .Data + 8. -
Page 6: Safety Instructions
1.1 Safety Instructions R is a High-Tech Product. To guarantee a smooth operation, it is necessary to keep following rules. The manufacturer of this device will not take responsibility of damages through disregard of the information in this manual. Warranty adjustments will be cancelled. 1. -
Page 7: Preparation And Installation
2 Preparation and Installation 2.1 Mounting R is fully operational whether it hangs or is mounted to the wall. It can also be operated while standing on the floor. Keep a safety distance of 0.5 m towards any easy inflammable materials (decoration etc.). Install a safety wire that can hold at least 10 times the weight of the fixture. -
Page 8: Secure The R
of the case and close the locks by turning them 90°. Verify the secure fit of the camlock system. The clamps themselves are directly attached permanently on the camlocks. 90° b) Use two clamps direct on the backside of the R to mount the unit on a truss (each two opposite threads max. -
Page 9: Connections
2.3 Connections 2.3.1 Mains supply Electronic ballast with: ~90 - 260 Volt, 50 - 60 Hz, earth contact type plug - Powercon Connected load 780W <=> 3.8 A (blind current compensation). Please see printing on the case for the right electronic supply! 2.3.2 DMX DMX 512 Standard input/output. -
Page 10: The Menu Field
The Menu Field You’ll find the control board on the side part of the base. It allows you to make all necessary adjustments of the . With the Mode-key you get MODE ENTER DOWN into the main menu. Afterwards you can navigate through the menu with the Up/Down-keys. -
Page 11: Adjust The Dmx- Address
COAD CODE Use the code for entering the calibration menu (for xxxx authorized persons only) CYAN Coarse calibration of the Cyan color wheel MAGE Coarse calibration of the Magenta color wheel YELL Coarse calibration of the Yellow color wheel DFSE Call on the default function values FEED Pan/Tilt feedback (error correction) On/Off... -
Page 12: Lamp On/Off (Lamp)
Every second sound impulse one step of the chaser. Additional you can choose a basic position for this audio chaser. Use therefore either the internal manual mode or an external controller to set the desired SVPT Pan/Tilt position. Confirm this setting in the menu by pressing the Enter-key. -
Page 13: Continuous Color Wheel
(FCOL) 3.7 Continuous Color Wheel fcol This function allows you to control the color wheel continuously. If it is switched off, the color wheel is stepping directly from one to another color. (RPAN) 3.8 Invert Pan Movement RPAN This function allows you to invert the Pan movement. Use the Up/Down-keys to select invert . -
Page 14: Lamp On Automatically
MAGE 000 - 255 Magenta color wheel YELL 000 - 255 Yellow color wheel COLO 000 - 255 Color wheel (fixed colors) SHUT 000 - 255 Shutter / Strobe function (the lamp strikes at DMX 255 if dimmer is "open" = DMX 255) DIMR 000 - 255 Dimmer... -
Page 15: Display (Disp)
Function Value Remark 0 - 255 Pan Position TILT 0 - 255 Tilt Position CYAN 0 - 255 Cyan color wheel MAGE 0 - 255 Magenta color wheel YELL 0 - 255 Yellow color wheel COLO 0 - 255 Color wheel (fixed colors) SHUT 0 - 255 Shutter / Strobe function... -
Page 16: Adjustments And Calibrations
By using this function you can choose between 4 types of fan speed operations. Use the Up/Down-keys to select desired function and press Enter to confirm or Mode to cancel and return to the menu. HIGH The cooling fan works continuously at max. speed. The fan automatically raises its speed in order to control inside temperature of the fixture. -
Page 17: Default Settings (Dfse)
SHUT - 99 - + 99 Adjustment of the Shutter CLRE Adjustments in the internal circuit. ARES - 99 - + 99 Adjust Reset (wheels stand still after the reset) VTIL - 99 - + 99 Software version of Tilt-board VTR1 - 99 - + 99 Software version of Head- board... -
Page 18: Correction Of Faults (Eflg)
(EFLG) 3.10.11 Correction of faults EFLG (Function available for authorized persons only) 3.11 Error and Information Messages HEAt This message appears if you try to switch on the lamp within 5 minutes after having switched off (lamp too hot). The message will appear on the display if the lamp doesn’t ignite within 20 seconds. -
Page 19: Dmx Channel Selection (Dmx Protocol)
4 DMX Channel Selection (DMX Protocol) Channel Function Time and Value 0 .. 530° min. 2,65 s 0..255 00..FF 0..100 1) PAN- coarse Low- Pos ... High- Pos + 2,1° (16 Bit) 0..255 00..FF 0..100 2) PAN-fine 0 .. 285° min. - Page 20 Channel Function Time and Value Open 0..15 0..0F 0..5 11) Beam Shaper 16..239 10..EF 6..94 shape Frost 240..255 F0..FF 95..100 12) Zoom Zoom 0% - 100% 8° - 22° 0..255 00..FF 0..100 No function 0..15 00..0F 0..6 13) Special Audio CMY chaser slow 16..23 10..17 7..9...
-
Page 21: Change The Lamp
5 Change the Lamp For a frictionless operation pleas read this chapter carefully and follow all instructions. 5.1 Safety Regulations • Pull out the main plug! • Wait min. 20 minutes after the last operation to cool down the fixture. •... -
Page 22: Safety Regulations
mended, under no circumstances should alcohol or solvents be used! The inside optical system should be maintained only by authorized persons. Please contact your local dealer. 6.1 Safety Regulations • Pull out the main plug! • Wait min. 20 minutes after the last operation to cool down the fixture. •... -
Page 23: Technical Specification
7 Technical Specification Mains supply ~90 - 260V, 50 - 60 Hz Power consumption 780 Watt, 3.8A, electronic ballast, (blind current compensated) Fuse protection Lamp: T 5A, 250V, 5x20 mm (fine-wire fuse) Electronic: T 1A, 250V, 5x20 mm (fine-wire fuse) Lamp Type HTI 575-DE (OSRAM) -
Page 24: Index
8 Index Audio ..............11 Maintenance ........... 21 Measures ............23 Mounting ............7 BGV C1 ..............7 Pan- movement..........23 Circumference..........22 Power supply............9 Cleaning ............22 Safety Instructions........... 6 Description of Device ........5 Secure ............... 8 DIN VDE 0711-217..........7 Display..............15 DMX ..............9 Test Program ........... - Page 25 German Light Production (1.0)
Need help?
Do you have a question about the YPOC 575 COLOR and is the answer not in the manual?
Questions and answers