
Subscribe to Our Youtube Channel
Related Manuals for Coastal Amusements TOY SOLDIER


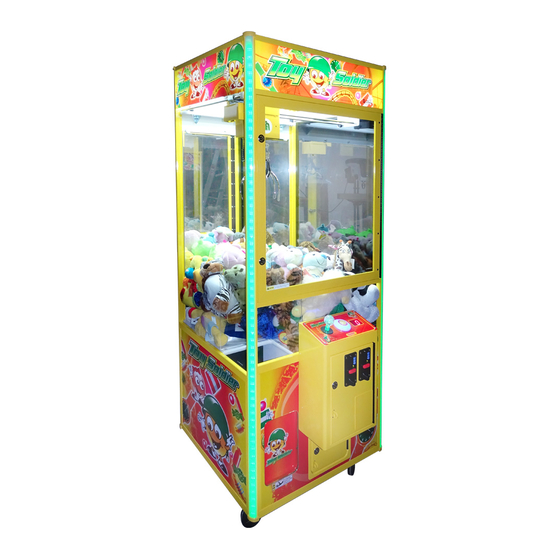
Summary of Contents for Coastal Amusements TOY SOLDIER
- Page 1 COASTAL TOY SOLDIER (MODEL WMH-288B) OPERATING MANUAL COASTAL AMUSEMENTS, INC. 1935 SWARTHMORE AVE. LAKEWOOD, NJ 08701 TEL: 1-732-905-6662 FAX: 1-732-905-6815 E-MAIL: sales@coastalamusements.com...
-
Page 2: Table Of Contents
WMH-188B/288B SERIAL INDEX GENERAL DESCRIPTION …………………………………………………… ※ WIRING DIAGRAM ………….………………………………………………… 4 ※ DIP SW INSTRUCTIONS …………………………………………………….. ※ INNER-VALUE SET UP INSTRUCTIONS ………………………………….. ※ TESTING INSTRUCTION …………………………………………………….. ※ ※ WINDING CORD INSTRUCTIONS ………………………………………….. TROUBLE SHOOTINGS ……………………………………………………… 13 ※ GANTRY & ASSEMBLY I ……………………………………………………… 14 ※... -
Page 3: General Description
WMH-188B/288B GENERAL DESCRIPTION 1. F unction: In general, this model consists of two sections, the Software and the Hardware. Follow below its applications: Software: It edited in the INTEL MCS-51 assembly, main CPU is 8052. Hardware: It consists of 6 sections listed below. (Pls. refer to the Hardware Provision Drawing.) Display: It mainly displays the number of coin insertion and the operation data of machine. - Page 4 2. How to play: 1. Insert coins/tokens into coin slot, the display shows credits and the coin counter takes record of coin in. 2. Press【RUNNING】button to move turning disc and mix objects. It may roll up your selected objects to the top for easier catching. (Invalid if the machine is set for ‘candy crane’ function / program.) Joystick operation: Use joystick to move claws above your selected object.
-
Page 5: Wiring Diagram
WMH-188B/288B Serial Main PCB Wiring Diagram Main ROM 主機板 W030934 / W070514 Color Connection Color Connection Black RD / WE +12V output Brown Joystick -- Front SW(N.O.) OE / WE COIN1 Meter Joystick -- Back SW (N.O.) YW / GN COIN2 Meter Orange Joystick -- Right SW (N.O.) - Page 6 Color Connection Color Connection Black Black Reserve. Black Yellow +5V Input Yellow +5V Input +12V Input Color Connection +12V Input Blue Output Sensor -- GND Orange +24V Input Gray Output Sensor -- signal Orange +24V Input Brown Output Sensor -- +12V Purple +48V Input Reserve.
-
Page 7: Dip Sw Instructions
DIP SW INSTRUCTIONS Program no.: UM288BC3 (T Soldier) Main Board: W030934 / 070514 DIP SW1 When the DIP SW PIN #6 VR1 Adj. of Power is setup on "Play till you win", the claw strength +48V voltage Claws lower down then release object Position where claws open at the exit... - Page 8 DIP SW2 8 : 1 Coin1 of method 6 : 1 (Coin Selector of Coin Pulse vs. Play) 4 : 1 2 : 1 4 : 1 Coin2 of method 3 : 1 (Bill Acceptor of Coin Pulse vs. Play) 2 : 1 1 : 1 Button...
-
Page 9: Inner-Value Set Up Instructions
Inner-Value Set Up Instructions ~ displays ~ pin of DIP SW2 to ON and turn power on. A voice “Good Luck” is heard Adjust the 7 after the displays run a self-testing. Adjust the coin mechs back to N.O. and the displays will blink『00』. -
Page 10: Testing Instruction
TESTING INSTRUCTION 1. Systems testing: Adjust COIN1 & COIN2 to N.C. then power on, the display will show [CC]. Adjust DIP SW2 to proceed with the testing in each item (function). Press【DESCEND】button to scroll thru each item, but make sure that all switches are properly adjusted per your requirement.(a special purpose for QC Engineer)... -
Page 11: Winding Cord Instructions
WINDING CORD INSTRUCTIONS ● Conductive-Cord Wheel (Winding Cord & Assembly II No.9) ● Winding-Cord Wheel (Winding Cord & Assembly II No.6) ●Conductive-Cord Wheel (Winding Cord & Assembly II No.7) Connected to Claws 【Correct winding method】 ● Conductive-Cord Wheel (Winding Cord & Assembly II No.9) ●... - Page 12 TROUBLESHOOTING 1. Take caution with the positive and negative poles of the DC power (+5V, +12V, +24V, +48V) in this machine when repairing it. Connect the poles correctly in order to avoid burning the PCB and/or operation under abnormal condition. 2.
- Page 13 (3) 『C0』 will also blink during the operation when players try to damage and/or cheat the machine with improper method to touch coin SW. Power off and on again, the machine should return back to its normal operation. (4) At using coin selector with sensor device to count coin ins,『C0』will blink when sensor device is out of function or blocked.
- Page 14 11. Claws does not lower down, but the【Descend】button is in normal condition: (1) Check if Up/Down motor is out of function of if its wires are properly connected. Also check if its shaft pinion is in proper position. (2) Check if winding cord is properly wound up. (3) Check if J4 connecting pin of P.C.B.
- Page 15 GANTRY ASSEMBLY DRAWINGS I ITEM # DESCRIPTION COASTAL PART # WU-MAR PART # 1,3,18,20 Front/Back Wheel PE-WHL-FB-002 S002 2,19 Crane Fixing Plate P008 Right Plate P015 Fixed Bearing S004 Rotating Shaft S014 Fixed Shaft S013 Black Cog PE-GEA-SHT-001 S007 Bearing mounting Plate P007 Bearing PE-BEA-GAN-S001...
- Page 16 GANTRY ASSEMBLY DRAWINGS II ITEM # DESCRIPTION COASTAL PART # WU-MAR PART # Carriage Rear Cover P013 Rotating Shaft S008 Rotating Shaft S009 4,5,21,22 Left/Right Wheel PE-WHL-L/R-006 S006 Claw Cord Wheel PE-WOW-S003 S003 Claw Cord Pulley PE-WHL-GAN-3005 S005 Claw Pulley Mounting Arm P009 Steel Motor mounting Plate P001...
Need help?
Do you have a question about the TOY SOLDIER and is the answer not in the manual?
Questions and answers