Advertisement
Quick Links
To Purchase This Game, Visit BMI Gaming | www.bmigaming.com | Or Contact International Sales at + 561-391-7200 (USA)
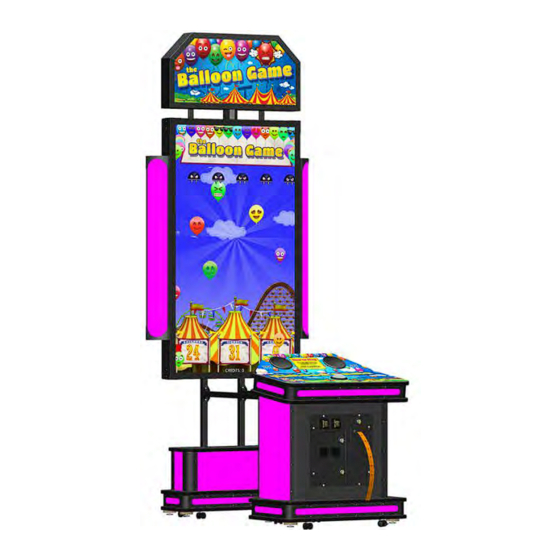
ASSEMBLY INSTRUCTIONS
65" VIDEO GAME CABINET
1950 Swarthmore Ave. Lakewood, NJ 08701
+1 (732) 905-6662
sales@coastalamusements.com
http://www.coastalamusements.com
Advertisement

Subscribe to Our Youtube Channel
Related Manuals for Coastal Amusements The Balloon Game


Summary of Contents for Coastal Amusements The Balloon Game
- Page 1 To Purchase This Game, Visit BMI Gaming | www.bmigaming.com | Or Contact International Sales at + 561-391-7200 (USA) ASSEMBLY INSTRUCTIONS 65” VIDEO GAME CABINET 1950 Swarthmore Ave. Lakewood, NJ 08701 +1 (732) 905-6662 sales@coastalamusements.com http://www.coastalamusements.com...
- Page 2 To Purchase This Game, Visit BMI Gaming | www.bmigaming.com | Or Contact International Sales at + 561-391-7200 (USA) Place the shipping pallet near the location where the game is to be installed and carefully remove the shipping carton. Image of boxed game.
- Page 3 To Purchase This Game, Visit BMI Gaming | www.bmigaming.com | Or Contact International Sales at + 561-391-7200 (USA) Pallet with carton removed...
- Page 4 To Purchase This Game, Visit BMI Gaming | www.bmigaming.com | Or Contact International Sales at + 561-391-7200 (USA) Carefully unpack and confirm that the following components are included. Console assembly Pedestal assembly Marquee assembly Side light pillars (x2) ...
- Page 5 To Purchase This Game, Visit BMI Gaming | www.bmigaming.com | Or Contact International Sales at + 561-391-7200 (USA) Side light pillars...
- Page 6 To Purchase This Game, Visit BMI Gaming | www.bmigaming.com | Or Contact International Sales at + 561-391-7200 (USA)
- Page 7 To Purchase This Game, Visit BMI Gaming | www.bmigaming.com | Or Contact International Sales at + 561-391-7200 (USA) Unloop the two harnesses on the front of the pedestal assembly and feed the wires through the horizontal tubes. Attach the tubes to the pedestal assembly using the nuts and washers attached to the pedestal.
- Page 8 To Purchase This Game, Visit BMI Gaming | www.bmigaming.com | Or Contact International Sales at + 561-391-7200 (USA) Place the console in front of the tubes, and feed the wires through the holes in the console. Remove the bolts and washers from the console and place console up against the horizontal tubes.
- Page 9 To Purchase This Game, Visit BMI Gaming | www.bmigaming.com | Or Contact International Sales at + 561-391-7200 (USA) Now connect the harnessing that goes from the pedestal to the console. There is an HDMI connector, an AC power connector, and 3 other harnesses. They are shown in the following photos.
- Page 10 To Purchase This Game, Visit BMI Gaming | www.bmigaming.com | Or Contact International Sales at + 561-391-7200 (USA) Now that the pedestal is securely attached to the console, you can now install the monitor. WARNING: TO AVOID DAMAGE OR INJURY, DO NOT INSTALL THE MONITOR HOUSING TO THE PEDESTAL UNLESS THE CONSOLE IS SECURELY ATTACHED IN ORDER TO STABILIZE THE ASSEMBLY.
- Page 11 To Purchase This Game, Visit BMI Gaming | www.bmigaming.com | Or Contact International Sales at + 561-391-7200 (USA) Place the monitor box in front of the console. Using at least two people, with at least one on each side, carefully lift the monitor (using side handles) over the control panel and bring it towards the pedestal.
- Page 12 To Purchase This Game, Visit BMI Gaming | www.bmigaming.com | Or Contact International Sales at + 561-391-7200 (USA)
- Page 13 To Purchase This Game, Visit BMI Gaming | www.bmigaming.com | Or Contact International Sales at + 561-391-7200 (USA)
- Page 14 To Purchase This Game, Visit BMI Gaming | www.bmigaming.com | Or Contact International Sales at + 561-391-7200 (USA) The two weld nuts circled in the picture will slide into the slots on the pedestal. Remove the wire box cover, and use the bolts that you took out of the monitor to secure the assembly to the mounting.
- Page 15 To Purchase This Game, Visit BMI Gaming | www.bmigaming.com | Or Contact International Sales at + 561-391-7200 (USA) Install the two bottom screws that you removed from the monitor housing earlier through the bottom mounting brackets.
- Page 16 To Purchase This Game, Visit BMI Gaming | www.bmigaming.com | Or Contact International Sales at + 561-391-7200 (USA) Remove the service hatches and connect the four harness connectors by feeding the wires through the hole on the right side (circled in red in the previous photo). The following photos show the connections.
- Page 17 To Purchase This Game, Visit BMI Gaming | www.bmigaming.com | Or Contact International Sales at + 561-391-7200 (USA) Slightly loosen the screws holding the brackets on the marquee to help align during installation. Connect the marquee power to the harness inside the monitor housing.
- Page 18 To Purchase This Game, Visit BMI Gaming | www.bmigaming.com | Or Contact International Sales at + 561-391-7200 (USA) Secure the marquee using the 8-32 ½” screws. Tighten all screws. Reinstall the monitor service hatches, and install the wire box cover using the 8-32 ½” screws.
- Page 19 To Purchase This Game, Visit BMI Gaming | www.bmigaming.com | Or Contact International Sales at + 561-391-7200 (USA)
- Page 20 When the game is placed in its final position, lock the casters to prevent the game from moving. You can now connect the AC power cord to the game and turn the power on. If you have any questions or problems, call Coastal Amusements at +1-732-905-6662. Technicians are available Monday through Friday from...
Need help?
Do you have a question about the The Balloon Game and is the answer not in the manual?
Questions and answers