
Related Manuals for Gfp 865DH-4


Summary of Contents for Gfp 865DH-4
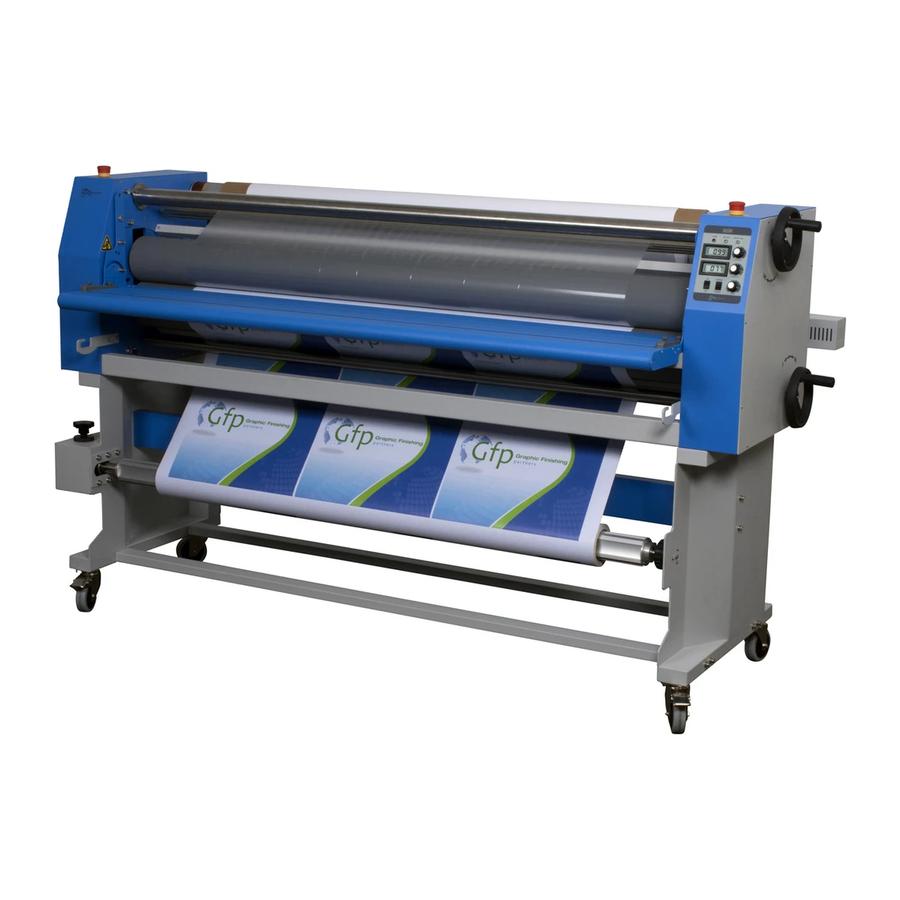
- Page 1 Gfp 865DH-4 March 2021 OPERATING MANUAL Gfp 865DH-4 Please read this manual carefully before operating! Do NOT reproduce this manual or make changes to it without express written consent from Gfp...
-
Page 2: Table Of Contents
Gfp 865DH-4 March 2021 Table of Contents Contents Page Introduction …………………………………………………….. Important Safety Instructions……………………………………. Installation Safeguards …………………………………………. General Safeguards……………………………………………… Operating Conditions ……………………………………………. Electrical Requirements…………………………………………. Packing List……………………………………………………….. Installation A. Uncrate the Machine………………………………………. B. Remove Heat Tube Package………………………………… C. Remove Machine from Skid………………………………. -
Page 3: Introduction
March 2021 1.Introduction Thank you for choosing a Gfp laminator. It has been designed and manufactured to provide years of continuous service. Please read this manual thoroughly before operating. Please inspect the box and the laminator for shipping damage. Damage should be brought to the immediate attention of the delivering carrier. -
Page 4: Installation Safeguards
Gfp 865DH-4 March 2021 3. Installation Safeguards Shipping damage should be brought to the immediate attention of the delivering carrier. Avoid locating the laminator near sources of heat or cold. Avoid locating the laminator in the direct path of forced, heated or cooled air. -
Page 5: General Safeguards
Gfp 865DH-4 March 2021 4. General Safeguards Keep hands, long hair, loose clothing, and articles such as neckties and necklaces away from the rollers to avoid entanglement and entrapment. The rollers have pinch points that can trap body parts or clothing and cause serious injury. -
Page 6: Operating Conditions
6. Electrical Requirements 220-240V 50/60 Hz Single Phase (NEMA 6-30R) 865DH-4 – 24 amp Connect the electrical plug, provided with the laminator, to a suitably grounded outlet only. This machine must have reliable earth ground to ensure the safety of the machine during operations. -
Page 7: Packing List
Gfp 865DH-4 March 2021 7. Packing list Remove all parts from shipping crate and boxes. Inspect parts and the machine carefully. Any missing parts should be reported to your dealer or distributor. Main Machine Crate Stand Box Part Quantity Part... -
Page 8: Installation
Gfp 865DH-4 March 2021 8. Installation 8 A. Uncrating the machine 1. Remove bolts around the base of the crate. 2. Lift crate top straight up and off the skid. 8 B. Remove Heat Tube Packages 3. Remove nuts on heater support brackets that hold the cardboard tubes to the inside of the crate and remove the heater packages. -
Page 9: Remove Machine From Skid
Gfp 865DH-4 March 2021 8 C. Remove Machine from Skid 1. Remove plastic cover and accessory box. 2. Raise the In-feed table (#1) and lock in place. 3. Remove rewind tube by pushing toward the spring side. 4. Remove supply shaft (#2) from the crate base by loosening the hex bolts on core adapters and sliding to one side. -
Page 10: Assemble Machine Stand
Gfp 865DH-4 March 2021 8 D. Assemble Machine Stand 1. Remove stand from shipping box. 2. Bolt cross members to stand side frame. 3. Larger cross member goes in the center and takes the shorter bolts. 4. Use a flat washer and lock washer – Flat washer contacts the stand. -
Page 11: Attach The Lower Supply Shaft Assembly
Gfp 865DH-4 March 2021 8 E. Attach Lower Supply Shaft Assembly 1. Bolt the bottom supply shaft assembly to the stand with 6 bolts by sliding the shaft through the hole on the left side of the left stand 2. Bolt the cover to supply shaft assembly 3. -
Page 12: Set Machine On Stand
Gfp 865DH-4 March 2021 8 F. Set the Machine on the Stand 1. Remove the machine from the bottom supports of the skid. 2. Lift the machine onto support stand using a FORKLIFT and moving straps that can lift 1000 lbs., to support the machine. -
Page 13: Align Machine To Stand
Gfp 865DH-4 March 2021 8 G. Align the Machine to the Stand 1. Attach alignment brackets to outside of both stand legs 2. Insert one alignment anchor bolt through the bracket on the outside of the stand into bottom of the machine on each side. -
Page 14: Install Front Media Unwind Shaft
Gfp 865DH-4 March 2021 8 H. Install the Front Media Unwind Shaft 1. Bolt left and right supply shaft brackets inside machine frame. 2. Insert Supply shaft and film core adaptors. Supply shaft bracket 2. Supply shaft 3. Film core adaptor w/brake... -
Page 15: Installing The Heat Tubes
Gfp 865DH-4 March 2021 9. Installing the Heat Tubes Warning: Do not attempt this with the machine plugged in. Machine must be unplugged and the power turned off! 9 A. Inserting the Heat Tubes 1. Remove Hand Wheels from right side cover. -
Page 16: Connecting The Electric Wires
Gfp 865DH-4 March 2021 9 B. Connecting the Electric Wires 1. With the tube in place, remove the porcelain sleeve (1), porcelain cap (2), hex nut (3), and flat washer (4) from both ends. 2. Connect the two ends to the electric wire connectors for both top and bottom heaters. -
Page 17: Installing The Lower Rear Rewind
Gfp 865DH-4 March 2021 10. Installing the Lower Rear Rewind 1. Remove the spacer plates from each side of the machine. 2. Install the right-side bracket w/cradle with the supplied hardware. 3. Install the left side bracket with the Control Panel on the left side of the machine. -
Page 18: Additional Installation Items
Gfp 865DH-4 March 2021 11. Additional Installation Items 5. Check drive chains for tightness. 6. Check all drive set screws for tightness. 7. Check all electrical connections and input power and test for proper operation. 12. System Components . Left Side Cabinet 2. -
Page 19: Control Panel
Gfp 865DH-4 March 2021 Control Panel 1. Power Indicator 6. Bottom Heat Indicator 2. Top Roller Temp Display 7. Top Heat Control Knob 3. Bottom Roller Temp Display 8. Bottom heat Control Knob 4. RUN/FOOT Switch 9. FORWARD/REVERSE Switch 5. Top Heat Indicator... -
Page 20: Operation
Gfp 865DH-4 March 2021 14. Operation 1. General operation Turn power to “ON” with the rear rotary power switch, POWER light on control will illuminate. 2. Cold laminating: When doing cold laminating, make sure both temperature dials are turned fully counterclockwise to turn off heaters. -
Page 21: Removing The Print Hold Down Assembly
Gfp 865DH-4 March 2021 15. Removing Print Hold-down Assembly 1. For roll-to-roll applications and mounting, it may be necessary to remove the print hold down assembly. 2. Unscrew the knurled thumb screws securing the Print Hold-down Assembly. 3. Lift off and remove assembly. - Page 22 Gfp 865DH-4 March 2021 4. Return the film core adaptor to the supply shaft. 5. Position the film in the middle of the supply shaft and measure the distance from one side of the film core adaptor to the side frame or use the substrate width positions pre-printed on the supply shaft.
-
Page 23: Threading Film
Gfp 865DH-4 March 2021 17. Threading Film 17 A. Cold PSA Film 1. Place cold film roll on top supply shaft and a roll of media on the bottom. (See “Loading Film” section 15) Pull the film and paper liner by hand over the top idler roller drape down across the front Nip roller. -
Page 24: Thermal Film Threading
Gfp 865DH-4 March 2021 1. Top Heat Roller 2. Linkage shaft for roller adjustment 3. Top idler roller 4. PSA film web 5. Liner rewind tube 6. Paper liner 7. PSA film roll 8. Top Rear Pull roller 9. Bottom Rear Pull roller 10. -
Page 25: Front Media Unwind
Gfp 865DH-4 March 2021 1. Top Heat Roller 2. Linkage shaft for roller adjustment 3. Top idler roller 4. Top film web 5. Top film supply roll 6. Top Rear Pull roller 7. Bottom Rear Pull roller 8. Bottom film supply roll 9. -
Page 26: Roller Pressure Adjustment
Gfp 865DH-4 March 2021 Top Film Supply Roll Supply Unwind Roll Bottom Film/Media Supply Roll 18. Roller Pressure Adjustment When the pressure-adjusting hand-wheel is turned clockwise, the top rubber roller comes down and the pressure will increase. When turned counterclockwise, the top rubber roller goes up and the pressure will decrease. -
Page 27: Roller Gap Adjustment
Gfp 865DH-4 March 2021 19. Roller Gap Adjustment To check for uneven roller gap: Place a sheet of paper between the rollers the full width of the laminator. Turn the pressure-adjusting hand wheel to lower the upper rubber roller. - Page 28 Gfp 865DH-4 March 2021 The machine is adjusted before delivery; under normal conditions the clutch should not need further adjustment. However, if the output web has horizontal waves (across the width of the web), the clutch may need to be adjusted clockwise to increase the speed of the pull rollers. This will increase the web tension between the nip and pull rollers to reduce the horizontal waves.
-
Page 29: Installing The Rear Rewind
Gfp 865DH-4 March 2021 21. Installing the Rear Rewind Assembly 1. Remove 4 screws and inserts bolted inside each side frame. 2. Bolt rewind motor assembly to control side frame and rewind bracket to opposite side frame where the inserts were located. -
Page 30: Troubleshooting
Gfp 865DH-4 March 2021 22. Troubleshooting 22 A. The Machine Problems Causes Solutions 1. No power supply 1. Plug in power cord 2. Main power switch is OFF 2. Place power switch to ON Machine does not turn on 3. Circuit breaker has tripped 3. -
Page 31: Thermal Film Output
Special attention needs to be paid to the area where the problem(s) is/are noticed. The Gfp 865DH does not have spring loaded rollers, they have a direct drive loading mechanism which eliminates the problems that can be caused from pressure spring failures. - Page 32 Gfp 865DH-4 March 2021 These two conditions are observed from either the area between the heat and pull rollers or the rear of the machine where the web is exiting the pull rollers Path 1. Clutch is too tight 1. Clutch is too loose 2.
- Page 33 Gfp 865DH-4 March 2021 These two conditions are observed in the web after exiting the pull rollers Path Media not compatible with Lines consistent with the high heat; receptive coating, circumference of the rollers; film and adhesive cooling flat spots on the heat roller...
-
Page 34: Specifications
Gfp 865DH-4 March 2021 23. Specifications Description 865DH-4 Laminating Width 65” Roller Diameter 5.25” Roller Gap 1.2” Max Temperature 266⁰ F Film core size 3” Laminating Speed 0-13 Ft/min Pressure Adjustment Hand wheel Heat Method Quartz tube Power Supply 240v 24 Amp... -
Page 35: Warranty
Gfp’s option, replaced without charge. This warranty is extended only to the original purchaser. This warranty is the only warranty made by Gfp and cannot be modified or amended. Gfp’s sole and exclusive liability and the customer’s sole and exclusive remedy under this warranty shall be, at Gfp’s option, to repair or replace any such defective part or product.
Need help?
Do you have a question about the 865DH-4 and is the answer not in the manual?
Questions and answers