
Related Manuals for Gfp 865DH


Summary of Contents for Gfp 865DH
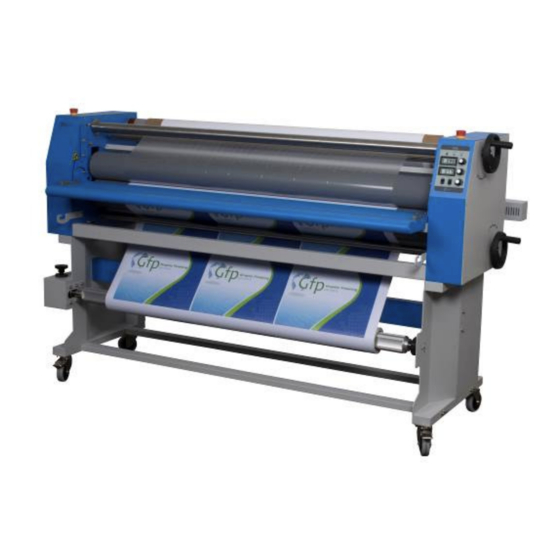
- Page 1 Gfp 865DH February 2018 OPERATING MANUAL Gfp 865DH Please read this manual carefully before operating!
-
Page 2: Table Of Contents
Gfp 865DH February 2018 Table of Contents Contents Page Introduction …………………………………………………… Important Safety Instructions………………………………….. Installation Safeguards ……………………………………….. General Safeguards……………………………………………. Operating Conditions …………………………………………. Electrical Requirements……………………………………….. System Components ………………………………………….. Control Panel …………………………………………………. Packing List …………………………………………………… Installation A. Uncrate the machine……………………………………. B. Remove heat tube package……………………………... -
Page 3: Introduction
February 2018 1. Introduction Thank you for choosing a Gfp laminator. It has been designed and manufactured to provide years of continuous service. Please read this manual thoroughly before operating. Please inspect the box and the laminator for shipping damage. Damage should be brought to the attention of the delivering carrier immediately. -
Page 4: General Safeguards
Gfp 865DH February 2018 NOTE: This equipment has been tested and found to comply with the limits for a Class A digital device, pursuant to part 15 of the FCC Rules. These limits are designed to provide reasonable protection against harmful interference when the equipment is operated in a commercial environment. -
Page 5: Operating Conditions
Gfp 865DH February 2018 5. Operating Conditions • Place machine on level surface • Environment requirements: o Ambient temperature: 50⁰ F - 104⁰ F o Humidity:30%—80%;ideal humidity:55% • Due to the static on film rolls, you should try to keep the environment clean. -
Page 6: System Components
Gfp 865DH February 2018 7. System Components . Left side cover 12. Top rewind shaft 2. Emergency stop switch 13. Top Supply shaft 3. Linkage shaft for pressure-adjustment 14. Top supply shaft bracket 4. Right side covert 15. On/Off switch 5. -
Page 7: Control Panel
Gfp 865DH February 2018 8. Control Panel 1. Power indicator 6. Bottom heat indicator 2. Top roller temperature display 7. Top heater control knob 3. Bottom roller temperature display 8. Bottom heater control knob 4. Run/ foot switch 9. Forward/ reverse switch 5. -
Page 8: Packing List
Gfp 865DH February 2018 9. Packing list Remove all parts from shipping create and boxes. Inspect parts and the machine carefully. Any missing parts should be reported to the shipper. Main Machine Stand Box Crate Part Quantity Part Quantity Main Machine... -
Page 9: Installation
Gfp 865DH February 2018 10. Installation 10 A. Uncrate the machine 1. Remove bolts around the base of the crate 2. Lift crate top straight up and off the skid 10 B. Remove heat tube packages from inside crate top 3. -
Page 10: Remove Machine From Skid
Gfp 865DH February 2018 10 C. Remove machine from skid 1. Remove plastic cover and accessory box. 2. Raise the In-feed table (# 1) and lock in place 3. Remove rewind tube by pushing toward the spring side 4. Remove supply shaft (# 2) from the crate base by loosening the hex bolts on core adapters and sliding to one side . -
Page 11: Assemble Machine Stand
Gfp 865DH February 2018 10 D. Assemble machine stand 1. Remove stand from shipping box 2. Bolt cross members to stand side frame 3. Larger cross member goes in the center and takes the shorter bolts 4. Use a flat washer and lock washer – Flat washer contacts the stand. -
Page 12: Set Machine On Stand
Gfp 865DH February 2018 10 E. Set machine on stand 1. Remove machine from the bottom supports of the packing box 2. Lift machine onto support stand using a FORK LIFT and moving straps to support the machine Heavy! Handle with care!! -
Page 13: Align Machine To Stand
Gfp 865DH February 2018 10 F. Align machine to stand 1. Attach alignment brackets to outside of both stand legs 2. Insert one alignment anchor bolt through the bracket on the outside of the stand into bottom of the machine on each side Alignment bracket 3. -
Page 14: Install Front Unwind
Gfp 865DH February 2018 10 G. Install front unwind shaft 1. Bolt left and right supply shaft brackets inside machine frame 2. Insert Supply shaft and film core adaptors Supply shaft bracket 2. Supply shaft 3. Film core adaptor/ brake... -
Page 15: Installing Heat Tube
Gfp 865DH February 2018 11. Installing Heat Tube Warning: Do not attempt this with the power on! 11 A. Insert heat tube 1. Remove gap Hand wheels from right side cover 2. Remove the right and left cabinet covers. 3. Remove left and right heater rubber cushion (2 ) from support brackets ( 4 ) 4. -
Page 16: Connect Electric Wires
Gfp 865DH February 2018 11 B. Connect electric wires 1. With the tube in place, remove the porcelain inserter (1), porcelain cap (2), hex nut (3), and flat washer (4) from both ends 2. Connect the two ends to the electric wire connectors for both top and bottom heaters 3. -
Page 17: Additional Installation Items
Gfp 865DH February 2018 12. Additional Installation Items 1. Check drive chains for tightness 2. Check all drive set screws for tightness 3. Check all electrical connections and input power and test for proper operation 13. Removing Print Hold Down Assembly 1. -
Page 18: Optional Rear Rewind
Gfp 865DH February 2018 15. Installing Optional Rear Rewind 15 A. Installing the Rewind Motor Assembly 1. Remove 4 screws and inserts bolted inside each side frame 2. Bolt rewind motor assembly to control side frame and rewind bracket to opposite side frame where the inserts were located 3. -
Page 19: Brake Tension Adjustment
Gfp 865DH February 2018 16. Brake Tension Adjustment 1. Adjust brake tension by turning the Tension adjustment knobs on top of each supply shaft assembly 2. Apply only enough brake tension to remove wrinkles from the vinyl web before it enters the nip rollers 3. -
Page 20: Threading Film
Gfp 865DH February 2018 19. Threading Film 19A. Cold PSA film 1. Place cold film roll on top supply shaft and a roll of media on the bottom. 2. Pull the film and paper liner by hand over the top idler roller drape down across the front Nip roller. -
Page 21: Thermal Film
Gfp 865DH February 2018 19B. Thermal film 1. Place thermal film roll on top and bottom supply shafts 2. Pull the top film over the top idler roller and drape down across the front Nip roller. 3. Turn the front hand-wheel counter clockwise to raise the front Nip roller 4. -
Page 22: Front Unwind
Gfp 865DH February 2018 19 C. Front unwind for encapsulation 1. Thread two rolls of thermal film as in section 19 B above 2. Remove supply shaft from front unwind brackets 2. Loosen the fastening screws on the film core adaptor on one side of the supply shaft, and slide it off the supply shaft. -
Page 23: Operation
Gfp 865DH February 2018 20. Operation 1. General operation • Turn power to “ON” with the rear power switch, Power light on control will illuminate • Select temperature and speed settings • Wait until rollers reach desired temperature displayed on LCD •... -
Page 24: Roller Pressure Adjustment
• Too much nip pressure will wrinkle the output. Bring the nip roller down to just touch the film, then increase slightly • NOTE: The Gfp 847DH model requires less nip pressure than the 865DH. When using the 47”, bring the rollers down only to touch the film together. Do not over tighten the nip pressure. -
Page 25: Pull Roller Clutch Adjustment
Gfp 865DH February 2018 23. Pull Roller Clutch Adjustment • A friction clutch is installed on the drive side of the rear lower pull roller shaft inside the left cabinet. Adjusting the compression nut will increase or decrease the rear pull roller speed to regulate film tension between the nip and the pull rollers. -
Page 26: Troubleshooting
Gfp 865DH February 2018 24. Troubleshooting Problems Causes Solutions 1. No power supply 1. Plug in power cord 2. Main power switch is OFF 2. Place power switch to ON Machine does not turn 3. Circuit breaker has tripped 3. Reset circuit breaker 4. -
Page 27: Specifications
Gfp 865DH February 2018 25. Specifications Description 865DH Laminating Width 65” Roller Diameter 5” Roller Gap 1” Max Temperature 266⁰ F Film core size 3” Laminating Speed 0-13 Ft/min Pressure Adjustment Hand wheel Heat Method Quartz tube Power Supply 240v 24 amp... -
Page 28: Warranty
Gfp’s option, replaced without charge. This warranty is extended only to the original purchaser. This warranty is the only warranty made by Gfp and cannot be modified or amended. Gfp’s sole and exclusive liability and the customer’s sole and exclusive remedy under this warranty shall be, at Gfp’s option, to repair or replace any such defective part or product.
Need help?
Do you have a question about the 865DH and is the answer not in the manual?
Questions and answers