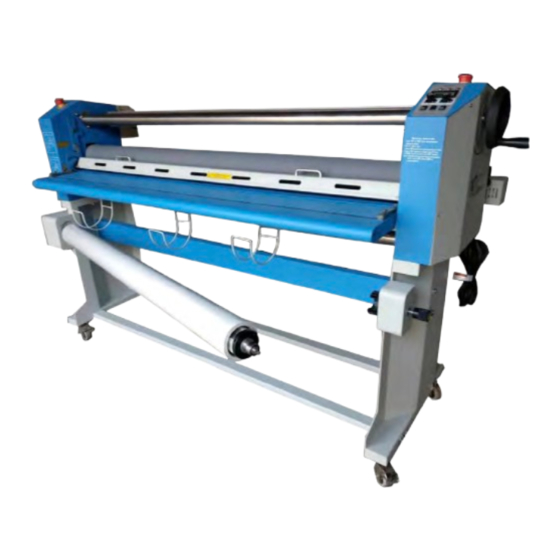
Summary of Contents for Gfp 563TH-4
- Page 1 Gfp 563TH-4 OPERATING MANUAL Gfp 563TH-4 Please read this manual carefully before operating! Unpacking, assembly, and operating videos are available at www.gfpartnersllc.com...
-
Page 2: Table Of Contents
Gfp 563TH-4 Table of Contents Contents Page Introduction …………………………………………………… Important Safety Instructions………………………………….. Installation Safeguards ……………………………………….. Regulatory Compliant Statements……………………………... General Safeguards……………………………………………. Operating Conditions …………………………………………. System Components ………………………………………….. Control Panel …………………………………………………. Packing List …………………………………………………... Installation A. Remove crate top and stand components…………….….. 11 B. -
Page 3: Introduction
Gfp 563TH-4 1. Introduction Thank you for choosing the Gfp 563TH laminator. It has been designed and manufactured to provide years of continuous service. Please read this manual thoroughly before operating. Please inspect the box and the laminator for shipping damage. Damage should be brought to the attention of the... -
Page 4: Regulatory Compliant Statements
Gfp 563TH-4 • Contact an electrician should the attachment plug provided with the laminator not match the receptacles at your location Ensure that the voltages of the power supply you are using match the rated working • voltages before operations. Do not use incorrect power supply Do not use damaged wires or sockets. -
Page 5: General Safeguards
This Class B digital apparatus complies with Canadian, CAN ICES-3(B)/NMB-3(B), interference-causing equipment regulation. Changes or modifications made to this device that are not expressly approved by Gfp, may void the user's authority granted by the FCC and/or by Industry Canada to operate the equipment. -
Page 6: Operating Conditions
Gfp 563TH-4 Disconnect from the power supply when the machine is not in use for a long time. • • When the machine lies idle for a long period of time, raise the top rubber roller to avoid flat spots on the rubber surface. -
Page 7: System Components
Gfp 563TH-4 7. System Components 10 Stand 1 Linkage Axle 11 Power Cord 2 E-STOP 12 Main Power Switch 3 Left Cabinet 13 Fuses 4 Swing-out Shaft Cover 5 Upper Unwind Supply Shaft 14 Supply Shaft Brake Adjustment Knob 15 Right Cabinet... - Page 8 Gfp 563TH-4 19 Supply Shaft Cradle and Brake Assembly 20 Temperature Sensor 21 Lower Rear Rewind 22 Exit table 23 Lower Nip Roller 24 Lower Idler and Support Bar 25 Support Cross Member 26 In-feed Table 27 Pressing Roller 28 Top Heat Roller...
- Page 9 Gfp 563TH-4...
-
Page 10: Packing List
Gfp 563TH-4 9. Packing List Remove all parts from shipping create and boxes. Inspect parts and the machine carefully. Any missing parts should be reported to the shipper upon receipt of shipment. Main Machine Crate Stand Box Part Quantity Part... -
Page 11: Installation
Gfp 563TH-4 10. Installation 10A. Remove crate top and stand components 1. Remove screws around the top of the crate 2. Remove the top supports and stand components, set aside Stand components Top supports 10B. Remove the crate and set aside 1. -
Page 12: Remove Packing Materials And Accessories
Gfp 563TH-4... -
Page 13: Assemble Machine Stand
Gfp 563TH-4 10D. Assemble machine stand 1. Remove stand components from the plastic shipping bags 2. Bolt cross members to stand side frame 3. Larger cross member goes in the center and takes the shorter bolts 4. Use a flat washer and lock washer – Flat washer contacts the stand. -
Page 14: Align Machine To Stand
Gfp 563TH-4... - Page 16 Bottom supply shaft with Media Alignment Disks NOTE: Printed media can be very slippery and will ‘telescope’ when loading on the supply shaft. Use the alignment disks to keep the edges properly lined up.
-
Page 17: Threading Film
Gfp 563TH-4 13. Threading Film 1. Pull the top film web under the rewind shaft, making sure there is proper resistance. The resistance can be adjusted with the adjusting knob on top of the supply shaft assembly 2. Turn the pressure-adjusting hand-wheel to lift the top rubber roller up. -
Page 18: Operation
Gfp 563TH-4 • • • •... -
Page 19: Brake Tension Adjustment
Gfp 563TH-4 16. Brake Tension Adjustment 1. Adjust brake tension by turning the Tension adjustment knobs on top of each supply shaft assembly 2. Apply only enough brake tension to remove wrinkles from the vinyl web before it enters the nip rollers 3. -
Page 20: Inserting Rewind Shafts
Gfp 563TH-4... - Page 22 c. c. c. c. • • • • •...
-
Page 23: Roller Gap Adjustment
Gfp 563TH-4 23. Troubleshooting Problems Causes Solutions 1. No power supply 1. Plug in power cord 2. Main power switch is OFF 2. Place power switch to ON Machine does not turn on 3. Circuit breaker has tripped 3. Reset circuit breaker 4. -
Page 24: Specifications
Gfp 563TH-4 24. Specifications Description 563TH Laminating Width 63” Roller Diameter 4.4” Roller Gap 1.1” Max Temperature 140⁰ F Film core size 3” Laminating Speed 0-20 Ft/min Pressure Adjustment Hand wheel Heat Method Metal alloy tube Power Supply 110 VAC 12 A... -
Page 25: Warranty
Warranty repair or replacement by Gfp or its authorized reseller(s) does not extend the warranty beyond the initial period from the date of installation.


Need help?
Do you have a question about the 563TH-4 and is the answer not in the manual?
Questions and answers