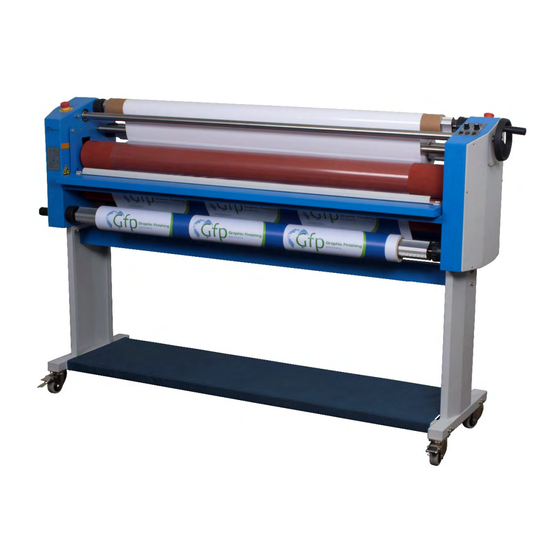
Summary of Contents for Gfp 300 Series
- Page 1 January 2019 OPERATING MANUAL Gfp 355 TH Gfp 363 TH Please read this manual carefully before operating! Unpacking, assembly, and operating videos are available at www.gfpartnersllc.com...
-
Page 2: Table Of Contents
January 2019 Table of Contents Contents Page Introduction …………………………………………………… Important Safety Instructions………………………………….. Installation Safeguards ………………………………………... General Safeguards……………………………………………. Operating Conditions …………………………………………. System Components ……………………………………….…. Control Panel …………………………………………………. Packing List …………………………………………………... Installation A. Uncrate the machine……………………………………. B. Remove stand cross members.…………………….…… C. Assemble machine stand……………………………….. D. -
Page 3: Introduction
January 2019 1. Introduction Thank you for choosing a Gfp 300 Series laminator. It has been designed and manufactured to provide years of continuous service. Please read this manual thoroughly before operating. Please inspect the box and the laminator for shipping damage. Damage should be brought to the attention of the delivering carrier... - Page 4 January 2019 Ensure that the voltages of the power supply you are using match the rated working voltages • before operations. Do not use incorrect power supply Do not use damaged wires or sockets. If abnormal conditions occur, switch off the power •...
-
Page 5: General Safeguards
January 2019 4. General Safeguards • Keep hands, long hair, loose clothing, and articles such as neckties away from rollers to avoid entanglement and entrapment. The rollers have pinch points that can trap body parts or clothing and cause serious injury •... -
Page 6: Operating Conditions
January 2019 5. Operating Conditions • Place machine on level surface • Environment requirements: Ambient temperature: 50⁰ F - 104⁰ F Humidity:30%—80%;ideal humidity:55% • Due to the static on film rolls, you should try to keep the environment clean. • Provide enough space around machine to ensure the safe and effective operation. The minimum area covered is 8 ft. -
Page 7: System Components
January 2019 6. System Components 1. Left Cabinet 2. Pressure Adjustment linkage shaft 3. Top Rubber Roller 4. Bottom Rubber Roller 5. Right Cabinet 6. Roller gap adjustment Hand Wheel 7. Power Switch 8. Stand 9. Top supply shaft 10. Rear rewind shaft 11. -
Page 8: Control Panel
January 2019... -
Page 9: Packing List
January 2019 8. Packing List Remove all parts from shipping crate and boxes. Inspect parts and the machine carefully. Any missing parts should be reported to the shipper upon receipt of shipment. Main Machine Crate Part Quantity Part Quantity Main Machine Allen Wrench 3mm Quick-Grip shafts Allen wrench 4mm... -
Page 10: Installation A. Uncrate The Machine
January 2019... -
Page 12: Assemble Machine Stand
January 2019 9C. Assemble machine stand 1. Locking casters are used toward the front of the machine 2. Start all screws by hand before tightening 3. Each screw takes a flat washer and lock washer – Flat washer against the stand. 4. -
Page 13: Set Machine On Stand
January 2019... -
Page 15: Loading Upper Shafts A. Remove Upper Supply And Rewind Shafts
Figure 1 Locking outer Sleeve... -
Page 16: Loading Film And Rewind Shafts
Figure 2... -
Page 17: Loading Bottom Supply Shaft A. Media Alignment Disks
Cardboard liner rewind Bottom supply shaft Bottom supply shaft with Media Alignment Disks NOTE: Printed media can be very slippery and ‘telescope’ when loading on the supply shaft. Use the alignment disks to keep the edges properly lined up. -
Page 18: Threading Film
January 2019 13. Threading Film 1. Turn the pressure-adjusting hand-wheel to lift the upper rubber roller. 2. Pass the top film web under the idler bar and down in front of the roller 3. Separate 1” of paper liner from the film web, attach film web to a leader board the width of the film roll and insert leader board into the rollers 4. -
Page 19: Adjusting Roller Tensions
January 2019... -
Page 20: Operation
January 2019 15. Operation 1. Plug power cord into a proper receptacle Connect the attachment plug provided with the laminator to a suitably • grounded outlet only. This machine must have reliable earth wire to ensure the safety of the machine during operations •... -
Page 21: Laminating
January 2019 17. Laminating Note: It is hard to remove film adhesive once it gets onto the rubber rollers. When laminating, always use materials the same width as the film roll. If your sheets are narrower than the film roll, use a laminating sled or Kraft paper roll on the bottom to keep the film adhesive from sticking to the bottom rubber roller of the machine. -
Page 22: Media From A Roll
January 2019 • • • •... -
Page 23: Pre-Coating Mounting Boards
• • • • • • • • • • • • •... -
Page 24: Troubleshooting
January 2019 19. Troubleshooting Problems Causes Solutions 1. No power supply 1. Plug in power cord 2. Main power switch is OFF 2. Place power switch to ON Machine does not turn on 3. Circuit breaker has tripped 3. Reset circuit breaker 4. -
Page 25: Specifications
January 2019 20. Specifications Description 355TH 363TH Laminating Width 55” 63” Roller Diameter 5” 5” Roller Gap 1” 1” Rear rewind Chain drive Chain drive Max Temperature 122° F 122° F Laminating Speed 0- 20 Ft/min 0- 20 Ft/min Top and bottom Top and bottom Unwinds Film core size... -
Page 26: Warranty
Gfp’s option, replaced without charge. This warranty is extended only to the original purchaser. This warranty is the only warranty made by Gfp and cannot be modified or amended. Gfp’s sole and exclusive liability and the customer’s sole and exclusive remedy under this warranty shall be, at Gfp’s option, to repair or replace any such defective part or product.


Need help?
Do you have a question about the 300 Series and is the answer not in the manual?
Questions and answers