Table of Contents
Advertisement
Quick Links
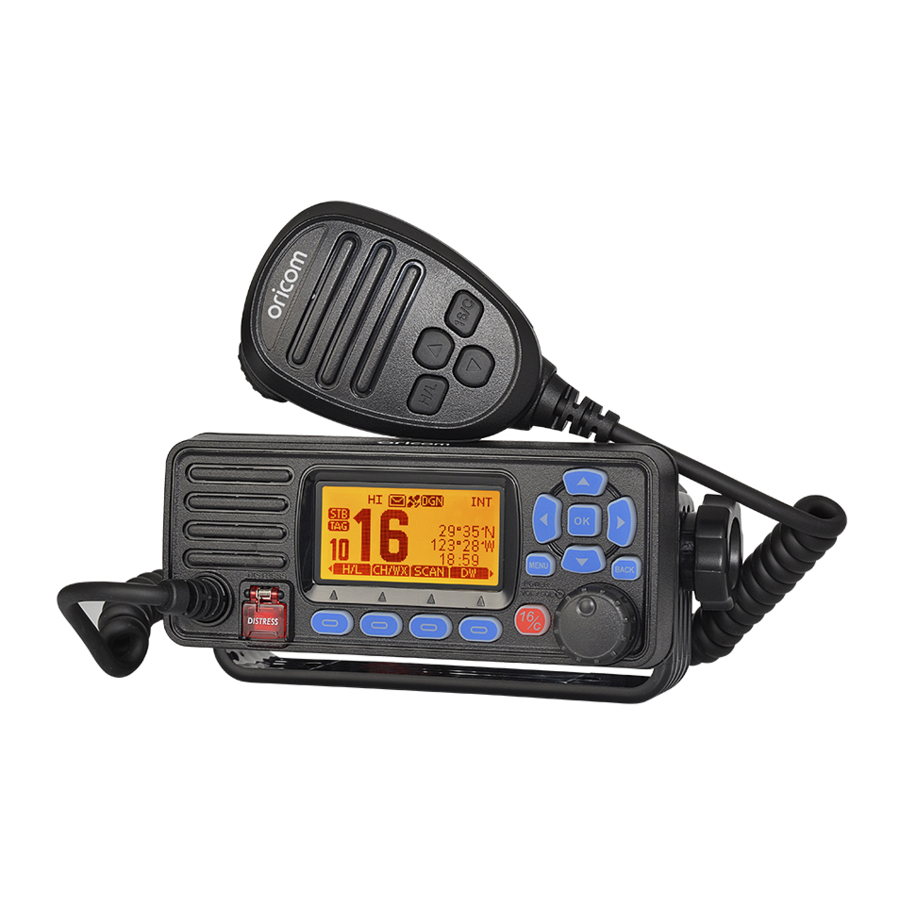
MX1100G
VHF MARINE RADIO
INSTRUCTION MANUAL
• Ingress protected to IPX7*
• Independent Class B DSC Dedicated Receiver
• Speaker Vibration Draining Function
• Built-in GPS Receiving Module
* The MX1100G meets IPX7 standard.
This is capable of withstanding water immersion of
up to 1m for 30 minutes.
1
Advertisement
Table of Contents

Related Manuals for Oricom MX1100G


Summary of Contents for Oricom MX1100G
- Page 1 • Ingress protected to IPX7* • Independent Class B DSC Dedicated Receiver • Speaker Vibration Draining Function • Built-in GPS Receiving Module * The MX1100G meets IPX7 standard. This is capable of withstanding water immersion of up to 1m for 30 minutes.
- Page 2 Need Help? Operators License If you need assistance setting up or using your Oricom product now or in the future, For information on using this product in Australia. visit the ACMA website below: call Oricom Support Australia on: https://www.acma.gov.au/theacma/marine-vhf-radio (02) 4574 8888 www.oricom.com.au...
- Page 3 Thank you for purchasing this VHF DSC marine radio. Please read all instructions carefully and completely before using the radio. CAUTION The radio is based on the technical characteristics of CCIR 493-4 and the opera- tional characteristics of CCIR 541-3 of the International Radio Consultative Com- • Only use the DISTRESS call when your ship, or a person on the mittee, and the resolutions of the International Telecommunication Union ITU-R Recommendation A.803(19), complying with national regulations and combined with...
-
Page 4: Table Of Contents
CONTENTS PREPARATION DUALWATCH / TRI-WATCH Supplied Accessories .................... 1 Description ......................13 Radio Mounting ..................... 1 Operation ......................13 DSC OPERATION Antenna Connection ..................... 2 Installation of Connecting Cables ................. 2 MMSI Code Programming ................. 14 Dimensions ......................3 ATIS ID Programming ..................14 PANEL DESCRIPTION DSC Address ID .................... -
Page 5: Supplied Accessories
PREPARATION ■ ■ ■ Supplied Accessories ■ Radio Mounting The following accessories are supplied: ■ ◆ Using the Supplied Mounting Bracket ITEM The universal mounting bracket supplied with your radio allows overhead or dash- board mounting. DC Power Cable 1. Fix the mounting bracket to overhead or dashboard with the supplied screws Spare Fuse and mount the radio to the mounting bracket with the knob bolts. -
Page 6: Antenna Connection
■ ■ Antenna Connection When connecting the external speaker, GPS, DC power supply, computer and nav- igation device by the rear panel cable end, cover the connectors and cables with rubber vulcanzing tape as below, to prevent water seeping into the radio. Please connect an antenna before transmitting. -
Page 7: Dimensions
■ 5.■ DC Power Connector ■ Dimensions Red - Positive(+), Black - Negative(-).The output voltage of the connected DC power supply must be 13.8V, do not connect the radio to a 24V storage power supply. If the current supplied to the radio is insufficient, the display may darken Unit: mm during transmission or the transmitting output power may drop significantly. -
Page 8: Panel Description
PANEL DESCRIPTION ■ ■ Front Panel Power/Volume/Squelch Knob [PWR/VOL/SQL] • Press and hold for one second to power ON/OFF the radio. • Rotate or press to enter the volume setting display interface, then rotate to Speaker Display adjust the volume. • Press twice to enter the squelch level setting display interface, then rotate to adjust the squelch. -
Page 9: Softkeys
■ 1.■ Distress Call [ ■ Softkeys Press to display the “DISTRESS” screen, to select the Nature of distress, then ] for easy access. The to make a call. Frequently used functions are assigned to the softkeys [ ], as shown below. functions’... -
Page 10: Microphone
■ 9.■ Vibration Water Draining [ ■ Microphone Press and hold this key to turn ON Vibration Water Draining function to clear water from the speaker grill. 10. Favourite Channel [ Microphone Press to set or release the displayed channel as a Favourite Channel. • Press to set current untagged channel as TAG channel;... - Page 11 ■ ■ Function Display • “SCAN 16” is displayed while Priority Scan, “SCAN” Scan Indicator is displayed while Normal Scan. • “DW 16” is displayed while Dualwatch, “TW 16” is displayed while Tri-watch. • “USA” is displayed when USA channel group is Channel Group Indicator selected.
-
Page 12: Power On/Off
BASIC OPERATION CONTENTS ■ ■ ■ Power ON/OFF ◆ Receiving 1. Press and hold [PWR] knob for 1 second to power ON. Volume Adjustment: 1. Rotate [VOL] knob to adjust the volume, volume adjustment interface is dis- 2. Press and hold [PWR] knob for 1 second again to power OFF. played. -
Page 13: Channel Group Selection
■ ■ ■ Channel Group Selection ◆ Call Channel Each regular channel group has a separate leisure-use Call channel (Default Channel Groups are pre-programmed. Channel 9). The Call channel is monitored during Tri-watch. 1. Press [MENU] key, the menu interface is displayed. 1. ... -
Page 14: Call Channel Programming
■ ■ Channel Name Setting the Weather Alert 1. Press [MENU] key, the menu interface is displayed. 2. Press [▲]/[▼] or rotate [DIAL] knob to select “Radio Settings”, then press Each channel can be assigned a name of up to 10 characters. Characters available for input: 26 uppercase letters, number 0~9, symbol (! “... -
Page 15: Display Contrast
4. Press [▲]/[▼] or rotate [DIAL] knob to adjust the backlight brightness. 2. Press and hold softkey [ ],the radio emits a low sound for draining. 5. Press [OK] to confirm. 3. Release softkey [ ] to turn vibration water draining function OFF. • Press softkey [ ] to return to main interface. -
Page 16: Scan Types
SCAN OPERATION ■ 4. To cancel the TAG channel setting, press softkey [ ] again. ■ Scan Types • “ ” disappears from the screen. This radio has normal scan and priority scan, this can be set in the menu item under ■... -
Page 17: Description
DUALWATCH / TRI-WATCH ■ ■ ■ Description ■ Operation 1. Press softkey [ ] to start Dualwatch or Tri-watch. This radio has Dualwatch and Tri-watch. • “DW 16” is displalyed during Dualwatch; “TW 16” is displalyed during Tri- Dualwatch monitors Channel 16 while you are receiving on another channel. watch. -
Page 18: Mmsi Code Programming
DSC OPERATION ■ 7. Repeat step 3 to 5 as above. ■ MMSI Code Programming • When your MMSI code input is successful, “MMSI Successfully Registered” is displayed as below. The 9-digit MMSI (Maritime Mobile Service Identity: DSC self ID) code can be pro- grammed by PC software and also manually set on this radio. -
Page 19: Dsc Address Id
■ 4. Repeat step 3 to enter all 10 digits. ◆ Entering the Position and Time 5. After 10 digits have been entered, press softkey [ ] to set the ID. A Distress call should include the vessel’s position and time. If no GPS data is re- 6. ... - Page 20 ■ 7. Then press softkey [ ] to save, and return to the previous screen. ◆ Entering an Individual ID • The entered Individual ID name is displayed. You can enter a total of 60 Individual IDs, and assign names to them of up to 10 characters.
- Page 21 6. Enter an Group ID Name: ACK Mode Auto Auto Auto Manual • Press [▲]/[▼]/[◄]/[►] to select the desired characters. ACK Type (Able) (Unable) • Press [OK] to input the characters. Individual ACK Auto Auto Manual • Select “←” or “→” to move the cursor, then press [OK]. (Able) (Unable) • Press [...
-
Page 22: Distress Call
• If “NG” is displayed, that means there is a problem with at least one of the 2. [ ]: Displays the “DISTRESS HISTORY”. transmitting DSC and the receiving DSC circuit. Contact Oricom Support should the transceiver be faulty. 3. [... - Page 23 ■ ◆ Simple Call 1. Confirm that no Distress call is being received. 2. While lifting up the key cover, hold down [DISTRESS] for 3 seconds until you hear 3 short countdown beeps and a long beep sound. • The backlight blinks. 4. ...
- Page 24 4. While lifting up the key cover, hold down [DISTRESS] for 3 seconds until you A default Distress alert contains: hear 3 short countdown beeps and a long beep sound. • Nature of Distress: Select as per Step 2. • The backlight blinks. • Position Information: The latest GPS, or manually entered position, which is held for 23.5 hours, or until transceiver is powered off.
-
Page 25: Individual Call
■ • Monitor Channel 16 as a coast station may require assistance. ◆ Receiving DSC Calls (Distress) • After Channel 16 is selected, you can select your next operation by pressing The radio receives Distress calls, Distress Acknowledgement calls and Distress the softkey below the following options. Cancel calls. - Page 26 9. When you receive an Acknowledgement “Able to comply”, an alarm sounds, the screen as below is displayed. 6. Select “Channel”, then press [OK] or softkey [ 7. Select a channel to assign, and then press [OK] or softkey [ • The assigned channels are preset by default.
- Page 27 3. Press softkey [ ] to select the Acknowledgement 2. Press the softkey for the next operation. type. → Press [ ■ ]: Ingores the call and returns to the operating screen. • (Able to Comply): Sends an Acknowledgement call without any • “...
-
Page 28: Group Call
NOTE: If the Auto ACK function is set to “Auto (Unable)”, the Acknowledgement “Unable to Comply” is automatically sent to the calling station when the call is received. This function is set to “Auto (Able)” by default. ■ ■ Group Call 6. ... -
Page 29: All Ships Call
■ ◆ Receiving an Group Call When a Group call is received: • The alarm sounds for 2 minutes. • “RCVD GROUP CALL” is displayed. 1. Press softkey [ ] to turn OFF the alarm. • The channel that is assigned by the caller is automatically selected after 10 ■... -
Page 30: Basic Operation Position Request Call / Polling Request Call
2. Press the softkey for the next operation. 8. Press softkey [ ] to send the All Ships call, ”Transmitting All Ships Call” is displayed, and then the assigned channel is automatically selected. → Press [ ■ ]: Ingores the call and returns to the operating screen. • The call is saved in the DSC Log. - Page 31 ■ 6. Press softkey [ ] to send the Position Request call. ◆ Sending a Position Request Call/ Polling Request • “Transmitting Position Request” is displayed, and then the assigned channel Call is automatically selected. 1. Press softkey [ ], the “OTHER DSC” screen is displayed. NOTE: If Channel 70 is busy, the radio stands by until the channel becomes NOTE: You can also display the “OTHER DSC”...
- Page 32 ■ ◆ Receiving a Position Request Call/Polling Request NOTE: Call • If the Auto ACK function in “DSC Settings” is set to “Auto”, the Position Reply When an Position Request call is received: is automatically sent to the calling station. • The alarm sounds for 2 minutes. • However, even if the Auto ACK function is set to “Manual”, after receiving a • “RCVD POS REQUEST”...
-
Page 33: Test Call
■ ◆ Sending a Test Call 1. Press softkey [ ], the “OTHER DSC” screen is displayed. NOTE: You can also display the “OTHER DSC” screen by selecting the “DSC Call” item on the Menu screen. 4. Press softkey [ ] to send the Position Reply call. - Page 34 → Press [ ■ ]: Ingores the call and returns to the operating screen. • The call is saved in the DSC Log. • “ ” blinks continuously until you display the call message. → Press [ ■ ]: Sends the Acknowledgement “Able to Comply”. • The call is saved in the DSC Log.
- Page 35 ■ ◆ Sending a Test Acknowledgement Call 5. Press softkey [ ], a confirmation screen is displayed. By default, when you receive a Test call, the Auto ACK function automatically sends an Acknowledgement to the calling station. If the function is set to “Manual”, do the following steps to send an Acknowledgement.
-
Page 36: Dsc Log
■ ■ DSC Log → Press [ ■ ]: Returns to the operating screen. → Press [ ■ ]: Returns to the previous screen. ■ ◆ Received DSC Log → Press [ ■ ]: Deletes the selected call log. The radio saves up to 30 received Distress call messages and 50 received “Other” NOTE: The confirmation screen is displayed before deleting. - Page 37 ■ ■ Multiple-task Mode If the Multiple-task function is enabled, the radio can hold up to 7 tasks. Therefore, you can handle more than 2 DSC tasks simultaneously by switching between the DSC tasks. ■ ◆ Setting Multiple-task Mode 1. You can enter “MULTI-TASK” screen by menu operation, steps as below: Menu →...
- Page 38 ■ ◆ Task List When one or more tasks are held, you can display the task list screen by pressing ], the number of tasks is displayed at the top of the screen. softkey [ The number of tasks On the “TASK LIST” screen, the following softkeys are displayed. ■...
-
Page 39: Menu Screen Operation
MENU SCREEN OPERATION ■ ■ Menu Screen Operation Source Source The Menu screen is used to select options and change settings. Latitude Longitude GPS Info (Display Position Info) UTC Time Speed Course Backlight Backlight ■ Display Contrast Display Contrast ◆ Entering Menu Screen Operation Key Beep Key Beep 1. ... -
Page 40: Radio Settings
■ ■ Radio Settings Position Input Position Input Individual ID Individual ID Setting Items Setting Options Defaults Group ID Group ID SCAN TYPE Normal Scan Normal Scan Priority Scan Auto Acknowledgement Auto ACK SCAN TIMER ON/OFF Channel Auto Switch CH Auto SW DSC Settings DUAL/TRI-WATCH Dualwatch Tri-watch... -
Page 41: Configuration
■ ■ ◆ Dualwatch/Tri-watch ◆ CH Close-up Select Dualwatch or Tri-watch, see corresponding chapter for details. You can select whether or not to display the channel name when changing the oper- ating channel. While the function is ON, when you press [▲]/[▼] to select channels, ■... - Page 42 ■ ■ ◆ Key Beep ◆ GPS You can select whether or not to sound a beep when a key is pressed. Selects a satellite to be used for GPS (Global Positioning System) to pinpoint the geographic location of your radio anywhere in the world. ■...
-
Page 43: Vhf Marine Radio Channel List (Default International)
■ ■ VHF MARINE RADIO CHANNEL LIST (Default International) Channel number Frequency (MHz) Channel number Frequency (MHz) Channel number Frequency (MHz) Channel number Frequency (MHz) USA INT CAN Transmit Receive USA INT CAN Transmit Receive USA INT CAN Transmit Receive USA INT CAN Transmit Receive... - Page 44 ■ ■ SPECIFICATIONS General Receiver ≤0.22μV TX: 156.000~162.000MHz Receive Sensitivity Frequency Range ≤0.22μV RX: 156.000~163.425MHz Squelch Sensitivity ≥70dB Modulation FM (16K0G3E), DSC (16K0G2B) Adjacent Channel Selectivity ≥70dB Frequency Stability ±5ppm Spurious Response Rejection Ratio ≥70dB Operating Voltage DC13.8V (±15%) Intermodulation Rejection Ratio ≤1.5A Operating Temperature -20°C~+60°C...
-
Page 45: Troubleshooting
■ ■ TROUBLESHOOTING The problems described in the following table are some common operating faults. These types of errors are generally caused by improper connections, incorrect operation set- tings, or operational errors due to incomplete programming. These problems are usually not caused by circuit failures. Before you suspect that the radio has malfunctioned, please refer to these tables and relevant parts of this manual. - Page 46 Oricom or Oricom’s authorised service provider. entitled to have the goods repaired or replaced if the goods fail to be of acceptable quality and the failure does not amount to a major failure. Oricom warrants that the How to make a claim under your Express product is free from defects in materials or workmanship during the Express War- ranty Period.
- Page 47 Please also be aware that goods presented for repair may be replaced by refurbished goods or parts of the same type rather than being repaired. Contact details for Oricom support and Express warranty claims in Australia Oricom International Pty Ltd...
- Page 48 Ref:12102020...
Need help?
Do you have a question about the MX1100G and is the answer not in the manual?
Questions and answers