Table of Contents
Advertisement
Quick Links
V2002D-PTZ User's Manual
User Guide
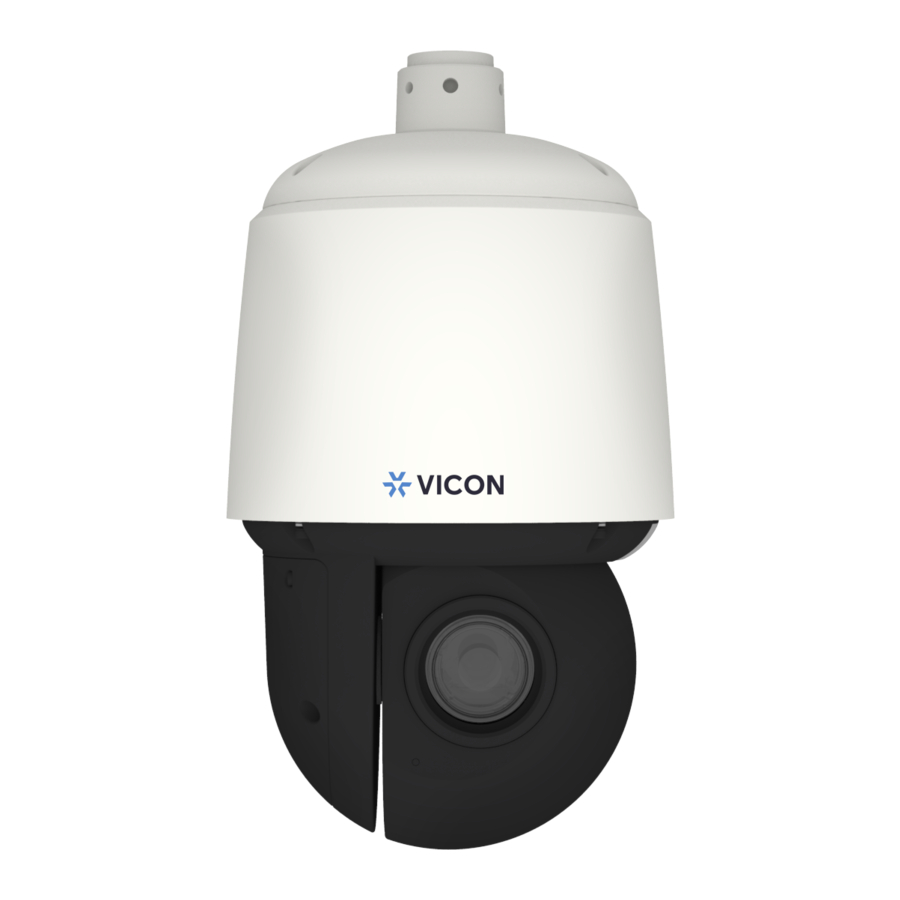
Roughneck® Pro V2002D-PTZ
Outdoor Vandal PTZ Dome Camera
XX320-00-00
Vicon Industries Inc. does not warrant that the functions contained in this equipment will
meet your requirements or that the operation will be entirely error free or perform precisely as
described in the documentation. This system has not been designed to be used in
life-critical situations and must not be used for this purpose.
Document Number: 8009-8320-00-00 Product specifications subject to change without notice.
Issued: 2/2021 Copyright © 2021 Vicon Industries Inc. All rights reserved.
Vicon Industries Inc.
Tel: 631-952-2288) Fax: 631-951-2288
Toll Free: 800-645-9116
24-Hour Technical Support: 800-34-VICON
(800-348-4266)
UK: 44/(0) 1489-566300
www.vicon-security.com
Advertisement
Table of Contents

Related Manuals for Vicon Roughneck Pro V2002D-PTZ


Summary of Contents for Vicon Roughneck Pro V2002D-PTZ
- Page 1 Outdoor Vandal PTZ Dome Camera XX320-00-00 Vicon Industries Inc. Vicon Industries Inc. does not warrant that the functions contained in this equipment will Tel: 631-952-2288) Fax: 631-951-2288 meet your requirements or that the operation will be entirely error free or perform precisely as Toll Free: 800-645-9116 described in the documentation.
-
Page 2: Table Of Contents
V2002D-PTZ User’s Manual Table of Content Connection ........................................1 Live View ........................................7 Playback ........................................10 Configuration ......................................13 Encode ..............................13 Image ..............................17 Video ..............................22 Network ............................... 26 System ..............................40 Account ..............................48 Event Source ............................51 Video Analytics ............................. - Page 3 V2002D-PTZ User’s Manual WARNING ⚫ This camera operates at 24 VAC/48 VDC/PoE (IEEE 802.3bt Class 6). ⚫ Installation and service should be performed only by qualified and experienced technicians and comply with all local codes and rules to maintain your warranty. ⚫...
- Page 4 V2002D-PTZ User’s Manual FCC Compliance Statement Information to the user: This unit has been tested and found to comply with the limits for a Class B digital device pursuant to Part 15 of the FCC Rules. Operation is subject to the following two conditions: (1) this device may not cause harmful interference, and (2) this device must accept any interference received, including interference that may cause undesired operation.
-
Page 5: Connection
V2002D-PTZ User’s Manual Introduction Refer to the Quick Guide for the V2002D-PTZ for instructions for installing the PTZ dome camera. Connection Default IP Address Since this is a network-based camera, an IP address must be assigned. The camera’s default IP address is obtained automatically through a DHCP server in your network;... - Page 6 V2002D-PTZ User’s Manual Viewing Preparation Images of the unit can be viewed through various browsers. Before viewing, follow these steps to enable the display. Enable Cookies as instructions below. In Internet Explorer, click Internet Options on the Tools menu. ...
- Page 7 V2002D-PTZ User’s Manual Scroll down to the ActiveX controls and plug-ins radio buttons and set as follows. 【Download signed ActiveX controls】→ Prompt (recommended) 【Download unsigned ActiveX controls】→ Prompt 【Initialize and script ActiveX not marked as safe for scripting】→ Prompt Figure: Security Settings 2/4 ...
- Page 8 V2002D-PTZ User’s Manual 【Run ActiveX controls and plug-ins】→ Enable 【Script ActiveX controls marked safe for scripting*】→ Enable Figure: Security Settings 4/4 Press OK to save the settings. Close all the browser windows and restart the browser. This will allow the new settings taking effect. ...
- Page 9 Windows Vista, and Microsoft Windows 7 or above. Steps to get the utility program running are listed below. 1. Download the IP Toolbox’s folder to local computer. The latest IP Toolbox can be found on Vicon’s website Camera Software Download page, vicon-security.com...
- Page 10 V2002D-PTZ User’s Manual you can input certain keywords into the field nearby and also narrow down the range by selecting the criteria from the dropdown menu for a target search on cameras connected. 9. Press “Auto Set IP Address” button to automatically give each camera an IP address from a predefined range and connected to predefined network internet controller.
-
Page 11: Live View
V2002D-PTZ User’s Manual Live View After accessing and logging in to the IP address of the camera, there are 3 main options on the upper left side: “Live View”, “Playback” and “Configuration”. The upper right corner, on the other hand, indicates the current user level and has the “Logout”... - Page 12 V2002D-PTZ User’s Manual Icon Definition The “Snapshot” button is for user to take a still picture (snapshot) and save it in a user predefined folder. The “Full Screen” button is for user to change to a full screen display. (ESC to exit full screen) The “Manual Recording”...
- Page 13 V2002D-PTZ User’s Manual Relearn Background: Click this button to save new background that later will be compared to current background for motion detection purposes. PTZ Control Panel Whether in Live View or Configuration, user can always see the PTZ Control Panel on the lower-left side of window.
-
Page 14: Playback
V2002D-PTZ User’s Manual Playback The camera provides a method to play video stored on micro SD card. Due to compatibility issues related to video and audio formats; when playing video stored on micro SD Card, it is highly recommended to use Chrome or Safari browser along with H.264 codec, since these browsers support H.264 format. - Page 15 V2002D-PTZ User’s Manual Date & Time User can select the exact date and time segment to search for recorded video, by clicking on a date on the calendar and entering time, respectively. Selected date will turn into a blue background on the calendar. The current date has a light brown background.
- Page 16 V2002D-PTZ User’s Manual Display/Playback Toolbar Figure: Display and Playback Toolbar To play a video, simply hover over a color bar on timeline area until a hover box displays; then click on the color bar for the recorded video to automatically start playing on the display. While the video is playing, user can hover over the displaying video to activate playback toolbar.
-
Page 17: Configuration
V2002D-PTZ User’s Manual Configuration After clicking “Configuration,” the screen will display as below, with several menu options on the left side for users to configure. These will be explained one by one in the following chapters. 1. Encode Figure: Encode Settings Profile Current Profile: 1/2/3 It is strongly recommended for user to define different settings under each stream to maintain better... - Page 18 V2002D-PTZ User’s Manual DSCP: 0 ~ 63 To classify and manage network traffic and provide quality of service (QoS) on modern IP networks, Differentiated Services Code Point (DSCP) is a computer networking architecture that specifies a resource allocation to each device on a priority-based pattern for ideal bandwidth management. The bigger value, the higher priority it will be.
- Page 19 V2002D-PTZ User’s Manual Profile: High Profile/Main Profile There are 2 different kinds of profiles for H.264 codec and 1 profile for H.265 codec compression ratios where the protocol for each type varies. Users can select the preferred one for their applications or contact IT personnel for more information.
- Page 20 V2002D-PTZ User’s Manual Aspect Single Resolution Codec Dual Stream Triple Stream Ratio Stream 1920x1080 + 1920x1080 + 1280x720 1920x1080 + 1920x1080 + 800x600 1920x1080 + 1920x1080 + 640x480 1920x1080 + 1920x1080 + 640x360 1920x1080 + 1920x1080 + 320x240 1920x1080 + 1920x1080 1920x1080 + 1280x960 + 1280x960 1920x1080 + 1280x960 1920x1080 + 1280x960 + 640x480...
-
Page 21: Image
V2002D-PTZ User’s Manual 2. Image 2.1 Exposure This section allows user to control the settings pertaining to exposure mode and day night modes. Note that the PTZ incorporates Smart IR and Adaptive IR automatically based on zoom level. Basic Settings Figure: Exposure Basic Settings Exposure Mode: Auto/Flickerless/Shutter Priority/Iris Priority/Manual/ There are 5 modes to select from, which are described below. - Page 22 V2002D-PTZ User’s Manual BLC Off/Upper/Lower/Central (1/3 )/Central (1/6 )/Left/Right Set an area for Backlight Compensation. Backlight Compensation is a function that sets the brightness of a selected area to optimal image level. This function is necessary when an autoiris lens closes quickly due to an intense light behind the object in the area being viewed, resulting in a display that is too dark and difficult to see.
- Page 23 V2002D-PTZ User’s Manual Shutter Speed: 1/10000 ~ 1/7.5 Select a shutter speed from the dropdown menu. Selecting 1/10000 provides the fastest shutter speed. Note Shutter Speed is only available when exposure mode is “Shutter Priority” or “Manual”. Gain: The larger the value, the more intensity of light comes into the camera and vice versa. Note Gain is only available when exposure mode “Manual”...
- Page 24 V2002D-PTZ User’s Manual Basic Setting Mode: Auto/ATW/Manual Auto: Continuously adjusts the camera color balance in accordance with any change in color temperature simultaneously. ATW: “Auto Tracing White Balance” automatically controls color temperature ranging from 2500°K to 10000°K. Manual - R Gain/B Gain: 0~511/One Push ...
- Page 25 V2002D-PTZ User’s Manual Color Item Option/Range Description Use slider or enter a number Brightness Selecting higher value provides brighter image. -100 - 100 Use slider or enter a number Selecting higher value provides higher contrast Contrast -100 - 100 image. Decreasing saturation brings the image closer to a Use slider or enter a number Saturation...
-
Page 26: Video
V2002D-PTZ User’s Manual 3. Video 3.1 Privacy Zone Basic Setting Privacy Zone enables user to block out a specific portion of the view with a solid color mask for privacy concerns. It must apply on all streams, TV output, and Live View; and it should not affect the motion detection behavior. - Page 27 V2002D-PTZ User’s Manual 3.3 Enhanced Codec Enhanced codec is a method to keep low bitrate when H.264 or H.265 is selected. The implementation of enhanced codec depends upon 2 key ideas. Dynamic ROI: This is used for the camera to dynamically adjust compression based on what it judges is of interest in the scene.
- Page 28 V2002D-PTZ User’s Manual iStream This is a groundbreaking technology that helps save network bandwidth efficiently while maintaining the clear image quality for critical image details based on the 2 cutting-edge features. Click iStreams to enable the features as follows: Figure: iStream Settings EcoZone ...
- Page 29 V2002D-PTZ User’s Manual Dynamic 3DNR While 3DNR allows user to adjust noise reduction level manually, dynamic 3DNR dynamically and automatically adjusts to the best noise reduction level according to the amount of noise on the image. Lux level change is what triggers changes in noise reduction level for dynamic 3DNR. Higher lux activates smaller noise reduction level.
-
Page 30: Network
V2002D-PTZ User’s Manual 4. Network 4.1 General This section is for user to set detailed settings related to wired network condition for the camera. Basic Setting Figure: Network Basic Setting Device Name Enter a device name. HTTP Port: 80, 1025 ~ 65535 This protocol allows for TCP protocol quality without having to open specific ports for streaming. - Page 31 V2002D-PTZ User’s Manual IP Settings Figure: Network IP Settings Item Option/ Range Description User can manually input IP address and the related Manual settings. This is a point-to-point-based protocol that offers authentication, encryption and compression. It PPPoE Mode predominantly authenticates user with the predefined username and password.
- Page 32 V2002D-PTZ User’s Manual IPv6 default Manually set a default router address under IPv6 router address protocol. Subnet prefix 1 ~ 128 Set prefix length for subnet. length IPv6 DNS Set a DNS (Domain Name Server) under IPv6 protocol. Wired Setting Speed &...
- Page 33 V2002D-PTZ User’s Manual 4.2 FTP Server FTP (File Transfer Protocol), transferring files via TCP-based network like the Internet, is a standard protocol that is adopted to transmit computer files from one host to another. The camera can act as both FTP Server and FTP Client. This section describes how to use the camera as FTP Server while 7.
- Page 34 V2002D-PTZ User’s Manual 4.3 SFTP Server SFTP (Secure File Transfer Protocol), used for transferring files via a more secure channel than FTP, is a network protocol that offers multiple file access, transfer and management over reliable data stream. Figure: SFTP Settings Enable: On/Off User can enable or disable SFTP server.
- Page 35 V2002D-PTZ User’s Manual 4.4 RTSP RTSP is a standard protocol for connecting a client to establish and control streaming data over the web. If you want to allow third-party devices or software to access video/audio streams from the IP camera over the network, you must configure the RTSP ports. The major difference between Unicast and Multicast is how client and server communicate packets with each other.
- Page 36 V2002D-PTZ User’s Manual Museum Search: On/Off Museum Search is used to find video where a defined amount of change in a region of interest is detected. The amount of change in a scene’s region of interest that will be searched for is defined using the Sensitivity.
- Page 37 V2002D-PTZ User’s Manual 4.5 SNMP SNMP (Simple Network Management Protocol) is an Internet standard protocol used for monitoring and managing the status of devices connected to IP networks. Three versions of SNMP have been developed, namely, SNMPv1, SNMPv2c and SNMPv3, with the newest version featuring improvements in performance, flexibility and security.
- Page 38 V2002D-PTZ User’s Manual Heartbeat: On/Off To ensure a network free from delayed notifications, “Heartbeat” communications protocol sends notifications at the selected interval. Select “On” or “Off” to enable or disable heartbeat function. Heartbeat Interval: 5 ~ 600 Input desired values in seconds for Heartbeat Interval. Event: On/Off Specifically designed for event occurrence, this option, when turned ON, will automatically record the log file of events that occurred for review afterwards.
- Page 39 V2002D-PTZ User’s Manual 4.6 802.1X 802.1X is an IEEE Standard for port-based network access control and defines the encapsulation of the Extensible Authentication Protocol (EAP) over IEEE 802, which is known as EAP over LAN. Simply select a desired EAP protocol type from the dropdown menu and then input its required subfields to complete setup.
- Page 40 V2002D-PTZ User’s Manual 4.7 Firewall Under this menu, user can manually define several IP addresses to be allowed or denied access to the camera. Figure: Firewall Settings Basic Setting Mode: Allow/Deny/Off Allow: Select this option to give inputted IP addresses access IP camera. ...
- Page 41 V2002D-PTZ User’s Manual 4.8 DDNS Dynamic Domain Name Server (DDNS) is the system that can automatically upgrade DSN records without further manual editing in real time, resulting in web address directing faster and smoother. Figure 3 - 22: DDNS Settings Basic Setting Enable: On/Off Type: DynDNS/No-IP/Two-DNS/FreeDNS...
- Page 42 V2002D-PTZ User’s Manual 4.9 SSL Method: None/Self Signed/ Upload Certificate Secure Sockets Layer (SSL), the standard security technology for establishing encryption, allows sensitive information such as login credentials to be transmitted securely. Select the method from the dropdown. Self Signed: Self-signed certificate is a privately owned key that has no connection to a person or ...
- Page 43 V2002D-PTZ User’s Manual 4.10 QoS QoS (Quality of Service) refers, specifically, to both resource control and traffic prioritization mechanisms to provide different priorities to different applications or users in an attempt of maintaining a certain level of performance on data flow. It is especially efficient when transport of traffic has additional requirements.
-
Page 44: System
V2002D-PTZ User’s Manual 5. System 5.1 Date & Time Figure: Date & Time Settings Basic Setting Current Server Time The current date/time is displayed here. Synchronization Mode: Manually/PC/NTP Server Manually setting Date and Time: Enter information to set date and time manually and individually. ... - Page 45 V2002D-PTZ User’s Manual 5.2 Audio Equipped with audio input/output ports, the camera is able to connect with external audio devices for audio input and output individually. See the settings page and descriptions below for more details. Figure: Audio Settings Audio In Setting Source: Line In Select which audio source will be connected from the 2 options in the dropdown menu.
- Page 46 V2002D-PTZ User’s Manual 5.3 Firmware Information about camera firmware is displayed on this page. User can manually upgrade System Firmware if upgrade is available. All motion of camera will be stopped during the firmware upgrade. Be sure to close any other screens before firmware upgrade. Never disconnect power or LAN cable during the upgrading process.
- Page 47 V2002D-PTZ User’s Manual 5.4 Initialization Figure: Initialize Settings Camera Type: 60Hz/50Hz Select “60Hz” or “50Hz” in accordance with requirements. Once set to the correct frequency, flickering by fluorescent light can be reduced. TV Format: Full/4:3/16:9 Select an appropriate TV format from the dropdown menu in accordance with aspect ratio of the monitor.
- Page 48 V2002D-PTZ User’s Manual 5.5 Advanced Security Advanced Secure functionality is used to turn off the access and connection to cameras completely or partially, making the IP camera even safer. Activating any of the protocols or services under Active Prevention or Passive Protection will override any related settings done elsewhere in the camera UI.
- Page 49 V2002D-PTZ User’s Manual SSH/FTP/SFTP/Port Scan/File Manipulation Enable: On/Off Set "On" to activate Passive Protection mode for a specific protocol or service. Email: On/Off Set “On” to enable an email to be sent to a predefined user when an IP address has been banned. Period: 1 ~ 10 Set an amount of time, in minutes, in which an IP address is allowed to try and fail to access or connect to camera.
- Page 50 V2002D-PTZ User’s Manual 5.7 OSD This section allows user to enable OSD (On Screen Display) settings. In addition, it extends the OSD function to the occurrence of events. Figure: OSD Settings Basic Setting There are up to 2 sets of OSD settings that can be enabled concurrently, as shown on the following table.
- Page 51 V2002D-PTZ User’s Manual 5.9 Events As an intelligent device, the IP camera is capable of automatically detecting many events, such as motion, tamper, network loss, alarm, etc., and taking actions to inform the user about these occurrences. The Event Search section assists administrator to have detailed yet systematic analysis on each individual event with its type, counts and time.
-
Page 52: Account
V2002D-PTZ User’s Manual 6. Account 6.1 Account Management Figure: Account Settings Account Setting Access Level: Admin/Operator/User Admin: “Admin” level has the highest privilege control for accessing camera, allowing handling of both live view and all the configuration settings. The default username is ADMIN and password for Admin depends on user’s initial setting. - Page 53 V2002D-PTZ User’s Manual Modify & Delete Users Delete: Choose one of the users from the list and then click “Delete” to remove it immediately. (The default Admin is not available to be deleted.) Modify: Choose one of the users from the list and enter updated information if necessary. Click “Save”...
- Page 54 V2002D-PTZ User’s Manual Group Mappings Admins/Operators/ Users Admins: Relates to the LDAP admin privileges, which are full access to live view functionalities. Operators: Relates to the LDAP operator privileges, which are watching live view and operating snapshot, manual recording and full screen. Users: Relates to the LDAP user privileges, which is only watching live view.
-
Page 55: Event Source
V2002D-PTZ User’s Manual 7. Event Source Event source configurations consist of Event Specific, Handler and Arming Schedule. The table below gives an overview of event source configurations and relevant remarks. Settings Type Arming Remark Event Specific Handler Schedule Alarm NO/NC Audio Sound Intensity Motion... - Page 56 V2002D-PTZ User’s Manual Email Enable: Check the box to enable an email to be sent to a predefined user when event occurs. Subject: Preset a subject of the email to be sent. Message: Preset message contents of the email to be sent. ...
- Page 57 V2002D-PTZ User’s Manual After clicking “Edit,” the prompt setting page will display as below. User can individually establish up to 3 sets of time ranges for each day, where start and end time can be separately defined. Check the box at the right side to enable the defined time range, followed by clicking “Apply”...
- Page 58 V2002D-PTZ User’s Manual 7.1 Alarm Connecting an alarm input device with the camera can expand alert functions. For example, when an infrared detector connected to the camera detects motion based on heat emission, an alarm input message will be sent to the camera. Additionally, by connecting to an alarm output device such as siren, the camera will send a signal to notify the siren and activate it when receiving an alarm signal either from alarm input device or other detection settings.
- Page 59 V2002D-PTZ User’s Manual 7.2 Audio By connecting to an audio input device, e.g., microphone, the camera can receive an audio input signal from the microphone and react with the certain responses that are preset under this section. Review the information below for details. Figure: Audio Event Settings Basic Setting Enable: Check the box to enable the audio input event function.
- Page 60 V2002D-PTZ User’s Manual 7.3 Motion This function is designed to establish related actions when the camera detects motion issues. Figure: Motion Detection Settings Motion Zone Area Setting Enable Draw a desired size with position on the right-side preview image for motion detection. Check the Enable box and click “Save”...
- Page 61 V2002D-PTZ User’s Manual 7.4 Network This function is designed to configure related actions when the camera is subject to network conflict or network lost events. Figure: Network Event Settings Basic Setting Wired Network Loss Check the box to enable the detection of network lost. When the camera loses internet access, the network loss event will be detected and recorded.
- Page 62 V2002D-PTZ User’s Manual 7.5 Schedule This function is designed to establish related actions for recording schedule, independent of any event. Figure: Recoding Schedule Settings Basic Setting Enable: Check the box to enable recording schedule function. Mode: Regular/Persist Regular: When enabled; the recording schedule will progress on a regular basis on the trigger interval settings.
- Page 63 V2002D-PTZ User’s Manual 7.6 Tamper This function is designed to establish related actions when the camera is subject to tamper events. Figure: Tamper Detection Settings Basic Setting Enable: Check the box to enable tamper detection. Sensitivity: High/Mid/Low Set the sensitivity for tamper detection. High means that camera can be triggered with a minor tamper issue, while Low means that camera is triggered with only a major tamper issue.
- Page 64 V2002D-PTZ User’s Manual 7.7 mSD Healthiness This function is designed to establish related actions when the inserted micro SD card has unexpected failed events or is running out of sufficient storage space. Figure: mSD Healthiness Settings Micro SD Card Events Free space Check the box to enable the detection of insufficient space of the inserted micro SD card.
-
Page 65: Video Analytics
V2002D-PTZ User’s Manual 8. Video Analytics Video Analytics (VA) comprises the proprietary algorithm to perform intelligent video analysis, e.g., to detect intrusion or loitering within defined zone from suspicious objects or to count people and traffic flow by designated line deployment. It is especially practical to monitor certain alert areas or key zones;... - Page 66 V2002D-PTZ User’s Manual Caution: If, for example, profile 1 was programmed for Intrusion, and then Line Crossing was selected before profile 2 is selected, profile 1 could potentially be reprogrammed with a different analytic. A warning will be sent if a preset is set to be used again. 5.
- Page 67 V2002D-PTZ User’s Manual 8.3 General This page contains general settings shared by all VA functions. Prior to setting up each VA function, it is fundamental to define the settings here before advancing to other function settings. Figure: Video Analytics: General Settings Basic Setting Sensitivity: High/Mid high/Mid/Mid Low/Low Choose a sensitivity level from the dropdown menu to define a clear threshold for triggering all VA...
- Page 68 V2002D-PTZ User’s Manual Size Settings Max Object Size Draw a desired maximum object size in the right-side preview window and then click “Save” to enable the settings. Any object larger than the maximum size defined here will neither be detected, nor triggered.
- Page 69 V2002D-PTZ User’s Manual Method Press and hold cursor on the right-side preview image to draw a line on the selected area and then click the “Save” button to have the settings take effect. Up to 3 lines can be assigned concurrently. Figure: Line Counting Performance on Live View Performance Switch to the Live View page and select “Line Counting”...
- Page 70 V2002D-PTZ User’s Manual Line 1 ~ 3 Check the box to enable each line setting. Press the arrow buttons at the upper-right corner to expand or collapse the setting page of Line 1 to Line 3 individually. The options from Direction dropdown menu (A to B, B to A) helps user to define the exact direction to be counted.
- Page 71 V2002D-PTZ User’s Manual 8.7 Loitering This function is designed to intelligently observe suspicious objects that enter and linger for a designated period within the alert area defined by administrator. This is a practical way to monitor key zones without wasting human resources to keep vigil in front of monitor 24/7. Figure: Loitering Settings Basic Setting Enable: Check the box to enable the loitering detecting function.
- Page 72 V2002D-PTZ User’s Manual Performance Switch to the Live View page and select “Loitering” from the lower-left VA dropdown menu. When there is a moving object/person traveling into and lingering within the designated zone over a designated period of time defined by administrator, as in the above image, the rectangular frame enclosing the suspicious object/person is highlighted with red color for distinctive identification.
- Page 73 V2002D-PTZ User’s Manual Performance Switch to the Live View page and select “Area Counting” from the lower-left VA dropdown menu. When there is a moving object entering into or moving off the designated area defined by administrator, as in the above image, the OSD counter will show the digit that represents the accumulated number from objects entering and leaving the designated area.
- Page 74 V2002D-PTZ User’s Manual Performance Switch to the Live View page and select “Intrusion” from the lower-left VA dropdown menu. When there is a moving object trespassing into the designated critical zone defined by administrator, as in the above image, both the rectangular frame enclosing the suspicious object and the defined zone are highlighted with red color for distinctive identification.
- Page 75 V2002D-PTZ User’s Manual Figure: Object Removed Performance on Live View Performance Switch to the Live View page and select “Object Removed” from the lower-left VA dropdown menu. When any of the items marked by colored zones is taken away, as in the above image, the zone will be highlighted with red color to indicate the original item was taken away.
- Page 76 V2002D-PTZ User’s Manual the lowest 15° for flexible applications. Also, direction of included angle can be adjusted by simply press and hold to move the middle arrow. Figure: Wrong Direction Performance on Live View Performance Switch to the Live View page and select “Wrong Direction” from the lower-left VA dropdown menu. When there is a moving vehicle crossing the green line but toward a direction away from the permitted range, i.e., blue included angle, the rectangular frame enclosing the detected vehicle is highlighted by red color for distinctive identification, as in the above image.
- Page 77 V2002D-PTZ User’s Manual Basic Setting Enable: Check the box to enable the Object Left detecting function. Trigger Interval: 5 ~ 300 Define a value for the threshold period to trigger Object Left alarm for any suspicious object that was left within the zone over the value. Method Draw a desired shape (octagon at the maximum) covering the key zone for Object Left detection and then click “Save”...
-
Page 78: Event Setting
V2002D-PTZ User’s Manual 9. Event Setting 9.1 Alarm Out This section is designed to set up detailed settings for alarm output(s) when events occur. Make sure you have enabled alarm output in each event section to activate this function. Figure: Alarm Output Settings Alarm Out Enable: Select “On”... - Page 79 V2002D-PTZ User’s Manual On Time: 0.1 ~ 200 (sec) Define a specific duration for alarm output. Off Time: 0.1 ~ 200 (sec) Define a specific interval for each alarm output triggering. Count: 1 ~ Infinite Define how many counts will be performed for alarm output. 9.2 Email This section is designed to set up detailed settings for email notification when events occur.
- Page 80 V2002D-PTZ User’s Manual Port Set “25” as default or change to dedicated number. Discuss with your IT administrator for details if necessary. User Name Input a username with privileges to access the server. Password Input the password associated with the username. Sender Settings Sender Email Address Enter the sender email address into the field.
- Page 81 V2002D-PTZ User’s Manual 9.3 FTP This section is designed to set up detailed settings for FTP image storing when events occur. Make sure you have enabled FTP function in each event section to activate this function. Figure: FTP Settings Basic Setting Server Address Input an FTP server address.
- Page 82 V2002D-PTZ User’s Manual 9.4 Record Setting This section is designed to set up detailed settings for video recording. Make sure you have enabled recording function in each event section to activate this function. Figure: Record Settings Basic Setting Record Type: Audio and Video/Video Choose which record type to use: ...
- Page 83 V2002D-PTZ User’s Manual 9.5 SD Card This section is designed to set up detailed settings for Edge Recording when events occur. Make sure you have enabled Edge Record function in each event section to activate this function. Figure: SD Card Settings Basic Setting Overwrite: On/Off This means that recorded files will be overwritten when SD card is at full capacity.
- Page 84 V2002D-PTZ User’s Manual Encryption Key Available when Encryption Mode is “On,” Encryption Key allows user to enter a password, which will be used for decrypting and access the video file on the SD card. SD Format Click “Format” to start formatting the mounted SD card. Formatting the SD card will always delete any data in the SD card no matter if ...
- Page 85 V2002D-PTZ User’s Manual 9.7 Sound This section is designed to set up detailed settings for audio output sounds when events occur. Make sure you have enabled Audio Out function in each event section to activate this function. Figure: Sound Settings Basic Setting Mode: One Shot/Infinite ...
- Page 86 V2002D-PTZ User’s Manual 9.8 HTTP Generic Event HTTP Generic Event can help user send messages and commands directly to Network Video Recorder (NVR), which supports CGI commands function. User can customize the messages and commands as needed. Figure: HTTP Generic Event Settings Basic Setting Method Select one of the events that can be communicated to the VMS/NVR, which supports HTTP generic...
-
Page 87: Ptz Settings
V2002D-PTZ User’s Manual 10. PTZ Settings In this chapter, user will be guided through setup steps for various types of PTZ operations, including PTZ movements (pan, tilt, zoom and focus); and actions (Scan, Preset, Tour and Pattern). In addition, Basic PTZ settings and PTZ Control Panel settings are also explained. Click “Save”... - Page 88 V2002D-PTZ User’s Manual Zoom Setting Figure: Zoom Setting Digital Zoom Limit: 1X/2X/4X/8X This function allows user to use digital zoom on the view to enlarge the view at 1x, 2x, 4x, and 8x, Zoom Speed: High/Medium/Low Allows the user to define the speed at which the camera changes from one zoom depth to another. High is a faster speed.
- Page 89 V2002D-PTZ User’s Manual Preset/Tour Move Speed: 1 ~ 500 Use the slider to select Preset and Tour speed. Higher value means the Preset and Tour movement speed will be faster. 10.3 Preset 10.4 Tour Refer to sections “ ” and “ sections for details on Preset and ...
- Page 90 V2002D-PTZ User’s Manual Figure: Pan/Tilt Limit Refer to the figure above and table below to go through the steps for setting up Note limits for Pan, Tilt and Scan operations. Item Option/ Range Description Enable Limit On/Off (Pan/Tilt/Scan) Enable limit by selecting “On” Left Limit ~ 360 (Pan/Scan)
- Page 91 V2002D-PTZ User’s Manual 10.3 Scan Scan action allows camera to automatically pan back and forth regularly within a specified limit, at a constant speed and with predefined and constant tilt, zoom and focus values. In Scan action, the entire scene (sequence of views) is being monitored repeatedly, so it is suitable for touring the scene without losing focus at any time and keeping the covered scene defined correctly.
- Page 92 V2002D-PTZ User’s Manual Go to: Tilt/Zoom/Focus Go to a previously setup tilt, zoom and focus for Scan action, by dragging and adjusting the tilt, zoom or focus bar or entering a value for setting tilt, zoom or focus and then saving by clicking “Save”. Click “Tilt”, “Zoom”...
- Page 93 V2002D-PTZ User’s Manual Preset List Preset Name: Displays the selected Preset Name on screen Text Color: Displays the selected color of Preset Name on screen Auto Refocus: Displays the selected option for Auto Refocus, On/Off. Delete All: Allows user to delete all the existing Presets at once. ...
- Page 94 V2002D-PTZ User’s Manual Motion Area: Click “Set” to enable motion area; then, on the view, click and drag to draw the motion area, used for motion detection purposes. Click Clear to delete the current motion area. Object Size 1 ~ 100: The lower the value, the smaller the object that can be detected, and vice- ...
- Page 95 V2002D-PTZ User’s Manual Tour Figure: Add Setting Tour Setting Preset Name: Display the name of all Presets added to the Tour. Stop Duration (3/5/7/10/15/30/60): To set stop duration time in seconds for each Preset. Preset Select: To select a Preset from the dropdown menu and add it to the current Tour. ...
- Page 96 V2002D-PTZ User’s Manual Pattern List Play/Stop: Select a Pattern from Pattern List, then click “Play/Stop” to start or stop playing the selected Pattern action. Start Record: Select a Pattern from Pattern List, then click “Start Record” to begin recording a Pattern action.
- Page 97 “autopan” or “tour” modes of operation. Such continuous operation is outside the scope of this warranty. Any product sold as “special” or not listed in Vicon’s commercial price list: One year from date of original retail purchase.
Need help?
Do you have a question about the Roughneck Pro V2002D-PTZ and is the answer not in the manual?
Questions and answers