Table of Contents
Advertisement
User Guide
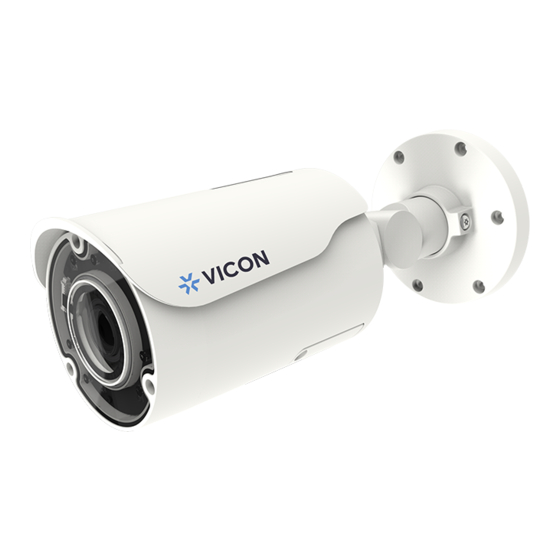
Roughneck® Pro and Roughneck
V2000/V2100 Series Cameras
XX318-00-00
Vicon Industries Inc. does not warrant that the functions contained in this equipment will
meet your requirements or that the operation will be entirely error free or perform precisely as
described in the documentation. This system has not been designed to be used in
life-critical situations and must not be used for this purpose.
Document Number: 8009-8318-00-00 Product specifications subject to change without notice.
Issued: 10/2020 Copyright © 2020 Vicon Industries Inc. All rights reserved.
Vicon Industries Inc.
Tel: 631-952-2288) Fax: 631-951-2288
Toll Free: 800-645-9116
24-Hour Technical Support: 800-34-VICON
(800-348-4266)
UK: 44/(0) 1489-566300
www.vicon-security.com
Advertisement
Table of Contents

Subscribe to Our Youtube Channel
Related Manuals for Vicon Roughneck Pro V2000 Series


Summary of Contents for Vicon Roughneck Pro V2000 Series
- Page 1 V2000/V2100 Series Cameras XX318-00-00 Vicon Industries Inc. Vicon Industries Inc. does not warrant that the functions contained in this equipment will Tel: 631-952-2288) Fax: 631-951-2288 meet your requirements or that the operation will be entirely error free or perform precisely as described in the documentation.
-
Page 2: Table Of Contents
V2000/V2100 User Guide Table of Content Connection ..................................2 Live View ..................................... 9 Playback .................................... 19 Configuration ..................................22 Encode ..............................22 Image ..............................34 Lens Control ............................41 Video ..............................43 Network ............................... 46 System ..............................57 Account ..............................62 Event Source ............................ -
Page 3: Connection
V2000/V2100 User Guide Connection Default IP Address Since this is a network-based camera, an IP address must be assigned. The camera’s default IP address is obtained automatically through a DHCP server in your network; be sure to enable DHCP in "Network Settings."... - Page 4 V2000/V2100 User Guide Viewing Preparation Images of the unit can be viewed through various browsers. Before viewing, follow these steps to enable the display. Enable Cookies as instructions below: In Internet Explorer, click Internet Options on the Tools menu. On the Privacy tab, move the settings slider to Low or Accept All Cookies.
- Page 5 V2000/V2100 User Guide Scroll down to the ActiveX controls and plug-ins radio buttons and set as follows. 【Download signed ActiveX controls】→ Prompt (recommended) 【Download unsigned ActiveX controls】→ Prompt 【Initialize and script ActiveX not marked as safe for scripting】→ Prompt ...
- Page 6 V2000/V2100 User Guide 【Run ActiveX controls and plug-ins】→ Enable 【Script ActiveX controls marked safe for scripting*】→ Enable Figure: Security Settings 4/4 Press OK to save the settings. Close the all browser windows and restart the browser. This will allow the new settings to take effect. ...
- Page 7 Windows Vista, and Microsoft Windows 7 or above. Steps to get the utility program running are listed below. 1. Download the IP Toolbox folder to local computer. The latest IP Toolbox can be found on Vicon’s website Camera Software Download page, vicon-security.com.
- Page 8 V2000/V2100 User Guide 9. Press “Auto Set IP Address” button to automatically give each camera an IP address from predefined range and connected to predefined network internet controller. User Name & Password: Enter username and password for the current auto set IP address ▪...
- Page 9 V2000/V2100 User Guide Follow the steps below to complete firmware upgrade: Click to add or remove camera to be upgraded (only verified cameras will be shown on this list). Select a camera or click “Select All” button to select a camera or all the cameras on the firmware ...
-
Page 10: Live View
V2000/V2100 User Guide Live View After accessing and logging in to the IP address of the camera, there are 3 main options on the upper left side: “Live View”, “Playback” and “Configuration.” The upper right corner indicates the current user level and has the “Logout”... - Page 11 V2000/V2100 User Guide In “Live View” page, user will have access to real-time Live View display. The drop-down menu under “Media Player” title consists of 2 options for display: ActiveX and JPEG. ActiveX, only available in Internet Explorer, provides full functionality, better image quality and lower bandwidth consumption in Live View page.
- Page 12 V2000/V2100 User Guide Figure: RS-485 Control Panel 1. Directional Arrows Click and hold the arrow buttons to make RS-485 device move in the desired direction. 2. Home Position Click the button to restore the RS-485 device to the default position. 3.
- Page 13 V2000/V2100 User Guide Video Analytics Figure: Video Analytics Panel Select a Video Analytics (VA) function from the dropdown menu. Make sure that the selected VA function is enabled in “Video Analytics” section. When “Off” is selected, the camera is not performing any VA function.
- Page 14 V2000/V2100 User Guide Display Modes Original Mode (1O) The original warped live view is sometimes not that accurate, due to few factors including assembly tolerance, to present a proper de-warped image under several display modes, e.g., 1P, 1P2Z. Therefore, the calibration section is specifically designed for user to readjust the central point of warped image to improve the de-warped performance to be closer to perfect.
- Page 15 V2000/V2100 User Guide When user clicks the panoramic screen and drags the mouse from right side to left side, the panoramic image moves from right side to left side horizontally, and vice versa. Figure: Panoramic Manipulation Panoramic manipulation is only available when the camera is Ceiling Mount Type. If ...
- Page 16 V2000/V2100 User Guide Figure: Dual Panoramic Manipulation Zone Display Mode (1Z) Zone display mode supports ePTZ function, allowing user to capture image as an optical PTZ camera. User can click and drag screen to adjust the field of view. If user needs to identify more details, user can zoom in or zoom out via scrolling mouse wheel.
- Page 17 V2000/V2100 User Guide Figure: ePTZ Zoom Manipulation Figure: ePTZ Pan and Tilt Manipulation Quad Zone Display Mode (4Z) Quad Zone Display Mode is composed of four zone screens, so that user can monitor four different zones of the live view simultaneously. Furthermore, the indicative window, located on lower right side of screen, shows the relative positions/areas/zones (1, 2, 3, 4 distributed in the indicative window;...
- Page 18 V2000/V2100 User Guide Indicative Window with numbered areas for Quad View Figure: Quad Zone Display Mode Figure: FOV adjustment in Indicative window Note The indicative window can be changed position by clicking and dragging. Panoramic Display Dual Zone Mode (1P2Z) Panoramic Display Dual Zone Mode provides one panoramic view screen and two zone screens.
- Page 19 V2000/V2100 User Guide Figure: Panoramic Display Dual Zone Mode...
-
Page 20: Playback
V2000/V2100 User Guide Playback The cameras provide a method to play video stored on micro SD card. Due to compatibility issues related to video and audio formats; when playing video stored on micro SD card, it is highly recommended to use Chrome or Safari browser. Remember that both camera and browser must support same format;... - Page 21 V2000/V2100 User Guide parameters chosen. Timeline: 0.5 ~ 6 (hours) Timeline is used for adjusting the time range of timeline area in terms of hours; each step from timeline changes half hour in timeline area. Timeline helps user get more details and a larger scale view of timeline area for easier search;...
- Page 22 V2000/V2100 User Guide Display/Playback Toolbar Figure: Display and Playback Toolbar To play a video, simply hover over a color bar on timeline area until a hover box displays; then click on the color bar for the recorded video to automatically start playing on the display. While the video is playing, user can hover over the displaying video to activate playback toolbar.
-
Page 23: Configuration
V2000/V2100 User Guide Configuration After clicking “Configuration”, the screen will display as below, with several menu options on the left side for users to configure. These will be explained one by one in the following chapters. 1. Encode 1.1 Encode Figure: Encode Settings Profile and Streams Profile... - Page 24 V2000/V2100 User Guide Check “Appendix: Product Comparison-Max resolution & frame rate” for details. Notes Check “Table: Correlations of Resolution/Streams/FPS/Codecs” for the correlated values. DSCP: 0 ~ 63 To classify and manage network traffic and provide quality of service (QoS) on today’s IP networks, Differentiated Services Code Point (DSCP) is a computer networking architecture that specifies a resource allocation to each device on a priority-based pattern for ideal bandwidth management.
- Page 25 V2000/V2100 User Guide Profile: High Profile/Main Profile There are 2 different kinds of profiles for H.264 codec and 1 profile for H.265 codec compression ratios, where the protocol for each type varies. H.264 Codec supports Main Profile and High Profile profiles. H.265 Codec supports Main Profile only.
- Page 26 V2000/V2100 User Guide Aspect Single Resolution Codec Dual Stream Triple Stream Ratio Stream 1920x1080 + 1280x720 1920x1080 + 1280x720 + 640x360 1920x1080 + 800x600 1920x1080 + 1280x720 + 320x240 16:9 H.264/H.265/MJPEG 1920x1080 (All smaller resolution are 1920x1080 + 800x600 + 800x600 available) (All smaller resolution are available) 1280x960 + 1280x960 + 1280x720...
- Page 27 V2000/V2100 User Guide Aspect Single Resolution Codec Dual Stream Triple Stream Ratio Stream 2592x1944 + 1600x1200 + 640x480 2592x1944 + 1600x1200 + 320x240 2592x1944 + 1440x1080 + 640x480 2592x1944 + 1440x1080 + 320x240 2592x1944 + 1600x1200 2592x1944 + 1280x960 + 1280x960 2592x1944 + 1440x1080 2592x1944 + 1280x960 + 640x480 2592x1944 + 1280x960...
- Page 28 V2000/V2100 User Guide Aspect Single Resolution Codec Dual Stream Triple Stream Ratio Stream 2304x1296 + 640x360 + 640x360 2304x1296 + 640x360 + 320x180 2304x1296 + 320x180 +320x180 1920x1080 + 1920x1080 1920x1080 + 1920x1080 + 640x360 16:9 H.264/H.265/MJPEG 60/30/30 1920x1080 1920x1080 + 1920x1080 + 1920x1080 1920x1080 + 1920x1080 + 1280x720 1920x1080 + 1920x1080 + 640x360 1920x1080 + 1920x1080...
- Page 29 V2000/V2100 User Guide Aspect Single Resolution Codec Dual Stream Triple Stream Ratio Stream 16:9 H.264/H.265/MJPEG 3840X2160 3840x2160 + 1920x1080 + 1920x1080 3840x2160 + 1920x1080 + 640x480 3840x2160 + 1920x1080 + 640x360 3840x2160 + 1920x1080 + 320x240 3840x2160 + 1280x960 + 1280x960 3840x2160 + 1920x1080 3840x2160 + 1280x960 + 640x480 3840x2160 + 1280x960...
- Page 30 V2000/V2100 User Guide Aspect Single Resolution Codec Dual Stream Triple Stream Ratio Stream H.264/H.265/MJPEG 2048x1536 2048x1536 + 2048x1536 + 1280x720 2048x1536 + 2048x1536 + 800x600 2048x1536 + 2048x1536 + 640x480 2048x1536 + 2048x1536 + 640x360 2048x1536 + 2048x1536 + 320x240 2048x1536 + 1920x1080 + 1920x1080 2048x1536 + 1920x1080 + 640x480 2048x1536 + 2048x1536...
- Page 31 V2000/V2100 User Guide Aspect Single Resolution Codec Dual Stream Triple Stream Ratio Stream 1280x960 + 1280x720 + 1280x720 1280x960 + 1280x720 + 640x480 1280x960 + 1280x720 + 640x360 1280x960 + 1280x720 + 320x240 1280x960 + 800x600 + 800x600 (All smaller resolutions are available) 16:9 60/30/30...
- Page 32 V2000/V2100 User Guide Aspect Single Resolution Codec Dual Stream Triple Stream Ratio Stream H.264/ H.265 4000x3000 4000x3000 + 1280x960 + 1280x960 4000x3000 + 1280x960 + 600x600 4000x3000 + 1280x960 + 640x480 4000x3000 + 1280x960 + 480x480 4000x3000 + 1280x960 + 320x240 4000x3000 + 1280x960 4000x3000 + 1280x960 + 240x240 4000x3000 + 960x960...
- Page 33 V2000/V2100 User Guide Aspect Single Resolution Codec Dual Stream Triple Stream Ratio Stream 1944x1944 + 1944x1944 + 800x600 1944x1944 + 1944x1944 + 600x600 1944x1944 + 1944x1944 + 640x480 1944x1944 + 1944x1944 + 480x480 1944x1944 + 1944x1944 + 320x240 1944x1944 + 1944x1944 + 240x240 1944x1944 + 2048x1536 + 600x600 1944x1944 + 2048x1536 + 640x480 1944x1944 + 2048x1536 + 480x480...
- Page 34 V2000/V2100 User Guide 1.2 Dewarp for V2360W Panoramic Camera Only Dewarp, a process of perspective correction of an image, to reverse the effects of geometric distortions caused by the camera lens. According the mounting type, the algorithm of Dewarp will process image properly.
-
Page 35: Image
V2000/V2100 User Guide 2. Image 2.1 Exposure This section allows user to control the settings pertaining to exposure mode and day/night modes. Basic Settings Figure: Exposure Basic Settings Exposure Mode: Auto/Flickerless/Shutter Priority/ Manual/True WDR There are 5 modes to select from, which are described below. Auto: With certain pre-settings, before taking videos, the camera automatically determines the ... - Page 36 V2000/V2100 User Guide P Iris Control: Auto/Manual More advanced than DC Iris, P Iris, with built-in stepper motor, assists camera to regulate the iris position precisely by considering volatile light conditions, thereby optimizing a result of crisp image with better depth of field. Two 2 options are available for selection as below: Auto: Iris position will automatically adjust accurately in accordance with the fluctuating light ...
- Page 37 V2000/V2100 User Guide Shutter Speed: 1/10000 ~ 1/7.5 Selecting 1/10000 provides the fastest shutter speed. Note Shutter Speed is only available when exposure mode is “Shutter Priority” or “Manual”. Gain: 0 ~ 36 The larger the value, the more intensity of light comes into the camera and vice versa. Note Gain is only available when exposure mode “Manual”...
- Page 38 V2000/V2100 User Guide Day Night Switch Control – Time is NOT available when exposure mode “Manual” is Note selected. Day Night Switch Control – Sensitivity: Day to Night (0 ~ 6)/Night to Day (0 ~ 6) This determines the sensitivity of the day/night mode switching mechanism. A larger value (High) means camera can auto switch from day to night or night to day mode based on minor light intensity change.
- Page 39 V2000/V2100 User Guide Smart IR: On/Off Smart IR technology was developed via an intelligent algorithm to keep close objects from overexposure effect under low-light environment. Turn “On” Smart IR function to have camera dynamically adjust the shutter speed as well as the sensor gain to prevent overexposure. Additionally, digital WDR will be automatically activated to preserve the details on the dark area, if necessary.
- Page 40 V2000/V2100 User Guide 2.3 Basic Setting Figure: Basic Settings Quality Sharpness: 0 ~ 100 Increasing the sharpness value will define the edges and small features of viewing images. If the edges appear too smooth or blurred, increase the sharpness. Selecting higher value provides the sharper image.
- Page 41 V2000/V2100 User Guide Image Rotation The image can be rotated 180 or 270 degrees when that selected from the dropdown. When corridor mode is enabled, the image will rotate 270 degrees. Orientation: Off/Flip Off: Disable video orientation function. 180°/270° Flip: Vertically change the display of the video. ...
-
Page 42: Lens Control
V2000/V2100 User Guide 3. Lens Control 3.1 Lens Control/Back Focus Figure: Lens Control/Back Focus Settings Zoom Control Absolute: 1 ~ 3 By dragging the bar for Manual Zoom Control, user can adjust lens zoom view between zoom in (Tele).and zoom out for a view of wide angle (Wide). The number at the right corner indicates the current zoom magnification, and a specific number can be entered there as well. - Page 43 V2000/V2100 User Guide Advanced: Due to a defocus issue that sometimes occurs between day and night mode switch, the “Day Position” and “Night Position” sections here allow user to precisely define a specific value for back focus settings on both day mode and night mode individually, thereby improving the accuracy of back focus for different times on a large scale.
-
Page 44: Video
V2000/V2100 User Guide 4. Video 4.1 Privacy Zone Privacy Zone enables user to block out a specific portion of the screen for privacy concerns. It must apply on all streams, TV output, and live view and it should not affect the motion detection behavior. There are up to 8 privacy zones for users to define. - Page 45 V2000/V2100 User Guide The Enhanced Codec technology features the both iZone and iStream technologies to not only economically distribute leverage between different regions and compression levels, but also effectively reduce the average bit rate to level down the overall bandwidth usage, as the following explains.
- Page 46 V2000/V2100 User Guide As opposed to iZone, the “EcoZone” can swiftly identify dynamic motion that occurred within a scene and retain its details with clear quality, whereas the rest areas, e.g., static background, will have a higher compression level, resulting in economically decreasing bandwidth on less important things but keeping the dynamic motion details for future forensic purpose.
-
Page 47: Network
V2000/V2100 User Guide 5. Network 5.1 General This section allows user to set detailed settings related to wired network condition for the camera. Basic Settings Figure: Network Basic Settings HTTP Port: 1025 ~ 65535 This protocol allows for TCP protocol quality without having to open specific ports for streaming. User using a firewall can utilize this protocol to allow streaming data through it. - Page 48 V2000/V2100 User Guide IP Settings Figure: Network IP Settings Description of IP Settings Item Option/ Range Description User can manually input IP address and the related Manual settings. This is a point-to-point-based protocol that offers authentication, encryption and compression. It PPPoE Mode authenticates user with the predefined username and...
- Page 49 V2000/V2100 User Guide IPv6 Address Manually set an IP address under IPv6 protocol. Subnet prefix 1 ~ 128 Set prefix length for subnet. length IPv6 default Manually set a default router address under IPv6 protocol. router address Subnet prefix 1 ~ 128 Set prefix length for subnet.
- Page 50 V2000/V2100 User Guide Basic Setting Figure: FTP Settings Enable: On/ Off User can enable or disable FTP server by selectin On or Off from the dropdown. Port: 21/1025 ~ 65535 Input a value or 21 by default into the port field to activate the FTP server function. The login ID and password are shared with the user account, which can be changed by modifying the username and password of the user account.
- Page 51 V2000/V2100 User Guide 5.5 RTSP RTSP is a standard protocol for connecting a client to establish and control streaming data over the web. If you want to allow third-party devices or software to access video/audio streams from the IP camera over the network, you must configure the RTSP ports. The major difference between Unicast and Multicast is how client and server communicate packets with each other.
- Page 52 V2000/V2100 User Guide rtsp://(camera IP address)/(URL stream 2) rtsp://(camera IP address)/(URL stream 3) For example: rtsp://192.168.0.30/URL stream1 Metadata: On/Off Turn Metadata On from the dropdown to enable information about data, which means the data information will be allocated systematically, keeping similar data together by certain criteria and distinguishing dissimilar data organizationally to effectively transmit data information.
- Page 53 V2000/V2100 User Guide Figure: SNMP Settings SNMP v1 Enable: On/Off Select “On” or “Off” to enable or disable. SNMP v2c Enable: On/Off Select “On” or “Off” to enable or disable. The community name can be specified as a password for read, write or trap access to all supported SNMP objects;...
- Page 54 V2000/V2100 User Guide Heartbeat Interval: 5 ~ 600 Input desired value in seconds for Heartbeat Interval. Event: On/Off Specifically designed for event occurrence, this option, when turned On, will automatically record the log file of events that occurred for review afterwards. Download MIB Click “Download”...
- Page 55 V2000/V2100 User Guide Basic Setting Mode: Allow/Deny/Off Allow: Select this option to allow inputted IP addresses access to the IP camera. Deny: Select this option to deny inputted IP addresses access to the IP camera. Off: Select this option if no actions will be made for inputted IP addresses. ...
- Page 56 V2000/V2100 User Guide 5.10 SSL Method: None/Self Signed/Request/Upload Certificate Secure Sockets Layer (SSL), the standard security technology for establishing encryption, allows sensitive information such as login credentials to be transmitted securely. Select the method from the dropdown. Self Signed: Self-signed certificate is a privately owned key that has no connection to a person or ...
- Page 57 V2000/V2100 User Guide 5.11 QoS QoS (Quality of Service) refers, specifically, to both resource control and traffic prioritization mechanisms by setting priorities to different applications or users with the intent of maintaining a certain level of performance on data flow. It is especially efficient when transport of traffic has additional requirements.
-
Page 58: System
V2000/V2100 User Guide 6. System 6.1 Date & Time Figure: Date & Time Settings Basic Setting Current Server Time The current date/time is displayed here. Synchronization Mode: Manually/PC/NTP Server Manually: Set date and time manually and individually. Synchronize with PC: Select this option to synchronize date and time of the camera to be consistent ... - Page 59 V2000/V2100 User Guide Date Time Format Date Format: Select format of dd/mm/yyyy, mm/dd/yyyy or yyyy/mm/dd from the dropdown menu. Time Format: Select format of 12 H or 24 H from the dropdown menu. 6.2 Audio For those cameras equipped with audio input/output ports, the camera is able to connect with external audio devices for audio input and output individually.
- Page 60 V2000/V2100 User Guide 6.3 Firmware Information about camera firmware is displayed on this page. User can manually upgrade System Firmware if upgrade is available. All motion of camera will be stopped during the firmware upgrade. Be sure to close any other screens before performing a firmware upgrade. Never disconnect power or LAN cable during the upgrading process.
- Page 61 V2000/V2100 User Guide Reboot Click “Reboot” to simply reboot the camera. Factory Default (Retain IP) Click to reset all configuration settings back to factory defaults excluding network settings. Factory Default Click to reset all configuration settings back to factory defaults. Advanced Security This screen provides a mechanism to protect the network ports from cyber-security concerns.
- Page 62 V2000/V2100 User Guide Event When an event is triggered, OSD can be displayed on screen to highlight and inform user. 6.6 Events As an intelligent device, the IP camera is capable of automatically detecting many events, such as motion, tamper, network loss, alarm, etc., and taking actions to inform the user about these occurrences.
-
Page 63: Account
V2000/V2100 User Guide RS485 function is available in box camera model only; check “Appendix: Product Note Comparison-RS485 Interface” for detail. 7. Account 7.1 Account Management Figure: Account Settings Account Setting Access Level: Admin/Operator/User Admin: Admin level has the highest privilege control for accessing camera, allowing handling of ... - Page 64 V2000/V2100 User Guide “ADMIN”. A user may reset the Account Management system to the camera’s default settings. 7.2 LDAP For accessing and maintaining distributed directory information services over an Internet Protocol network, the Lightweight Directory Access Protocol (LDAP), an open, vendor-neutral, industry-standard application protocol, has a major role in both intranet and internet applications to facilitate information sharing between devices.
- Page 65 V2000/V2100 User Guide Enable TLS When TLS is enabled, the data transmission will be done through TLS mode, using encryption for the protection of data communication. (TLS is a widely adopted security protocol designed to facilitate privacy and data security for communications over the Internet, which encrypts internet traffic of all types, making secure internet communication, and therefore internet commerce, possible.)
-
Page 66: Event Source
V2000/V2100 User Guide 8. Event Source Event source configurations consist of Event Specific, Handler and Arming Schedule. The table below gives an overview of event source configurations and dependencies. Settings Type Arming Remark Event Specific Handler Schedule Alarm NO/NC ✓ Model Dependent. - Page 67 V2000/V2100 User Guide Email Enable: Check the box to enable an email to be sent to a predefined user when event occurs. Subject: To preset a subject of the email to be sent. Message: To preset message contents of the email to be sent. ...
- Page 68 V2000/V2100 User Guide After clicking “Edit,” the setting page will be shown as below. User can individually create up to 3 sets of time ranges for each day, where start and end time can be separately defined. Check the box at the right side to enable the defined time range, followed by clicking “Apply”...
- Page 69 V2000/V2100 User Guide Figure: Alarm Event Settings Basic Setting Enable: Check the box to enable the alarm input function. Type: NO/NC NO (Normally Opened): An alarm will be triggered when the external contact closes. NC (Normally Closed): An alarm will be triggered when the external contact opens. 8.2 Audio By connecting to an audio input device, e.g., microphone, the camera can receive an audio input signal from the microphone and react with the certain responses that are preset under this section.
- Page 70 V2000/V2100 User Guide Figure: Audio Event Settings Basic Setting Enable: Check the box to enable the audio input event function. Sound Intensity Threshold: 1 ~ 100 Define an exact sound intensity threshold to trigger the actions when the camera receives audio signal from the connected input device.
- Page 71 V2000/V2100 User Guide Basic Setting Enable: Check the box to enable the defocus event function. 8.4 Motion This function is designed to establish related actions when the camera detects motion issues. A maximum of 4 motion detection areas can be customized by users. Figure: Motion Detection Settings Motion Zone Area Setting Object Size: 1 ~ 100...
- Page 72 V2000/V2100 User Guide Figure: Network Event Settings Basic Setting Wired Network Loss Check the box to enable the detection of network lost. When the camera loses internet access, the network loss event will be detected and recorded. Wired Network Conflict Check the box to enable the detection of network conflict.
- Page 73 V2000/V2100 User Guide through when the next alarm is triggered. For example, if an alarm is triggered during 12:00:00 - 12:00:10 (alarm duration of 10 seconds), the following alarm will not be triggered until 12:01:00 with a defined interval time of 60 seconds. 8.7 Tamper This function is designed to establish related actions when the camera is subject to tamper events.
- Page 74 V2000/V2100 User Guide Mount failure Check the box to enable the detection of failure of the inserted micro SD card. When any failure issue occurs on SD card, the selected handlers will be activated. Press the arrow icon at the upper-right corner to expand or collapse the setting ...
-
Page 75: Video Analytics
V2000/V2100 User Guide 9. Video Analytics Video Analytics (VA) comprises the proprietary algorithm to perform intelligent video analysis, e.g., to detect intrusion or loitering within defined zone from suspicious objects or to count people and traffic flow by designated line deployment. It is especially practical to monitor certain alert areas or key zones;... - Page 76 V2000/V2100 User Guide 9.1 General This page contains general settings shared by all VA functions. Prior to setting up each VA function individually, accurately define the fundamental settings here before advancing to other function settings. Figure: General Settings Basic Setting Sensitivity: High/Mid high/Mid/Mid Low/Low Choose a sensitivity level from the dropdown menu to define a clear threshold for triggering all VA functions.
- Page 77 V2000/V2100 User Guide 9.2 Line Counting This function is designed to count the moving objects that passed through the designated line defined by users. Appropriate applications for this function, for instance, can be an entrance of a shopping mall or exit of a department store. It can also be applied to count the traffic flow of an intersection. Figure: Line Counting Settings Line Setting Reference Line Cross...
- Page 78 V2000/V2100 User Guide Performance Switch to the Live View page and select “Line Counting” from the lower-left Video Analytics dropdown menu. When there’s a moving object traveling through the designated line as in the above image, the number coming along with the arrow and line will increase (“1” shown in the image). Additionally, any moving object within the live view will be framed by a blue rectangle for clear identification.
- Page 79 V2000/V2100 User Guide Figure: Line Cross Performance On Live View Performance Switch to the Live View page and select “Line Cross” from the lower-left Video Analytics dropdown menu. When there’s a moving object crossing the designated line as in the above image, both the crossed line and the rectangular frame enclosing the moving object are highlighted with red color for distinctive identification.
- Page 80 V2000/V2100 User Guide Define a value for the threshold period to trigger loitering alarm by any suspect object that enters and lingers in the zone over that value. Method Draw a desired shape (octagon at the maximum) covering the key zone for loitering detection, followed clicking “Save”...
- Page 81 V2000/V2100 User Guide Basic Setting Enable: Check the box to enable the area counting function. Location X & Location Y: 1 ~ 10 Input a value or slide the bar to define the exact location for the OSD counter, which records number accumulated by both exit and entry of the defined zone.
- Page 82 V2000/V2100 User Guide 9.6 Intrusion Different from Line Cross, Intrusion is a function where administrator can define an irregular shaped an area (octagonal at the maximum) to watch if any suspicious object enters the area . Using Intrusion, administrator can effortlessly have command of a critical zone and receive a prompt warning if any object trespasses the defined critical zone in real-time.
- Page 83 V2000/V2100 User Guide Performance Switch to the Live View page and select “Intrusion” from the lower-left Video Analytics dropdown menu. When there’s a moving object trespassing into the designated critical zone defined by administrator, as in the above image, both the rectangular frame enclosing the suspect object and the defined zone are highlighted with red color for distinctive identification.
- Page 84 V2000/V2100 User Guide Figure: Object Removed Performance On Live View Performance Switch to the Live View page and select “Object Removed” from the lower-left Video Analytics dropdown menu. When any of the items marked by colorful zones is taken away, as in the above image, the zone will be highlighted with red color to indicate the original item was removed.
- Page 85 V2000/V2100 User Guide the lowest 15° for flexible applications. Also, direction of included angle can be adjusted by simply press and hold to move the middle arrow. Figure: Wrong Direction Performance On Live View Performance Switch to the Live View page and select “Wrong Direction” from the lower-left Video Analytics dropdown menu.
- Page 86 V2000/V2100 User Guide Define a value for the threshold period to trigger object left alarm for any suspicious object that was left within the zone over the value. Method Draw a desired shape (octagon at the maximum) covering the key zone for object left detection, followed by clicking “Save”...
-
Page 87: Event Setting
V2000/V2100 User Guide 10. Event Setting 10.1 Alarm Out This section is designed to set up detailed settings for alarm output(s) when events occur. Make sure you have enabled alarm output in each event section to activate this function. Figure: Alarm Output Settings Alarm Out Enable: Select “On”... - Page 88 V2000/V2100 User Guide Off Time: 0.1 ~ 200 (sec) Define a specific interval for each alarm output triggering. Count: 1 ~ Infinite Define how many counts will be performed for alarm output. Be sure to Save settings to have them take effect. 10.2 Email This section is designed to set up detailed settings for email notification when events occur.
- Page 89 V2000/V2100 User Guide Port Set “25” as default or change to a dedicated number. Discuss with your IT administrator for details if necessary. User Name Input a user name with privilege to access the server. Password Input the password associated with the user name. Sender Settings Sender Email Address Define the sender email address into the field.
- Page 90 V2000/V2100 User Guide 10.3 FTP This section is designed to set up detailed settings for FTP image storing when events occur. Make sure you have enabled FTP function in each event section to activate this function. Figure: FTP Settings Basic Setting Server Address Input an FTP server address.
- Page 91 V2000/V2100 User Guide 10.4 Record Setting This section is designed to set up detailed settings for video recording. Make sure you have enabled recording function in each event section to activate this function. Figure: Record Settings Basic Setting Record Type: Video/Audio and Video Choose which record type to be use: Audio And Video: Both video and audio will be recorded.
- Page 92 V2000/V2100 User Guide 10.5 SD Card This section is designed to set up detailed settings for Edge Recording when events occur. Make sure you have enabled Edge Record function in each event section to activate this function. Figure: SD Card Settings Basic Setting Overwrite: On/Off This means that recorded files will be overwritten when SD card is at full capacity.
- Page 93 V2000/V2100 User Guide Set the number of frames to be captured prior to an event. Event Capture Interval: 1 ~ 10 (sec) Set a time interval ranging from 1 to 10 seconds between each snapshot capture. Post Event Capture Count: 1 ~ Infinite (Frame) Set the number of frames to be captured after an event occurred.
- Page 94 V2000/V2100 User Guide 10.8 HTTP Generic Event HTTP Generic Event can help user send messages and commands directly to Network Video Recorder (NVR), which supports CGI commands function. User can customize the messages and commands as needed. Figure: HTTP Generic Event Settings Basic Setting Method Select one of the 10 selectable events that can be communicated to the VMS/NVR, which supports...
-
Page 95: Appendix: Product Comparison
V2000/V2100 User Guide Appendix: Product Comparison Dome Mini Bullet Model Type V2102D-W313MIR V2105D-W313MIR V2102B-W28IR V2102B-W28IR H.265/HEVC MP H.265/HEVC MP H.265/HEVC MP H.265/HEVC MP Video H.264 MP/BP H.264 MP/BP H.264 MP/BP H.264 MP/BP Compression H.264 HP (>=720p) H.264 HP (>=720p) H.264 HP (>=720p) H.264 HP (>=720p) MJPEG MJPEG... - Page 96 V2000/V2100 User Guide Bullet Dome Model Type V2008D-W313MIR V2102B-W313MIR V2105B-W313MIR V2002D-W313MIR V2005D-W313MIR V2008-W-NL H.265/HEVC MP H.265/HEVC MP H.265/HEVC MP H.265/HEVC MP H.265/HEVC MP H.265/HEVC MP Video H.264 MP/BP H.264 MP/BP H.264 MP/BP H.264 MP/BP H.264 MP/BP H.264 MP/BP H.264 HP (>=720p) H.264 HP (>=720p) H.264 HP (>=720p) H.264 HP (>=720p)
- Page 97 V2000/V2100 User Guide Bullet Micro Dome Panoramic Model Type V2008B-W313MIR V2005D-W28IR V2002B-W313MIR V2005B-W313MIR V2002D-W28IR V2360W-12 H.265/HEVC MP H.265/HEVC MP H.265/HEVC MP H.265/HEVC MP H.265/HEVC MP H.265/HEVC MP Video H.264 MP/BP H.264 MP/BP H.264 MP/BP H.264 MP/BP H.264 MP/BP H.264 MP/BP H.264 HP (>=720p) H.264 HP (>=720p) H.264 HP (>=720p)
- Page 98 l is intended for administrators and users of network camera, and applicable firmware is specified in the cover page. It includes instructions for using and managing the camera on your network. Previous experience in networking will be of useful when using this product. The network camera supports ONVIF profile S, profile G, profile Q.
Need help?
Do you have a question about the Roughneck Pro V2000 Series and is the answer not in the manual?
Questions and answers