Table of Contents
Advertisement
Quick Links
User Guide
Roughneck® AI V2000D-PTZ
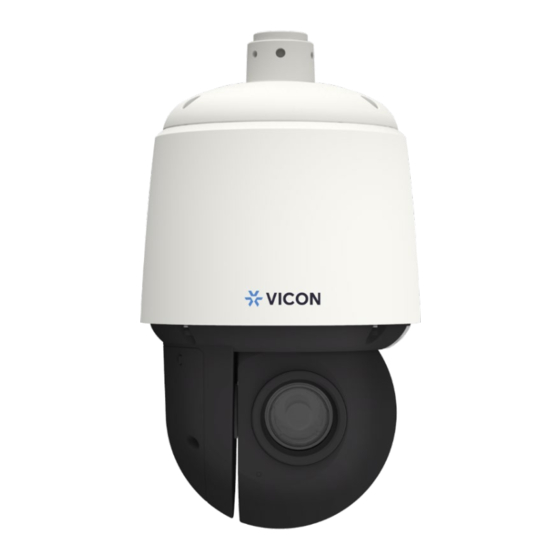
Outdoor Vandal PTZ Dome Camera
XX320-01-02
Vicon Industries Inc. does not warrant that the functions contained in this equipment will
meet your requirements or that the operation will be entirely error free or perform precisely as
described in the documentation. This system has not been designed to be used in
life-critical situations and must not be used for this purpose.
Document Number: 8009-8320-01-02 Product specifications subject to change without notice.
Issued: 7/2023 Copyright © 2023 Vicon Industries Inc. All rights reserved.
Vicon Industries Inc.
Tel: 631-952-2288) Fax: 631-951-2288
Toll Free: 800-645-9116
24-Hour Technical Support: 800-34-VICON
(800-348-4266)
UK: 44/(0) 1489-566300
www.vicon-security.com
Advertisement
Table of Contents

Related Manuals for Vicon Roughneck AI V2000D-PTZ


Summary of Contents for Vicon Roughneck AI V2000D-PTZ
- Page 1 Outdoor Vandal PTZ Dome Camera XX320-01-02 Vicon Industries Inc. Vicon Industries Inc. does not warrant that the functions contained in this equipment will Tel: 631-952-2288) Fax: 631-951-2288 meet your requirements or that the operation will be entirely error free or perform precisely as Toll Free: 800-645-9116 described in the documentation.
-
Page 2: Table Of Contents
Event Source ............................40 Video Analytics: V2002D-PTZ Only ....................... 49 Video Analytics: V2005D-PTZ Only ....................... 62 Event Setting ............................72 PTZ Settings ............................80 Appendix 1: Continuous Recording to an SD Card ......................90 Vicon Standard Equipment Warranty ............................94... -
Page 3: Connection
PRONTO Device Manager, which can be found on Vicon’s website. Note that when accessing the camera for the first time, a message will display to reset the password. Since this is a network-based camera, an IP address must be assigned. The camera’s default IP address is obtained automatically through a DHCP server in your network;... - Page 4 V2000D-PTZ User’s Manual PRONTO Device Manager PRONTO is Vicon’s device manager (Discovery tool) that can be used to discover all Vicon cameras on a system. Figure: PRONTO Interface • Upon startup of the PRONTO Device Manager, the tool’s auto-discovery function generates a list of the discovered cameras on the network in a resource list.
-
Page 5: Live View
V2000D-PTZ User’s Manual Live View After accessing and logging in to the IP address of the camera, there are 3 main options on the upper left side: “Live View,” “Playback” and “Configuration.” The upper right corner indicates the current user level and has the “Logout”... - Page 6 V2000D-PTZ User’s Manual In “Live View” page, user will have access to real-time Live View display. The drop-down menu under “Media Player” title consists of 2 options for display: JPEG and H.264. JPEG offers a broad range of browser options, including Chrome, Opera, etc., but has lower frame rate display.
- Page 7 V2000D-PTZ User’s Manual In addition, the user can adjust camera view using the options listed below. Item Option/Range Description Up - Down ~ 105 Click and drag to tilt camera view. Left - Right ~ 360 Click and drag to pan camera view ~ 120x (up to 240x Wide - Tele Click and drag to zoom in/out camera view...
-
Page 8: Playback
V2000D-PTZ User’s Manual Playback The camera provides a method to play video stored on micro SD card. Due to compatibility issues related to video and audio formats; when playing video stored on micro SD Card, it is highly recommended to use Chrome or Safari browser along with H.264 codec, since these browsers support H.264 format. - Page 9 V2000D-PTZ User’s Manual Figure: Timeline Area User can click, and then drag left or right to see other parts of the timeline area. Based on the search configuration, if there is a video list on micro SD card, it will be shown on timeline area in different colors, sizes and times based on type, duration and time recorded, respectively.
-
Page 10: Configuration
V2000D-PTZ User’s Manual Configuration After clicking “Configuration,” the screen will display as below, with several menu options on the left side for users to configure. These will be explained one by one in the following chapters. 1. Encode Figure: Encode Settings Profile and Streams Current Profile: 1/2/3 It is strongly recommended to define different settings under each stream to maintain better video... - Page 11 V2000D-PTZ User’s Manual DSCP: 0 ~ 63 To classify and manage network traffic and provide quality of service (QoS) on modern IP networks, Differentiated Services Code Point (DSCP) is a computer networking architecture that specifies a resource allocation to each device on a priority-based pattern for ideal bandwidth management. The bigger the value, the higher priority it will be.
- Page 12 V2000D-PTZ User’s Manual Profile: High Profile/Main Profile There are 2 different kinds of profiles for H.264 codec and 1 profile for H.265 codec compression ratios, where the protocol for each type varies. H.264 Codec supports Main Profile and High Profile profiles. H.265 Codec supports Main Profile only.
-
Page 13: Image
V2000D-PTZ User’s Manual 2. Image 2.1 Exposure This section allows user to control the settings pertaining to exposure mode and day night modes. Note that the PTZ incorporates Smart IR and Adaptive IR automatically based on zoom level. Basic Settings Figure: Exposure Basic Settings Exposure Mode: Auto/Flickerless/Shutter Priority/Iris Priority/Manual There are 5 modes to select from, which are described below. - Page 14 V2000D-PTZ User’s Manual BLC Off/Upper/Lower/Central (1/3 )/Central (1/6 )/Left/Right Set an area for Backlight Compensation. Backlight Compensation is a function that sets the brightness of a selected area to optimal image level. This function is necessary when an autoiris lens closes quickly due to an intense light behind the object in the area being viewed, resulting in a display that is too dark and difficult to see.
- Page 15 V2000D-PTZ User’s Manual Gain 0 ~ 48: The larger the value, the more intensity of light comes into the camera and vice versa. Gain is only available when exposure mode “Manual” is selected. Otherwise, a Max Note Gain slider is provided, 0 ~ 48. Day Night Setting Figure: Day Night Switch Control Settings Day Night Switch Control –...
- Page 16 V2000D-PTZ User’s Manual IR Mode: Auto/On/Off Select “On” to enable IR LED permanently and select “Auto” to let camera switch IR LED on or off based on light intensity of different applications. Choose “Off” to turn off IR LED. Smart IR: On/Off Smart IR technology was developed via an intelligent algorithm to keep close objects from overexposure effect under low-light environment.
- Page 17 V2000D-PTZ User’s Manual 2.3 Basic Setting Figure: Basic Settings Quality Sharpness: 0 ~ 100 Increasing the sharpness value will define the edges and small feature of viewing images. If the edges appear too smooth or blurred, increase the sharpness. Selecting higher value provides the sharper image.
-
Page 18: Video
V2000D-PTZ User’s Manual Orientation: Off/Flip Off: Disable video orientation function. Flip: Vertically change the orientation of the video display. 3. Video 3.1 Privacy Zone Basic Setting Privacy Zone enables user to block out a specific portion of the view with a solid color mask for privacy concerns. - Page 19 V2000D-PTZ User’s Manual Once a Privacy zone is set up, “View” and “Clean” options will become available. For zones already setup, click “View” to go to the scene where privacy zone was defined. If privacy zone is enabled, solid color block will be seen on the view; however, if privacy zone is disabled, no solid color block will be seen on the view.
- Page 20 V2000D-PTZ User’s Manual First, click iZone to turn on one or both Zones. On the preview image, the cursor changes to a cross icon; left click and drag to outline a desired zone. User can select a level for each Zone. High level means higher image quality and lower compression in the Zone.
- Page 21 V2000D-PTZ User’s Manual Due to the attribute of dynamic bitrate management, “Rate Control” options (CBR, CVBR, and VBR) under Encode page are NOT available when “EcoZone” function is activated. Notes Due to the dynamic frame & bitrate adjustments, both “Rate Control” & “GOP” options ...
-
Page 22: Network
V2000D-PTZ User’s Manual 4. Network 4.1 General This section is for the user to set detailed settings related to wired network condition for the camera. Basic Setting Figure: Network Basic Setting Device Name Enter a device name. HTTP Port: 80, 1025 ~ 65535 This protocol allows for TCP protocol quality without having to open specific ports for streaming. - Page 23 V2000D-PTZ User’s Manual IP Settings Figure: Network IP Settings Item Option/ Range Description User can manually input IP address and the related Manual settings. This is a point-to-point-based protocol that offers authentication, encryption and compression. It PPPoE Mode predominantly authenticates user with the predefined username and password.
- Page 24 V2000D-PTZ User’s Manual Wired Setting Speed & Duplex: Auto/10 or 100 Half Duplex/10 or 100 Full Duplex Due to the collision issue, Half Duplex can only send or receive information at one time, while Full Duplex can receive and transmit in full line rate simultaneously without the issue of collision. For the Mbps number, the larger the number, the faster the results;...
- Page 25 V2000D-PTZ User’s Manual 4.2 FTP Server FTP (File Transfer Protocol), transferring files via TCP-based network like the Internet, is a standard protocol that is adopted to transmit computer files from one host to another. The camera can act as both FTP Server and FTP Client. This section describes how to use the camera as FTP Server while 7.
- Page 26 V2000D-PTZ User’s Manual 4.4 RTSP RTSP is a standard protocol for connecting a client to establish and control streaming data over the web. If you want to allow third-party devices or software to access video/audio streams from the IP camera over the network, you must configure the RTSP ports. The major difference between Unicast and Multicast is how client and server communicate packets with each other.
- Page 27 V2000D-PTZ User’s Manual Museum Search: On/Off Museum Search is used to find video where a defined amount of change in a region of interest is detected. The amount of change in a scene’s region of interest that will be searched for is defined using the Sensitivity.
- Page 28 V2000D-PTZ User’s Manual 4.5 SNMP SNMP (Simple Network Management Protocol) is an Internet standard protocol used for monitoring and managing the status of devices connected to IP networks. Three versions of SNMP have been developed, namely, SNMPv1, SNMPv2c and SNMPv3, with the newest version featuring improvements in performance, flexibility and security.
- Page 29 V2000D-PTZ User’s Manual Input the IP address of SNMP server in “Target IP” field. Heartbeat: On/Off To ensure a network free from delayed notifications, “Heartbeat” communications protocol sends notifications at the selected interval. Select “On” or “Off” ” when a Mode is selected to enable or disable heartbeat function.
- Page 30 V2000D-PTZ User’s Manual 4.6 802.1X 802.1X is an IEEE Standard for port-based network access control and defines the encapsulation of the Extensible Authentication Protocol (EAP) over IEEE 802, which is known as EAP over LAN. Simply select a desired EAP protocol type from the dropdown menu and then input its required subfields to complete setup.
- Page 31 V2000D-PTZ User’s Manual 4.8 DDNS Dynamic Domain Name Server (DDNS) is the system that can automatically upgrade DSN records without further manual editing in real time, resulting in web address directing faster and smoother. Figure 3 - 22: DDNS Settings Basic Setting Enable: On/Off Type: DynDNS/No-IP/Two-DNS/FreeDNS...
- Page 32 V2000D-PTZ User’s Manual Figure: Self Signed & Request Settings Request Similar to the settings of Self-Signed, by clicking the “Generate Certificate” after inputting the required fields, Request will provide user, in addition to showing the information like self signed, with a download option of created certificate for future utilization.
-
Page 33: System
V2000D-PTZ User’s Manual 5. System 5.1 Date & Time Figure: Date & Time Settings Basic Setting Current Server Time The current date/time is displayed here. Synchronization Mode: Manually/PC/NTP Server Manually: Enter information to set date and time manually and individually. ... - Page 34 V2000D-PTZ User’s Manual 5.2 Audio Equipped with audio input/output ports, the camera is able to connect with external audio devices for audio input and output individually. See the settings page and descriptions below for more details. Figure: Audio Settings Audio In Setting Source: Line In Select which audio source will be connected from the 2 options in the dropdown menu.
- Page 35 Never disconnect power or LAN cable during the upgrading process. It takes approximately 3 minutes for the unit to reboot after firmware upgrade process. Click “Choose File” to locate the firmware file and click “Upgrade” to proceed or use Vicon’s PRONTO Device Manager;...
- Page 36 V2000D-PTZ User’s Manual Configuration Setting Reboot Click “Reboot” to simply reboot the camera. Factory Defaults (Retain IP) Click to reset all configuration settings back to factory defaults excluding network settings. Factory Defaults Click to reset all configuration settings back to factory defaults. 5.5 Advanced Security Advanced Secure functionality is used to turn off the access and connection to cameras completely or partially, making the IP camera even safer.
- Page 37 V2000D-PTZ User’s Manual Enable: On/Off While Active Prevention simply blocks the access and connection to the camera, Passive Protection, bans IP addresses that try and fail to access or connect to the IP camera through the specific protocol or service within a defined period of time and with certain frequency; an email is then sent to a predefined user as notification.
- Page 38 V2000D-PTZ User’s Manual Banned IP List Figure: Banned IP List Whenever an IP address is banned, it will be shown on the Banned IP List, including the time it was banned. Select an IP address or select all IP addresses; then click reset to remove it or them from the banned list at your convenience.
-
Page 39: Account
V2000D-PTZ User’s Manual 6. Account 6.1 Account Management Figure: Account Settings Account Setting Access Level: Admin/Operator/User Admin: “Admin” level has the highest privilege control for accessing camera, allowing handling of both live view and all the configuration settings. The default username is ADMIN and password for Admin depends on user’s initial setting. - Page 40 V2000D-PTZ User’s Manual 6.2 LDAP For accessing and maintaining distributed directory information services over an Internet Protocol network, the Lightweight Directory Access Protocol (LDAP), an open, vendor-neutral, industry standard application protocol, has a major role in both intranet and internet applications to facilitate information sharing between devices.
- Page 41 V2000D-PTZ User’s Manual Enable TLS: On/Off User can enable LDAP over TLS after uploading certificate. When TLS is enabled, the data transmission will be done through TLS mode, using encryption for the protection of data communication. (TLS is a widely adopted security protocol designed to facilitate privacy and data security for communications over the Internet, which encrypts internet traffic of all types, making secure internet communication, and therefore internet commerce, possible.) To turn TLS “On”, first click “Choose File”...
-
Page 42: Event Source
V2000D-PTZ User’s Manual 7. Event Source Event source configurations consist of Event Specific, Handler and Arming Schedule. The table below gives an overview of event source configurations and relevant remarks. Settings Type Arming Remark Event Specific Handler Schedule Alarm NO/NC Audio Sound Intensity Motion... - Page 43 V2000D-PTZ User’s Manual Enable: Check the box to enable the OSD function when an event occurs. Text: Input desired text manually to display when event occurs. HTTP Generic Event Enable: Check the box to enable the function when event occurs. ...
- Page 44 V2000D-PTZ User’s Manual Figure: Arming Schedule Setting...
- Page 45 V2000D-PTZ User’s Manual 7.1 Alarm Connecting an alarm input device with the camera can expand alert functions. For example, when an infrared detector connected to the camera detects motion based on heat emission, an alarm input message will be sent to the camera. Additionally, by connecting to an alarm output device such as siren, the camera will send a signal to notify the siren and activate it when receiving an alarm signal either from alarm input device or other detection settings.
- Page 46 V2000D-PTZ User’s Manual 7.2 Audio By connecting to an audio input device, e.g., microphone, the camera can receive an audio input signal from the microphone and react with the certain responses that are preset under this section. Review the information below for details. Figure: Audio Event Settings Basic Setting Enable: Check the box to enable the audio input event function.
- Page 47 V2000D-PTZ User’s Manual 7.3 Motion This function is designed to establish related actions when the camera detects motion issues. Motion detection areas are setup from the PTZ Settings, Preset screen, but the function must be Enabled from this screen first. See below and Section 10.4 of this manual for details. Figure: Motion Detection Settings Motion Zone Area Setting Enable...
- Page 48 V2000D-PTZ User’s Manual 7.4 Network This function is designed to configure related actions when the camera is subject to network conflict or network lost events. Figure: Network Event Settings Basic Setting Wired Network Loss Check the box to enable the detection of network loss. When the camera loses internet access, the network loss event will be detected and recorded.
- Page 49 V2000D-PTZ User’s Manual Regular: When enabled, the recording schedule will progress on a regular basis on the trigger interval settings. Persist: When enabled, regardless of interval, the recording schedule will progress continuously. Trigger Interval: 5 ~ 3600 (sec) The trigger interval is the time between two alarms when in Regular mode.
- Page 50 V2000D-PTZ User’s Manual 7.7 mSD Healthiness This function is designed to establish related actions when the inserted micro SD card has unexpected failed events or is running out of sufficient storage space. Figure: mSD Healthiness Settings Micro SD Card Events Free space Check the box to enable the detection of insufficient space of the inserted micro SD card.
-
Page 51: Video Analytics: V2002D-Ptz Only
V2000D-PTZ User’s Manual 8. Video Analytics: V2002D-PTZ Only Video Analytics (VA) comprises the proprietary algorithm to perform intelligent video analysis, e.g., to detect intrusion or loitering within defined zone from suspicious objects or to count people and traffic flow by designated line deployment. It is especially practical to monitor certain alert areas or key zones; this relieves administrator from constantly staying in front of the monitor by recording only critical scenes where events happen, facilitating interoperability and reducing required recording storage for surveillance camera. - Page 52 V2000D-PTZ User’s Manual analytic. A warning will be sent if a preset is set to be used again. 5. Each analytic has a Handler section. Handler is used to define how to deal with the video analytics result (e.g., audio out, alarm out, recording, etc.). 6.
- Page 53 V2000D-PTZ User’s Manual 8.3 General This page contains general settings shared by all VA functions. Prior to setting up each VA function, it is fundamental to define the settings here before advancing to other function settings. Figure: Video Analytics: General Settings Basic Setting Sensitivity: High/Mid high/Mid/Mid Low/Low Choose a sensitivity level from the dropdown menu to define a clear threshold for triggering all VA...
- Page 54 V2000D-PTZ User’s Manual Figure: Line Counting Settings Line Setting Reference Line Cross Pressing this button will allow user to apply the identical line deployment settings referred from Line Cross function, an easy way to prompt setup and implement. Reset Counting Pressing the button will erase the accumulated counting records.
- Page 55 V2000D-PTZ User’s Manual 8.5 Line Cross This function is designed to establish borderlines to guard certain alerted zones within the camera coverage. For example, administrator can assign multiple lines bordering the area where a valuable object is located to efficiently monitor any suspicious person crossing those borderlines deployed. Figure: Line Cross Settings Basic Setting Reference Line Counting...
- Page 56 V2000D-PTZ User’s Manual Performance Switch to the Live View page and select “Line Cross” from the lower-left VA dropdown menu. When there is a moving object crossing the designated line as in the above image, both the crossed borderline and the rectangular frame enclosing the moving object are highlighted with red color for distinctive identification.
- Page 57 V2000D-PTZ User’s Manual Figure: Loitering Performance on Live View Performance Switch to the Live View page and select “Loitering” from the lower-left VA dropdown menu. When there is a moving object/person traveling into and lingering within the designated zone over a designated period of time defined by administrator, as in the above image, the rectangular frame enclosing the suspicious object/person is highlighted with red color for distinctive identification.
- Page 58 V2000D-PTZ User’s Manual Method Draw a desired shape (octagon at the maximum) covering the desired zone for area counting and define a location for OSD counter; then “Save” to have the settings take effect. Figure: Area Counting Performance on Live View Performance Switch to the Live View page and select “Area Counting”...
- Page 59 V2000D-PTZ User’s Manual Method Draw a and then click “Save” to have the settings take effect. Figure: Intrusion Performance on Live View Performance Switch to the Live View page and select “Intrusion” from the lower-left VA dropdown menu. When there is a moving object trespassing into the designated critical zone defined by administrator, as in the above image, both the rectangular frame enclosing the suspicious object and the defined zone are highlighted with red color for distinctive identification.
- Page 60 V2000D-PTZ User’s Manual Basic Setting Trigger Interval Define an exact threshold of time to trigger Object Removed detection. Either use the slider or enter an exact number in the field. Zone 1 ~ 3 Check the box to enable each zone setting. Press the arrow buttons at the upper-right corner to expand or collapse the setting page of Zone 1 to Zone 3 individually.
- Page 61 V2000D-PTZ User’s Manual Figure: Wrong Direction Settings Basic Setting Enable: Check the box to enable the wrong direction detecting function. Method Press and hold the mouse to draw a green line on targeted area; the blue included angle in the proximity of the green line, appears to indicate the permitted range for vehicles passing.
- Page 62 V2000D-PTZ User’s Manual 8.11 Object Left The detection function “Object Left” is specifically designed to prevent an object from being intentionally deposited in a critical place, e.g., entrance of building or subway station. If a person deliberately leaves an object, such as a backpack, it can be intelligently detected and determined a suspicious abandoned object.
- Page 63 V2000D-PTZ User’s Manual Performance Switch to the Live View page and select “Object Left” from the lower-left VA dropdown menu. When there is a suspicious object left within the designated zone over a certain period of time defined by administrator, as in the above image, the rectangular frame enclosing the suspicious object is highlighted with red color for distinctive identification.
-
Page 64: Video Analytics: V2005D-Ptz Only
V2000D-PTZ User’s Manual 9. Video Analytics: V2005D-PTZ Only Video Analytics with object classification technology processes digital video using a special AI algorithm to perform security related functions. Using these analytics provides a practical solution to reviewing hours of surveillance video to identify incidents that have been configured, increasing efficiency of security monitoring. - Page 65 V2000D-PTZ User’s Manual 9.1 Setup Guidelines Before analytics can be configured, presets must be configured as explained in the PTZ section of this manual. There are five (5) profiles (relating to presets) that can be setup for video analytics. Each profile can be associated with analytics and a preset position.
- Page 66 V2000D-PTZ User’s Manual Basic Setting Click the arrow on Line 1 to open the screen above. Click the arrows on Lines 2 and 3 as needed. Enable: Check the box to allow configuring this function. Direction Select the line direction for crossing, A to B, B to A or in both directions, to help define the exact direction the line is crossed.
- Page 67 V2000D-PTZ User’s Manual 9.3 Loitering Loitering is designed to watch for suspect people/objects that enter and linger within a defined area for a defined period of time. Up to three areas can be defined for loitering, each with a different color, green, blue or yellow.
- Page 68 V2000D-PTZ User’s Manual 9.4 Crowding Crowding is designed to keep track of the number of people/objects in a designated area. This can be useful when it is necessary to minimize the number of people/objects in any given area to create an alarm when there is congestion in the defined area.
- Page 69 V2000D-PTZ User’s Manual 9.5 Intrusion Intrusion can define an area to watch for any suspicious or unauthorized person/object that enters the specified area. This way a critical area can be monitored for any trespassing. Up to three areas can be defined for intrusion, each with a different color, green, blue or yellow.
- Page 70 V2000D-PTZ User’s Manual 9.6 Tailgating Tailgating is designed to control access to a sensitive area and detect if more than one person/vehicle enters an area too close to the previous entry. Up to 3 lines can be configured, each noted by a different color, green, blue or yellow line.
- Page 71 V2000D-PTZ User’s Manual Performance After saving the setting, on the Live page Tailgating can be selected from the Video Analytics dropdown. When an object moves across the designated line too quickly after the previous, the event will be highlighted on the screen. The bounding boxes that will display on Live and Playback video will be green for a person, blue for a vehicle and yellow for an animal.
- Page 72 V2000D-PTZ User’s Manual 9.8 Object Left Object Left is designed to prevent an object from being intentionally deposited in a critical place. If an object is left in a defined area, it can quickly be determined if it is suspicious. Up to three areas can be defined for object left, each with a different color (green, blue or yellow).
- Page 73 V2000D-PTZ User’s Manual Notes on Anchor Point: Setting the anchor point adds another dimension to fine-tune how an event is triggered. Since objects are represented as a bounding box, this pinpoints exactly where in that box the trigger occurs. By selecting the specific place in the bounding box (Bottom Center/Right/Left, Top Center/Right/Left, or Center Center) that the object triggers the alarm, each analytic event can be customized for different scenarios.
-
Page 74: Event Setting
V2000D-PTZ User’s Manual 10. Event Setting 10.1 Alarm Out This section is designed to set up detailed settings for alarm output(s) when events occur. Make sure you have enabled alarm output in each event section to activate this function. Figure: Alarm Output Settings Alarm Out Enable: Select “On”... - Page 75 V2000D-PTZ User’s Manual NC (Normally Closed): An alarm will be triggered when the external contact opens. On Time: 0.1 ~ 200 (sec) Define a specific duration for alarm output. Off Time: 0.1 ~ 200 (sec) Define a specific interval for each alarm output triggering. Count: 1 ~ Infinite Frame Define how many frames will be counted for alarm output.
- Page 76 V2000D-PTZ User’s Manual Server Address Input a designated server address for email notification. Port Set “25” as default or change to dedicated number. Discuss with your IT administrator for details if necessary. User Name Input a username with privileges to access the server. Password Input the password associated with the username.
- Page 77 V2000D-PTZ User’s Manual Basic Setting Server Address Input an FTP server address. Port: 21/1025 ~ 65535 Set “21” as default or change to dedicated number. Discuss with your IT administrator for details if necessary. Username Input a user name with privileges to access the server. Password Input the password associated with the username.
- Page 78 V2000D-PTZ User’s Manual Clip Duration: 5 ~ 10 (sec) Set the length limit for recording file. Clip Size: 50 ~ 100 (MB) Define the file size for recording file. Record Codec: H.264/H.265 Choose type of video codec. H.264: Camera records video with H.264 video file format. ...
- Page 79 V2000D-PTZ User’s Manual Capacity Capacity only displays when the Status is “Working normally;” it shows the capacity of the inserted SD card. Free Space Free Space only displays when the Status is “Working normally;” it shows the amount of free space on the inserted SD card.
- Page 80 V2000D-PTZ User’s Manual 10.7 Sound This section is designed to set up detailed settings for audio output sounds when events occur. Make sure you have enabled Audio Out function in each event section to activate this function. Figure: Sound Settings Basic Setting Mode: One Shot/Infinite ...
- Page 81 V2000D-PTZ User’s Manual 10.8 HTTP Generic Event HTTP Generic Event can help a user send messages and commands directly to Network Video Recorder (NVR), which supports CGI commands function. User can customize the messages and commands as needed. Figure: HTTP Generic Event Settings Basic Setting Method Select one of the events that can be communicated to the VMS/NVR, which supports HTTP generic...
-
Page 82: Ptz Settings
V2000D-PTZ User’s Manual 11. PTZ Settings In this chapter, the user will be guided through setup steps for various types of PTZ operations, including PTZ movements (pan, tilt, zoom and focus); and actions (Scan, Preset, Patrol (Tour) and Pattern). In addition, Basic PTZ settings and PTZ Control Panel settings are also explained. Click “Save”... - Page 83 V2000D-PTZ User’s Manual Zoom Setting Figure: Zoom Setting Digital Zoom Limit: 1X/2X/4X/8X This function allows user to use digital zoom on the view to enlarge the view at 1x, 2x, 4x, and 8x, Zoom Speed: High/Medium/Low Allows the user to define the speed at which the camera changes from one zoom depth to another. High is a faster speed.
- Page 84 V2000D-PTZ User’s Manual Preset/Patrol Move Speed: 1 ~ 500 Use the slider to select Preset and Patrol speed. Higher value means the Preset and Patrol movement speed will be faster. 11.4 Preset 11.5 Patrol Refer to sections “ ” and “ sections for details on Preset and ...
- Page 85 V2000D-PTZ User’s Manual region of interest where activity usually would occur, while 151° and above is ignored, as this region may have an object blocking the scene. Figure: Pan/Tilt Limit Refer to the figure above and table below to go through the steps for setting up ...
- Page 86 V2000D-PTZ User’s Manual 11.3 Scan Scan action allows the camera to automatically pan back and forth regularly within a specified limit, at a constant speed and with predefined and constant tilt, zoom and focus values. In Scan action, the entire scene (sequence of views) is being monitored repeatedly, so it is suitable for touring the scene without losing focus at any time and keeping the covered scene defined correctly.
- Page 87 V2000D-PTZ User’s Manual Go to: Tilt/Zoom/Focus Go to a previously setup tilt, zoom and focus for Scan action, by dragging and adjusting the tilt, zoom or focus bar or entering a value for setting tilt, zoom or focus on the PTZ control panel and then saving by clicking “Save”.
- Page 88 V2000D-PTZ User’s Manual Preset Position Figure: Preset List Preset List Preset Name: Displays the selected Preset Name on screen Text Color: Displays the selected color of Preset Name on screen Auto Refocus: Displays the selected option for Auto Refocus, On/Off. ...
- Page 89 V2000D-PTZ User’s Manual Figure: Add Preset Position Preset Position Text Color: Select the color for the name of Preset displayed on screen. Two options are available, “White” and “Black.” Auto Refocus: Set “On” to allow the camera auto refocus when viewing a Preset. Setting “Off” disables this function.
- Page 90 V2000D-PTZ User’s Manual 11.5 Patrol Patrol action configures a sequence of presets and dwell time for each preset for the camera automatically and regularly repeated action. User can set up to 4 Patrols and add a maximum of 128 Presets in each Patrol; a Preset can be repeated. Patrol is suitable for situations where user has a set of key areas to monitor following a convenient monitoring sequence and dwell time.
- Page 91 V2000D-PTZ User’s Manual 11.6 Pattern Pattern action memorizes camera series of up to 128 pan, tilt, zoom and presets operations to be automatically and regularly repeated when the Pattern is activated. By default, the focus and iris are in auto status during the time the pattern is being memorized. Pattern is suitable when user wants to use the camera for touring a scene (sequence of views) while having more flexibility on adjustment of pan/tilt speed and angle, zoom depth and presets selection.
-
Page 92: Appendix 1: Continuous Recording To An Sd Card
V2000D-PTZ User’s Manual Appendix 1: Continuous Recording to an SD Card There are two options for continuous recording to the uSD card, Regular and Persist. Regular uses pre-defined intervals. The date/time must be set properly to record the clips, preferably with time synched to an NTP server. - Page 93 V2000D-PTZ User’s Manual Playback: Press Search to update the timeline. The selected clip will play, and the playback will stop at the end of the clip. Click on the next clip to play it back.
- Page 94 V2000D-PTZ User’s Manual 2. If user wants to use Persist mode and see the timeline updated: If the event has not ended yet, you can see the blue color on the timeline after 50 MB file is generated. However, if the event is finished, then the green color will be blended with the blue timeline.
- Page 95 V2000D-PTZ User’s Manual Playback: Press Search to update the timeline. The selected clip will play, and the playback will stop at the end of the clip. Click on the next clip to play it back.
-
Page 96: Vicon Standard Equipment Warranty
(bug) free. Software support via telephone, if provided at no cost, may be discontinued at any time without notice at Vicon’s sole discretion. Vicon reserves the right to make changes to its software in any of its products at any time and without notice.
Need help?
Do you have a question about the Roughneck AI V2000D-PTZ and is the answer not in the manual?
Questions and answers