Table of Contents
Advertisement
Advertisement
Table of Contents

Related Manuals for Thermo Scientific SlideMate AS


Summary of Contents for Thermo Scientific SlideMate AS
- Page 1 Thermo Scientific SlideMate AS Operator Guide A83910100 Issue 1...
- Page 2 SlideMate AS Operator Guide...
- Page 3 A83910100 Issue 1 Company Information Copyright 2014. Pyramid Innovation Ltd. All rights reserved. Pyramid Innovation Ltd is an ISO 9001:2008 Accredited Company. Pyramid Innovation Ltd is the trading name of Pyramid Innovation Ltd. All other trademarks are the property of Pyramid Innovation Ltd and its subsidiaries Pyramid Innovation Ltd makes every endeavour to ensure that the information contained in its support documentation is correct and clearly stated but does not accept responsibility for any errors or omissions.
-
Page 4: Symbols
SlideMate AS Operator Guide Symbols The following symbols and conventions may be used throughout this document and on the instrument: This symbol is used on the equipment, or in a document, to indicate that instructions must be followed for safe and correct operation. If this symbol appears on the instrument, always refer to the operator guide. -
Page 5: Table Of Contents
A83910100 Issue 1 Table of Contents COMPANY INFORMATION .......................... 3 SYMBOLS .............................. 4 TABLE OF CONTENTS ............................ 5 SAFETY INFORMATION .......................... 7 ............................... 7 NTRODUCTION .............................. 7 ENERAL AFETY .............................. 8 HEMICAL AFETY ............................... 8 NVIRONMENT ............................ 8 ARRANTY TATEMENT ... - Page 6 SlideMate AS Operator Guide ................................. 29 LUETOOTH ............................ 30 DMIN ENERAL ................................ 31 RINTER .................................. 32 Object Hierarchy ............................ 33 CHAPTER 4 – ADVANCED OPERATION ...................... 34 ................................. 34 TEMS Adding, Editing and Deleting ........................ 34 Add Data Item .............................. 34 Editing a Data Item ............................ 35 Deleting a Data Item ............................ 36 ...
-
Page 7: Safety Information
A83910100 Issue 1 Safety Information Introduction Pyramid Innovation Ltd products are designed for convenient and reliable service; however, incorrect actions by a user may damage the equipment, or cause a hazard to health. The following sections contain important information for the safe setup and use of the instrument. The following sections contain important information for the safe setup and use of the instrument, and should be read and understood by the user before using the instrument. -
Page 8: Chemical Safety
SlideMate AS Operator Guide Chemical Safety The introduction of chemicals creates potential hazards. Thermo Fisher Scientific has adopted the following position with regard to the subject of volatile chemicals used in laboratories: Do not use harmful chemicals or solvents to clean the instrument. -
Page 9: How To Use This Guide
SlideMate AS. Chapter 2 - Installation and Setup This chapter is a step-by-step guide to installing and setting up SlideMate AS and its accessories. Chapter 3 - Basic Operation This chapter explains the basic operating techniques required to perform routine tasks and use SlideMate AS on a day-to-day basis. -
Page 10: Chapter 1 - Introducing Slidemate As
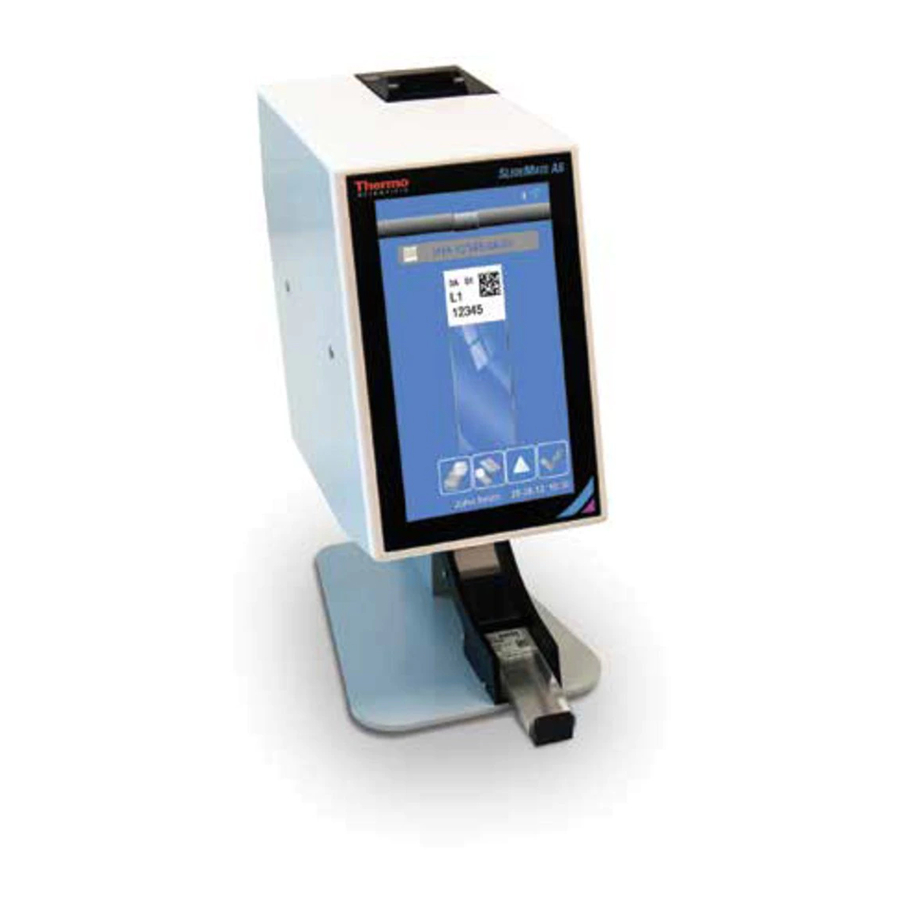
SlideMate AS Operator Guide Chapter 1 – Introducing SlideMate AS Introduction The printer is designed to print slides on-demand. The display shows you what will be printed. To print a slide you drop it into the opening in the black plastic guide on the top of the printer. -
Page 11: Identification Of Parts
A83910100 Issue 1 Identification of Parts The following diagrams identify the different components of the PrintMate AS. Slide Input Guide Connections and Power Input Touch Display Slide Connection Tray Mains Adaptor... -
Page 12: System Specifications
SlideMate AS Operator Guide System Specifications Mechanical Specifications Height 295mm Width 140mm Depth 200mm Weight 3.78Kg Electrical Specification Voltage 24V DC Current 1.5A Environmental Specification Warning - For indoor use only 5 ˚C to 40 ˚C Temperature (Operating Limits) +15˚C to +30 ˚C (+59 ˚F to +86 ˚F) -
Page 13: Chapter 2 - Installation And Setup
A83910100 Issue 1 Chapter 2 – Installation and Setup Installation and Setup This chapter describes the installation and setup procedures for SlideMate AS and covers the following subjects: Unpacking the SlideMate AS. Locating the SlideMate AS. Electrical Connections and Start Up Procedure. -
Page 14: Unpacking
SlideMate AS Operator Guide Unpacking To unpack the SlideMate AS: Remove the accessories from the top of the packaging inside the box. Remove the upper inner packaging from the box. Gently lift the instrument out of the packaging and carefully put it on a flat level surface. -
Page 15: Locating The Slidemate As
A83910100 Issue 1 Locating the SlideMate AS... -
Page 16: Electrical Connections And Start-Up Procedure
SlideMate AS Operator Guide Electrical Connections and Start-Up Procedure Once you have unpacked your SlideMate AS and located it in the correct position within your laboratory, you need to ensure the connections to instrument are setup correctly. Carry out the following: ... -
Page 17: Setting Up Slidemate As
A83910100 Issue 1 Setting up SlideMate AS Once you have unpacked the SlideMate AS and position it in the correct location, connect it up to an Ethernet cable or a USB cable. Note The use of an Ethernet cable or USB cable is optional. The instrument can be used as a stand alone. -
Page 18: Changing The Thermal Transfer Ribbon
SlideMate AS Operator Guide Changing the Thermal Transfer Ribbon Removing the Thermal Transfer Ribbon Once the instrument has used all the Thermal Transfer Ribbon and filled the Collection Spool, carry out the following instructions to remove: Open the sliding door. -
Page 19: Fitting The Thermal Transfer Ribbon Roll
A83910100 Issue 1 Fitting the Thermal Transfer Ribbon Roll In order to fit the Thermal Transfer Ribbon, carry out the following instructions: Slide open the side door to access the spools inside the instrument. Fit the Supply Spool onto the instrument using the clear lead attached on the roll. - Page 20 SlideMate AS Operator Guide Tape Matt Side Print Head Collection Spool Tape Guide Pin Supply Spool...
-
Page 21: Printer Status Indication
The user is in printer setup and the printer is offline. Registration Procedure Once the SlideMate AS is located and setup correctly, you will need to register the product to complete the warrantee registration. Once the printer setup is complete, the warrantee registration page will be displayed. -
Page 22: Iqoq Print Test Slide
If you put the slide in glass facing forward, the SlideMate AS will try to print then you will have to reprint. The printed slide will drop into the collection tray. -
Page 23: Chapter 3 - Basic Operation
A83910100 Issue 1 Chapter 3 – Basic Operation Basic Operation Main User Interface The printer is now ready to print slides. The default Template is displayed which has three fields. Tape Level This tells the user how much tape is left before it needs replacing. -
Page 24: Editing Label Field Data
SlideMate AS Operator Guide Editing Label Field Data From the Main Screen showing the slide that you are going to print, press the print area on the Slide which will then allow you to edit the information shown. Moves from field to field. -
Page 25: Creating A Sequence Of Slides
A83910100 Issue 1 Creating a Sequence of Slides From the Main Screen showing the slide that you are going to print, press . This will then take you to the Create Sequence screen. Press to modify the slide numbers to and from that will appear on the series of slides. -
Page 26: Selecting A Protocol And Saving A Protocol
SlideMate AS Operator Guide Selecting a Protocol and Saving a Protocol Once the sequence has been created, use the < or > arrows to select each field. To create a protocol; select the slide and change the field, i.e. Special Stain for that slide. -
Page 27: Using The Touch Panel
A83910100 Issue 1 Using the Touch Panel Administration Configuration Menus From the main start up screen press the settings button. Enter the pass code 7251. Note If the password option is not enabled, you can activate in the Printer Section of the Settings Menu. -
Page 28: Wi-Fi
SlideMate AS Operator Guide Wi-Fi Note WiFi connection cannot be used if browser approval is necessary. In order to enable the Wi-Fi function on the instrument: From the Settings menu, press the Wi-Fi button. This then takes you to the Wi-Fi screen ... -
Page 29: Bluetooth
A83910100 Issue 1 Bluetooth In order to enable the Bluetooth function on the instrument: From the Settings menu, press the Bluetooth button. This then takes you to the Bluetooth screen. Check the tick box to enable the Bluetooth. ... -
Page 30: Admin General Menu
SlideMate AS Operator Guide Admin General Menu The General function lists all the information and instrument settings relating to the SlideMate AS. Version The current version number of the software loaded on the instrument Driver This is version number of the Driver of the instrument... -
Page 31: Printer
A83910100 Issue 1 Printer This function allows you to make changes to the settings regarding the print function of the instrument. From the Admin Configuration Menu press the Printer button. The following screen will be displayed: This allows the manual printing of a slide. Press the slide in the middle of the screen Manual Print once a slide has been placed into the... -
Page 32: Data
The Templates function allows the user to set up and save Templates used when Templates printing information onto slides. Also to select any previously saved templates. This function allows the SlideMate AS to scan a cassette and transfer the information Translators into an existing template then print that information onto a slide. -
Page 33: Object Hierarchy
A83910100 Issue 1 Object Hierarchy There can be any number of objects. For example: Request Form Tissue Pot Cassette Slide The relationship of the objects is parent and child. The Request form is the parent of the Tissue Pot and the Tissue Pot is the parent of the cassettes etc. -
Page 34: Chapter 4 - Advanced Operation
SlideMate AS Operator Guide Chapter 4 – Advanced Operation Items Adding, Editing and Deleting Data items are used to store data and display data in templates. Scroll Buttons Selected Item Delete Selected item Edit Selected item Add item Save and Close Add Data Item ... -
Page 35: Editing A Data Item
A83910100 Issue 1 Name Name of Item specified previously Text Alpha / Numeric Numeric Numbers Only Data Type Used when multiple List items are required Date Fixed Field time Character Maximum number of characters for Count the item Text that will be displayed in the Default Text field as default. -
Page 36: Deleting A Data Item
SlideMate AS Operator Guide Deleting a Data Item Scroll Buttons Select Item Delete Selected Item Edit Selected Item Add Item Save and Close Select the item to be deleted. Hit the Garbage Can button. If the item is on a template; remove it first before deleting the item. -
Page 37: Translators
A83910100 Issue 1 Translators Translators have two functions: The first use is to take a barcode and separate the fields to populate the items on the template. The second use is to take the data items and place them into a barcode and print it on the template. - Page 38 If scanning a barcode in order to populate a field, hold the barcode under the scanner on the left lower side of the SlideMate AS. Or manually enter the date string that will be sent from the LIS through the Cache Directory.
-
Page 39: Delimiters
A83910100 Issue 1 Delimiters Select the Delimiter and then press the checkmark. If the delimiter is not on the list, press Add the delimiter. Press the checkmark to accept the changes. If multiple Delimiters are required, press until you have all the necessary delimiters. - Page 40 SlideMate AS Operator Guide Name Press to change the name of the translator. Object This is by default. Code Example of Code Delimiter(s) Press to verify Delimiters Item (Data) assignments Data assignment attempts to assign the correct item to the delimited data.
-
Page 41: Rules
A83910100 Issue 1 Rules Rules can be set based on the data that is to be delimited. E.g. If you want to use this delimiter for the Prefix, highlight Prefix and press Rules. The following screen will appear allowing you to either select a desired Rule or to create a new Rule. -
Page 42: Translators Without Delimiters
SlideMate AS Operator Guide Translators without Delimiters From the Data Screen, press the Translators button. Press the button to add a new Translator. Rename the Translator as required. Enter the code or scan the barcode. Once the code appears on the screen, press the checkmark to accept changes. - Page 43 A83910100 Issue 1 The Data Assignments screen will then appear. This allows the user to assign the line separators that will allocate the individual parts of the code. Selects Separation Line Adds the Separation Line Removes the Separation Line Moves the Separation Line to the Left Moves the Separation Line to the Right ...
-
Page 44: Templates
SlideMate AS Operator Guide Templates Adding, Editing and Deleting Scroll Buttons (if required) Select Item Delete Selected Item Edit Selected item Add Item Save and Close Add a Template From the Settings Menu, after entering the Password; Select Data then Templates. -
Page 45: Template Settings
A83910100 Issue 1 Name of the item selected Delete Moves to next item Template Settings Template Items Accept Changes Move selection on the slide Page Selection Flips the Field Translator No. Configuration Template Template Settings When you press the Template Settings button , the following screen appears: Allows the user to change or edit Name... -
Page 46: Template Items
SlideMate AS Operator Guide Template Items Once you have set up the Template Settings, you need to add the Items that will be displayed on that Template. When you press the Template Items button , the following screen appears: Delete Item... - Page 47 A83910100 Issue 1 If a Barcode is desired on the template; you must have a barcode field added to the template to use as a container for the data within the barcode. Choose the translator used for the data Translator required Code128 (Subset A), Data Matrix or QR- Symbology...
-
Page 48: Chapter 5 - Troubleshooting
SlideMate AS Operator Guide Chapter 5 – Troubleshooting Troubleshooting Table Error / Symptom Possible Cause Remedy Connect the mains lead to the Mains lead is not connected. instrument, refer to Electrical Connections and Start-Up procedure. Screen is blank on switch Mains socket is not switched on. -
Page 49: Chapter 6 - Cleaning And Maintenance
Avoid touching the print head surface with bare skin. Remove the print ribbon from the printer. Remove a swab from the SlideMate AS cleaning kit (part no) and bend the tube at the swab end to release the solution. Rub the print surface edge (where the print head contacts the slide) of the print head firmly with the swab. -
Page 50: Appendices
SlideMate AS Operator Guide Appendices Appendix A – Consumables and Accessories Consumables and Accessories List Description Part Number Thermal Transfer Ribbon A83910001 Power adaptor A83920013 Input:100-240V ~ 1.1A, 50-60Hz Output: 24V DC 1.5A Mains lead UK A83920012 Mains lead EU... -
Page 51: Appendix B - Repacking Instructions
Place the Upper inner foam packaging on top of the SlideMate AS instrument and gently press into place. Place the upper packing into the box and place all the accessories into the box. -
Page 52: Appendix C - Approved Slides
SlideMate AS Operator Guide Appendix C – Approved Slides Description Thermo Scientific Superfrost® slides (White European) Thermo Scientific Superfrost® Plus slides (White Adhesion) Thermo Scientific Polysine Slides (White) Super Up-Rite Slide (White) Bond-Rite Slides (White) Thermo Scientific Superfrost Slides (White) -
Page 53: Appendix D - Icon Glossary
A83910100 Issue 1 Appendix D – Icon Glossary About Printer Bluetooth On Data Settings Data Items Data Translators Date & Time Display Settings General Settings Hub Settings International Keyboard Settings Network Settings Printer Busy Printer Ready Printer Setup Printer Settings Scanner Settings Software Update Sound Settings... -
Page 54: Index
SlideMate AS Operator Guide Index A D Add Data Item ............... 34 Data Adding, Editing and Deleting ........ 34 Object Hierachy ............ 3 3 Advanced Operation ............. 34 Deleting a Data Item ............. 3 6 Delimiters .............. 39 Items ................ 34 E Rules ................ 41 Templates .............. 44 Editing a Data Item ............ 3 5 Translators ............... 37 Translators without Delimiters ........ 42 F Appendices .............. 50 Appendix A – Consumables and Accessories ... 50 Fitting the Thermal Transfer Ribbon Roll ...... 1 9 Consumables and Accessories List ...... 50 ... - Page 55 A83910100 Issue 1 Environmental Specification ........ 12 Add Data Items............ 4 6 Mechanical Specifications ........ 12 Adding, Editing and Deleting ........ 4 4 Print Specification ............ 12 Template Items ............ 4 6 Template Settings ............ 4 5 T Translators for Data Items .......... 3 7 Troubleshooting ............ 4 8 Templates Troubleshooting Table .......... 4 8 Add a Template ............ 44 ...
Need help?
Do you have a question about the SlideMate AS and is the answer not in the manual?
Questions and answers
The set up password on the printer page has accidentally been pressed and although its working it keeps asking for the password but I can't get back to the printer page to turn off the set up password option