Table of Contents
Advertisement
Quick Links
Advertisement
Table of Contents

Related Manuals for ESDEC CLICKFIT EVO


Summary of Contents for ESDEC CLICKFIT EVO
- Page 1 MANUAL EN MOUNTING SYSTEM CORRUGATED ROOF LANDSCAPE CORRUGATED ROOF www.esdec.com...
- Page 2 • Roof surface type: Corrugated sheets • Roof pitch: Between 15 and 60 degrees (35 degrees is optimal) date. Esdec B.V. reserves the right to make adjustments to this document without prior notice. Edge zone...
- Page 3 3. ClickFit EVO End Clamp Support Grey 1008065 ACCESSORIES 3B. ClickFit EVO End Clamp Support Black 1008065-B 4. ClickFit EVO End Cap Without End Clamp Support Grey 8. ClickFit EVO Mounting Rail Connector Piece 1008066 1008061 4B. ClickFit EVO End Cap Without End Clamp Support Black 1008066-B 5.
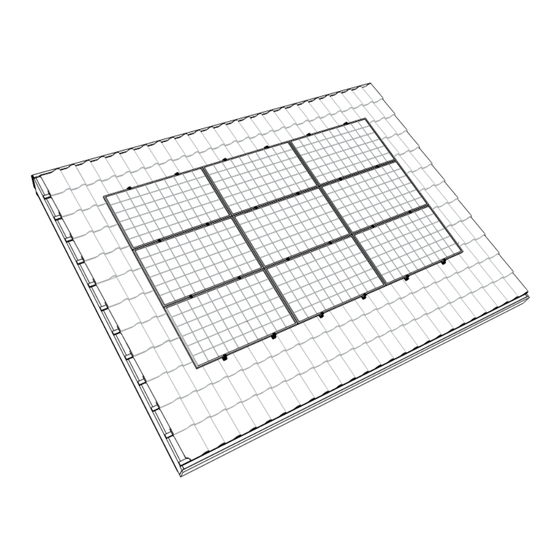
- Page 4 2 INSTALLATION PREPARATIONS 1 DETERMINE THE ROOF CONDITION min. 30 cm Note: Make sure your roof is in good condition! min. 30 cm 2 POSITION THE SOLAR PANELS min. 30 cm Note: Place the solar panels on a roof surface without shade.
- Page 5 4 INSTALLING THE MOUNTING BRACKETS 1 PLACE THE MOUNTING BRACKETS ON THE PURLINS max. 1,4 m 2/4W Only use the (existing) roof screws in the positions indicat- ed by the corrugated sheet supplier. Screws should not be used in different positions. Place the brackets on a rise and in a purlin.
- Page 6 5 MOUNTING THE RAILS 1 PLACE THE RAIL ON THE MOUNTING BRACKET AND CLICK IT IN PLACE Click! 1. Make sure the rail exceeds 80-250 mm beyond the last mounting bracket. 2. First place the rail over the entire length of the brackets before clicking it in place.
- Page 7 7 MOUNTING THE FIRST SOLAR PANEL 1 MOUNT THE FIRST SOLAR PANEL ONTO THE RAILS Note: Click the cables into the cable clip and slide the panel to the bottom of the rail. 2 PLACE THE MODULE CLAMP AND SLIDE THE END CLAMP SUPPORT AND END CAP ONTO THE RAIL Click! 1.
- Page 8 Repeat steps 7 – 9 to finish the rows. QUICK MAKE THE CLICK WITH ESDEC Esdec RELIABLE Londenstraat 16 Esdec has developed, produced and supplied professional mounting systems for solar panels on 7418 EE Deventer INNOVATIVE roofs since 2004. ClickFit and FlatFix are inspired by The Netherlands installers who regularly place solar panels.
Need help?
Do you have a question about the CLICKFIT EVO and is the answer not in the manual?
Questions and answers