Table of Contents

Related Manuals for ESDEC Clickfit Evo


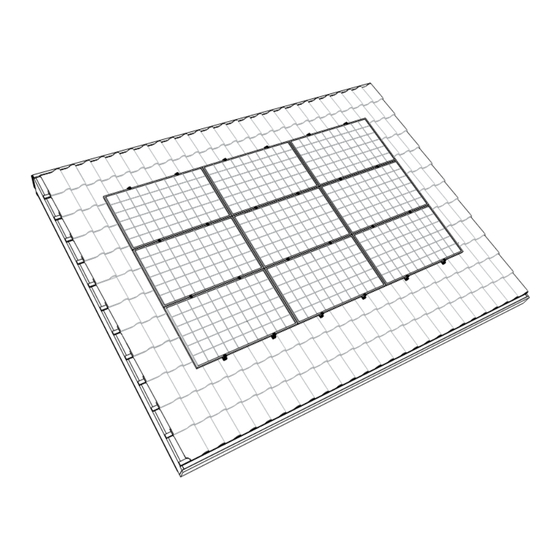
Summary of Contents for ESDEC Clickfit Evo
- Page 1 MANUAL MOUNTING SYSTEM WITH TRUSSHOOK FOR PITCHED ROOF WITH TILES portrait layout landscape layout ClickFit Evo mounting system with trusshook for solar panels, for pitched roofs with roof tiles Rev. 31.10.18 © ESDEC BV 2018...
-
Page 2: Table Of Contents
The manufacturer rejects all responsibility for damage or injuries caused by failure to meticulously follow this mounting manual and failure to exercise the usual caution during the transportation, mounting and use of the ClickFit Evo mounting system with truss- hook. -
Page 3: Introduction
Read the manual carefully so that you are aware of its entire contents. Follow the instructions in the manual meticulously. Always execute the actions in the correct sequence. Store the manual in a safe and dry place. If you lose the manual you can request a new copy from Esdec B.V. 2. General installation conditions General Failure to comply with the instructions in this document can result in the nullification of all guarantee and product liability claims. - Page 4 Removal and disassembly Remove the product in accordance with the local laws and regulations. Guarantee Guarantee in accordance with guarantee conditions and general terms and conditions of Esdec BV. These can be viewed at the website www.esdec.com. Liability The manufacturer does not accept any liability whatsoever for damage and or injury caused by failure to (stringently) comply with the safety regulations and instructions in this manual, or due to inattentiveness during the installation of the product specified in this document and any accompanying accessories.
-
Page 5: Product Description
3. Product description The ClickFit Evo mounting system consists of the patented adjustable trusshooks, mounting rails and the mounting materials necessary to mount the solar panels on a tiled roof in portrait or landscape layout. The trusshook has a rotatable click bracket that enables the mounting rails to be clicked onto the trusshook both horizontally and vertically. -
Page 6: Exploded-View Mounting System In Landscape Layout
4.2 Exploded-view mounting system in landscape layout 4.3 Trusshook for portrait or landscape layout The trusshook has rotatable click bracket so that the mounting rail can be clicked onto the trusshook both vertically and horizontally. This allows the trusshook to be applied for both portrait and landscape layouts. Trusshook with click bracket Trusshook with click bracket in portrait layout... -
Page 7: Parts List
4. ClickFit Evo trusshook Article no: 100-80 5. ClickFit Evo trusshook filling rubber Article no: 100-8063 6. ClickFit Evo Mounting rail cable clip optimizer ready Article no: 100-8062 7. ClickFit Evo Mounting rail end cap grey Article no: 100-8060 7B. ClickFit Evo Mounting rail end cap black Article no: 100-8060-B 8. -
Page 8: Mounting Preparation
5. Mounting preparation 5.1 Checking tools and accessories Here is a list of the required tools/aids: Marker / chalk Brush Tape measure Battery-powered drill Metal saw Safety gloves Safety glasses Safety helmet Safety clothing Safety shoes Mouth mask Hearing protection Scaffold or stable safe ladder 5.2 Cleaning the roof... -
Page 9: Determining And Measuring The Position Of The Solar Panels
5.3 Determining and measuring the position of the solar panels When determining the position of the solar panels on the pitched roof it is very important to pay attention to the amount of sunlight received during the entire day and during the entire year. Place the panels on a roof surface that is not shaded. The shadows of a chimney, dormer window, trees and nearby buildings have a detrimental effect on the yield of the solar panels. -
Page 10: Installation Of Mounting System In Portrait Layout
6. Installation of mounting system in portrait layout 6.1 Pre-mounting the mounting rail connector First determine the rail length required for the row of solar panels. You can connect the mounting rails to each other with mounting rail connectors. There are small clamps with teeth on the mounting rail connector that grip the inside of the rail. -
Page 11: Fastening Trusshooks
6.2 Fastening trusshooks 1. Slide the tile above the trusshook upwards, under the tile on top of it. Place the mounting flange of the trusshook on the roof batten, ensure that it connects correctly and pull the trusshook against the tile. Place the trusshook in the concave part (dip) of the underlying tile. -
Page 12: Fastening The Mounting Rail
6.3 Fastening the mounting rail 1. Place the mounting rail in the installed trusshooks. 2. Ensure that the end of the mounting rail protrudes 90 - 250 mm from the last trusshook. 3. Now click the mounting rail onto the trusshooks. Ensure that it clicks on firmly. 4. -
Page 13: Mounting The Mounting Rail Cable Clip Optimizer Ready And Optimizer
6.4 Mounting the mounting rail cable clip optimizer ready and optimizer (option) 1. Position the cable clip on the top mounting rail of a row. One cable clip is used per solar panel. The cable clips are under the middle of the panel. Place the cable clips approximately 1m from each other. 2. - Page 14 6.5 Mounting 1st solar panel on the mounting rails Mounting aid (Option): Click the mounting aid (2x) onto the frame on the back of the solar panel. Use the mounting holes at the top of the frame for this. Click the cables of the solar panel securely into the cable clamp on the mounting aid. Hang the solar panel, including the mounting aid, on the mounting rail.
-
Page 15: Mounting Other Solar Panels On The Rails
6.6 Mounting other solar panels on the mounting rails Click the universal module clamps onto the mounting rails. Slide them against the first solar panel. Place the second solar panel on the mounting rail, click the cables of the solar panel securely into the cable clip and slide the solar panel to the first against the universal module clamp. -
Page 16: Completing The Mounting Of The 1St Row Of Solar Panels
6.7 Completing the mounting of the 1st row of solar panels 1. Allow the mounting rail to protrude 20 - 35 mm from the edge of the solar panel. Slide the mounting rail end cap with universal module (end) clip onto the mounting rail. Attention! Choose the correct recess so that the end clip connects to the solar panel. -
Page 17: Completing The Mounting Of Several Rows Under Each Other
6.8 Completing the mounting of several rows under each other 1. To obtain an uninterrupted field of panels you slide the underlying solar panels against the row of solar panels above them. 2. Repeat the steps of chapter 6.5 - 6.7. The field of panels is now finished! Attention! See appendix for restrictions and other details. -
Page 18: Installation Of Mounting System In Landscape Layout
7. Installation of mounting system in landscape layout 7.1 Pre-mounting the mounting rail connector First determine the total rail length required for the solar panels under each other. You can connect the mounting rails to each other with mounting rail connectors. The mounting rail connector has small clamps with teeth that grip the inside of the rail. -
Page 19: Fastening Trusshooks
7.2 Fastening trusshooks 1. Slide the tile above the trusshook upwards, under the tile above it. Place the mounting flange of the trusshook on the roof batten, ensure that it connects correctly and pull the trusshook against the tile. Place the trusshook in the concave section (dip) of the underlying tile. -
Page 20: Fastening The Mounting Rail
7.3 Fastening the mounting rail 1. Place the mounting rail in the installed trusshooks. 2. Ensure that the end of the mounting rails protrudes 90 - 250 mm from the last trusshook. 3. Now click the mounting rail onto the trusshooks. Ensure that it is firmly clicked into place. 4. -
Page 21: Mounting The Mounting Rail Cable Clip Optimizer Ready And Optimizer
7.4 Mounting the mounting rail cable clip optimizer ready and optimizer (option) 1. Position the cable clip on the mounting rail of a row. One cable clip is used per solar panel. The cable clips are positioned under the centre of the panel. Place the cable clips approximately 1 m apart. 2. - Page 22 7.5 Mounting the 1st solar panel on a mounting rails Hang the solar panel on the mounting rail. Click the cables of the solar panel into the cable clip that has been installed. Slide the first solar panel to the bottom of the mounting rail. Leave 20 - 35 mm of the rail protruding visibly under the solar panel.
-
Page 23: Mounting Other Solar Panels On Then Rails
7.6 Mounting other solar panels on the rails Click the universal module clamps onto the mounting rails. Slide them against the first solar panel. Place the second solar panel on the mounting rail, click the cables of the solar panel securely into the cable clip and slide the solar panel to the first against the universal module clamp. -
Page 24: Completing The Mounting Of The 1St Row Of Solar Panel Above Each Other
7.7 Completing the mounting of the 1st row of solar panels above each other 1. Allow the mounting rail to protrude 20 - 35 mm from the edge of the solar panel. Slide the mounting rail end cap with universal module (end) clip onto the mounting rail. Attention! Choose the correct recess so that the end clip connects with the solar panel. -
Page 25: Completing The Mounting Of Several Rows Next To Each Other
7.8 Completing the mounting of several rows next to each other 1. To obtain an uninterrupted field of solar panels you slide the adjacent solar panels against the row of solar panels. 2. Repeat the steps of chapter 7.5 - 7.7. The panel field is now finished! Attention! See appendix for restrictions and other details. -
Page 26: Appendix
8. APPENDIX 8.1 Specifications for installation 8.1 - 01 Slide the connector into the ends of the mounting rails. Slide the connector to the centre of the middle stud of the connector. This ensures that the connector is divided equally over the 2 rail ends. 8.1 - 02 The first trusshook must be fitted a minimum of 90 mm from the end of the mounting rail. -
Page 27: Tightening Moments
8.1 - 05 The trusshook must be mounted a minimum of 90 mm from the end of the mounting rail. And a maximum of 250 mm. 8.1 - 06 The mounting rails must protrude 20 - 35 mm from the edge of the solar panel.
Need help?
Do you have a question about the Clickfit Evo and is the answer not in the manual?
Questions and answers