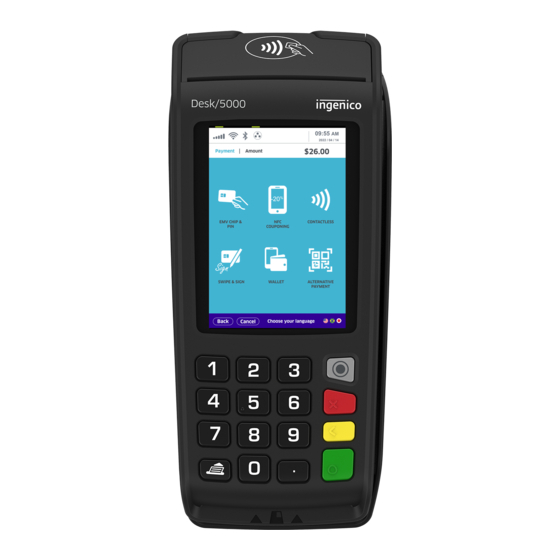
Ingenico Desk/5000 Manual
Pinpad
Hide thumbs
Also See for Desk/5000:
- User manual (39 pages) ,
- Quick start manual (24 pages) ,
- Quick reference manual (9 pages)
Table of Contents
Advertisement
th
One Blue Hill Plaza, 16
Floor, PO Box 1546
Pearl River, NY 10965
1-800-PC-AMERICA, 1-800-722-6374
(Voice) 845-920-0800 (Fax) 845-920-0880
Ingenico Desk/5000 EMV Certified
PINpad with Global Payments Canada
Cash Register Express now supports payment processing with EMV chip enabled cards through
the Ingenico Desk/5000 EMV PINpad device. This document provides step-by-step instructions
on installation and usage of the Desk/5000 with Cash Register Express.
Note: To use Global Payments EMV as a payment processor you must be using version 12.8001
or above.
1 |
P a g e
Advertisement
Table of Contents

Related Manuals for Ingenico Desk/5000


Summary of Contents for Ingenico Desk/5000
- Page 1 PINpad with Global Payments Canada Cash Register Express now supports payment processing with EMV chip enabled cards through the Ingenico Desk/5000 EMV PINpad device. This document provides step-by-step instructions on installation and usage of the Desk/5000 with Cash Register Express.
-
Page 2: Table Of Contents
TABLE OF CONTENTS INSTALLING THE HARDWARE FOR TCP/IP ARDWARE ONNECTIONS CONFIGURING THE STATIC IP ADDRESS IN THE PIN PAD CONFIGURE ETHERNET COMMUNICATION CONFIGURE RECEIPT PRINTING CONFIGURING CRE/RPE FOR USE WITH GLOBAL PAYMENTS EMV ENABLING ON-SCREEN SIGNATURE (OPTIONAL) CONFIGURE PINPAD FOR DEBIT CASH BACK FEATURE (OPTIONAL) PERFORMING A CREDIT CARD SALE PERFORMING A CREDIT CARD SALE USING AN EMV ENABLED CARD PERFORMING A CREDIT CARD SALE USING A CONTACTLESS ENABLED CARD... - Page 3 Each register running card transactions must have its own Desk/5000 device; Desk/5000 devices may not be shared among registers. Credit card settlements must be done in CRE on every station where a Desk/5000 device is connected and you must enter a password on the pinpad to begin the settlement. ...
- Page 4 Document Version Date Author Description of Changes December 10, 2018 1st Release P a g e...
-
Page 5: Installing The Hardware For Tcp/Ip
Installing the Hardware for TCP/IP Important: Every register processing card transactions MUST have its own unit. Also, settlements need to be Desk/5000 run through CRE on each register that has a unit connected and processing card transactions. Desk/5000 Hardware Connections 1. - Page 6 3. Connect End 1 into your AC outlet or surge protector. 4. Connect End 2 into the pin pad’s power receiver. The pin pad will turn on and make a beeping sound when the connection is made properly. 5. Locate your Ethernet cable that is connected to the same router or switch that your computer is connected to.
- Page 7 6. Locate the Ethernet Port on the pin pad’s receiver, it is marked with “ETH” on the pinpad receiver. 7. Connect the Ethernet cable into the pin pad’s Ethernet port. 8. The pinpad should be powered on and it should display the global payments screen saver logo.
-
Page 8: Configuring The Static Ip Address In The Pin Pad
Configuring the Static IP Address in the Pin Pad 1. With the pinpad Powered on, touch the scree to stop the screen saver. Then Press the ADMIN button on screen. 2. Select Setup Menu (3). P a g e... - Page 9 3. Enter the Admin Name & Password. Then press the green button on the keypad. 4. Select Communications (2). 5. Select Ethernet P a g e...
- Page 10 6. Select Ethernet Setup (2). 7. Select Static IP (2). 10 | P a g e...
- Page 11 8. If you’re ok with the IP address that the pinpad obtained already, then .Select the Green Circle or Green button on the keypad. NOTE: If you have a certain IP address you want to use. Enter all information then select the buttons to accept the changes.
- Page 12 10. Ethernet Menu, Select Current Setup 11. Select Print. So you have a copy of the IP address. You will need this later. 12 | P a g e...
-
Page 13: Configure Ethernet Communication
Configure Ethernet Communication Setup communication between CRE and the Ingenico Desk/5000 device. . Follow instructions below 1. With the pinpad Powered on, touch the screen to stop the screen saver. Then Press the ADMIN button on screen. 2. Scroll down then select Misc. Options or press 8 on the keypad. - Page 14 3. Enter the Admin Name & Password. Then press the green button on the keypad. 4. Select Semi-integrated (1) 14 | P a g e...
- Page 15 5. Select Communication Type (2). 6. Select Ethernet(3), then Enter 15 | P a g e...
- Page 16 7. Enter a port number, you can use 443. In this example I’m using . Then select enter. Note: Reminder this port number. You will need this port number for CRE. 16 | P a g e...
-
Page 17: Configure Receipt Printing
Configure Receipt Printing This is to configure the pinpad to print through CRE’s receipt printer. 1. With the pinpad Powered on, touch the screen to stop the screen saver. Then Press the ADMIN button on screen. 2. Scroll down then select Misc. Options or press 8 on the keypad. - Page 18 3. Enter the Admin Name & Password. Then press the green button on the keypad. 4. Select Semi-integrated (1) 18 | P a g e...
- Page 19 5. Select Receipt Options (3). 6. Select ECR (1), Then Enter 7. Press the Red Cancel button until you’re back at the start up screen. 19 | P a g e...
-
Page 20: Configuring Cre/Rpe For Use With Global Payments Emv
8. Select TCP/IP under the Communication Type section 9. Enter the IP Address being used by the pinpad from the print out. Desk/5000 10. Verify that Port No. is set to the # entered in Step 7 when steeping up communications. -
Page 21: Enabling On-Screen Signature (Optional)
Enabling On-Screen Signature (Optional) Configuring this option will allow the customer to sign on the screen and the signature will print on the receipt. If it’s not enabled the receipt will print a signature line for the customer to sign. 1. - Page 22 7. After a Credit Card is complete through the pinpad CRE will prompt for Customer Signature. 8. Sign using the touch screen and then select done. Note: Signature prints on both receipts 22 | P a g e...
-
Page 23: Configure Pinpad For Debit Cash Back Feature (Optional)
Configure Pinpad for Debit Cash Back Feature (Optional) Configuring this feature will prompt the customer for cash back when doing a debit sale. Batch must be closed before performing this change. Follow Instructions below. 1. With the pinpad Powered on, touch the screen to stop the screen saver. - Page 24 3. Enter the Admin Name & Password. Then press the green button on the keypad. 4. Select Trans Options Or 4 on the keypad. 24 | P a g e...
- Page 25 5. Select Debit 6. Select CashBack 7. Select Debit. 25 | P a g e...
- Page 26 8. Select CashBack Setup 9. On the CashBack Setup screen, Enter a value for the Cash Back Limit Then enter values for the CashBack buttons. Select Green button to confirm. Select Red button on the keypad to back out to the Splash Screen.
-
Page 27: Performing A Credit Card Sale
Performing a Credit Card sale Now the CRE is configured to communicate with the pin pad we can now start processing credit card sales. To process a sale with the swipe card. 1. After you’ve added the items to an invoice and selected Credit in CRE the pinpad will prompt. - Page 28 3. When prompted enter the Last 4 digits of the card number on the pinpad. 4. When the sale is complete the pinpad will display similar to the image on the left side. 28 | P a g e...
-
Page 29: Performing A Credit Card Sale Using An Emv Enabled Card
Performing a Credit Card sale using an EMV enabled card To complete a credit card sale with an EMV card follow the steps below. 1. After you’ve added the items to an invoice and selected Credit in CRE the pinpad will prompt. - Page 30 3. Wait for the pinpad to approve the sale. Do not remove the card from the pinpad. 4. When the sale is complete the pinpad will display “Approved Remove card”. 30 | P a g e...
-
Page 31: Performing A Credit Card Sale Using A Contactless Enabled Card
Performing a Credit Card sale using a Contactless enabled card To complete a credit card sale with a contactless card follow the steps below 1. After you’ve added the items to an invoice and selected Credit in CRE the pinpad will prompt. - Page 32 3. Wait for the pinpad to process the sale 4. When the sale is complete the pinpad will display “Approved”. 32 | P a g e...
-
Page 33: Performing A Manual Card Entry
Performing a manual card entry In the event that the pinpad is unable to read a credit/debit card, you can manually enter the card information by following the steps below. 1. After you’ve added the items to an invoice and selected Credit in CRE the pinpad will prompt. - Page 34 3. Enter ID and Password, then hit enter 4. Select either Yes or No. If selected Yes, skip step 5 34 | P a g e...
- Page 35 5. If No was selected from the previous step. You must enter the CVC number from the back of the Credit Card using the keypad on the device. 6. When the sale is complete the pinpad will display similar to the image on the left side 35 | P a g e...
-
Page 36: Performing A Debit Card Sale
Performing a Debit Card sale To complete a debit card sale follow the steps below. EMV Debit Cards Only. 1. After you’ve added the items to an invoice and selected Credit in CRE the pinpad will prompt. Like on the left side. 2. - Page 37 4. Enter your Pin 5. Wait for process to complete. 6. When the sale is complete the pinpad will display “Approved” 37 | P a g e...
-
Page 38: Performing A Debit Card Sale With Cash Back (Optional)
Performing a Debit Card sale with cash back (optional) To complete a debit card sale with cash back, follow the steps below. EMV Debit Cards Only. 1. After you’ve added the items to an invoice and selected Credit in CRE the pinpad will prompt. - Page 39 3. Select Yes (1) when prompted for cashback. 4. Select the cashback amount listed or select other to enter another amount. $10 cashback is selected in this example. Note: Amount must be under the limit set in the cashback options in the pinpad. 39 | P a g e...
- Page 40 5. Verify the totals are correct. Select Accept (1) 6. Select Account. 40 | P a g e...
- Page 41 7. Enter Pin number, then select Green button on keypad. 8. When the sale is complete the pinpad will display Approved with Cash back Amount. 41 | P a g e...
-
Page 42: Performing A Return
Performing a Return In the event that a customer wants to return their items for a refund, they must swipe the card they want the refund to be processed on and the employee must enter the last 4 digits of the card #. See below for more details. 1. -
Page 43: Performing A Void
Performing a Void In the event that you have to void a sale, the reference # of that sale must be entered in the pinpad. You can find the APPR CODE and REF numbers on the receipt of the invoice. See below for more details. 1. - Page 44 4. Select Yes to confirm the void. 5. When the void is complete the pin pad will display an approval code. 44 | P a g e...
-
Page 45: Performing A Settlement/Batch Close
Performing a Settlement/Batch Close To batch out at the end of the day you must initiate the settlement in CRE but the pinpad’s admin password must be entered on the pinpad to settle. 1. Select the Manager or Options button. 2. - Page 46 5. The pinpad will now prompt you to enter the Manager Password, enter the password and press the green enter key. 6. Press yes to start the settlement 7. Verify the settlement then Select Accept (1) 46 | P a g e...
- Page 47 8. Wait for the settlement to complete 9. When the settlement is finished a settlement report will print 47 | P a g e...
- Page 48 10. You will then be prompted to print a detailed report, press yes to print the report or no the finish the settlement. 11. Please wait until the settlement finalizes. CRE will prompt messages boxes about the settlement. Pinpad will return to the splash screen.
Need help?
Do you have a question about the Desk/5000 and is the answer not in the manual?
Questions and answers
I don't remember Supervisor Password
To reset the Supervisor Password for the Ingenico Desk/5000, press the button to set up your Manager and Supervisor passcode. Follow the on-screen instructions to select the appropriate option. If you need help with setting up or resetting the password, contact the 24/7 client support team.
This answer is automatically generated
what is the pre-auth button do
The pre-auth button on the Ingenico Desk/5000 is used to void an open pre-authorization transaction. When pressed, it prompts the user to confirm whether they want to void the pre-auth by selecting [1] for Yes or [2] for No, followed by any applicable screen prompts.
This answer is automatically generated
how do I change my settlement report to print in full detail and not summary. it just changed after the last update
how do I set a managers password??