Table of Contents
Advertisement
Quick Links
11.44
291
SERVICE & OPERATING MANUAL
Original Instructions
2.00
Certified Quality
51
SUCTION PORT
1 1/2" NPT
Quality System
ISO9001 Certified
Environmental Management System
ISO14001 Certified
Binks
195 International Blvd.,
Glendale Heights, IL 60139 USA
Telephone:
1.800.99.BINKS
630.237.5000
Toll Free Customer Service
and Technical Support
800-992-4657
Toll Free Fax
888-246-5732
Model 41-818810
2.12
54
Part Sheet 77-2993
Advertisement
Table of Contents

Related Manuals for Binks Gemini II 41-818810


Summary of Contents for Binks Gemini II 41-818810
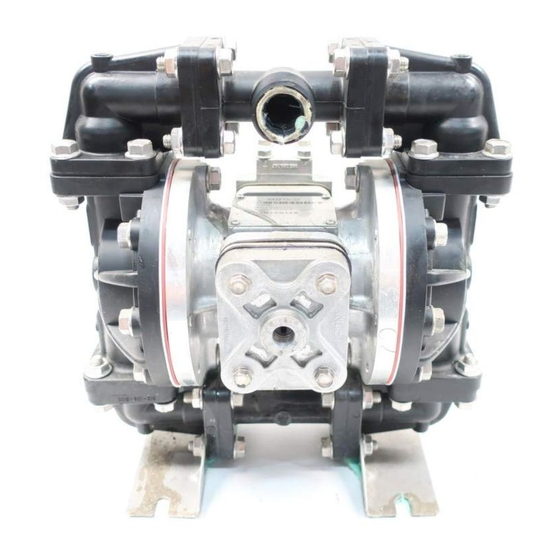
- Page 1 Certified Quality 2.12 Model 41-818810 SUCTION PORT 1 1/2" NPT Quality System ISO9001 Certified Environmental Management System ISO14001 Certified Binks 195 International Blvd., Glendale Heights, IL 60139 USA Telephone: 1.800.99.BINKS 630.237.5000 Toll Free Customer Service and Technical Support 800-992-4657 Part Sheet 77-2993...
- Page 2 Safety Information IMPORTANT WARNING When used for toxic or aggressive fluids, the pump should Read the safety warnings and instructions in this manual always be flushed clean prior to disassembly. before pump installation and start-up. Failure to comply with the recommendations stated in this manual could damage the pump and void factory warranty.
-
Page 3: Table Of Contents
Table of Contents SECTION 1: PumP SPECIfICaTIONS ....1 • Performance • Materials • Warranty Information • Dimensional Drawings SECTION 2: INSTallaTION & OPEraTION ..3 • Principle of Pump Operation • Recommended Installation Guide • Troubleshooting Guide SECTION 3: ExPlOdEd VIEw ......6 • Composite Repair Parts Drawing • Composite Repair Parts List SECTION 4: aIr ENd .........8 • Air Distribution Valve Assembly • Pilot Valve Assembly • Intermediate Assembly SECTION 5: wET ENd ........11 • Diaphragm Drawings • Diaphragm Servicing SECTION 6: CErTIfICaTES ......13... -
Page 4: Performance
Binks shall fail under normal use and service due to a defect in material or workmanship within five years from the date of shipment from Binks factory. See complete warranty at www.binks.com... - Page 5 Model 41-818810 Dimensions in Inches. (metric dimensions in brackets) Dimensional tolerance: ±1/8" (±3mm) 14.41 14.41 5.59 5.59 16.63 16.63 DISCHARGE PORT DISCHARGE P 2.12 2.12 1 1/2" NPT 1 1/2" NPT 14.41 5.59 16.63 DISCHAR 2.12 1 1/2" NP 21.75 21.75 20.47 20.47 11.44 11.44 20.47 11.44 4X .38 4X .38 2.00 2.00...
-
Page 6: Principle Of Pump Operation
Principle of Pump Operation Air-Operated Double Diaphragm (AODD) pumps are powered by compressed air. The main directional (air) control valve distributes ① compressed air to an air chamber, exerting uniform pressure over the inner surface of the diaphragm . At the same time, ② the exhausting air from behind the opposite diaphragm ③ is directed through the air valve assembly(s) to an exhaust port ④ (P1) Air Line As inner chamber pressure exceeds liquid chamber (P2) pressure... -
Page 7: Recommended Installation Guide
recommended Installation Guide Installation And Start-Up Locate the pump as close to the product being pumped as possible. Keep the suction line length and number of fittings to a minimum. Do not reduce the suction line diameter. Air Supply Connect the pump air inlet to an air supply with sufficient capacity and pressure to achieve desired performance. A pressure regulating valve should be installed to insure air supply pressure does not exceed recommended limits. Air Valve Lubrication The air distribution system is designed to operate WITHOUT lubrication. This is the standard mode of operation. If lubrication is desired, install an air line lubricator set to deliver one drop of SAE 10 non-detergent oil for every 20 SCFM (9.4 liters/sec.) of air the pump consumes. Consult the Performance Curve to determine air consumption. Air Line Moisture Water in the compressed air supply may cause icing or freezing of the exhaust air, causing the pump to cycle erratically or stop operating. Water in the air supply can be reduced by using a point-of-use air dryer. Air Inlet And Priming To start the pump, slightly open the air shut-off valve. After the pump primes, the air valve can be opened to increase air flow as desired. If opening the valve increases cycling rate, but does not increase the rate of flow, cavitation has occurred. The valve should be closed slightly to obtain the most efficient air flow to pump flow ratio. 41-818810sm-rev0812... -
Page 8: Troubleshooting Guide
Troubleshooting Guide Symptom: Potential Cause(s): Recommendation(s): Pump Cycles Once Deadhead (system pressure meets or exceeds air Increase the inlet air pressure to the pump. Pump is designed for 1:1 pressure ratio at zero flow. supply pressure). (Does not apply to high pressure 2:1 units). Air valve or intermediate gaskets installed incorrectly. Install gaskets with holes properly aligned. Bent or missing actuator plunger. Remove pilot valve and inspect actuator plungers. Pump Will Not Operate Pump is over lubricated. Set lubricator on lowest possible setting or remove. Units are designed for lube free operation. / Cycle Lack of air (line size, PSI, CFM). Check the air line size and length, compressor capacity (HP vs. CFM required). Check air distribution system. Disassemble and inspect main air distribution valve, pilot valve and pilot valve actuators. -
Page 9: Composite Repair Parts Drawing
Composite repair Parts drawing Torque 90 in. lbs. Torque: 360 in. lbs. Torque 90 in. lbs. Torque: Plate to Rod 360 in. lbs. Torque: Plate to Plate 600 in. lbs. Service Kits 41-718858 Air Motor Repair Kit Bumpers, Bushings, Gaskets, O-ring, Retaining Rings, and Seals. -
Page 10: Composite Repair Parts List
Composite repair Parts list Item Description Qty. 1 Air Valve Assembly w/Integral muffler Air Valve Assembly Ball, Check Ball, Check Bushing Pilot Valve Assembly Intermediate Bracket Bumper, Diaphragm Bushing, Plunger Cap, Air Inlet Assembly Capscrew, Hex Hd 7/16-14 X 2.00 Capscrew, Hex Hd 3/8-16 X 1.75 Capscrew, Hex Hd 5/16-18 X 1.75 Capscrew, Hex HD 3/8-16 X 1.00 Capscrew, Soc Hd 3/8-16 X 2.50... -
Page 11: Air Distribution Valve Assembly
air distribution Valve assembly Air Distribution Valve Servicing Air Valve Assembly Parts List Item Description See repair parts drawing, remove screws. Air Valve Assembly Step 1: Remove hex cap screws (1-F). 1-A Body, Air Valve Step 2: Remove end cap (1-E) and bumper (1-C). Sleeve and Spool Set Step 3: Remove spool part of (1-B) (caution: do not scratch). 1-C Bumper Step 4: Press sleeve (1-B) from body (1-A). 1-D O-Ring 1-E Cap, End Step 5: Inspect O-Rings (1-D) and replace if necessary. -
Page 12: Pilot Valve Assembly
Pilot Valve assembly Pilot Valve Servicing Pilot Valve Assembly Parts List With Pilot Valve removed from pump. Item Description Step 1: Remove snap ring (4-F). Pilot Valve Assembly Step 2: Remove sleeve (4-B), inspect O-Rings (4-C), Valve Body replace if required. Sleeve (With O-Rings) Step 3: Remove spool (4-D) from sleeve (4-B), O-Ring (Sleeve) inspect O-Rings (4E), replace if required. -
Page 13: Intermediate Assembly
Intermediate assembly Intermediate Assembly Drawing INTeRMeDIATe RePAIR PARTS LIST Item Description Step 1: Remove plunger, actuator (29) from center of Bracket, Intermediate intermediate pilot valve cavity. Step 2: Remove Ring, Retaining (30), discard. Bracket, Intermediate Bushing, Plunger Step 3: Remove bushing, plunger (7), inspect for wear O-Ring and replace if necessary with genuine parts. Plunger, Actuator Step 4: Remove O-Ring (26), inspect for wear and Ring, Retaining* replace if necessary with genuine parts. Seal, Diaphragm Rod Step 5: Lightly lubricate O-Ring (26) and insert into intermediate. *Note: It is recommended that when plunger components Step 6: Reassemble in reverse order. - Page 14 diaphragm Service drawing, with Overlay Torque: Plate to Plate 480 in. lbs. 600 in. lbs. Santoprene Torque: Plate to Plate 480 in. lbs. 41-818810sm-rev0812...
-
Page 15: Diaphragm Servicing
diaphragm Servicing Step 1: With manifolds and outer chambers Step 4: Push the threaded outer diaphragm removed, remove diaphragm assemblies from plate through the center hole of the diaphragm. diaphragm rod. DO NOT use a pipe wrench or similar Note: Most diaphragms are installed with the tool to remove assembly from rod. Flaws in the rod natural bulge out towards the fluid side. S05, surface may damage bearings and seal. Soft jaws... - Page 16 Declaration of Conformity BINKS, 195 International Blvd, Glendale Heights, IL 60139 Certifies that BINKS models: 41-818810, 41-818820, 41-818822, 41-818830, 41-818823, 41-818836 Air-Operated Double Diaphragm Pump comply with the European Community Directive 2006/42/EC on Machinery, according to Annex VIII. This product has used Harmonized Standard EN809:1998+A1:2009, Pumps and Pump Units for Liquids - Common Safety Requirements, to verify conformance.
- Page 17 EC Declaration of Conformity In accordance with ATEX Directive 94/9/EC, Equipment intended for use in potentially explosive environments. Manufacturer: Applicable Standard: BINKS EN13463-1: 2001, 195 International Blvd EN13463-5: 2003 Glendale Heights, IL 60139 AODD Pumps For Type Examination Designations, see page 2 (back) KEMA Quality B.V.
- Page 18 EC Declaration of Conformity ATEX Summary of Markings Non-Conductive Type Marking Listed In Fluids BINKS Models: II 2 G c T5 KEMA 09ATEX0072 X KEMA 09ATEX0072 X II 3/2 G c T5 KEMA 09ATEX0072 X 41-818810 II 2 D c T100...
Need help?
Do you have a question about the Gemini II 41-818810 and is the answer not in the manual?
Questions and answers