Table of Contents
Advertisement
Available languages
Available languages
1. General Information.......................... 2
2.1. Safety Warnings.......................... 3
2.2. Fire/Explosion Hazards .............. 5
2.3. Pressure Relief Procedure .......... 5
3.1. Typical Installation ...................... 6
3.2. Flush Pump.................................. 8
3.3. Start and djust Pump .............. 8
PROP 65 W RNING
C PROP
W RNING: This product contains chemicals
65
known to the State of California to cause
cancer and birth defects or other
reproductive harm.
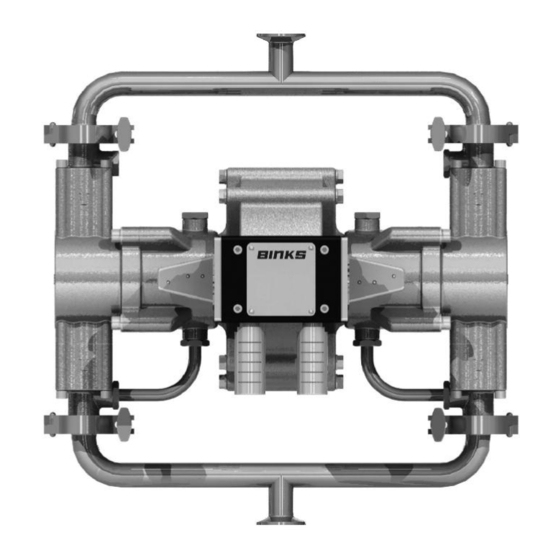
Binks 4.5:1 EXEL
IR POWERED PUMP
POSITIVE PRIME RECIPROC TING
HORIZONT LLY OPPOSED 4-B LL PUMP
- W TERBORNE COMP TIBLE -
INDEX
4. Specifications & Operation .............. 9
5.1. Parts List ...................................... 10
5.2. Exploded View ............................ 11
5.3. Disassembly ................................ 12
5.4. Re-assembly ................................ 13
5.5. General Maintenance ................ 17
6. Troubleshooting ................................ 18
Replaces
Part
Part Sheet
Sheet
77-2872R
77-2872R-1
Advertisement
Chapters
Table of Contents

Subscribe to Our Youtube Channel
Related Manuals for Binks 41-38045


Summary of Contents for Binks 41-38045
-
Page 1: Table Of Contents
Binks 4.5:1 EXEL IR POWERED PUMP POSITIVE PRIME RECIPROC TING HORIZONT LLY OPPOSED 4-B LL PUMP – W TERBORNE COMP TIBLE – INDEX 1. General Information......2 4. Specifications & Operation ....9 2. Safety Information 5. Maintenance 2.1. Safety Warnings......3 5.1. -
Page 2: General Information
BS EN 1127-1, BS EN 13463-1:2001, and thereby conform to the protection requirements of Council Directive 94/9/EC relating to Equipment and Protective Systems for use in Potentially Explosive tmospheres, protection level II 2 G X. May 30, 2007 pproved By: ______________________________ Date: ____________ Chuck McCulloch, Binks Binks reserves the right to modify equipment specification without prior notice. -
Page 3: Safety Information 2.1. Safety Warnings
Improper grounding or sparks can cause a hazardous condition and result in fire, explosion or electric shock and other serious injury. FOR FURTHER S FETY INFORM TION REG RDING BINKS ND DEVILBISS EQUIPMENT, SEE THE GENER L EQUIPMENT S FETY BOOKLET (77-5300). - Page 4 3. DO NOt cover the tip guard and attempt to GENER L W RNINGS and safety devices of Binks, the user assumes “blow back” fluid. This is not an air sprayer. 1. NEVER leave a pressurized sprayer all risks and liabilities.
-
Page 5: Fire/Explosion Hazards
The Exel Pump has no exposed moving parts that can Ground Wire Kit is included! create possible hazards to personnel. However, there are Use Binks Ground Wire Kit #41-13021 some safety points to consider: GROUNDING THE PUMP 1. Exhausting air from a motor cycling with the mufflers removed can exceed OSHA limits. -
Page 6: Typical Installation
SECTION 3.1 – TYPIC L INST LL TION W LL MOUNT BR CKET 207-12328 Two brackets provide a wall mount pattern of 5-1/2" (5.5") vertical by 6-5/8" (6.625") horizontal. 6.625" [168] 5.5" [140]... -
Page 7: Installation
Use a compatible thread compound on all tapered male The mounting of the pump to a vertical surface or wall may pipe threads to guard against leakage and to lubricate require reinforcement back-up. Please contact your Binks Representative for assistance in planning your system. Be threads for assembly. -
Page 8: Flush Pump
SECTION 3.2 – FLUSH PUMP BEFORE INST LL TION W RNING To reduce the risk of fluid injection injury, static sparking, and splashing, read and follow safety instructions on pages 3 through 5 of this part sheet. The pump was factory tested with lightweight oil. Some with a compatible solvent. -
Page 9: Specifications & Operation
Distance from pump dB ( ) Tungsten Carbide Background UHMW-PE 25 feet PTFE Hard Chrome (41-38045) 10 feet Ceramic (41-39045) 6 inches The Exel “Dynamic” Pump incorporates bellows seals NOTE between the dynamic chamber and the air motor. The Excessively high cycle rates may cause bellows failure. -
Page 10: Maintenance 5.1. Parts List
Items not available separately. Order kits below. L Reference Part Sheet 77-2799 for further detail. Hard chrome coated piston supplied with 41-38045 Standard Pump. Ceramic coated piston supplied with 41-39045 Extreme Duty Pump. IR MOTOR H RDW RE KIT 41-4453... -
Page 11: Exploded View
SECTION 5.2 – EXPLODED VIEW... -
Page 12: Disassembly
SECTION 5.3 – DIS SSEMBLY Numbers in parentheses ( ) refer to the exploded view Step 7 is required only for maintenance on balls and seats. drawing on page 11. 7. Remove the four socket head cap screws (28) that hold FLUID SECTION each flange adapter (27) and ball cage (26) to the output block. -
Page 13: Re-Assembly
Pre-lubricate and carefully install the cover plate air control valve and the pilot valves use only factory o-rings (5, 43). Be sure that they are seated firmly. approved grease: Binks part number 41-4458-K. The bolts should be tightened snugly (10 ft-lb). Do not over tighten. -
Page 14: Piston Rod
SECTION 5.4 – RE- SSEMBLY 6. Install the pilot valve assembly (41) using the two socket head cap screws (42). 7. Pre-lubricate the o-rings for air logic circuits. Install the pre-lubricated o-rings into their appropriate ports on the air motor: the pilot valve ports (38), the air motor-to-piston ports (44), exhaust ports (43), and, finally, the rest of the pilot valve ports. -
Page 15: Output Block
SECTION 5.4 – RE- SSEMBLY 12. Install the piston (16) into the chamber and secure FLUID SECTION with the retaining bolt (18) and bolt seal (17). Torque the piston bolt to 40-50 ft-lbs. Make sure that the If Fluid Sections were disassembled, re-assemble shaft does not twist when the pistons are assembled as follows: and tightened to the shaft. -
Page 16: Screw
SECTION 5.4 – RE- SSEMBLY NOTE Lip of piston’s seal should face toward pressurized chamber (away from air motor). Carefully place the block with the seal over the pis- PISTON SE L ton. Press firmly until the block seats on the chamber (13). -
Page 17: General Maintenance
Double Sided Seats Binks Exel pumps have double sided tungsten carbide seats installed at the factory in the tapered edge orientation (below left). This orientation is optimal for most types of coatings. However, if a highly viscous or filled material is used, the seats may be flipped over for use in the sharp edge orientation (below right). -
Page 18: Troubleshooting
Do not run the pump above the recommend- ed operating range. Damage to the bellows and piston seals is likely to occur. WARRANTY This product is covered by Binks’ 1 Year Limited Warranty. Binks Sales and Service: www.binks.com U.S.A./ Canada Customer Service Toll Free Customer Service and Technical Support 195 Internationale Blvd. - Page 19 BOMB IRE COMPRIMIDO BINKS EXEL 4.5:1 DE BOMB DE 4 BOL S CON ÉMBOLOS OSCIL NTES P R CEB DO POSITIVO – COMP TIBLE CON DISPOSITIVOS TR NSPORT DOS – ÍNDICE 1. Información general ......20 4. Especificaciones y operación .... 27 2.
- Page 20 Equipos y Sistemas Protectores para uso en tmósferas Potencialmente Explosivas, nivel de protecciónII 2 G X. 30 de mayo de 2007 probado por: ___________________________________ Fecha: ___________________ Chuck McCulloch, Binks Binks se reserva el derecho de modificar la especificación del equipo sin previo aviso.
- Page 21 P R MÁS INFORM CIÓN CERC DE LOS EQUIPOS BINKS Y DEVILBISS, CONSULTE EL FOLLETO DE SEGURID D GENER L DE LOS EQUIPOS (77-5300).
- Page 22 DVERTENCI S GENER LES 3. NO cubra el resguardo de la punta ni trate de con los dispositivos de seguridad de Binks, el usuario “inyectar hacia atrás” el fluido. Esta pistola no es asume todos los riesgos y responsabilidades.
- Page 23 ¡Se incluye el equipo del cable de puesta a tierra! ocasionar posibles peligros al personal. No obstante, hay Use el Equipo del cable de puesta a tierra de Binks #41-13021 algunos puntos de seguridad que se deben tener en cuenta: 1.
- Page 24 SECCIÓN 3.1 – INST L CIÓN TÍPIC SOPORTE DE MONT JE MUR L 207-12328 Dos soportes permiten un patrón de montaje mural de 5-1/2 pulg. (5.5 pulg.) vertical por 6-5/8 pulg. (6.625 pulg.) horizontal. 6.625" [168] 5.5" [140]...
- Page 25 Para asistencia en la planificación de lubricar las roscas para el ensamble. su sistema, sírvase ponerse en contacto con su Representante de Binks. segúrese de cumplir con todos los códigos federales, estatales y Se incluye el soporte de montaje mural en todas las bombas Exel.
- Page 26 SECCIÓN 3.2 – PURG R L BOMB NTES DE L INST L CIÓN DVERTENCI Para reducir el riesgo de lesiones por inyección de fluido, descargas estáticas y salpicaduras, lea y siga las instrucciones de seguridad que se encuentran de la página 21 a la 23, inclusive, de esta Hoja de piezas. La bomba fue sometida a prueba en la fábrica con aceite bombeando, púrguelo completamente con un disolvente compat- liviano.
- Page 27 Fondo UHMW-PE 25 pies PTFE 10 pies Cromo duro (41-38045) 6 pulgadas Cerámica (41-39045) La bomba “Dinámica” Exel incorpora obturadores de fuelle entre la cámara dinámica y el motor de aire comprimido. La bomba no debe ser alimentada con presión ni con gravedad.
- Page 28 Los artículos no están disponibles por separado. Pida los siguientes equipos. L Para más detalles consulte la Hoja de piezas 77-2799. Se suministra émbolo cromado duro con la Bomba Estándar 41-38045. Se suministra émbolo revestido con material cerámico con la Bomba de Rendimiento extremo 41-39045.
- Page 29 SECCIÓN 5.2 – VIST DE LOS COMPONENTES...
- Page 30 SECCIÓN 5.3 – DESENS MBL JE Los números en paréntesis ( ) se refieren a la vista de los com- El paso 7 se requiere únicamente para mantenimiento de las ponentes en la página 29. bolas y los asientos. SECCIÓN DE FLUIDO 7.
- Page 31 únicamente grasa aprobada por la fábrica: Pieza libras). No apriete demasiado. de Binks número 41-4458-K. 5. Inserte la varilla de empuje de la válvula piloto asegurándose 2. Si se necesitan obturadores del eje del motor de aire com- de que se aloje debidamente.
- Page 32 SECCIÓN 5.4 – REENS MBL JE 6. Instale el conjunto de la válvula piloto (41) utilizando los dos tornillos de cabeza encastrada (42). 7. Pre-lubrique las juntas tóricas para los circuitos de aire lógicos. Instale las juntas tóricas pre-lubricadas en sus aberturas corre- spondientes en el motor de aire comprimido: las aberturas de la válvula piloto (38), las aberturas del motor de aire comprimido al émbolo (44), los orificios de escape (43) y, por último, el...
- Page 33 SECCIÓN 5.4 – REENS MBL JE 12. Instale el émbolo (16) en la cámara y asegúrelo con el perno SECCIÓN DE FLUIDO de retención (18) y el obturador del perno (17). Apriete el perno del émbolo a 40-50 pies-libras. Asegúrese de que el Si se desensambla la Sección de fluido, reensámblela eje no se retueza al ensamblar los émbolos y fijarlos al eje.
- Page 34 SECCIÓN 5.4 – REENS MBL JE El borde del obturador del émbolo debe estar orientado hacia la cámara presurizada (en dirección opuesta al motor de aire comprimido). Coloque cuidadosamente el bloque con el obturador sobre el OBTUR DOR DEL ÉMBOLO émbolo.
- Page 35 Las bombas Exel de Binks tienen asientos de dos lados de carburo de tungsteno instalados en la fábrica en la orientación del borde ahusado (abajo izquierda) Esta orientación es óptima para la mayor parte de los tipos de revestimientos. No obstante, si se utiliza un material altamente viscoso o lleno, los asientos se pueden voltear para uso en la orientación del borde filoso (abajo derecha).
- Page 36 Es probable que ocurran daños al fuelle y al émbolo. GARANTÍA Este producto está cubierto por la Garantía Limitada por 1 Año de Binks. Centros de venta y servicios de Binks: www.binks.com Servicio al Cliente en EE.UU./Canadá...
Need help?
Do you have a question about the 41-38045 and is the answer not in the manual?
Questions and answers