Table of Contents
Advertisement
Quick Links
Advertisement
Table of Contents

Related Manuals for Knauer Azura CM 2.1S


Summary of Contents for Knauer Azura CM 2.1S
- Page 1 Conductivity Monitor CM 2.1S Instructions HPLC HPLC Document No. V6710...
- Page 2 Support: Do you have questions about the installation or the operation of your instrument or software? International Support: Contact your local KNAUER partner for support: www.knauer.net/en/Support/Distributors-worldwide Support in Germany (Austria & Switzerland on case-to-case basis): Phone: +49 30 809727-111 (workdays 9-17h CET)
-
Page 3: Table Of Contents
Table of contents General . . . . . . . . . . . . . . . . . . . . . . . . . . . . . . . . . . . . . . . . . . . . . . . . . . . . . . . . . . . . . . . . . . . . . . . . . . . . . . 1 1 .1 About these instructions . - Page 4 3 .5 Eluents/buffers . . . . . . . . . . . . . . . . . . . . . . . . . . . . . . . . . . . . . . . . . . . . . . . . . . . . . . . . . . . . . . . . . . 9 3 .5 .1 Suitable eluents/buffers .
- Page 5 5 .9 Switching off device . . . . . . . . . . . . . . . . . . . . . . . . . . . . . . . . . . . . . . . . . . . . . . . . . . . . . . . . . . . .28 Functionality tests .
-
Page 6: General
These operating instructions are an integral part of the device. It must be kept in the immediate vicinity of the device and accessible to the user at all times. You can download these and other instructions from the KNAUER web- site: www.knauer.net/library 1.2 Signal words... -
Page 7: Legal Information
1.4.4 Warranty seal A blue or orange warranty seal is affixed to some devices. A blue seal is used by KNAUER’s Manufacturing or Customer Support ƒ for devices to be sold. After repair, service technicians attach an orange seal onto the identi- ƒ... -
Page 8: Basic Safety Instructions
Operating outdoors. Otherwise, the manufacturer does not guarantee ƒ the functionality and safety of the device. Operation in potentially explosive areas without special and addition- ƒ al explosion protection. Contact the KNAUER Customer Support for more information. AZURA® Conductivity Monitor CM 2.1S Instructions, V6710... -
Page 9: User Qualification
ƒ alcohol or medication. They have participated in the installation of an instrument or training ƒ by KNAUER or an authorized company. If users do not meet these qualifications, they must inform their supervisors. 2.3 Operator responsibility The operator is any person who operates the device himself or leaves it to a third party for use and who bears the legal product responsibility for the protection of the user or third parties during operation. -
Page 10: Safety Features On The Device
Basic safety instructions Personalised protective safety equipment which is specified in the ƒ particular laboratory. 2.5 Safety features on the device Power switch: Devices of the AZURA® L series may be switched off ƒ using the power switch (toggle switch on the back side of housing) at any time, this causes no damage to the device. -
Page 11: Specific Environments
ƒ system in order to avoid dead volumes, not exactly fitting connections and spreading contamination. Safety features: The device may only be opened by the KNAUER Cus- ƒ tomer Support of KNAUER or any company authorized by KNAUER (see chapter “1.4.1 Liability limitation”, p. 2). -
Page 12: Service Request Form And Decontamination Report
Devices which are shipped without the completed document “Service request form and decontamination report” will not be repaired. If you would like to return a device to KNAUER, make sure to enclose the com- pleted document: www.knauer.net/servicerequest. 3. Product information 3.1 Features... -
Page 13: Symbols And Signs
Product information Legend: LAN connector Analog ports RS-232 connector Power connection Ground Fig. 2: Rear view 3.3 Symbols and signs The following symbols and labels are located on the device: Symbol Description Electrostatic discharge hazard, damages to system, device, or components can occur. Hazard due to high voltage. -
Page 14: Eluents/Buffers
Note: The list of selected solvents was compiled based on research in the perti nent literature and is only a recommendation by KNAUER. 3.5.1 Suitable eluents/buffers CM flow cell and Eluents/buffers suitable for CM flow cell and pH flow cell... -
Page 15: Unsuitable Eluents/Buffers
Installation 3.5.2 Unsuitable eluents/buffers CM flow cell and Eluents/buffers unsuitable for CM flow cell and pH flow cell pH flow cell Acetonitril ƒ pH electrode Eluents/buffers unsuitable for pH electrode or glass electrodes in general Media that can dissolve the glass surface, for example: Hydrofluoric acid solutions ƒ... -
Page 16: Unpacking
Installation 4.1.2 Unpacking Prerequisites There is no noticeable damage to the packaging. Utility knife Tools Process 1. Set-up the package in such a way that you can read the label. Using the utility knife, cut the adhesive tape and open the packaging. 2. -
Page 17: Cm Flow Cell
Installation 4.2 CM flow cell The CM flow cell is supplied with built-in capillaries that cannot be disas- sembled. In the event that the capillary is clogged and cannot be cleaned even by repeated flushing processes, the CM flow cell must be replaced. There is a plug on the rear side of the CM flow cell, which is used to con- nect the flow cell to the front side of the monitor. -
Page 18: Attaching Cm Flow Cell To Conductivity Monitor
Installation 4.2.1 Attaching CM flow cell to conductivity monitor Device defect Device damage possible. Î Switch off the device before mounting/dismounting the flow cell. Î Observe the notes in chapter „Replacing the CM flow cell“ on page 33. Prerequisites The device has been switched off. ƒ... -
Page 19: Ph Monitor (Optional)
Installation 4.3 pH monitor (optional) The pH monitor is used to measure the pH value in aqueous solutions such as buffers. The pH monitor consists of a pH electrode and a pH flow cell. When flushing the monitor at high flowrates or using non-saline solvents, the pH electrode should be excluded from the flowpath. -
Page 20: Connecting Ph Monitor To Capillaries
Installation Process Figure 4. Connect the plug of the elec- trode to the socket on the front side of the monitor. Next steps Integrate the pH monitor into the FPLC/HPLC flow path by installing it Prerequisites down stream of the conductivity monitor. You can do this by mounting the pH monitor onto the AZURA®... -
Page 21: Connecting The Device To The Computer
4.4.1 Connecting the device to the computer via LAN Note: HPLC devices made by KNAUER work only with IP adresses which are assigned via IPv4. IPv6 is not supported. This section describes how to set up an HPLC system in a local area net- work (LAN) and how a network administrator can integrate this LAN into your com pany network. -
Page 22: Configuring The Router
4.4.4 Configuring the router The router is preset at the factory. You find information about IP address, user name and password in the router instructions: www.knauer.net/router Process 1. To open the router configuration, start your Internet browser and enter the IP address (not for all routers). -
Page 23: Controlling Several Systems Separately In A Lan
Installation Process 1. Check that the IP address range of the router and of the company network do not overlap. 2. In case of an overlap, change the IP address range of the router. 3. Use the patch cable to connect the router WAN port to the company net work. -
Page 24: Firmware Wizard: Setting A Static Ip Address
Installation For Firmware Wizard, it is possible to set a fixed (static) or dynamic (DHCP) IP address via software. 4.5.1 Firmware Wizard: Setting a static IP address Note: More information about LAN settings can be found in the Mobile Control Software Instructions in the chapter “Firmware Wizard” (docu- ment no. -
Page 25: Firmware Wizard: Setting A Dynamic Ip Address
Installation 4.5.2 Firmware Wizard: Setting a dynamic IP address Prerequisites The device is switched on. ƒ Firmware Wizard is installed and running. ƒ Process Procedure 1. In Firmware Wizard, cleck <Reset LAN Settings...>. 2. The window <Device connection settings> opens. Enter MAC adress of the device into the text field <Target device serial num- ber>... -
Page 26: Operation
Operation Process Figure 1. Set the on/off switch to the OFF position 2. Connect the power supply to the device and afterwards plug the power plug into the socket. Next steps Set the on/off switch to the ON position and start up the device. 5. -
Page 27: Operating Elements
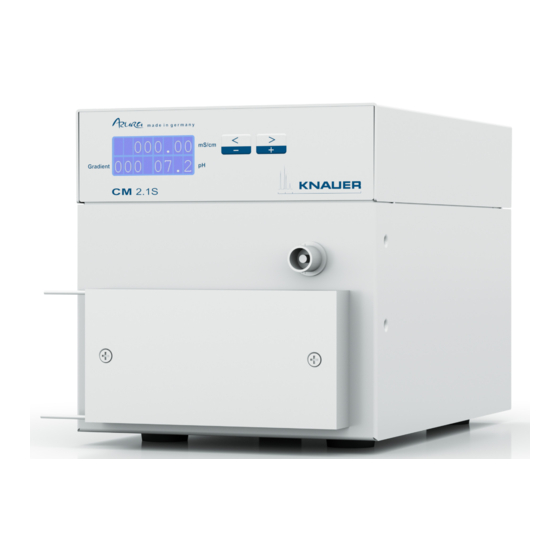
Operation 5.2.1 Operating elements Display and keypad Explanation The status display shows the conduc tivity (line 1), the current gradient composition (line 2, left), and the pH value (line 2, right). Fig. 11: Status display Press both arrow keys ƒ simultane ously to activate the keypad. -
Page 28: Selecting The Interface
Operation Display content Description Two menus help to calibrate the pH monitor: #0 is preset to pH07 ƒ #1 can be adjusted to a value between pH02..ƒ pH12 and corresponds to the pH value of the second calibra tion solution that is used. Select this menu to view the serial number of the monitor. -
Page 29: Checking The Operating Hours
By entering a correction factor ( TEMP-COR ) in percent, you activate the temperature compensation. Since this correction factor is substance- specific, KNAUER recommends setting it to 1.7 % when dealing with FPLC-compatible electrolyte and buffer solutions. AZURA® Conductivity Monitor CM 2.1S Instructions, V6710... -
Page 30: Adjusting The Calibration Function
If you leave the correction factor at 0.0 %, the temperature compensation is deactivated and the raw data is displayed (regardless of the set referen- ce temperature). Prerequisites The monitor has been switched on. Process Display 1. Press both arrow keys. 2. -
Page 31: Specifying The Offset Value
Operation Process Display 3. Read the measured value and modify the % value of the factor until the measured value and the target value match. Press both arrow keys. ƒ Hold down the left arrow key and use the ƒ right arrow key to scroll until the correct display appears. -
Page 32: Calibrating The Ph Electrode
Operation This is normally not necessary and is a sign of contamination or clogging of the CM flow cell. A typical sign of this is that the zero value (with water) deviates strongly from zero. Since the conductivity monitor cannot be calibrated automatically, you have the possibility to set a value for the shift of the measured values between -10.0 % and +10.0 % in the OFFSET menu to make the analysis result more comparable. -
Page 33: Switching Off Device
Operation Process Display 1. Press both arrow keys. 2. Hold down the left arrow key and use the right arrow key to scroll until the correct display appears. 3. Let go of the arrow keys and press the left or right arrow key to select a value. -
Page 34: Functionality Tests
Installation The customer may request the Installation Qualification, which is free of Qualification (IQ) charge. In case of a request, the technical support of KNAUER or from a provider autho rized by KNAUER performs this functionality test during the installation. -
Page 35: Troubleshooting
Troubleshooting 7. Troubleshooting If the device stops functioning or there are connection problems, start by check ing the following items: Does the display light up? ƒ Are the LEDs on the LAN port turned on? ƒ When you connect the cable, the green LED goes on. The second LED blinks yellow during data transfer. -
Page 36: Possible Problems And Solutions
Troubleshooting Has this been successful? ƒ 7. Make sure that the IP port of the device matches the port in the chromatog raphy software. 7.2 Possible problems and solutions Problem Solution Conductivity The desired conductivity Flush the device according to chapter 8.3. measuring value is not reached The system pressure is... -
Page 37: Maintenance And Care
Maintenance and care 8. Maintenance and care Proper maintenance of your devices will ensure successful analyses and repro ducible results. 8.1 Maintenance contract The following maintenance work on the device may only be performed by the manufacturer or a company authorized by the manufacturer and is covered by a separate maintenance contract: Opening the Module ƒ... -
Page 38: Replacing The Cm Flow Cell
Maintenance and care Note: Never use organic solvents for flushing after working with buffers. Always flush with water first. In addition, always rinse with water after each rinsing with organic rinsing solutions - including aqueous mixtures. Sub- sequent dry blowing with oil-free compressed air further increases the cleaning effect. -
Page 39: Flushing And Cleaning The Ph Monitor
Note: The settings that were suitable for the operation of the disassem- bled cell are still stored in the monitor. KNAUER recommends performing a function test with the newly assembled cell according to Chapter 6 and, if necessary, optimizing the settings according to Chapters 5.6 and 5.7 for the new cell. -
Page 40: Replacing Ph Electrode
4. Install and rinse the new pH electrode according to chapter 4.3.1. 9. Transportation and storage Carefully prepare the device for transport or storage. If you want to return your device to KNAUER for repairs, enclose the Service Request Form which can be downloaded from our website. -
Page 41: Disassembling The Device
Transportation and storage 9.2 Disassembling the device 9.2.1 Disconnecting the power supply Prerequisites The device has been switched off. Process 1. Pull the power supply out of the socket and afterwards remove the plug from the device. 2. Package the power supply and store it nearby the device. 9.2.2 Removing the CM flow cell The CM flow cell must be disassembled before transport or storage. -
Page 42: Storage Of The Ph Monitor
10.1 AVV marking in Germany According to the German „Abfallverzeichnisverordnung“ (AVV) (January, 2001), old devices manufactured by KNAUER are marked as waste electri- cal and elec tronic equipment: 160214. 10.2 WEEE registration KNAUER as a company is registered by the WEEE number DE 34642789... -
Page 43: Technical Data
Technical data 11. Technical data Main features Detector type Conductivity monitor Conductivity 0.1-999 mS/cm Accuracy <5 % full scale Precision in measuring <2 % of full scale or ≤5 mS/cm larger range (0.1-300 mS/cm) values Linearity ±1 % full scale pH measuring range pH 2-12 pH precision... -
Page 44: Chemical Compatibility Of Wetted Materials
The following list contains information about the chemical compatibility of all wetted materials which are used in devices made by KNAUER. The data bases on a literature research on the manufacturer specifications of the materials. The wetted materials of this device are listed in the chapter “Technical data”. - Page 45 Chemical compatibility of wetted materials (such as hydrofluoric acid, hydrobromic acid) and gaseous halogens. Hydrochloric acid is approved for most applications. In addition, following solvents can have a swelling effect and may have an impact on the functionality of the built-in components: Methylene chlo- ride, THF and DMSO in any concentration such as acetonitrile in higher concentrations.
-
Page 46: Non-Metals
Chemical compatibility of wetted materials reducing solvents, inorganic acids or at higher temperatures. Maximum operating temperature: 50 °C Polytetrafluorethylene (PTFE, Teflon®) PTFE is very soft and anti-adhesive. This material is resistant against almost all acids, lyes and solvents, except against fluid natrium and fluo- ride compounds. -
Page 47: Metals
Chemical compatibility of wetted materials Zirconium oxide (Z Zirconia ceramics are characterized by their high mechanical resistance, which makes them particularly resistant to wear and corrosion. It is also biocompatible, has low thermal conductivity and is resistant to high pressures. Sapphire Synthetic sapphire is virtually pure monocrystalline alumina. -
Page 48: Repeat Orders
Repeat orders Titanium, titanium alloy (TiA16V4) Titanium has a low weight and a high hardness and stability. It stands out due to its very high chemical compatibility and biocompatibility. Titan is applied when neither stainless steel nor PEEK are usable. 13. - Page 49 Latest KNAUER instructions online: www.knauer.net/library KNAUER Phone: +49 30 809727-0 Wissenschaftliche Geräte GmbH Fax: +49 30 8015010 Hegauer Weg 38 E-Mail: info@knauer.net 14163 Berlin Internet: www.knauer.net © KNAUER 2021...
Need help?
Do you have a question about the Azura CM 2.1S and is the answer not in the manual?
Questions and answers