Table of Contents
Advertisement
H
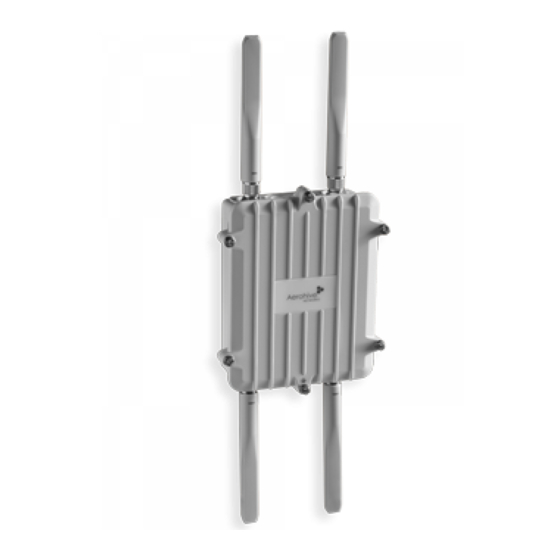
AP 170
IVE
I
NSTALLATION
This guide explains how to mount a HiveAP 170 to a pole or flat surface in virtually any outdoor
setting, and connect it to HiveManager over the network. To register, get product documentation, see
compliance information, and download software updates, visit www.aerohive.com/support.
K
C
IT
ONTENTS
The HiveAP 170 kit includes the items shown in
Figure 1 HiveAP 170 kit contents
Plane Bracket (1)
HiveAP 170
To install your HiveAP 170, you will need the following accessories (ordered separately) and tools:
•
(2) 2.4 GHz antennas (AH-ACC-170-ANT-2G)
•
(2) 5 GHz antennas (AH-ACC-170-ANT-5G)
•
A switch that provides PoE power, or a PoE provisioning device
•
(1) shielded cat5 Ethernet cable rated for outdoor use; length not to exceed 328 feet (100 m)
•
Crosshead screwdriver for 1/4" (6 mm) x 3/8" (10 mm) screws
•
Drive sockets (nut drivers) for 3/8" (10 mm) nuts
•
Flat blade screwdriver to tighten hose clamp
S
I
AFETY
NSTRUCTIONS AND
Read and follow these safety instructions and hazard warnings before installing a HiveAP 170 outdoors. Keep these
instructions for future reference.
•
To comply with RF (radio frequency) exposure limits, do not place the HiveAP 170 within 8" (20 cm) of people.
•
You can install the HiveAP 170 in wet, windy locations. Therefore, make sure to install the Ethernet cable
housing for a complete waterproof connection.
•
To protect the HiveAP 170 from lightning, do not place it at the highest point of a building or structure.
P/N 330052-01, Rev. A
G
UIDE
, R
A
EQUIRED
CCESSORIES
Figure
Base
Bracket (1)
Ground Cable (1)
S
,
AND
1.
(4) Hex Head Bolt, 3/8"x1/2"
(10 mm x 13 mm)
Lock Washer, Flat Washer 1/2" (13 mm)
Hose Strap (1)
(4) Round Head Screw 1/4" (6 mm)
Lock Washer, Flat Washer
Ethernet
(4) Sleeve Bolt Assembly
Housing (1)
H
W
ITE
AZARD
T
OOLS
Sleeve, 5/8" (16 mm),
Bolt 1 15/16" (5 cm),
Hex nut 3/8" (10 mm),
Washer 5/8" (16 mm)
ARNINGS
1
Advertisement
Table of Contents

Subscribe to Our Youtube Channel
Related Manuals for Aerohive HIVEAP 170


Summary of Contents for Aerohive HIVEAP 170
- Page 1 • To comply with RF (radio frequency) exposure limits, do not place the HiveAP 170 within 8" (20 cm) of people. • You can install the HiveAP 170 in wet, windy locations. Therefore, make sure to install the Ethernet cable housing for a complete waterproof connection.
-
Page 2: Device , Power , And Environmental Specifications
Do not locate the HiveAP 170 enclosure near overhead power lines or other electric light or power circuits, or where it can come into contact with such circuits. During installation, exercise extreme care not to come into contact with these circuits, which can cause serious injury or death. -
Page 3: Poe Connections
Note: For best performance, deploy HiveAPs at least 100 feet (30.5 m) apart from each other. PoE Connections In most cases, you can connect an Ethernet cable directly from your HiveAP 170 to a PoE-enabled switch, or to a PoE injector inside the building (see Figure 2). -
Page 4: Vertical Pole Mount
Aerohive Networks Vertical Pole Mount The following steps explain how to mount the HiveAP 170 on a vertical pole. 1. Attach the plane bracket to the back of the unit using the hex bolts, lock washers and flat washers. Tighten the bolts with a socket or nut driver. -
Page 5: Horizontal Pole Mount
When attaching the HiveAP 170 to a horizontal pole, such as the arm of a street light, make sure that the face of the device is perpendicular to the Earth for optimal RF coverage. -
Page 6: Flat Surface Mount
Aerohive Networks Flat Surface Mount The following steps explain how to mount the HiveAP 170 on a flat surface. You will need the plane bracket and the four sleeve-bolt assemblies. 1. Use the plane bracket as a template to mark the location of the mounting holes on the surface. -
Page 7: External Antennas
AH-ACC-170-ANT-5G). These antennas fit the N-type antenna connectors on the top and bottom of the HiveAP 170. The two connectors on the bottom of the unit are for the 2.4 GHz antennas, and the two on the top of the unit are for the 5 GHz antennas (device and antennas are labeled). - Page 8 Threaded Housing ONNECTING TO THE ETWORK The final step to the installation is to connect the HiveAP 170 to the network so that it can form a CAPWAP connection to HiveManager, as shown in Figure After you cable the HiveAP to an Ethernet network and it is receiving PoE power, it automatically attempts to get its network settings through DHCP and contact HiveManager.
- Page 9 HiveManager then form a secure contact HiveManager Online at CAPWAP connection on port 12222. redirector.aerohive.com:12222. If the HiveAP cannot make a If the Aerohive redirection server CAPWAP connection to has a serial number for that HiveAP HiveManager on port 12222, it tries HiveManager Online...
-
Page 10: Using The Virtual Access Console
If the HiveAP forms a CAPWAP connection with the Aerohive redirection server and its serial number has been entered in an ACL, the redirection server automatically redirects the CAPWAP connection the corresponding HiveManager Online VHM (virtual HiveManager). - Page 11 > HiveAPs page, do the following: • Check if the HiveAP serial number is listed in the ACL on the Aerohive redirection server. Log in to myaerohive.com, and then click Redirector > Monitor > HiveAP Access Control List. If the serial number is not in the ACL, click Enter, type the serial number in the HiveAP Serial Number field, and then click Save.
-
Page 12: Where To Go For More Information
Aerohive also offers CBT (computer-based training) modules. CBTs are online Flash tutorials that explain Aerohive concepts and walk you through configuration procedures step by step. You can use CBTs to familiarize yourself with the HiveManager GUI and learn how to configure HiveAPs. Aerohive CBTs are available for free...
Need help?
Do you have a question about the HIVEAP 170 and is the answer not in the manual?
Questions and answers