Table of Contents
Advertisement
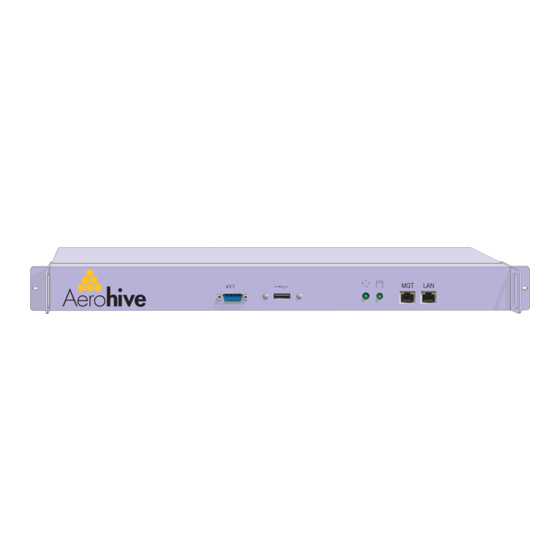
Quick Links
Advertisement
Table of Contents

Related Manuals for Aerohive HiveAP 20 ag


Summary of Contents for Aerohive HiveAP 20 ag
- Page 1 Aerohive Deployment Guide...
- Page 2 Copyright Notice Copyright © 2007 Aerohive Networks, Inc. All rights reserved. Aerohive Networks, the Aerohive Networks logo, HiveOS, HiveAP, and HiveManager are trademarks of Aerohive Networks, Inc. All other trademarks and registered trademarks are the property of their respective companies.
-
Page 3: Federal Communication Commission Interference Statement
HiveAP Compliance Information Federal Communication Commission Interference EC Conformance Declaration Statement Marking by the above symbol indicates compliance with the Essential Requirements of the R&TTE Directive of the European Union (1999/5/ This equipment has been tested and found to comply with the limits for EC). - Page 4 Radio LAN device overholder de væsentlige krav og øvrige relevante krav i direktiv Important! Before making connections, make sure you have the correct 1999/5/EF. cord set. Check it (read the label on the cable) against the following: Aerohive...
- Page 5 AP C OMPLIANCE NFORMATION Le cordon doit être en mesure d'acheminer un Power Cord Set courant nominal d'au moins 10 A. U.S.A. The cord set must be UL-approved and CSA certified. La prise femelle de branchement doit être du type à and Canada Minimum specifications for the flexible cord: mise à...
- Page 6 HiveAP Compliance Information Aerohive...
-
Page 7: Table Of Contents
Contents Chapter 1 The HiveAP Platform ..............9 Product overview ...................10 Ethernet and Console Ports ..................12 Status LEDs ......................13 Antennas ......................14 Mounting the HiveAP ..................15 Device, Power, and Environmental Specifications.............16 Chapter 2 The HiveManager Platform ............17 Product overview ...................18 Ethernet and Console Ports .................. - Page 8 Example 3: Using IEEE 802.1X Authentication ............78 Example 4: Applying QoS ..................81 CLI Commands for Examples ................87 Commands for Example 1 ..................87 Commands for Example 2 ..................87 Commands for Example 3 ..................88 Commands for Example 4 ..................89 Aerohive...
-
Page 9: Chapter 1 The Hiveap Platform
Chapter 1 The HiveAP Platform The Aerohive HiveAP 20 ag is a new generation wireless access point. HiveAPs offer unique abilities to self-organize and coordinate with each other, creating a distributed-control WLAN solution that offers greater mobility, security, quality of service, and radio control. -
Page 10: Product Overview
Access, and Mesh interfaces. For details, see "Status LEDs" on page 802.11a RP-SMA Connector (For future use) You can connect a detachable single-band antenna to the male 802.11a RP-SMA (reverse polarity-subminiature version A) connector. Note that doing so disables the adjacent fixed antenna. Aerohive... - Page 11 RODUCT OVERVIEW Component Description Power Connector The 48-volt DC power connector (0.38 amps) is one of two methods through which you can power a HiveAP . To connect it to a 100 – 240-volt AC power source, use the AC/DC power adaptor that ships with the product as an option.
-
Page 12: Ethernet And Console Ports
RJ-45 Connector White/Orange For cross-over Ethernet cables, the Orange wires terminate at one end according to the T568A standard and at the White/Green other according to T568B. Blue White/Blue Green White/Brown Brown Aerohive... -
Page 13: Status Leds
RODUCT OVERVIEW The pin assignments in the male DB-9 console port follow the EIA (Electronic Industries Alliance) RS-232 standard. To make a serial connection between your management system and the console port on the HiveAP, you can use a null modem serial cable, use another serial cable that complies with the RS-232 standard, or refer to the pin-to-signal mapping shown in Figure 3... -
Page 14: Antennas
Antenna Antenna Switch 1 Switch 2 802.11a/b/g 802.11a/b/g Dual-Band Dual-Band Fixed Fixed Antenna Antenna Radio 1 Radio 2 RF 802.11b/g RF 802.11a Cut-away view of the HiveAP to show the relationship of the antennas and the two internal radios. Aerohive... -
Page 15: Mounting The Hiveap
If you do not enter this command, the subinterface uses the remaining fixed antenna that remains connected to radio 2 (the external antenna only disables the adjacent fixed antenna). Note: For information about these and other commands, see the Aerohive CLI Reference Guide. OUNTING THE You can use the mounting plate to attach the HiveAP to any surface that supports its weight (1.5 lb., 0.68 kg) and to... -
Page 16: Device, Power, And Environmental Specifications
RJ-45 power input pins: Wires 4, 5, 7, 8 or 1, 2, 3, 6 Environmental Specifications • Operating temperature: 32 to 122 degrees F (0 to 50 degrees C) • Storage temperature: -4 to 158 degrees F (-20 to 70 degrees C) • Relative Humidity: Maximum 95% Aerohive... -
Page 17: Chapter 2 The Hivemanager Platform
Chapter 2 The HiveManager Platform The HiveManager is a management appliance that provides centralized configuration, monitoring, and reporting for multiple HiveAPs. The following are a few of the many benefits that a HiveManager offers: • True "zero configuration" installations of HiveAPs •... -
Page 18: Product Overview
Chapter 2 The HiveManager Platform RODUCT OVERVIEW The Aerohive HiveManager is a central management system for configuring and monitoring HiveAPs. You can see its hardware components in Figure 1 and read a description of each component in Table Figure 1 HiveManager Hardware Components... -
Page 19: Ethernet And Console Ports
RODUCT OVERVIEW Component Description USB Port The USB port is reserved for internal use. Status LEDs The status LEDs convey operational states for the system power and hard disk drive. For details, see "Status LEDs" on page MGT and LAN Ethernet Ports The MGT and LAN Ethernet ports are compatible with 10/100/1000-Mbps connections, automatically negotiate half- and full-duplex mode with the connecting devices, and support RJ-45 connectors. -
Page 20: Status Leds
(steady glow or blinking). The meanings of the various color + illumination patterns for each LED are shown in Figure Figure 4 Status LEDs System Power Hard Disk Drive Dark: No power Dark: Idle Steady illumination: Powered on Blinking: Active Aerohive... -
Page 21: Rack Mounting The Hivemanager
OUNTING THE ANAGER OUNTING THE ANAGER You can mount the HiveManager in a standard 19" (48 cm) equipment rack with two rack screws—typically 3/4", 1/2", or 3/8" long with 10-32 threads. The HiveManager ships with mounting brackets already attached to its left and right sides near the front panel (see Figure 1 on page 18). -
Page 22: Device, Power, And Environmental Specifications
Power supply cord: Standard three conductor SVT 18AWG cord with an NEMA5-15P three-prong male plug and three-pin socket Environmental Specifications • Operating temperature: 32 to 140 degrees F (0 to 60 degrees C) • Storage temperature: -4 to 176 degrees F (-20 to 80 degrees C) • Relative Humidity: 10% – 90% (noncondensing) Aerohive... -
Page 23: Chapter 3 Using Hivemanager
Chapter 3 Using HiveManager You can conceptualize the Aerohive cooperative control architecture as consisting of three broad planes of communication. On the data plane, wireless clients gain network access by forming associations with HiveAPs. On the control plane, HiveAPs communicate with each other to coordinate functions such as best-path forwarding, fast roaming, and automatic RF (radio frequency) management. -
Page 24: Installing And Connecting To The Hivemanager Gui
"Cloning Configurations" on page 29 • "Sorting Displayed Data" on page 30 • "Multiselecting" on page 30 • "HiveManager Configuration Workflow" on page 31 • "Updating HiveAP Firmware" on page 32 • "Updating Software on the HiveManager" on page 33 Aerohive... -
Page 25: Installing And Connecting To The Hivemanager Gui
• Flow control: none 5. Log in by entering the default user name (root) and password (aerohive). 6. The network startup wizard automatically starts. If not, enter the following command: startupWizard.sh 7. Follow the instructions in the wizard to configure the IP address and netmask for the MGT and LAN interfaces, as well as the default gateway and host name of the HiveManager and its primary DNS server. - Page 26 Figure 3 Using Just the MGT Interface Default Gateway: 10.1.1.1 (The HiveManager sends all traffic to the default gateway.) 8. After you complete the startup wizard, enter these commands to reboot the software: stopHiveManager.sh root public reboot You can now disconnect the serial cable. Aerohive...
- Page 27 When the download and installation completes, a login prompt appears. 4. Type the default user name and password (root and aerohive) in the login fields and then click Connect. The HiveManager GUI application automatically opens and prompts you to enter a license key.
-
Page 28: Introduction The The Hivemanager Gui
Some convenient aspects that the HiveManager GUI offers are the ability to detach windows, clone configurations, sort displayed information, and apply configurations to multiple HiveAPs at once. A brief overview of this functionality is presented in the following sections. Aerohive... -
Page 29: Detaching Windows
NTRODUCTION THE THE ANAGER Detaching Windows When a HiveManager window contains so much information that you cannot display everything you want to see, you can detach it from the confines of its framed area. Click the Detach Current Window button in the toolbar. Then you can resize and reshape it to the dimensions you want, essentially customizing your work space. -
Page 30: Sorting Displayed Data
Shift-click to select multiple contiguous objects or control-click to select multiple noncontiguous objects. Then click the Modify button ( ) in the toolbar. The changes you make in the Edit User Profile dialog box apply to both of the selected user profiles. Here, you are changing the comment. Aerohive... -
Page 31: Hivemanager Configuration Workflow
ANAGER ONFIGURATION ORKFLOW ANAGER ONFIGURATION ORKFLOW Assuming that you have already installed your HiveAPs, uploaded maps (see "Setting Up Topology Maps" on page 37), and decided on the features and settings you want them to use, you are now ready to start configuring the HiveAPs through the HiveManager . -
Page 32: Updating Hiveap Firmware
The HiveManager makes it easy to update firmware running on managed HiveAPs. First, you obtain new HiveAP firmware from Aerohive support and upload it to the HiveManager. Then you push the firmware to the HiveAPs and activate it by rebooting the HiveAPs. -
Page 33: Updating Software On The Hivemanager
HiveManager GUI. If you save the image to a TFTP server, you can direct the HiveManager to log in and load it from a directory there. 1. Contact Aerohive support to obtain a new HiveManager image. 2. Save the HiveOS image file to a local directory, an FTP server, or a TFTP server. - Page 34 Image Name: Type the name of the HiveOS image file. 2. Click Finish to save the new software (without rebooting the HiveManager) or click Reboot to reboot the HiveManager with the new software now. Note: For the HiveManager to use the newly loaded image, you must reboot it. Aerohive...
-
Page 35: Chapter 4 Hivemanager Examples
Chapter 4 HiveManager Examples The following examples in this chapter show how to install over 70 HiveAPs at three locations in a corporate network, use the HiveManager to create configurations for them, and then push the configurations to them over the corporate network. - Page 36 "Example 2: Defining Network Objects" on page 42 Define a MAC OUI (organizationally unique identifier) and MAC filter so that QoS classifiers, SSID profiles, and device groups can reference them. You also map the MAC OUI and several services to Aerohive classes. •...
-
Page 37: Example 1: Mapping Locations And Installing Hiveaps
1: M XAMPLE APPING OCATIONS AND NSTALLING The HiveManager allows you to mark the location of HiveAPs on maps that you can then use to track devices and monitor their status. First, you must upload the maps to the HiveManager, and then name and arrange them in a structured hierarchy (see "Setting Up Topology Maps"). - Page 38 Name: HQ-B1-F1 • Icon: floor • Background Map: HQ-B1-F1.png • Location: HQ-B1-F1 A green floor icon ( ) labeled "HQ-B1-F1" appears on the CorpOffices image, and a new entry named "HQ-B1-F1" appears nested under "CorpOffices" in the menu tree. Aerohive...
- Page 39 4. Select the icon, drag it to the position where you want it to be, and then click Save . 5. Click HiveAP Maps > CorpOffices > Topology > Add Submap. 6. In the Add HQ-B1-F1 dialog box, enter the following, and then click OK: •...
-
Page 40: Preparing The Hiveaps
Also, on the HiveAP Management > New HiveAPs > Automatically discovered page in the HiveManager GUI, you can sort detected HiveAPs by map name so that you can more easily assign them to device groups, radio profiles, and hive profiles. Aerohive... - Page 41 HiveAPs throughout the buildings. The MAC address on the label is for the mgt0 interface. Because the MAC addresses of all HiveAPs begin with the Aerohive MAC OUI 00:19:77, you only need to record the last six numbers in the address. For example, if the MAC OUI is 0019:7700:0120, you only need to write "000120" to be able to distinguish it from other HiveAPs later.
-
Page 42: Example 2: Defining Network Objects
In this example, you define a MAC OUI object for the type of VoIP (Voice over IP) phones in use in the network and assign it to Aerohive class 6. After you configure QoS (Quality of Service) settings for voice traffic, HiveAPs can then use the OUI to distinguish voice traffic so that they can prioritize it (see "Example 3: Defining User Profiles and QoS... - Page 43 Mapping the MAC OUI and Services to Aerohive Classes Map VoIP phone MAC OUIs to Aerohive class 6 so that you can give voice traffic higher priority than other types of traffic. Because voice traffic is delay-sensitive, you need to make sure that the HiveAPs forward voice traffic immediately.
- Page 44 Note: You do not need to configure HTTP , because that service is predefined and is already mapped to Aerohive class 2. 9. To close the New QoS Classification and Marking Policy dialog box, click OK. Creating a MAC Filter The MAC filter that you define here becomes useful when you define the SSID for voice traffic (see "voip SSID"...
-
Page 45: Example 3: Defining User Profiles And Qos Settings
Figure 7 User Profiles and their Forwarding Rates and Weights In addition, there are Aerohive class weights, scheduling types, and rate limits applied to each class of traffic within a user profile. Through these factors, a HiveAP can further prioritize different types of traffic. The settings used in... - Page 46 Weighted Round Robin You set the rate limits for Aerohive classes 0 – 5 at 56 Kbps to ensure that—even if the VoIP phone is updating its software or is otherwise engaged in activity other than voice traffic—some bandwidth remains reserved for voice.
- Page 47 IT Staff User Profile 1. Click HiveAP Configuration > QoS Policies > User Profiles > (Add button). The New User Profile dialog box appears. 2. On the General page, enter the following: • User Profile Name: IT (You cannot include any spaces when defining a user profile name.) •...
- Page 48 4 - Controlled Load Weighted Round Robin 2000 3 - Excellent Effort Weighted Round Robin 2000 2 - Best Effort 1 Weighted Round Robin 2000 1 - Best Effort 2 Weighted Round Robin 2000 0 - Background Weighted Round Robin 2000 Aerohive...
-
Page 49: Example 4: Setting Ssid Profiles
4: S SSID P XAMPLE ETTING ROFILES An SSID (service set identifier) is an alphanumeric string that identifies a set of authentication and encryption services that wireless clients and access points use when communicating with each other. In this example, you define the following three SSID profiles, which are also shown in Figure SSID Name... - Page 50 3. Click the MAC Filter tab. 4. From the MAC Filter Name drop-down list, choose corpVoIPphones, click Add, and then click OK. By applying a MAC filter to the voip SSID, you restrict access to VoIP phones matching the specified OUI. Aerohive...
- Page 51 corp SSID 1. Click HiveAP Configuration > SSID Profiles > (Add button). The New SSID Profile dialog box appears. 2. On the General page, enter the following, and then click OK: • Name: corp • Comment: SSID for corporate employees •...
-
Page 52: Example 5: Setting Management Service Parameters
HiveAPs query the secondary server through a VPN tunnel if queries to the local primary server elicit no replies. • Syslog and SNMP servers (Same as "hq") • NTP server (Same as "hq") Figure 10 Location of Servers in Relation to Each Management Service Set Aerohive... - Page 53 Management Services Set: hq 1. Click HiveAP Configuration > Management Services > (Add button). The New Management Services dialog box appears. 2. On the General page, enter the following: • Profile Name: hq (You cannot include spaces in the name of a management services profile.) •...
- Page 54 3. On the General page, modify only the following settings, and then click OK: • Comment: Mgt settings for branch HiveAPs DNS Server Configuration: • Select 10.1.1.25 HQ Primary DNS Server, click Edit, enter the following, and then click OK: — IP Address: 10.2.2.251 — Comment: Branch Primary DNS Server Aerohive...
-
Page 55: Example 6: Setting Aaa Radius Settings
6: S AAA RADIUS S XAMPLE ETTING ETTINGS In this example, you define the connection settings for a RADIUS server so that HiveAPs can send RADIUS authentication requests—encapsulated in EAP (Extensible Authentication Protocol) packets—to the proper destination. After corporate employees associate with HiveAPs, they gain network access by authenticating themselves to a RADIUS server. - Page 56 RADIUS home servers. You can then add and remove multiple HiveAPs without having to reconfigure the RADIUS home servers after each change. Aerohive...
-
Page 57: Example 7: Creating Two Device Groups
"Example 5: Setting Management Service Parameters" on page 52 Defined in "Example 6: Setting AAA RADIUS Settings" on page 55 Defined in "Mapping the MAC OUI and Services to Aerohive Defined in "Example 3: Defining User Profiles and QoS Settings" on page 45 Defined in "Example 4: Setting SSID Profiles"... - Page 58 QoS Classification and Marking Policy: VoIP-QoS The QoS classification policy was previously defined. See "Mapping the MAC OUI and Services to Aerohive Classes" on page 3. In the Profile Mappings section, click Add. The New SSID-User Profile-VLAN Mapping dialog box appears.
- Page 59 9. Click in the empty User Profile cell to activate the drop-down list, choose Emp, select Default for Employees user profile, set the VLAN ID as 1, and then click Add. 10. Click in the new empty User Profile cell to activate the drop-down list, choose IT, set the VLAN ID as 1, and then click OK.
-
Page 60: Example 8: Creating Three Hive Profiles
2. In the Profile Name field, type Hive3, and then click OK. The Hive3 Hive Profile dialog box appears. 3. Modify the comment to an appropriate description for Hive3, such as "Hive for Branch Site", leave the other options at their default settings, and then click OK. Aerohive... -
Page 61: Example 9: Assigning Hiveaps To A Device Group, Radio Profile, Hive Profile, And Topology Map
9: A XAMPLE SSIGNING S TO A EVICE ROUP ADIO ROFILE ROFILE OPOLOGY After completing the steps in the previous examples, you can now assign the following device settings as appropriate to each detected HiveAP: • Device group (created in "Example 7: Creating Two Device Groups"... - Page 62 — Radio Profile: def-radio-profile-mode(bg) — Radio Channel: Auto (Default) — Radio Power: Auto (Default) • wifi1 — Admin State: Up (default) — Operation Mode: Backhaul — Radio Profile: def-radio-profile-mode(a) — Radio Channel: Auto (Default) — Radio Power: Auto (Default) Aerohive...
- Page 63 Changing the login settings for the managed HiveAPs is an important security precaution. The default user name and password are admin and aerohive. The HiveManager offers great flexibility and convenience in how you assign new login settings. You can assign a new...
- Page 64 Chapter 4 HiveManager Examples Aerohive...
-
Page 65: Chapter 5 Hiveos
Chapter 5 HiveOS You can deploy a single HiveAP and it will provide wireless access as an autonomous AP (access point). However, if you deploy two or more HiveAPs in a hive, you can provide superior wireless access with many benefits. A hive is a set of HiveAPs that exchange information with each other over a layer-2 switched network to form a collaborative whole (see Figure... -
Page 66: Common Default Settings And Commands
{ strict rate_limit 0 | wrr user rate limit = 54,000 Kbps rate_limit weight } mode = strict forwarding for all Aerohive classes qos policy def-user-policy user-profile classes 0 - 4 rate limit = 54,000 Kbps rate_limit weight class 5 rate limit = 10,000 Kbps... -
Page 67: Configuration Overview
ONFIGURATION VERVIEW ONFIGURATION VERVIEW The amount of configuration depends on the complexity of your deployment. As you can see in "Deployment Examples (CLI)" on page 69, you can enter a minimum of three commands to deploy a single HiveAP, and just a few more to deploy a hive. -
Page 68: Policy-Level Configurations
RADIUS server—an SSID that references the user profile, and a subinterface to which you assign the SSID. The configuration steps are shown in Figure Figure 2 Steps for Configuring and Applying QoS Aerohive... -
Page 69: Chapter 6 Deployment Examples (Cli)
Chapter 6 Deployment Examples (CLI) This chapter presents several deployment examples to introduce the primary tasks involved in configuring HiveAPs through the HiveOS CLI. "Deploying a Single HiveAP" on page 70, you deploy one HiveAP as an autonomous access point. This is the simplest configuration: you only need to enter and save three commands. -
Page 70: Example 1: Deploying A Single Hiveap
Note: If the switch supports PoE (Power over Ethernet), the HiveAP can receive its power that way instead. The Power LED glows steady amber during the bootup process. After the bootup process completes, it then glows steady green to indicate that the firmware is loaded and running. Aerohive... - Page 71 5. Because you do not need to configure all the settings presented in the wizard, press CTRL+c to exit it. The login prompt appears. 6. Log in using the default user name admin and password aerohive. Step 2 Configure the HiveAP 1.
- Page 72 Note: You can also enter the following commands to check the association status of a wireless client: show auth, show roaming cache, and show roaming cache mac <mac_addr>. The setup of a single HiveAP is complete. Wireless clients can now associate with the HiveAP using SSID "employee" and access the network. Aerohive...
-
Page 73: Example 2: Deploying A Hive
2: D XAMPLE EPLOYING A Building on "Deploying a Single HiveAP" on page 70, the office network has expanded and requires more HiveAPs to provide greater coverage. In addition to the basic configuration covered in the previous example, you configure all three HiveAPs to form a hive within the same layer 2 switched network. - Page 74 3. Before closing the console session, check the radio channel that HiveAP-1 uses on its backhaul subinterface, which by default is wifi1.1: Write down the channel number for future reference (in this example, it is 149). When configuring HiveAP-2 and -3, set their wifi1.1 subinterfaces for backhaul communications to this channel. exit Aerohive...
- Page 75 Step 2 Configure HiveAP-2 and HiveAP-3 1. Power on HiveAP-2 and log in through its console port. 2. Configure HiveAP-2 with the same commands that you used for HiveAP-1: ssid employee ssid employee security protocol-suite wpa-auto-psk ascii-key N38bu7Adr0n3 interface wifi0.1 ssid employee hive hive1 hive hive1 password s1r70ckH07m3s interface mgt0 hive hive1...
- Page 76 Chapter 6 Deployment Examples (CLI) 6. Check that HiveAP-3 has associated with the other members at the wireless level. Aerohive...
- Page 77 7. To check that the hive members have full data connectivity with each other, associate a client in wireless network-1 with HiveAP-1 (the SSID "employee" is already defined on clients in wireless network-1; see "Deploying a Single HiveAP"). Then check if HiveAP-1 forwards the client’s MAC address to the others to store in their roaming caches.
-
Page 78: Example 3: Using Ieee 802.1X Authentication
RADIUS server at 10.1.1.10. The RADIUS server is in turn Wireless Network Access Connections linked to the database of the Active Directory server on which all the user accounts have previously been created and stored. Wired Ethernet Network Connections Aerohive... - Page 79 Note: This example assumes that the RADIUS and AD servers were previously configured and populated with user accounts that have been in use on a wired network (not shown). The only additional configuration on these servers is to enable the RADIUS server to accept authentication requests from the HiveAPs. Step 1 Define the RADIUS server on the HiveAP-1 Configure the settings for the RADIUS server (IP address and shared secret) on HiveAP-1.
- Page 80 <mac_addr>. The setup for using IEEE 802.1X is complete. Wireless clients can now associate with the HiveAP using SSID "employee", authenticate themselves through IEEE 802.1X to a RADIUS server, and access the network. Aerohive...
-
Page 81: Example 4: Applying Qos
In this example, you want the hive members to prioritize voice, streaming media, and e-mail traffic. First, you map distinguishing elements of these traffic types to three Aerohive QoS (Quality of Service) classes: Class 6: voice traffic from VoIP phones with MAC OUI 00:12:3b (the OUI for all phones in the network) Voice traffic is very sensitive to delay and cannot tolerate packet loss without loss of voice quality. - Page 82 Chapter 6 Deployment Examples (CLI) Note: The HiveAP assigns all traffic that you do not specifically map to an Aerohive class to class 2, which by default uses WRR with a weight of 30 and a rate of 54,000 Kbps.
- Page 83 The MMS (Microsoft Media Server) protocol can use several transports (UDP, TCP , and HTTP). However, for a HiveAP to be able to map a service to an Aerohive QoS class, it must be able to identify that service by a unique characteristic such as a static destination port number or a nonstandard protocol number.
- Page 84 Aerohive QoS classes 0, 1, 2, 4, and 7, the policy applies default settings to them. The HiveAP assigns all traffic that you do not specifically map to an Aerohive class to class 2, which uses WRR with a weight of 30 and a rate of 54,000 Kbps by default.
- Page 85 Figure 5 QoS Policy "voice" 2. Create a user profile and apply the QoS policy to it. user-profile employee-net group-id 2 qos-policy voice You apply the QoS policy "voice" to all users belonging to the user-profile "employee-net" with group ID 2.
- Page 86 When there is more traffic than available bandwidth, the HiveAP applies the "voice" policy. It performs strict forwarding for voice and uses a WRR (weighted round robin) scheduling discipline for directing streaming media and data traffic to queues to await forwarding. The QoS configuration is complete. Aerohive...
-
Page 87: Cli Commands For Examples
CLI C OMMANDS FOR XAMPLES CLI C OMMANDS FOR XAMPLES This section includes all the CLI commands for configuring the HiveAPs in the previous examples. The CLI configurations are presented in their entirety (without explanations) for easy copying and pasting. Simply copy the blocks of text for configuring the HiveAPs in each example and paste them at the command prompt. -
Page 88: Commands For Example 3
10.1.1.10 shared-secret s3cr3741n4bl0X ssid employee security protocol-suite wpa-auto-8021x save config HiveAP-2 aaa radius-server first 10.1.1.10 shared-secret s3cr3741n4bl0X ssid employee security protocol-suite wpa-auto-8021x save config HiveAP-3 aaa radius-server 10.1.1.10 shared-secret s3cr3741n4bl0X ssid employee security protocol-suite wpa-auto-8021x save config Aerohive... -
Page 89: Commands For Example 4
CLI C OMMANDS FOR XAMPLES Commands for Example 4 Enter the following commands to configure the hive members to apply QoS (Quality of Service) to voice, streaming media, and data traffic in "Applying QoS" on page HiveAP-1 qos classifier-map oui 00:12:3b qos 6 service mms tcp 1755 service smtp tcp 25 service pop3 tcp 110... - Page 90 5 wrr 20000 90 qos policy voice qos 3 wrr 54000 60 user-profile employee-net group-id 2 qos-policy voice save config Aerohive...
Need help?
Do you have a question about the HiveAP 20 ag and is the answer not in the manual?
Questions and answers