
Related Manuals for Metos WD-215T


Summary of Contents for Metos WD-215T
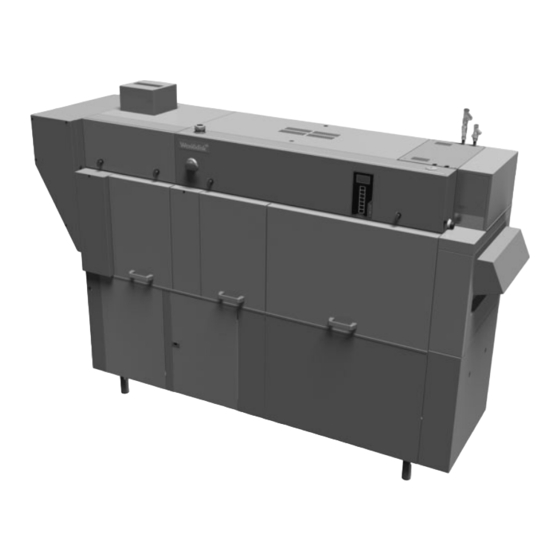
- Page 1 TRAY DISHWASHER WD-215T (translation of original documentation) Installation and user manual S/N: Gäller från:01. 09. 2011 Rev.: 3.0...
- Page 2 When you need service or technical help, please let us know the serial number shown on the rating plate. This will make it easier to provide you with correct serv- ice. For your convenience, space is provided below for you to record your local Metos service contact information. METOS TEAM Metos service phone number:................
-
Page 3: Table Of Contents
WD-215T Rev. 1. General information ................. 1 1.1 Symbols used in this manual ................1 1.2 Symbols on the dishwasher ................2 1.2.1 Machine marking ..................2 1.3 Checking that the machine and the manual correspond ........2 2. Safety instructions ................3 2.1 General information .................. - Page 4 WD-215T Rev. 3.7 Connections ..................... 9 3.7.1 Water connection ..................10 3.7.2 Steam connection (steam-heated machine) ........... 10 3.7.3 Condensation water connection (steam-heated machine) ..... 10 3.7.4 Drain connection ..................10 3.7.5 Ventilation ....................10 3.7.6 Electrical connection ................11 3.8 Installing detergent and drying agent equipment ...........
-
Page 5: General Information
WD-215T Rev. 3.0 (201109) General information 1. General information Read the instructions in this manual carefully as they contain important informa- tion regarding the correct, effective and safe installation, use and servicing of the dishwasher. Keep this manual in a safe place so that it can be used by other operators of the dishwasher. -
Page 6: Symbols On The Dishwasher
WD-215T Rev. 3.0 (201109) General information 1.2 Symbols on the dishwasher This symbol on a machine component warns of the presence of electrical equip- ment. The component may only be removed by a qualified electrician. The ma- chine is sensitive to electrostatic discharge (ESD), which is why a static electricity wristband must be used when handling the electronics. -
Page 7: Safety Instructions
WD-215T Rev. 3.0 (201109) Safety instructions 2. Safety instructions 2.1 General information The machine is CE marked, which means that it complies with the requirements of the EU machinery directive with regard to product safety. Product safety means that the design of the machine will prevent personal injury or damage to property. -
Page 8: Detergent And Drying Agent
WD-215T Rev. 3.0 (201109) Safety instructions 2.4 Detergent and drying agent Only detergent and drying agent intended for industrial dishwashing machines must be used. Washing-up liquid must not be used in the machine or for pre-treat- ing items (soaking, pre-washing, etc.). Contact your detergent supplier regarding the choice of a suitable detergent. -
Page 9: Cleaning The Floor
WD-215T Rev. 3.0 (201109) Safety instructions 2.6.3 Cleaning the floor When the floor is washed, water can splash up under the machine and damage the components. These have not been designed to withstand being washed with water. Do not wash the floor within 1 metre of the dishwasher. Pressure washers have special protective cases which can be fitted to prevent water splashing. -
Page 10: Installation
WD-215T Rev. 3.0 (201109) Installation 3. Installation 3.1 General information The machine must be installed by authorised personnel only. Read these instructions carefully, as they contain important information regarding the correct installation method. The instructions should be used together with the flow diagram and the machine’s wiring diagram. -
Page 11: Transport And Storage
WD-215T Rev. 3.0 (201109) Installation 3.3 Transport and storage Check that there is sufficient height available to transport the machine to its instal- lation site. The machine is supplied with a pallet. Transport it to the installation site using a handtruck. -
Page 12: Installation
WD-215T Rev. 3.0 (201109) Installation 3.6 Installation 3.6.1 Preparing for the installation Check that the overheating protection on the booster heater and the tank element are set to zero. 3.6.2 Positioning the machine The final position of the machine is either free-standing in the room or placed with the back against a wall. -
Page 13: Connections
WD-215T Rev. 3.0 (201109) Installation 3.7 Connections The picture shows a machine with the feed direction from right to left. The oppo- site feed direction is also available. WD215T_12_R1 Installation drawing. A=Perforation in the end plate for drain connection. Electrical connection. -
Page 14: Water Connection
WD-215T Rev. 3.0 (201109) Installation 3.7.1 Water connection Connect the cold water pipe (2) and the hot water pipe (3). When connecting from the floor (extra equipment), connect the cold and hot water pipe to (9) and (10) respectively, on the back of the machine. -
Page 15: Electrical Connection
WD-215T Rev. 3.0 (201109) Installation 3.7.6 Electrical connection The locking knob for the electrical cabinet door is supplied packed inside the ma- chine on delivery. This symbol on a machine component warns of the presence of electrical equip- ment. The component may only be removed by a qualified electrician. The ma- chine is sensitive to electrostatic discharge (ESD), which is why a static electricity wristband must be used when handling the electronics. -
Page 16: Installing Detergent And Drying Agent Equipment
WD-215T Rev. 3.0 (201109) Installation 3.8 Installing detergent and drying agent equipment The machine is ready for fitting detergent and drying agent equipment, but this is not included in the delivery. To avoid making unnecessary holes in the machine, the equipment should be placed on the wall behind the machine. -
Page 17: Checking And Setting The Final Rinse Flow
WD-215T Rev. 3.0 (201109) Installation 3.9 Checking and setting the final rinse flow The final rinse flow is set in the factory, but should be checked after the machine has been installed. WD215T_8 Functions on control panel and circuit board for checking and setting the final rinse flow. -
Page 18: Trial Run
WD-215T Rev. 3.0 (201109) Installation 3.10 Trial run Prepare the machine for a trial run by following the INSTRUCTIONS FOR USE. The instructions describe the measures that must be taken to prepare the ma- chine for operation. 3.10.1 Start-up schedule This should be completed and signed by the customer on start-up. - Page 19 WD-215T Rev. 3.0 (201109) Installation 1. Check: • Water, steam and drain connections • That the machine is evenly balanced • That the closed doors are in line • Adaptation of possible tray exemptions • Detergent and drying agent •...
-
Page 20: Technical Documentation
WD-215T Rev. 3.0 (201109) Installation 3.11 Technical documentation To ensure that the machine is operated and serviced correctly, it is important that the documentation supplied with the machine is made available to the personnel using it. The installation and user manual, which describes handling and care among other things, should be stored near the machine. -
Page 21: Instructions For Use
WD-215T Rev. 3.0 (201109) Instructions for use 4. Instructions for use All staff using the machine must be given training in how the machine works by the person responsible for staff safety. The dishwasher should not be used by anyone suffering from a physical or mental illness. - Page 22 WD-215T Rev. 3.0 (201109) Instructions for use Display for messages. LED which indicates that functions are enabled. Button for starting the filling process and heating of the machine. Button for manually unloading the trays. Button to start/stop the feed. Button for diagnostics function (only for service engineers).
-
Page 23: Preparations Before Filling
WD-215T Rev. 3.0 (201109) Instructions for use 4.1.2 Preparations before filling Check: • that the machine has been cleaned and that the stopcocks for the water are open. • that any tray dispenser for the storage of trays is in place. -
Page 24: Using The Machine
WD-215T Rev. 3.0 (201109) Instructions for use 4.2 Using the machine 4.2.1 Washing • Before trays are fed into the machine, they must be soaked to remove dried-on pieces of food. • Push in the trays on the long side first through the feed opening. The belt and the washing process will start. -
Page 25: Unloading Trays Manually
WD-215T Rev. 3.0 (201109) Instructions for use 4.2.5 Unloading trays manually Manual unloading is used to empty the machine of trays. When the last trays need to be washed and the machine has stopped, use the manual unloading mode to take the remaining trays out of the machine. - Page 26 WD-215T Rev. 3.0 (201109) Instructions for use Rec_filter Filter for final rinse Cleaning the outside of the machine Wipe the outside of the machine with a soft, damp cloth. If detergent is used, it must not contain abrasives. Detergents containing abra- sives will damage the stainless steel panels.
-
Page 27: Cleaning And Checking Each Week Or As Required
WD-215T Rev. 3.0 (201109) Instructions for use Incorrect cleaning methods NOTE: If the incorrect cleaning method is used, this may damage the machine. The following points must be observed: Do NOT use steel wool as it will cause corrosion to form in the machine. -
Page 28: Cleaning In The Event Of An Alarm Or Once A Year
WD-215T Rev. 3.0 (201109) Instructions for use 4.3.3 Cleaning in the event of an alarm or once a year The machine's condensing battery (D) must be cleaned at least once a year or when an alarm with a message about cleaning the battery appears on the control panel display. - Page 29 WD-215T Rev. 3.0 (201109) Instructions for use NOTE: When cleaning the battery and the base of the battery box, do not use more water than the drain (E) under the battery can remove from the machine. The battery must be cleaned with hot water at normal pressure. Do not aim the water directly at the fan motor (5) on the end of the battery.
-
Page 30: Operating Problems
WD-215T Rev. 3.0 (201109) Instructions for use 4.3.4 Operating problems Troubleshooting In addition to the faults shown on the control panel, other faults can occur. The table below shows some faults which can be rectified by the operator. If the prob- lem persists, contact authorised service personnel. - Page 31 WD-215T Rev. 3.0 (201109) Instructions for use Error messages Machine faults and user faults are indicated with messages on the display (1). If an alarm occurs, LED (8) will light up or flash. If the LED flashes, the alarm can be reset by pressing button (9).
- Page 32 WD-215T Rev. 3.0 (201109) Instructions for use Alarm texts Alarm text Cause Action (31) Reset the alarm by pressing button (9). TIMEOUT HEATING Contact service personnel. TANKS AND BOILERS PRESS RESET (33) Close the door and start the feed by DOOR IS OPEN pressing button (5).
- Page 33 WD-215T Rev. 3.0 (201109) Instructions for use Alarm texts Alarm text Cause Action (75) The rinse nozzles (15) for the final rinse Clean the nozzles. Reset the alarm by FINAL RINSE ERROR are blocked. pressing button (9). LOW FLOW IN...
-
Page 34: Teknisk Information
WD-215T Rev. 3.0 (201109) Teknisk information 5. Teknisk information The manufacturer reserves the right to make changes to the technical data. Technical data Pump motor chemical wash (kW) Pump motor, recirculating rinse (kW) 0,11 Condensing fan (kW) 0,12 Drying zone fan (kW) - Page 35 WD-215T Rev. 3.0 (201109) Teknisk information Connection, steam-heated machine 50-140 kPa Total connected power (kW) Main fuse 400V 3N~ (A) * Max. connection area 400V 3N~ (L1-L3, N, PE) Cu (mm²) Steam connection (internal thread) R 1" Condensing water connection (internal thread) R ½"...
Need help?
Do you have a question about the WD-215T and is the answer not in the manual?
Questions and answers