Table of Contents
Advertisement
Quick Links
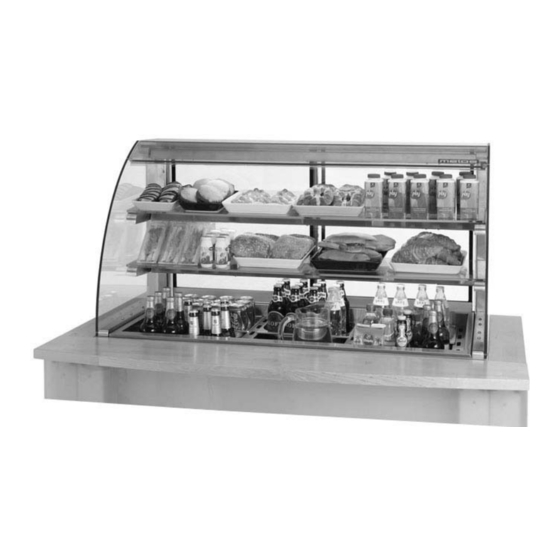
COLD DISPLAY
HALO
4312000, 4312002, 4312004, 4312030, 4312032, 4312034, 4312060, 4312062, 4312064, 4312304, 4312306, 4312308,
4312100, 4312102, 4312104, 4312110, 4312112, 4312114, 4312130, 4312140, 4312132, 4312134, 4312180, 4312182,
4312184, 4312186, 4312188, 4312190, 4312286, 4312160, 4312162, 4312164, 4312170, 4312172, 4312174, 4312192,
4312194, 4312196, 4312106, 4312108, 4312200, 4312202, 4312204, 4312210, 4312212, 4312240, 4312280, 4312282,
4312284, 4312288, 4312290, 4312260, 4312262, 4312264, 4312270, 4312272, 4312274, 4312292, 4312294, 4312296,
4312304, 4312306, 4312308
S/N: 10960903010010
Rev.: 1.2
Advertisement
Table of Contents

Related Manuals for Metos HALO Series


Summary of Contents for Metos HALO Series
- Page 1 COLD DISPLAY HALO 4312000, 4312002, 4312004, 4312030, 4312032, 4312034, 4312060, 4312062, 4312064, 4312304, 4312306, 4312308, 4312100, 4312102, 4312104, 4312110, 4312112, 4312114, 4312130, 4312140, 4312132, 4312134, 4312180, 4312182, 4312184, 4312186, 4312188, 4312190, 4312286, 4312160, 4312162, 4312164, 4312170, 4312172, 4312174, 4312192, 4312194, 4312196, 4312106, 4312108, 4312200, 4312202, 4312204, 4312210, 4312212, 4312240, 4312280, 4312282, 4312284, 4312288, 4312290, 4312260, 4312262, 4312264, 4312270, 4312272, 4312274, 4312292, 4312294, 4312296, 4312304, 4312306, 4312308 S/N: 10960903010010...
- Page 3 Dear Customer, Congratulations on deciding to choose a Metos appliance for your kitchen activities. You made an excellent choice. We will do our best to make you a satisfied Metos customer like thousands of customers we have around the world.
- Page 4 2.9.2009 Rev. 1.2...
-
Page 5: Table Of Contents
2.9.2009 Rev. 1. General ......................1 1.1 Symbols used in the manual ..................1 1.2 Symbols used on the appliance ..................1 1.3 Checking the relation of the appliance and the manual ..........1 2. Safety ......................2 2.1 Safe use of the appliance ....................2 2.2 Disposal of the appliance .................... - Page 6 2.9.2009 Rev.
-
Page 7: General
2.9.2009 Rev. 1.2 General 1. General Carefully read the instructions in this manual as they contain important information re- garding proper, efficient and safe installation, use and maintenance of the appliance. Keep this manual in a safe place for eventual use by other operators of the appliance. The installation of this appliance must be carried out in accordance with the manufactur- er’s instructions and following local regulations. -
Page 8: Safety
2.9.2009 Rev. 1.2 Safety 2. Safety 2.1 Safe use of the appliance For safe use of the appliance, observe the following safety instructions: • When moving or servicing the appliance, always unplug it from the power supply. • While cleaning the appliance, be cautious not to allow the electrical devices to come into contact with water. -
Page 9: Functional Description
2.9.2009 Rev. 1.2 Functional description 3. Functional description 3.1 Intended use of the appliance The appliance is designed for use in serving lines, restaurants, cafés and kitchens. The upper section and basin of the cold display are designed for short-time storage of pre- cooled foodstuffs before distribution. -
Page 10: Operating Switches
2.9.2009 Rev. 1.2 Functional description 3.2.1 Operating switches Operating panel Main switch (green) Light switch (orange) Thermostat Operating panel (models with refrigerated cupboard) Main switch, display (green) Thermostat, display Light switch (orange) Thermostat, refrigerated cupboard Main switch, refrigerated cupboard (green) -
Page 11: Operating Instructions
2.9.2009 Rev. 1.2 Operating instructions 4. Operating instructions 4.1 Operation Before putting products in the unit, wait until it has reached the temperature set with the thermostat. Correct cold storage of foodstuffs facilitates kitchen activities and affects energy con- sumption. Please observe the following points when using the appliance: •... -
Page 12: After Use
2.9.2009 Rev. 1.2 Operating instructions 4.2 After use 4.2.1 Cleaning In normal use, the appliance does not require any other daily care than sufficient cleaning. The interior and exterior of the appliance is mainly of stainless steel. For cleaning the in- terior and exterior, use neutral or slightly alkaline cleaning agents or wipe the surfaces with a damp cloth. -
Page 13: Installation
2.9.2009 Rev. 1.2 Installation 5. Installation 5.1 Operating conditions The appliance should not be placed in a location exposed to heavy thermal load, e.g. direct sunlight or thermal radiators. Positioning cold equipment close to bains marie and ovens should be avoided. The appliance is designed for operarion in normal ambient conditions (i.e. -
Page 14: Installation
2.9.2009 Rev. 1.2 Installation 5.4 Installation The appliance is supplied with adjustable legs. Mount the appliance with the help of the adjustable legs in a horizontal position as accurately as possible, ensuring that the appli- ance rests evenly on all legs. If adjustment is not performed with great care, the door and locks may not work properly. -
Page 15: Electrical Connections
2.9.2009 Rev. 1.2 Installation 5.5 Electrical connections Connect the appliance to the power supply with an earthed socket. For making the con- nection, a socket protected with a fuse of 16 A has to be provided for each unit. 5.6 Start-up After connecting the appliance to the power supply, turn on the main switch (green) and make sure that the indicator light of the switch lights up. -
Page 16: Thermostat Operation
2.9.2009 Rev. 1.2 Installation 5.7.1 Thermostat operation The microprocessor-based control unit contains a series of parameters to control the re- frigerated display’s functions. Each refrigeration unit has been pre-programmed at the factory. The user can carry out two programming functions: setting the temperature and starting a manual defrost cycle. -
Page 17: Troubleshooting
2.9.2009 Rev. 1.2 Troubleshooting 6. Troubleshooting In case the appliance does not function as expected, review the following list of problems to find out if the appliance can be put in order without a service call. In all enquiries, please contact an authorized service company. Most problems can be managed on the phone. - Page 18 2.9.2009 Rev. 1.2 Technical specifications 8. Technical specifications Refrigeration circuit diagram J06335 A3 Wiring diagram S00236 I3 Installation drawing J06367 A2 Installation drawing J06369 A2 Installation drawing J06372 A2 Installation drawing J06373 A2 Installation drawing J06376 A1 Installation drawing J06377 A1 Installation drawing J06379 A1...
-
Page 19: Spare Parts
Refrigeration circuit diagram J06335 A3... - Page 20 Wiring diagram S00236 I3...
-
Page 21: Voltage Codes
Installation drawing J06367 A2... - Page 22 Installation drawing J06369 A2...
- Page 23 Installation drawing J06372 A2...
- Page 24 Installation drawing J06373 A2...
- Page 25 Installation drawing J06376 A1...
- Page 26 Installation drawing J06377 A1...
- Page 27 Installation drawing J06379 A1...
-
Page 28: Technical Specifications
1.3.2010 Rev. 1.2 Technical specifications Item Model Type Specification Electric connection 230 V 50 Hz Power input 800,1200 1,1 kW Power input 1600 1,4 kW Power input 800, 1200, 1600 1,4 kW Temperature adjustment range +4°C...+12°C Ambient conditions max. +25°, rel. humidity 60% Refrigerant R404A Amount of refrigerant...
Need help?
Do you have a question about the HALO Series and is the answer not in the manual?
Questions and answers