
Related Manuals for Durr Dental CA 4


Summary of Contents for Durr Dental CA 4
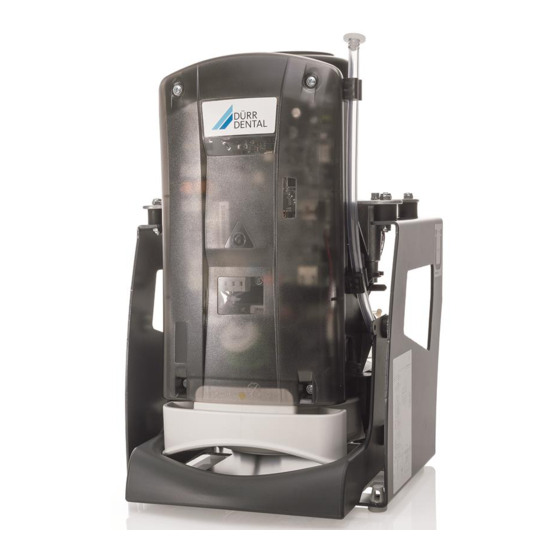
- Page 1 CA 4 amalgam separator Installation and operating instructions 9000-606-44/30 *9000-606-44/30*...
-
Page 3: Table Of Contents
Contents Contents Setup options ....Pipe materials ....Hose materials ....Important information Pipe/hose installation . - Page 4 17 Transporting the unit ....17.1 Close CA 4 ....Appendix 18 Handover record .
-
Page 5: Important Information
These installation and operating instructions apply to: Unit can be used with Tyscor Pulse CA 4 Order number: 7805-100-50; 7805-100-50E; 7805-200-50; 7805-200-60 Refer to Operating Instructions. Warnings and symbols Warnings Wear protective gloves. -
Page 6: Copyright Information
Important information Safety Order number Dürr Dental has designed and constructed this unit so that when used properly and for the inten- Serial number ded purpose it does not pose any danger to people or property. Medical device Despite this, the following residual risks can remain: Health Industry Bar Code (HIBC) –... -
Page 7: General Safety Information
Important information – Use for separation of dust, sludge or plaster or Specialist personnel similar substances. Operation – Use in conjunction with flammable or explosive Unit operating personnel must ensure safe and mixtures. correct handling based on their training and –... -
Page 8: Only Use Original Parts
Important information 2.10 Transport NOTICE The original packaging provides optimum protec- Negative effects on the EMC due to tion for the unit during transport. non-authorised accessories If required, original packaging for the unit can be Use only Dürr Dental parts or accesso- ❯... -
Page 9: Product Description
CA 4 amalgam separator CA 4 ......7805-033-00 Model with 230 V / 1~, 50 Hz ..7805-100-50 Orotol plus (2.5 litre bottle) . -
Page 10: Technical Data
Product description Technical data Electrical data 7805-100-50 7805-200-60 7805-200-50 Voltage Mains frequency Rated power Nominal current Fuses* (2x) T 4.0 AH Type of protection IP 21 Protection class Over-voltage category in accordance with IEC 60127-2 Electrical data – electronics Switching performance signal output Max. - Page 11 Product description Network connection Standard IEEE 802.3u Data rate Mbit/s Connector RJ45 Type of connection Auto MDI-X ³ CAT5 Cable type Ambient conditions during storage and transport Temperature °C -10 to +60 Relative humidity < 95 Ambient conditions during operation Temperature °C +10 to +40...
- Page 12 Product description Electromagnetic compatibility (EMC) Interference immunity measurements Immunity to electrical fast transients/bursts – I/O, SIP/SOP ports Compliant IEC 61000-4-4:2012 Immunity to interference, surges Compliant IEC 61000-4-5:2005 Immunity to conducted disturbances, induced by radio- frequency fields – AC mains voltage Compliant IEC 61000-4-6:2013 Immunity to conducted disturbances, induced by radio-...
- Page 13 Product description Electromagnetic compatibility (EMC) Interference immunity measurements on the supply input Immunity to fast electrical transients/bursts – AC mains voltage IEC 61000-4-4:2012 Compliant ± 2 kV 100 kHz repetition rate Immunity to surges, line-to-line IEC 61000-4-5:2005 Compliant ± 0.5 kV, ± 1 kV Immunity to surges, line-earth IEC 61000-4-5:2005 Compliant...
- Page 14 Product description Electromagnetic compatibility (EMC) Interference immunity measurements SIP/SOP N/A = not applicable 9000-606-44/30 2011V003...
-
Page 15: Type Plate
Product description Type plate The type plate can be found on the side of the amalgam separator motor. Type plate Evaluation of conformity This device has been subjected to conformity acceptance testing in accordance with the cur- rent relevant European Union guidelines. This equipment conforms to all relevant requirements. -
Page 16: Operation
Product description Operation Motor Electronics Sediment PCB with sediment sensor and light barriers Sensor block Emergency start sensor Reference sensor Water start sensor Safety end switch on sediment PCB Collecting container Sediment sensor Levelling pump Inlet connecting piece Magnets for RPM monitoring Waste water outlet Relief valve 9000-606-44/30 2011V003... - Page 17 Product description Vessel lift Amalgam sludge Fluid with amalgam Waste water, cleaned Vent The amalgam separator works according to the centrifugal principle and is driven by an electromotor. Each time the unit is supplied with power, the amalgam separator performs level measuring using the sediment sensor.
-
Page 18: Assembly
Assembly Pipe materials Assembly Only use vacuum-sealed HT-waste pipes manufactured from the following materials: – Polypropylene (PP), Requirements – Chlorinated polyvinyl chloride (PVC-C), Installation/setup room – Unplasticized polyvinyl chloride (PVC-U), – Polyethylene (PE). The room chosen for set up must fulfil the follow- The following materials must not be used: ing requirements: –... -
Page 19: Information About Connecting Cables
Assembly Observe the current consumption of the devi- Control cable ❯ ces that are to be connected. Installation type Line layout (minimum The diameter of the connections depends on the requirements) current consumption, length of line and the ambi- Fixed installation –... -
Page 20: System Components
Assembly System components Rinsing unit For surgical procedures and for procedures using powder jet devices, a rinsing unit must in all cases be installed in the treatment unit. The rins- ing unit provides a small amount of water during aspiration. This dilutes the aspirated fluids (blood, saliva, rinsing water, etc.), which can then be transported more effectively. -
Page 21: Installation
Assembly Installation Prior to working on the unit or in case of danger, disconnect it from the mains. Connect the hoses and lay correctly Install the hoses so they are as short as possible and with sufficient incline. Downstream of separation units, a positive suction head of 150 mm must be maintained in order to prevent backflow. -
Page 22: Electrical Connections
Assembly Electrical connections WARNING Electric shock The device may only be connected to a supply system with a earthed power outlet. ❯ Establish the electrical connection to the supply network (230 V). ❯ – To a Dürr control box. – Connected to a power outlet via the surgery's main power switch. Connection the display panel. - Page 23 Assembly Display panel connection (6-pin connector) Sensitivity of the sensor conductance 100/200 µS 100 Mbit network connection Diagnostic connector Micro SD card holder Brake fuse T 3.15 AH (IEC 60127-2) Fuse T 4.0 AH (IEC 60127-2) Fuse T 4.0 AH (IEC 60127-2) 9000-606-44/30 2011V003...
-
Page 24: Connections And Displays Of The Control
Assembly Connections and displays of the control U1Z2 Z1 1 2 3 H100 H103 H101 H102 H104 230 V AC power supply 9000-606-44/30 2011V003... - Page 25 Assembly Motor connection Sensor system connection X4.1 Emergency start sensor X4.2 Reference sensor X4.3 Water start sensor External start (optional input, protective low voltage 24V, AC/DC) External alarm (switching capacity max. 24V, 120mA, AC/DC) Relief valve connection Display panel connection (RJ45 connector) Display panel connection (6-pin connector) Bus module Sensitivity of the sensor conductance 100/200 µS...
-
Page 26: Display Panel Connection
The display panel is used to indicate mes- Where a model 7801 amalgam separator sages acoustically and visually (via LEDs). is being replaced by a CA 4 unit, the dis- play panel can be connected using the If the amalgam separator is set-up at a larger dis- adapter cable provided. -
Page 27: Network Connection
Assembly Connect the existing display cable to the termi- Plug the network cable into the electronics and ❯ ❯ nals of the adapter PCB. into a network socket. – Ground terminal X2 Attach the network cable to the device. ❯ –... -
Page 28: Commissioning
Assembly Commissioning Combining devices safely – The overall safety of the unit and its main per- In many countries technical medical prod- formance features are independent of the net- ucts and electrical devices are subject to work. The device is designed for operation regular checks at set intervals. -
Page 29: 10 Service Program
Assembly 10 Service program 2900 9000-606-44/30 2011V003... -
Page 30: Description Of The Service Program
Assembly Every time the service key is pressed, the sedi- 11 Description of the service ment level is checked. Lifting the sediment level check wire strip allows the simulation of various program sediment levels. The various fill levels are shown by LEDs H100 - H102 on the sediment measur- Wear protective equipment to avoid any ing PCB (main board):... -
Page 31: Usage
Usage 12.3 Amalgam collector vessel is Usage 100% full Yellow LED lights up 12 Display/handling Red display flashes Audible signal melody sounds – At a fill level of 100% the signal melody can no longer be switched off by pressing the reset button. -
Page 32: Brake Monitoring
Usage 13 Disinfection and cleaning If this problem happens again on the same day, the amalgam separator will no longer be operational - notify the service NOTICE technician. Device malfunctions or damage due to use of incorrect media 12.6 Brake monitoring Guarantee claims may become invalid as a result. -
Page 33: Once Or Twice A Week Before The Midday Break
Usage The following are required for disinfection/clean- 14 Replace the amalgam col- ing: lector vessel ü Non-foaming disinfectant/cleaning agent that is compatible with the materials. NOTICE ü Unit care system, e.g. OroCup Risk of contamination if the amalgam To pre-clean, suck up 2 litres of water with the ❯... -
Page 34: Remove The Amalgam Collecting Container From The Device
Usage 14.1 Remove the amalgam collect- ing container from the device Swivel the vessel lift upwards and remove the ❯ full amalgam collecting container from the unit. 14.2 Disposal of amalgam collect- ing container The contents of the amalgam collecting container are contaminated with heavy metals and must not be disposed of as household waste or the environment. -
Page 35: 15 Maintenance
Usage 15 Maintenance All maintenance work must be performed by a qualified expert or by one of our Service Techni- cians. WARNING Infection due to contaminated unit Clean and disinfect the suction before working on the unit. ❯ Wear protective equipment when working (e. g. impermeable gloves, protective goggles and ❯... -
Page 36: Tests
Usage 15.1 Tests WARNING Infection due to contaminated unit Clean and disinfect the suction before ❯ working on the unit. Wear protective equipment when ❯ working (e. g. impermeable gloves, protective goggles and mouth and nose protection). In some countries the owner is required to keep an operating handbook. -
Page 37: Troubleshooting
Troubleshooting Troubleshooting 16 Tips for operators and service technicians Any repairs exceeding routine maintenance may only be carried out by qualified personnel or our service. WARNING Infection due to contaminated unit Clean and disinfect the suction before working on the unit. ❯... - Page 38 Troubleshooting Error Possible cause Remedy The unit does not switch off Start signal from sensor, e.g. Clean the sensor. * ❯ due to soiling Fluid in the collecting container Check that the pump propel- ❯ is not pumped out ler is seated tightly and look for signs of damage.
-
Page 39: 17 Transporting The Unit
Disinfect a defective unit using a suitable sur- ❯ face disinfection agent. Seal all connections with sealing caps. ❯ Pack the unit securely in preparation for trans- ❯ port. 17.1 Close CA 4 Sealing cap (order no. 9000‑412‑98) Filled collecting container Empty collecting container 9000-606-44/30 2011V003... -
Page 40: Appendix
Appendix Appendix 18 Handover record This document confirms that a qualified handover of the medical device has taken place and that appropriate instructions have been provided for it. This must be carried out by a qualified adviser for the medical device, who will instruct you in the proper handling and operation of the medical device. Product name Order number (REF) Serial number (SN) - Page 44 Hersteller/Manufacturer: DÜRR DENTAL SE Höpfigheimer Str. 17 74321 Bietigheim-Bissingen Germany Fon: +49 7142 705-0 www.duerrdental.com info@duerrdental.com...
Need help?
Do you have a question about the CA 4 and is the answer not in the manual?
Questions and answers