Mira Realm Installation, Operation, Maintenance Manual
Hide thumbs
Also See for Realm:
- Installation and user manual (20 pages) ,
- Installation and user manual (20 pages)

Related Manuals for Mira Realm


Summary of Contents for Mira Realm
- Page 1 SHOWER CONTROL Installation Operation &B Maintenance GuideB THESE INSTRUCTIONS ARE TO BE LEFT WITH THE USER...
-
Page 2: Table Of Contents
Realm ..............18 9 ..Maintenance: Fault Diagnosis ............19 Cleaning ..............20 Appendices: 1 ..Dimensions: Realm..............21 2 ..Spare parts: Realm spare parts list..........22 Realm spare parts diagram ........23 Guarantee, Customer Care ........Back cover... -
Page 3: Important Safety Information
Section Important Safety Information 1. WARNING! 1.1. Products manufactured by us are safe and without risk provided they are installed, used and maintained in good working order in accordance with our instructions and recommendations. 2. Caution! 2.1. Read all of these instructions. 2.2. -
Page 4: Introduction
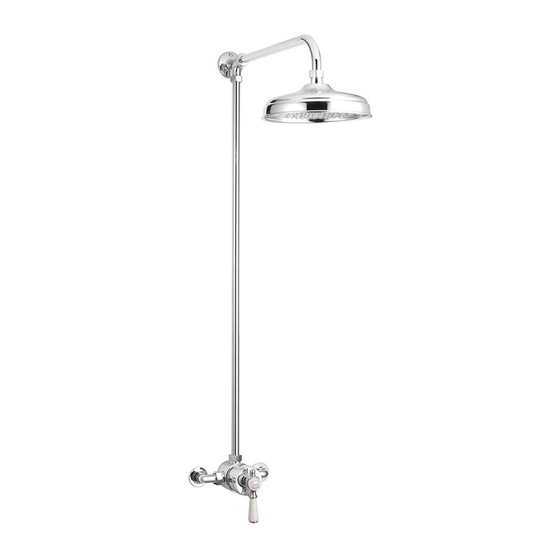
Section Introduction Thank you for purchasing a quality Mira product. To exploit the full potential of your new shower, please take time to read this guide thoroughly, having done so, keep it handy for future reference. The Mira Realm is a single point 1/2" thermostatic shower mixer incorporating a wax capsule thermostat to ensure constant showering temperatures. -
Page 5: Pack Contents Checklist
¨ 2 x Regulators ¨ ¨ 2 x Pipe Concealing Plates 1 x Shower Head ¨ 1 x Mira Realm Shower Control ¨ 3 x No. 10 x 1 1/4" Screws 1 x 2.5 mm A/F ¨ Hexagon Wrench ¨... -
Page 6: Specifications
Section Specifications 1. Pressure range 1.1. Minimum operating pressure (Gas Water Heater) 1.0 bar. 1.2. Minimum operating pressure (Gravity Feed) 0.1 bar. 1.3. Maximum maintained pressure 3.0 bar. 1.4. Maximum static pressure 10.0 bar. 1.5. Maximum pressure loss ratio 5:1. 2. -
Page 7: Installation Requirements
Section Installation Requirements 1. General Read the section "Important Safety Information" first. 1.1. Supply pipework MUST be flushed to clear debris before connecting the shower control. 1.2. Do not fit any form of flow control in the outlet pipework. 1.3. Do not install the product in a position where it could become frozen. 1.4. - Page 8 2.1. Instantaneous gas-heated showers (e.g. combination boilers) - The shower MUST be installed with a multipoint gas water heater or combination boiler of a fully modulating design (i.e. where the water draw-off rate indirectly controls the gas flow rate to the burner). A drop tight pressure reducing valve (PRV) MUST be fitted if the supply pressures exceed 3 bar maintained.
- Page 9 2.2. Gravity fed showers - The shower control MUST be fed from a cold water storage cistern and hot water cylinder providing nominally equal pressure.
- Page 10 2.3. Mains pressurised instantaneous hot water shower, heated from a thermal store - Packages of this type, fitted with a tempering valve can be used with the Mira Realm. A drop tight pressure reducing valve MUST be fitted if the supply pressures exceed 3 bar maintained.
- Page 11 2.4. Unvented mains pressure showers - The shower can be installed with an unvented, stored hot water cylinder. Only a "competent person" as defined by the Building Regulations may fit this type of system. For packages with no cold water take off after the appliance reducing valve, it will be necessary to fit an additional drop tight pressure reducing valve when the mains pressure is over 3 bar.
- Page 12 2.5. Pumped showers (inlet pumps) - The shower can be installed with an inlet pump (twin impeller). The pump MUST be located on the floor next the hot water cylinder. The hot water cylinder/vent pipes must be arranged as shown to achieve air separation.
-
Page 13: Installation
Section Installation 1. General Read section Installation Requirements first. Concealing Important! Two flow regulators (grey housing Plate with black insert) are supplied with this product. By fitting these in the inlet elbows of the shower control (see diagram) this Compression product can be used with high pressure Olive systems. - Page 14 Rigid Riser Pipe 1.1. The hot water service must always be connected to the inlet marked "HOT" in the base of the shower control body. Wall Plug Backplate 1.2. The inlet elbows can be swivelled to Compression accept rising, falling or back entry supplies, or any combination of two.
- Page 15 1.9. Temporarily fit the rigid riser pipe and horizontal arm and wall bracket to the shower control outlet and mark the position of the wall bracket. Use a spirit level to ensure the pipe is vertical. Note that the horizontal arm can be shortened if required.
-
Page 16: Commissioning
Section Commissioning 1. Maximum temperature setting This thermostatic shower control has been fully performance tested and the maximum temperature has been pre-set to approximately 42°C under ideal installation conditions at the factory. Site conditions and personal preference may dictate that the maximum temperature has to be reset. - Page 17 1.6. Locate the 2.5 mm A/F hexagon wrench (supplied) in the grub screw. Cooler 1.7. Adjust as follows: Warmer - Turn anti-clockwise Cooler - Turn clockwise. Warmer 1.8. Refit the lever assembly in reverse order and turn the shower control off.
-
Page 18: Operation
Section Operation 1. Realm This thermostatic shower control has a single sequential lever. The shower control is turned on by turning the control lever anti-clockwise. The shower control is turned off by turning the control lever clockwise. When the control lever is turned on (anti- clockwise) the sequence is: Cold water à... -
Page 19: Maintenance
You may, if you wish, choose to engage the services of a Mira Service Engineer or Agent, the terms of which are outlined on the back page of this guide. -
Page 20: Cleaning
Malfunction Cause Remedy Flow of water too Flow regulators fitted Refer to installation fast. incorrectly or not selection chart and check fitted. shower control. Very low flow of Flow regulators fitted Refer to installation water. when not required. selection chart and check shower control. -
Page 21: Dimensions
Appendix Dimensions 1. Realm 395 mm Max 35 mm 165 mm 105 mm 990 mm 86 mm 168 mm 175 mm... -
Page 22: Spare Parts
Appendix Spare Parts 1. Realm spare parts list 066.19 Regulator Set 100.75 Rigid Riser Set - chrome 100.76 Rigid Riser Set - light golden 122.66 Head Assembly 122.67 Sleeve Assembly 122.68 Seal Pack - components identified 'A' 122.69 Component Pack - light golden - components identified 'B' 122.70 Thermostat... -
Page 23: Realm Spare Parts Diagram
2. Realm spare parts diagram B, C B, C 349.98 B, C 349.99 805.51 805.52 100.75 100.76 802.38 802.39 B, C 555.91 555.92 066.19 804.08 804.09 B, C 066.19 122.67 802.38 B, C 802.39 B, C 122.70 122.71 122.66 122.73 122.74... - Page 24 Our Service Force is available to provide a quality service use or lack of maintenance, including build-up of limescale. at a reasonable cost. You will have the assurance of a Mira Damage or defects if the product is taken apart, repaired or trained engineer/agent, genuine Mira spares –...
Need help?
Do you have a question about the Realm and is the answer not in the manual?
Questions and answers