Table of Contents
Advertisement
Quick Links
Page
Contents
2
1.
3
2.
3
3.
3
4
5
5
7
4.
7
8
9
10
5.
11
6.
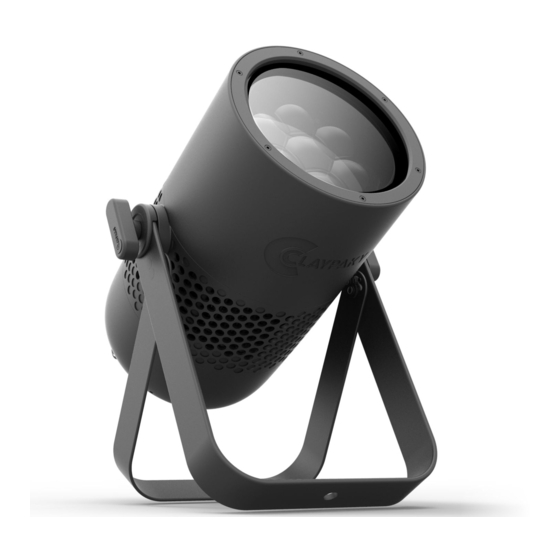
Mini B ParLED Aqua
Mini B ParLED Aqua WW
INSTRUCTION MANUAL
INDEX
Congratulations on choosing a Claypaky product
We thank you for your custom.
Please note that this product, as all the others in the
rich Claypaky range, has been designed and made with
total quality to ensure excellent performance and best
meet your expectations and requirements.
1
CL2018
CL2017
Advertisement
Table of Contents

Summary of Contents for Claypaky Mini-B ParLED Aqua
-
Page 1: Table Of Contents
We thank you for your custom. Safety information Please note that this product, as all the others in the rich Claypaky range, has been designed and made with Unpacking and preparation total quality to ensure excellent performance and best Installation and start-up meet your expectations and requirements. -
Page 2: Safety Information
1. SAFETY INFORMATION SAFETY INFORMATION IMPORTANT: Claypaky recommends you carefully read and keep the safety information on this product, also available in digital format at the following link: www.claypaky.com Ref: [FIS020 - Safety information Mini-B ParLED Aqua] INFORMAZIONI DI SICUREZZA... -
Page 3: Unpacking And Preparation
2. UNPACKING AND PREPARATION Packing contents - Fig. 1 3. INSTALLATION AND START-UP 3.1 Installing the fixture Installing the projector - Fig. 2 The projector can be installed on the floor on a truss or on the ceiling or wall. WARNING: with the exception of when the projector is positioned on the floor, the safety cable must be fitted. -
Page 4: Connecting To Manis Supply
Power in Ethernet Control Panel - Fig. 3 Connecting and disconnecting power cable - Fig. 4 NB: connecting one Mini-B ParLED AQUA to the mains, it is possible to connect up to a maximum of 12 @200-240Vac - 5 @100-120Vac Mini-B ParLED AQUA in parallel at the same time. -
Page 5: Connecting The Control Signal Line: Dmx / Art-Net
Ext.8Bit Switching on the projector - Fig. 7 Plug-in the power connector. The projector starts the reset procedure. At the same time, the following information scrolls on the display: Mini-B ParLED AQUA Version X.X.X Date - Hour The control panel (Fig. 7) has a display and buttons for the complete programming and management of the projector menu. The display can be in one of two conditions: standby or setting status. - Page 6 Functions of the buttons - Using the menu Menu Return to the top level Enter Confirms the displayed value, or activates the displayed function, or enters the successive menu. Increases the value displayed (with auto-repetitions) or passes to the previous item in a menu. Down Decreases the value displayed (with auto-repetitions) or passes to the next item in the menu.
-
Page 7: Maintenance
It is recommended that the projector undergoes an annual service by a qualified technician for special maintenance involving at least the following operations: - General cleaning of internal parts. - Restoring lubrication of all parts subject to friction, using lubricants specifically supplied by Claypaky. - General visual check of the internal components, cabling, mechanical parts, etc. -
Page 8: Battery Removal
4.2 Battery removal Battery removal - Fig. 10 This product contains a rechargeable battery. To preserve the environment, please dispose the battery at the end of its life according to the regulation in force. Mini B ParLED Aqua... -
Page 9: Opening The Covers
4.3 Opening the covers Opening the covers - Fig. 11 Mini B ParLED Aqua... -
Page 10: Specifications
5. SPECIFICATIONS Mini-B ParLED Aqua (13.58") (11.07") (14.45") POWER SUPPLIES ELECTRONICS AC power input Neutrik PowerCON True1 IP65 100-240V, 50/60 Hz. • Function reset from the lighting desk. • “AUTOTEST” function from menu. INPUT POWER • Electronic monitoring with status error. -
Page 11: Cause And Solution Of Problems
6. CAUSE AND SOLUTION OF PROBLEMS THE PROJECTOR WILL NOT SWITCH ON ELECTRONICS NON-OPERATIONAL PROBLEMS DEFECTIVE PROJECTION REDUCED LUMINOSITY POSSIBLE CAUSES CHECKS AND REMEDIES No mains supply. Check the power supply voltage. LED exhausted or defective. Call an authorised technician. Signal transmission cable faulty or disconnected. - Page 12 CLAYPAKY - Via Pastrengo, 3/b - 24068 Seriate (BG) Italy - Tel. +39-035 -654311 - www.claypaky.com S.p.A.


Need help?
Do you have a question about the Mini-B ParLED Aqua and is the answer not in the manual?
Questions and answers