Table of Contents
Advertisement
Quick Links
Installation Instructions
Please Read Before Installing
Description
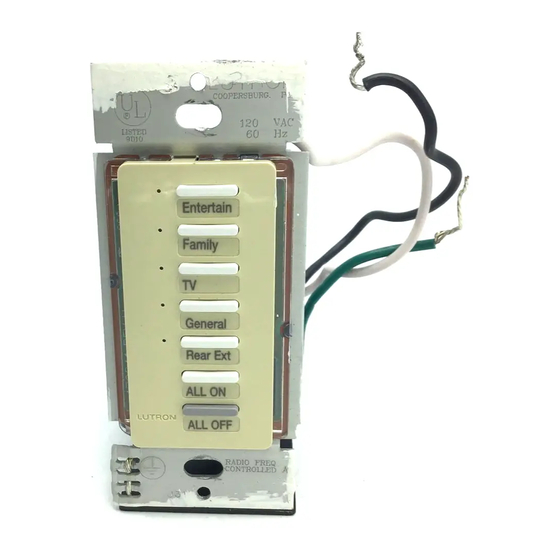
The HWD-5KP, -5RL and HWD-10KP, -10RL keypads
are for use with HomeWorks systems. The keypad
buttons are programmed with a personal computer
using the HomeWorks Utility.
Up to 32 keypads, each with a unique address, can be
connected to each keypad link on the HomeWorks
Wired Processor. A maximum of 300 keypad LEDs
can be connected per processor. To increase the
number of LEDs, see the HomeWorks Technical
Reference Guide.
Important Notes
Codes: Install in accordance with all local and national
electrical codes.
Environment: Ambient operating temperature:
0-40°C, 32-104°F, 0-90% humidity, non-condensing.
Indoor use only.
Wallplates: Lutron Claro
®
are recommended for best color match and clean aes-
thetic appearance. Do not paint controls or wallplates.
Cleaning: To clean, wipe with a clean damp cloth. DO
NOT use any chemical cleaning solutions.
Wallboxes: Lutron recommends using 3 1/2" (89mm)
deep wallboxes for easier installation.
and Satin Colors
wallplates
TM
Designer-Style Wired
Slim-Button Keypads
HWD-5KP, -5RL, -10KP, -10RL
15 V
, 42 mA
HWD-5KP
HWD-10KP
HWD-5RL
HWD-10RL
1
Advertisement
Table of Contents

Related Manuals for Lutron Electronics Homeworks HWD-10KP


Summary of Contents for Lutron Electronics Homeworks HWD-10KP
-
Page 1: Important Notes
Installation Instructions Please Read Before Installing Description The HWD-5KP, -5RL and HWD-10KP, -10RL keypads are for use with HomeWorks systems. The keypad buttons are programmed with a personal computer using the HomeWorks Utility. Up to 32 keypads, each with a unique address, can be connected to each keypad link on the HomeWorks Wired Processor. - Page 2 Installation Disconnect power to the keypads by turning off all circuit breakers connected to the HomeWorks Processor or keypad link auxiliary power supply. Danger - Wiring with power ON may result in personal injury. Address keypads. Assign a unique address to each keypad using the DIP switch on the back of the keypad.
- Page 3 Low-Voltage (Class 2/PELV) Wiring Diagram Keypads can be connected to any of these three links depending on the configuration of the HomeWorks Utility ® Keypad Addressing Keypad Rear View DIP switches 1-5 for setting address, DIP 1 2 3 4 5 6 switch 6 does not affect keypad address.
-
Page 4: Limited Warranty
• Check that keypad wires 3 & 4 are properly connected. • Check that keypad link is plugged into correct connector at processor. • Verify that link is configured for HomeWorks keypads in the HomeWorks Utility. • Check keypad for proper address using table on previous page.
Need help?
Do you have a question about the Homeworks HWD-10KP and is the answer not in the manual?
Questions and answers