Savant IP Audio 1 Deployment Manual
Hide thumbs Also See for IP Audio 1:

Advertisement

Savant® IP Audio Deployment Guide
Document Number:
009-1572-03
Document Date:
January 2020
Document Supports:
da Vinci 8.7 or higher
This document outlines the process for deploying Savant IP Audio products including physical installation, RacePoint Blueprint™ configuration, and web-based
user interface setup.
Products supported by this guide include:
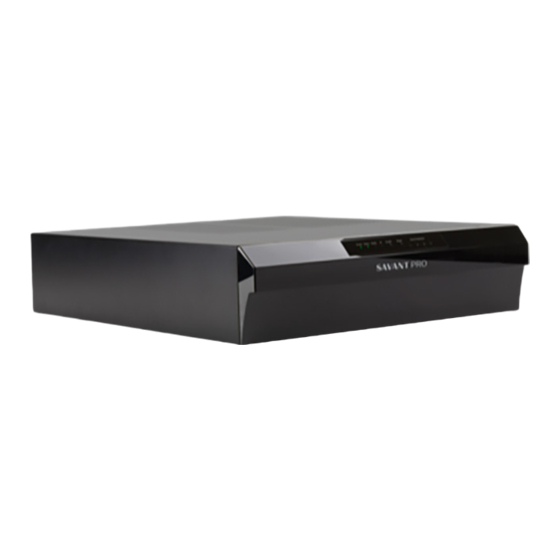
IP Audio 1 with Savant Music 2.0 [PAV-SIPA1SM]
IP Audio 50 with Savant Music 2.0 [PAV-SIPA50SM]
IP Audio 125 with Savant Music 2.0 [PAV-SIPA125SM]
ProAV 7 Source Audio Input IP Transmitter with Control [PAV-AIM7C]
ProAV 16 Channel Audio Output IP Receiver with Control [PAV-AOM8C]
IP Audio 16 Channel Balanced Audio Output IP Receiver with Control [PAV-AOMBAL8C]
IP Audio Soundbars [IP-STUDIOxx-2CH]
IP Audio Micro Aperture Speakers [EDG-4-AVB-x, EDG-4-SAT-x]
Copyright © 2020 Savant Systems, LLC
- 1 -
45 Perseverance Way, Hyannis, MA 02601
Savant.com
| 508.683.2500

Advertisement

Table of Contents
loading
Need help?

Need help?

Do you have a question about the IP Audio 1 and is the answer not in the manual?

Questions and answers

Summary of Contents for Savant IP Audio 1

  • Page 1 Document Date: January 2020 Document Supports: da Vinci 8.7 or higher This document outlines the process for deploying Savant IP Audio products including physical installation, RacePoint Blueprint™ configuration, and web-based user interface setup. Products supported by this guide include: –...
  • Page 2: Table Of Contents

    Appendix B: UPS Recommendations ................38 Blueprint Configuration ....................17 5.1. Basic Blueprint Layout ..................17 5.2. Adding a Savant IP Audio Device to a Configuration ....... 17 5.3. Assigning Inputs and Outputs (I/Os) .............. 18 5.4. AVB Speaker Grouping ..................19 Web User Interface (Web UI) ..................
  • Page 3 Important Safety Information - Read First Safety Statements Before installing, configuring, or operating any equipment, Savant recommends All safety instructions below should be read, understood, and applied under all that each dealer, integrator, installer, etc. access and read all relevant technical relevant circumstances when working with this equipment.
  • Page 4: Before You Begin

    Read this document in its entirety before starting deployment of the product, and ensure that the following required items are available: Savant IP Audio device(s) ..........................................Unique ID (UID) of the Savant IP Audio device(s).................................. Located on the back of the device.
  • Page 5: Deployment Steps

    3. Wiring and Connections The Savant IP Audio control connections send data to control a device and receive data to display current status on the user interfaces or trigger a system action. Each port type may support multiple protocols that are determined by the logical connection within Blueprint.
  • Page 6: Checking And Replacing The Fuse

    Gently clip the new fuse into the cartridge and slide the cartridge part way into the receptacle, ensuring that the alignment is correct. Press cartridge fully into receptacle, ensuring that it is seated and secure. Savant IP Audio Deployment Guide Copyright © 2020 Savant Systems, LLC 009-1571-03 | 200224...
  • Page 7: Speaker Wiring

    Pin 5 IR 3 - Pin 4 IR 2 + Pin 6 IR 3 + Use white stripe for positive (+) Use white stripe for positive (+) Savant IP Audio Deployment Guide Copyright © 2020 Savant Systems, LLC 009-1571-03 | 200224...
  • Page 8: Rs-232 Wiring

    (RS-232) RJ-45 to DB9 Serial Control Adapters Refer to the RS-232 Conversion to DB9 and RS-422/485 Pinout Application Note located on the Savant Customer Community for more information on RJ-45 to DB9 adapters. IMPORTANT! If using RJ-45 to DB9 adapters not supplied by Savant: –...
  • Page 9: Gpio Connections

    The PAV-SIPA125SM, PAV-AOM8C, and PAV-AOMBAL8C have GPIO ports which share the same wiring. General Purpose Input/Output (GPIO) ports are binary I/O ports used by Savant controllers to trigger actions within the system. GPIO actions may be configured to control a device, such as turning on an amplifier (output), or detecting a device state change (input) to perform a triggered workflow.
  • Page 10: Installation

    Enclosure Installation The PAV-SIPA50SM device can be mounted in a structured media panel. The enclosure brackets need to be attached prior to mounting. Savant recommends using vented (louvered) enclosure doors.
  • Page 11: Pav-Sipa125Sm

    (RMB-SIPA12F-00) which allows 2 units to be placed side by side in a standard 1U rack mounting. Savant IP Audio Deployment Guide Copyright © 2020 Savant Systems, LLC 009-1571-03 | 200224...
  • Page 12: Pav-Aim7C/Pav-Aom8C/Pav-Aombal8C

    These devices can be placed on a solid flat surface such as a table or shelf. Or these devices can use the optional RMB-PAVAM2F-xx or RMB- PAVAM2-xx allows two devices to be mounted side by side. This rack is compatible with all standard 19-inch National Electrical Manufacturers Association (NEMA) rack mounts. Savant IP Audio Deployment Guide Copyright © 2020 Savant Systems, LLC 009-1571-03 | 200224...
  • Page 13: Ip Micro Aperture Speakers

    Mount with the selected shape facing into the room. – Select the proper spacer for your drywall finish. – 1/2” use 7 mm spacer. – 5/8” use 10 mm spacer Savant IP Audio Deployment Guide Copyright © 2020 Savant Systems, LLC 009-1571-03 | 200224...
  • Page 14 Connect the speaker connection. Insert the speaker into the ceiling mount. If the ceiling is 5/8” thick or greater remove the rubber friction bands from the springs. Savant IP Audio Deployment Guide Copyright © 2020 Savant Systems, LLC 009-1571-03 | 200224...
  • Page 15: Ip Soundbar

    Choose the desired Mounting Bracket (use the Bracket Selection table on the previous page). Find the screws that fit the TV’s VESA mounting points. Savant IP Audio Deployment Guide Copyright © 2020 Savant Systems, LLC 009-1571-03 | 200224...
  • Page 16 Back of the TV Mounting Bracket Reattach to the TV mount/stand. UMB Stabilizer Break off the any additional thread of the stabilizer with a pair of pliers. Savant IP Audio Deployment Guide Copyright © 2020 Savant Systems, LLC 009-1571-03 | 200224...
  • Page 17: Blueprint Configuration

    This example shows adding a PAV-SIPA125SM. The same Stereo Out 1 (Stereo Speakers) Assigned Inputs Audio Output 2 SpeakerInput process applies for all Savant IP Audio devices being added to a Stereo Out 2 (Stereo Speakers) 2.1 StandardWire (Stereo Spea... Audio Output 3 configuration.
  • Page 18: Assigning Inputs And Outputs (I/Os)

    Stereo Out 4 (Stero Speakers) Media connector: Stereo Out 3 (Stero Speakers) Name on Component: Stereo Out 3 Direction: Output Show user defined properties Show Data Table Savant IP Audio Deployment Guide Copyright © 2020 Savant Systems, LLC 009-1571-03 | 200224...
  • Page 19: Avb Speaker Grouping

    IMPORTANT INFO! The above example shows the analog audio output of a PAV-SIPA125SM used in a speaker group. The analog output of a PAV-SIPA50SM cannot be used in AVB Speaker Grouping. Savant IP Audio Deployment Guide Copyright © 2020 Savant Systems, LLC 009-1571-03 | 200224...
  • Page 20 Master Name: Dresden Residence Type: User Preferred None Audio Source: Ignore Audio Services Paths For AV Services Allow Independent Services Allow Independent Services With Managed Audio Notes: Savant IP Audio Deployment Guide Copyright © 2020 Savant Systems, LLC 009-1571-03 | 200224...
  • Page 21: Web User Interface (Web Ui)

    Default User Name: RPM Default Password: RPM Log in to 10.0.100.50:80 Your password will be sent unencrypted. User Name Password Remember this password Cancel Log In Savant IP Audio Deployment Guide Copyright © 2020 Savant Systems, LLC 009-1571-03 | 200224...
  • Page 22: Status Tab

    A second method for setting these devices to a Static IP can be done with EMBScanner, for information on this method see Appendix B for more information. Savant IP Audio Deployment Guide Copyright © 2020 Savant Systems, LLC 009-1571-03 | 200224...
  • Page 23: Inputs & Outputs Tab

    Toggle between Stereo and Mono by clicking in this field. Mono Summing combines the left and right stereo output channels into a single speaker channel output. Output Channels Used for testing/troubleshooting only. This can be set through the Savant Pro App from the Settings > Audio Settings > Speaker Configuration menu. Process Toggle between Process or Pass-Through, this feature is disabled on the Speaker Out.
  • Page 24 Toggle between Stereo and Mono by clicking in this field. Mono Summing combines the left and right stereo output channels into a single speaker channel output. Output Channels Used for testing/troubleshooting only. This can be set through the Savant Pro App from the Settings > Audio Settings > Speaker Configuration menu. Process Toggle between Process or Pass-Through, this feature is disabled on the Speaker Outputs.
  • Page 25 Toggle between Stereo and Mono by clicking in this field. Mono Summing combines the left and right stereo output channels into a single speaker channel output. Output Channels Used for testing/troubleshooting only. This can be set through the Savant Pro App from the Settings > Audio Settings > Speaker Configuration menu. Process Toggle between Process or Pass-Through, this feature is disabled on the Speaker Outputs.
  • Page 26 IP Audio devices these changes are made in 1dB increments. Subwoofer Toggle on or off. If on it enables a fixed high pass filter at 80Hz. Configuration Savant IP Audio Deployment Guide Copyright © 2020 Savant Systems, LLC 009-1571-03 | 200224...
  • Page 27 Toggles a constant 1kHz tone through all un-muted Speaker R1 Unmuted Test Tone Speaker L2 Unmuted channels Speaker R2 Unmuted Channel Toggles Test Tone on or off for the selected channel. Mute Savant IP Audio Deployment Guide Copyright © 2020 Savant Systems, LLC 009-1571-03 | 200224...
  • Page 28: Calibration Tab

    0 hz +24 dB 0 dB Zone 4 Left Disabled 0 hz +24 dB 0 dB Zone 4 Right Disabled 0 hz +24 dB 0 dB Savant IP Audio Deployment Guide Copyright © 2020 Savant Systems, LLC 009-1571-03 | 200224...
  • Page 29: Expansion

    – The number of IP Audio devices which can be supported in any given system is defined by the Savant Host type and da Vinci runtime version being used on site. For Host feature support limits, refer to the Release ReadMe or Host Licensing and Feature Support Matrix for the relevant da Vinci runtime version, available via the Savant Customer Community.
  • Page 30: Adding An Avb/Tsn Switch

    Assigned Inputs Data AVB_A Ethernet Port (AVB (A)) Savant IP Audio device Ethernet ports should be connected to ports on the AVB switch as shown in the example image. Savant IP Audio Deployment Guide Copyright © 2020 Savant Systems, LLC...
  • Page 31: Multi-Switch Blueprint Layout With 16 Avb Devices

    Only one of the AVB/TSN switches should be physically connected to the rest of the network via its uplink port. As noted above, this connection is not represented within Blueprint. Savant IP Audio Deployment Guide Copyright © 2020 Savant Systems, LLC 009-1571-03 | 200224...
  • Page 32: Savant Music

    The Savant Music 2.0 service is generated in Blueprint, and all streaming services are managed via the Savant Pro App. Each stream of Savant Music 2.0 is distributable to any other IP Audio device connected to the AVB network. The system scales sources as endpoints are added naturally.
  • Page 33: Adjusting Input Gain

    Select the target IP Audio device. Select Zone. Select the input device/port. Adjust the Input Gain as desired. NOTE: Input Gain can be set plus or minus 10 dB. Savant IP Audio Deployment Guide Copyright © 2020 Savant Systems, LLC 009-1571-03 | 200224...
  • Page 34: Adjusting Minimum / Maximum Volume

    Max (db) ENVIRONMENT Entry Savant Lighting Restore Defaults Select the target IP Audio device. Select Zone. Select the output device/port. Adjust the Minimum/Maximum Volume as desired. Savant IP Audio Deployment Guide Copyright © 2020 Savant Systems, LLC 009-1571-03 | 200224...
  • Page 35: Savant Music Trim

    9.4. Savant Music Trim Input trim of the Savant Music 2.0 service can be adjusted from within System Monitor. The trim adjustment is from 0 dB to -12 dB. Below is an image of the Music Service System Monitor screen.
  • Page 36: Appendix A: Network Requirements

    Managing IP Addresses To ensure that the IP Address will not change due to a power outage, a static IP Address or DHCP reservation should be configured. Savant recommends using DHCP reservation within the router. By using this method, IP Addresses for all devices can be managed from a single UI avoiding the need to access devices individually.
  • Page 37: Dns (Add, Remove, Query)

    DNS (Add, Remove, Query) Setting DNS is only relevant for devices with a built in Savant Music stream. Follow the instructions below to add, remove, or query the DNS servers configured for IP Audio devices. Open a terminal window on a MacBook/SDE.
  • Page 38: Appendix B: Ups Recommendations

    Appendix B: UPS Recommendations Savant does not recommend any brand or model UPS, however there are a couple of factors that should be considered. It is important that the UPS does not only work during complete power loss but protects devices and their functionality during events like surges and brownouts. It is not uncommon for a residence or small business to see variations in power service that do not result in a complete black-out.
  • Page 39: 009-1571-03 | 200224 2 Of

    Savant Systems, LLC. shall not be liable for any technical or editorial errors or omissions contained herein or for incidental or consequential damages resulting from the performance, furnishing, reliance on, or use of this material.

Table of Contents