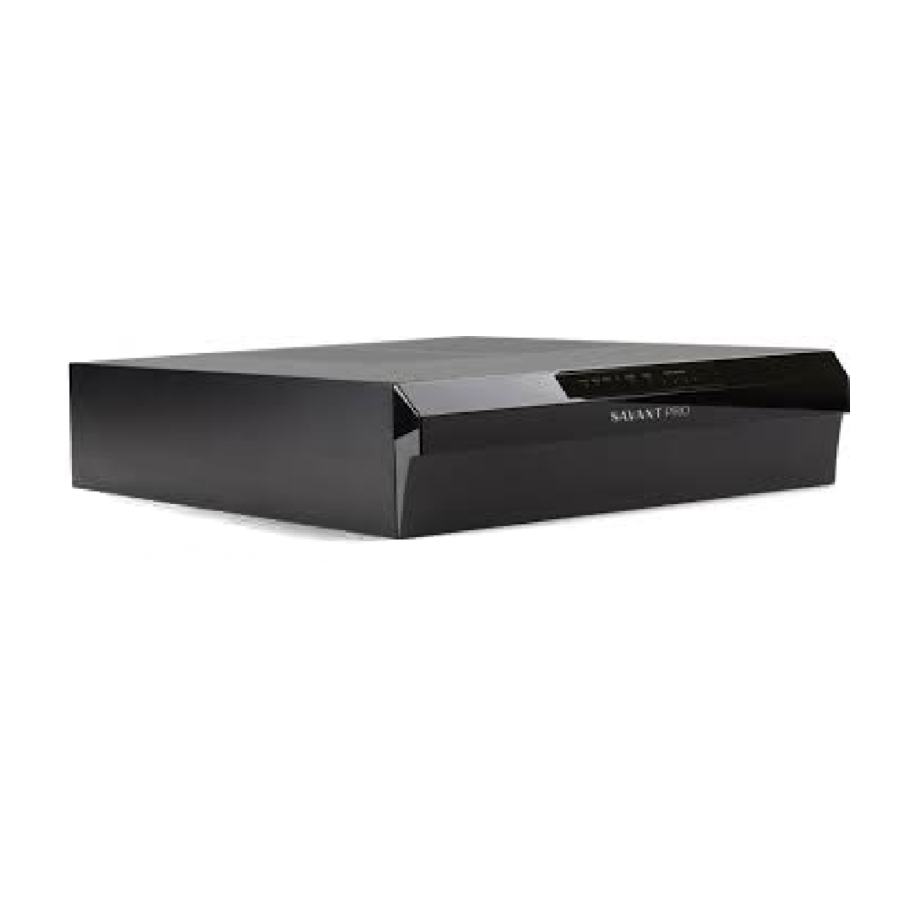
Savant PAV-SIPA50SM - IP Audio 50 Quick Reference Guide
- Deployment manual (39 pages) ,
- Deployment manual (35 pages) ,
- Quick reference manual (3 pages)
Advertisement
Box Contents
- (1) Savant IP Audio 50 (PAV-SIPA50SM)
- (2) Enclosure Bracket (071-1103-xx)
- (1) 2U Rack Bracket (071-1102-xx)
- (1) Power Cord (064-0079-xx)
- (4) #10x½ Screw (039-0405-xx)
- (4) Push Rivet (039-0406-xx)
- (6) M4 Screw (039-0403-xx)
- (4) 4-pin Speaker Connector (028-0702-xx)
- (2) 4-pin IR Connector (028-0703-xx)
- (4) Rubber Feet (074-0655-xx)
- (4) M3 Feet Screw (039-0407-xx)
- (1) Quick Reference Guide (this document)
- (1) 2U Rack Bracket (071-1102-xx)
Specifications
| Environmental | ||||
| Temperature | 32° to 104°F (0° to 40°C) | |||
| Humidity | 10% to 80% Relative Humidity (non-condensing) | |||
| Maximum BTU | 750 BTU/HR | |||
| Dimensions | ||||
| Height | Width | Depth | Weight | |
| 3.03 in (77 mm) | 12.00 in (305 mm) | 14.17 in (360 mm) | 10.6 lb (4.81kg) | |
| Rack Space: 2U | ||||
| Power | ||||
| Input Power | 100/240V AC (50/60 Hz) 5.7A | |||
| Maximum Power | 225W | |||
| Operating Parameters | ||||
| Rated Power (Speaker Output) | 50 WPC at 8 ohms (THD+N < 0.1%) 70 WPC at 8 ohms (THD+N < 1.0% | |||
| Frequency Response | 20 Hz - 20 kHz +/- 0.5 dB, speaker output | |||
| Signal-to-Noise Ratio (SNR) | >95 dB, speaker output | |||
| Supported Digital Input Formats | 44.1 kHz / 48 kHz / 96 kHz at 16-bit / 20-bit / 24-bit resolution | |||
| Networking | ||||
| Supported Standard | IEEE 802.1 AVB/TSN switches IEEE 802.3 Ethernet | |||
| Regulatory | ||||
| Safety and Emissions | FCC Part 15B | CE Mark | C-Tick | UL |
| RoHS | Compliant | |||
| Minimum Support Requirements | ||||
| Software Release | da Vinci 8.8 | |||
| Music Streaming | ||||
| The Savant IP Audio 50 has a built-in single stream of Savant Music for easy access to popular music streaming services. (Streaming service fees may apply.) | ||||
Front Panel

 Power LED | Green: System has power and is operating normally. Red: System is in standby mode and most of the controller circuitry is powered down. Off : System is not receiving power. |
 Status LED | Green Blinking: Embedded system is ready, but no communication has been established with the host. Green: Host has established communications with the embedded system. Red Blinking: Embedded fi rmware is running, but has not received a DHCP IP Address. Red: Host has determined the fi rmware needs to be updated, but a problem occurred during the process that will initiate a reset. Amber Blinking: Embedded system has a valid link local IP Address and is connecting to the host. Amber: Host is updating the embedded fi rmware. Off : Embedded processor is resetting, or is powered up, and is booting the embedded fi rmware. Hardware Failure: If a hardware failure occurs, the status LED indication will be interrupted every three seconds with a solid red indication. For example, if the LED is blinking green when a hardware failure occurs, the LED will alternate between blinking green and solid red at three-second intervals. |
 RS232 LED | Green: RS-232 serial port activity. Off : No RS-232 serial port activity. |
 IR LED | Green: IR port signal activity. Off : No IR port activity. |
 On/Off Button | On: Fully enables all internal power rails and processor. Off : Disables most internal power rails and processor, but not internal AC/DC power supply. Hold On/Off button for about 5 seconds to place into standby mode. The Power LED turns red. Hold On/Off button for about 1 second to take system out of standby mode. The I/O power switch on the back of unit must be On (I) to enable this function. To turn the power off for the entire system, press the I/O power switch on the rear panel to Off [O]. |
 Reset Button | Resets the network. Hold Reset Button for 5 seconds while powered Onto clear network settings. Status LED will rapidly blink red when reset is complete. |
 Zone Protection | Red: Protection mode has been enabled to protect a zone/channel; typically indicates thermal protection, clipping or over current. Off : Zone is off and protection mode has not |
Rear Panel

 Speaker Connections | (4) Speaker output zones. Uses 4-pin Speaker Connectors. NOTE: Compatible with 8 ohm or 4 ohm speakers. |
 Analog Preamp Output | (1) Analog stereo line output (Left & Right). Direct Line Level 2.1-V RMS Output. |
 Analog Input | (2) Analog stereo inputs (Left & Right), RCA line-level inputs; 22 kΩ input impedance. |
 Digital Audio Out | (1) Digital optical preamp output (TOSLINK), line-level 96kHz/24-bit output, fi xed volume. |
 Digital Audio In | (2) Digital optical audio inputs (TOSLINK). Supports up to 96kHz/24-bit digital audio in; PCM stereo format only. |
 IR | (4) IR Ports Uses 4-pin IR Connectors to send IR signals to control devices with an IR input or IR receiver via an IR fl asher (5V tolerant only). See IR Wiring section for important precautions regarding IR functionality before making any connections. |
 RS-232 | 8-pin RJ-45 port used to transmit and receive serial binary data to and from serial controllable devices. CTS/RTS handshaking availability based on component profi le. See RS-232 Connections section for pin-outs. |
 Ethernet | 8-pin RJ-45 port 10/100/1000 Base-T auto-negotiating port. Supports Audio Video Bridging (AVB). |
 Ethernet Activity LED | Green Blinking: Activity (Rx/Tx) Off : No Activity |
 Ethernet Link LED | Green Solid: Ethernet Link is established (any speed). Off : Ethernet link is not established. |
 USB | USB 2.0 Type A (reserved for future use) |
 Power Input | 100/240V AC (50/60 Hz) 2.7A Fuse: 250V 3A slow blow fuse; field replaceable I/O (power switch): I (On): Powers On the chassis. O (Off ): Powers Off the chassis. |
Network Requirements
Connect all Savant devices to the same local area network (LAN) or subnet as the host. Savant recommends not implementing any type of traffi c or packet shaping in your network topology for the Savant devices as this may interfere with performance.
Expansion
Up to sixteen Savant IP Audio devices can be connected in a single system, providing a virtual audio switch that can be confi gured to suit almost any need.
RS-232 Connections

RJ-45 Connector (Gold pins face up)
| Pin 1 | No Connection |
| Pin 2 | No Connection |
| Pin 3 | No Connection |
| Pin 4 | Ground (GND) |
| Pin 5 | Receive (RXD) |
| Pin 6 | Transmit (TXD) |
| Pin 7 | Clear to Send (CTS) |
| Pin 8 | Request to Send (RTS) |
Pins 7 and 8 are only required for CTS/RTS handshaking.

When wiring to this port, do not connect any wires within the cable that are not required for communication.
NOTES:
- CTS/RTS handshaking is supported for fl ow control based on the profi le used in the confi guration.
- Wire coloring is included to identify the pins used for this connection. Colors shown do not represent any wiring standard.
- The IP Audio 125 does not support RS-422/485
RJ-45 to DB9 Adapter: Savant off ers RJ-45 to DB9 adapters in a variety of confi gurations that can be used for RS-232 control. Refer to the RS-232 Conversion to DB9 and Pinout Application Note located on the Savant Customer Community for more information on RJ-45 to DB9 adapters.
IR Wiring

IR connections are made using 4-pin IR Connectors supplied with the device. The wire slips into the hole and locks with a screw located at the top of the connector.
IR Wiring Precautions
Ensure that all IR emitters are within 15 feet (4.6 meters) from the controller's location.
Use of 3rd party blinking IR emitters with Talk Back is not recommended. These types of emitters can draw voltage away from the IR signal that can degrade IR performance.
NOTE: While not shown in the diagram above, IR connections 3 to 4 follow the same wiring as 1 to 2.
Speaker Connections

Speaker wiring connections are made using 4-pin Speaker Connectors supplied with the device. The wire slips into the hole and locks with a screw located at the top of the connector. Speaker connectors accept up to 12AWG speaker cable
NOTES:
- Wire order shown does not represent any wiring standard. It may be different than other models.
- While not shown in the diagram above, Zones 2 to 4 follow the same wiring as Zone 1.
Network Confi guration
To ensure that the IP Address will not change due to a power outage, a static IP Address or DHCP reservation should be confi gured. Savant recommends using DHCP reservation within the router. By using this method, static IP Addresses for all devices can be managed from a single UI, avoiding the need to access devices individually.
Setting DHCP reservation varies from router to router. Refer to the documentation for the router to confi gure DHCP reservation. Refer to the Savant IP Audio Deployment Guide (009-1571-xx) located on the Savant Customer Community for more information.
Replace the Fuse

ELECTRIC SHOCK HAZARD: Disconnect the unit from AC power by removing the power cord from the AC outlet and the unit before replacing the fuse.
The orientation of the cartridge within the unit and location of the fuse within the cartridge are crucial to proper operation. Make note of the orientation of the cartridge and the fuse location within the cartridge before removing.
- Disconnect the unit from AC power by removing the power cord.
- Open the fuse cover on the AC power input using a fl at head screwdriver or similar thin fl at head tool. This will allow access to the fuse cartridge.
- Using a fl at head screwdriver or similar thin fl at head tool, gently loosen the cartridge and pull the cartridge out of the unit slowly. As the cartridge is removed, make note of the orientation, as it is important to proper operation.
TIP: Mark the chassis and fuse holder with a marker in order to align when replacing.
- Remove the old fuse from the cartridge and discard.
- Gently place the new fuse inthe cartridge and place the cartridge part way into the receptacle aligning it as defi ned in the diagram.
- Gently press on the cartridge the rest of the way until it seats into the terminals at the rear of the slot.
NOTE: If any resistance is encountered during seating the cartridge, DO NOT apply more pressure. Stop pressing on the cartridge, remove it, verify the orientation, and repeat step.
Installation
Rack Installation

The Savant IP Audio 50 device can be mounted in a 2U rack style enclosure and is compatible with all standard 19-inch National Electrical Manufacturers Association (NEMA) rack mounts. The 2U Rack Bracket needs to be attached prior to mounting. See Savant IP Audio Deployment Guide for more information.
Enclosure Installation
 The Savant IP Audio 50 device can be mounted to a Structured Media Enclosure. The Enclosure Brackets need to be attached prior to mounting. For proper ventilation, louvered enclosure doors are recommended. See Savant IP Audio Deployment Guide for more information.
Additional Documentation
Refer to the following documents located on the Savant Customer Community for additional information.
- Savant IP Audio Deployment Guide (009-1571-xx)
- Savant Media Server/Savant Music Supported Streaming Services Application Note
Important Safety Information t
Before installing, confi guring, and operating Savant equipment and other vendor equipment, Savant recommends that each dealer, integrator, installer, etc. access and read all the required technical documentation. Savant technical documentation can be located by visiting Savant.com. Vendor documentation is supplied with the equipment.
Read and understand all safety instructions, cautions, and warnings in this document and the labels on the equipment.
Safety Statements
Follow all of the safety instructions listed below and apply where applicable. Additional safety information will be included where applicable.
- Read these instructions.
- Keep these instructions.
- Heed all warnings.
- Follow all instructions.
- Do not use this apparatus near water.
- Clean only with dry cloth.
- Do not block any ventilation openings. Install in accordance with the manufacturer's instructions.
- Do not install near any heat sources such as radiators, heat registers, stoves, or other apparatus (including amplifi ers) that produce heat.
- Do not defeat the safety purpose of the polarized or grounding-type plug. A polarized plug has two blades with one wider than the other. A grounding type plug has two blades and a third grounding prong. The wide blade or the third prong is provided for your safety. If the provided plug does not fi t into your outlet, consult an electrician for replacement of the obsolete outlet.
- Protect the power cord from being walked on or pinched particularly at plugs, convenience receptacles, and the point where they exit from the apparatus.
- Only use attachments/accessories specifi ed by the manufacturer.
- Use only with the cart, stand, tripod, bracket, or table specifi ed by the manufacturer, or sold with the apparatus. When a cart is used, use caution when moving the cart/apparatus combination to avoid injury from tip over.
- Unplug this apparatus during lightning storms or when unused for long periods of time.
- Refer all servicing to qualifi ed service personnel. Servicing is required when the apparatus has been damaged in any way, such as power supply cord or plug is damaged, liquid has been spilled or objects have fallen into the apparatus, the apparatus has been exposed to rain or moisture, does not operate normally, or has been dropped.
- To completely disconnect this equipment from the AC mains, disconnect the power supply cord plug from the AC receptacle.
- Use the included power cord with the grounding prong intact to insure proper grounding of the device.

Documents / ResourcesDownload manual
Here you can download full pdf version of manual, it may contain additional safety instructions, warranty information, FCC rules, etc.
Download Savant PAV-SIPA50SM - IP Audio 50 Quick Reference Guide
Advertisement


Need help?
Do you have a question about the PAV-SIPA50SM and is the answer not in the manual?
Questions and answers