Advertisement
Quick Links
Einbauanleitung
| Mounting instructions
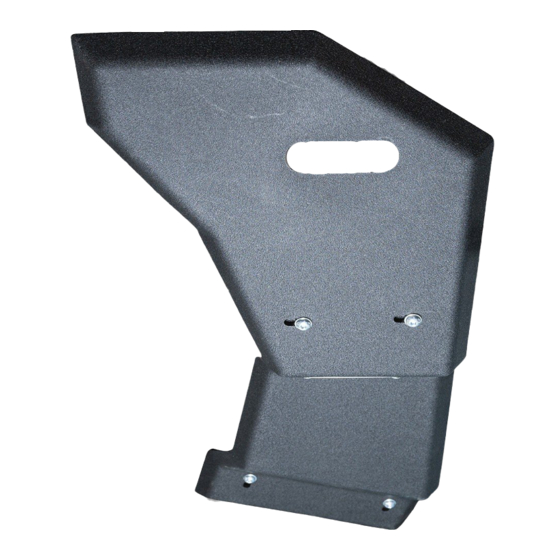
Ford Ranger AdBlue Tank Unterfahrschutz
Ford Ranger AdBlue tank skid plate
Modell
| Model
HFORASPAB01
Trägerfahrzeug: Ford Ranger ab Facelift 2015
Beginne erst dann mit dem Einbau, wenn du diese Anleitung komplett gelesen und verstanden hast!
Montagezeit: ca. 60 Minuten
fits: Ford Ranger facelift since 2015-
Read this manual complete, do not start the installation until you fully understood the manual!
Installation duration: approximate 60 minutes
w w w . h o r n t o o l s . c o m
Advertisement

Related Manuals for Horn Tools HFORASPAB01


Summary of Contents for Horn Tools HFORASPAB01
- Page 1 Ford Ranger AdBlue Tank Unterfahrschutz Ford Ranger AdBlue tank skid plate Modell | Model HFORASPAB01 Trägerfahrzeug: Ford Ranger ab Facelift 2015 Beginne erst dann mit dem Einbau, wenn du diese Anleitung komplett gelesen und verstanden hast! Montagezeit: ca. 60 Minuten...
- Page 2 Technische Änderungen vorbehalten / technical changes reserved Allgemeine Hinweise | universal notes ► Fragen / questions Solltest du noch Fragen zur Montage oder zum Gebrauch deines Produktes haben, kontaktier uns gerne! If you have further questions regarding the mounting or the useage of your horntools product feel free to contact ►...
-
Page 3: Stückliste | Partlist
Stückliste | partlist Anzahl Bild Zeichnungsnummer Beschreibung quantity image drawing number description Hauptplatte hforaspab01 main plate Vorder Halter hforaspab01_front_ bracket front bracket Hinterer Halter hforaspab01_rear_ bracket rear bracket Versteifung hforaspab01_stiffener stiffener Schraubenliste | boltlist Unterfahrschutz zu Halter / skid plate to brackets... - Page 4 Technische Änderungen vorbehalten / technical changes reserved Einbauanleitung | manual Im ersten Schritt muss das Reserverad demontiert werden. The first step is to remove the spare wheel. Nun können die zwei Halter mit dem Auto verschraubt werden. ACHTUNG! Stütze den AdBlue Tank mit einem Getriebeheber ab, sobald du beginnst die Schrauben zu entfernen.
- Page 5 Abb. 3: Montagepunkt hinten links / mounting Abb. 4: Montagepunkt hinten rechts / mounting point rear left point rear right Abb. 5: Montagepunkt vorne links / mounting Abb. 6: Montagepunkt vorne rechts / mounting point front left point front lright Datum / date: 12.11.2020 Seite / page:...
- Page 6 Technische Änderungen vorbehalten / technical changes reserved Nun wird die Hauptplatte mit den zwei Haltern verschraubt. Verwende hierfür die beiliegenden ISO7380 M8x20mm Schrauben, sowie die dazugehörigen Unterlegscheiben Abb. 7. Now the main plate gets screwed to the two brackets. Use the enclosed ISO7380 M8x20mm screws and the associated washers Abb.
- Page 7 Anschließend wird die Versteifung zwischen dem vorderen Halter und der Hauptplatte verschraubt. Verwende hierfür die beiliegenden ISO7380 M8x20mm Schrauben, sowie die dazugehörigen Unterlegscheiben Abb. 8-10. Then the stiffener is screwed between the front bracket and the main plate. Use the enclosed ISO7380 M8x20mm screws and the corresponding washers Abb.
- Page 8 Technische Änderungen vorbehalten / technical changes reserved Abb. 11: CAD Abbild des Unterfahrschutzes inkl. Halter/ CAD image of the skid plate including the brackets Datum / date: 12.11.2020 Seite / page:...
- Page 9 Alle Schrauben anhand der Drehmomenttabelle, auf der letzten Seite dieser Anleitung, festziehen. Den ordnungsgemäßen Halt aller Schrauben periodisch überprüfen. Torque down all bolts according to the diagram on the last page of this installation manual. Periodically check the proper hold of all bolts. Drehmomenttabelle | torque diagram [torque in Nm] Regelgewinde Abmessung...
- Page 10 horntools GmbH Wallenmahd 23 . 6850 Dornbirn . AUSTRIA email: office@horntools.com UID: ATU65090439 w w w . h o r n t o o l s . c o m...
Need help?
Do you have a question about the HFORASPAB01 and is the answer not in the manual?
Questions and answers