Advertisement
Quick Links
Einbauanleitung
| Mounting instructions
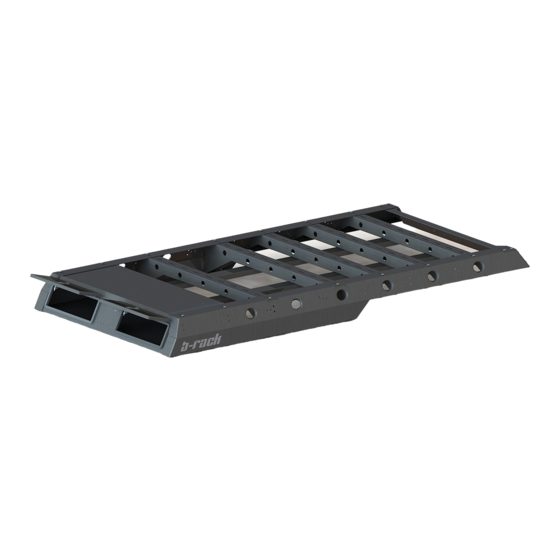
B-Rack Overlay
B-Rack overlay
Modell
| Model
HBRRR01
Beginne erst dann mit dem Einbau, wenn du diese Anleitung komplett gelesen und verstanden hast!
Montagezeit: ca. 300 Minuten
Read this manual complete, do not start the installation until you fully understood the manual!
Installation duration: approximate 300 minutes
w w w . h o r n t o o l s . c o m
Advertisement

Related Manuals for Horn Tools HBRRR01


Summary of Contents for Horn Tools HBRRR01
- Page 1 B-Rack overlay Modell | Model HBRRR01 Beginne erst dann mit dem Einbau, wenn du diese Anleitung komplett gelesen und verstanden hast! Montagezeit: ca. 300 Minuten Read this manual complete, do not start the installation until you fully understood the manual! Installation duration: approximate 300 minutes w w w .
- Page 2 Technische Änderungen vorbehalten / technical changes reserved Allgemeine Hinweise | universal notes ► Fragen / questions Solltest du noch Fragen zur Montage oder zum Gebrauch deines Produktes haben, kontaktiere uns gerne! If you have further questions regarding the mounting or the useage of your horntools product feel free to contact ►...
- Page 3 Stückliste | partlist Anzahl Bild Zeichnungsnummer Beschreibung quantity image drawing number description linke Seitenwand/ PHBRRR01_01_left left side panel PHBRRR01_01_ rechte Seitenwand/ right right side panel Heckteil/ PHBRRR01_02 tail section Längsstrebe/ PHBRRR01_03 Longitudinal strut Querstrebe A/ PHBRRR01_04 cross strut A Halter für Querstrebe A/ PHBRRR01_05 bracket for cross strut A Querstrebe B/...
- Page 4 Technische Änderungen vorbehalten / technical changes reserved PHBRRR01_bolt- Schraubplatte / plate boltplate Schraubenliste | boltlist Artikel Größe Länge Schraubenklasse Kopfform Oberfläche Norm Anzahl article size length strength class head surface finish standard qty. Linsenkopf verzinkt / Schraube/bolt ISO7380 lense head galavanized Linsenkopf verzinkt /...
- Page 5 Einbauanleitung | Manual Im ersten Schritt werden die Bauteile, wie abgebildet, auf dem Kopf auf Boden (vorzugsweise auf einen Teppich) aufgelegt Abb.1. In the first step, the components are placed upside down on the floor (preferably on a carpet) as shown in Abb.1.
- Page 6 Technische Änderungen vorbehalten / technical changes reserved PHBRR01_03 Abb. 2: verschraubte Längsstrebe/ bolted longitudinal struts Jetzt werden je zwei Querstreben Halter A mit der Querstrebe A lose verschraubt, verwende hierfür 16x ISO7380 M8x16mm Schrauben und Unterlegscheiben Abb.3-4. Now two cross strut brackets A are bolted loosely to cross strut A, use 16x ISO7380 M8x16mm screws and washers Abb.3-4.
- Page 7 PHBRR01_05 Abb. 4: verschraubter Querstreben Halter/ bolted cross strut bracket Im nächsten Schritt werden die beiden Seitenteile (PHBRRR01_01_left/right), sowie die Frontblende (PHBRRR01_07), lose montiert. Um das Heckteil (PHBRRR01_02) und die Querstreben Halter (PHBRRR01_05) mit den Seitenteilen zu verbinden, verwende 18x ISO7380 M8x20mm Schrauben und Unterlegscheiben.
- Page 8 Technische Änderungen vorbehalten / technical changes reserved PHBRR01_03 PHBRR01_03 Abb. 5: Explosionsansicht/ exploded view Abb. 6: lose zusammengeschraubter HBRRR01/ loosely bolted together HBRRR01 Datum / date: 28.09.2020 Seite / page:...
- Page 9 Nun wird die Breite des B-Rack Overlays eingestellt, sodass dieses auf das B-Rack passt. Hierfür muss die Breite des B-Rack abgemessen werden! Danach werden alle losen Schrauben angezogen. Anschließend wird das Overlay auf das B-Rack gehoben (min. 4 Personen) und verschraubt. Verwende hierfür 12x ISO7380 M8x25mm Schrauben und Unterlegscheiben, sowie 6x Schraubplatten Abb.6-7.
- Page 10 Technische Änderungen vorbehalten / technical changes reserved Abb. 7: Explosionsansicht/ exploded view Abb. 8: Zusammengebautes B-Rack mit B-Rack Overlay/ Assembled B-Rack with B-Rack overlay Datum / date: 28.09.2020 Seite / page:...
- Page 11 Bevor das Fahrzeug bewegt und das B-Rack samt Overlay benutzt werden darf, musst du die Bedienungsanleitung komplett gelesen und verstanden haben. Versichere dich das alle Schrauben laut Drehmomenttabelle angezogen sind und alles festsitzt, danach kann die Reise los gehen! Before driving the vehicle and using the B-Rack including the overlay, you must have completely read and understood the user manual.
- Page 12 Technische Änderungen vorbehalten / technical changes reserved Drehmomenttabelle | torque diagram [torque in Nm] Regelgewinde Abmessung Vorspannkraft (kN) Anziehmoment (Nm) Festigkeits- 10.9 12.9 10.9 12.9 klasse M 4x0,70 1,29 1,71 1,02 1,37 M 5x0,80 2,79 10,9 M 6x1,00 2,96 3,94 13,2 15,4 10,0...
- Page 13 Notizen | Notes Datum / date: 28.09.2020 Seite / page:...
- Page 14 horntools GmbH Wallenmahd 23 . 6850 Dornbirn . AUSTRIA email: office@horntools.com UID: ATU65090439 w w w . h o r n t o o l s . c o m...
Need help?
Do you have a question about the HBRRR01 and is the answer not in the manual?
Questions and answers