Advertisement
Table of Contents
STEP 1
Read through these instructions
thoroughly before you begin assembly.
We have found this to be of great value
when first assembling this product.
STEP 2
Remove all parts and hardware from
packing material. Wooden pieces
should be placed on a non-abrasive
surface (like the carton or carpet) to
prevent damage to the finish.
STEP 3
Identify all parts using diagram at right.
STEP 4
Identify and count hardware using diagrams at
right and below.
(2) Door Pulls
(2) 5/8" Pan Screws
STEP 5
Stand the side assembly (A) on edge
and attach bottom assembly (B)
with two 1-1/4" #8 screws. Repeat
to attach other side.
STEP 6
Stand unit upright. Insert hinge pin
into each predrilled hole in front
corner of bottom shelf and drop two
washers over each pin.
STEP 7
Mount magnet catch in predrilled
holes in underside of shelf (C)
using 1/2" #6 Pan screws
provided.
STEP 8
Mount magnet plate to back of each door
using 1/2" #5 Flat screw.
STEP 9
Attach Door pulls by placing pulls through
decorative plates, then through door,
securing with 5/8" pan screws.
STEP 10
Add shelf (C) to cabinet
assembly by aligning both side
assemblies (A) using one 1 1/4"
#8 screw on each side. This
will enable you to pivot the
shelf to install the doors.
DO NOT FULLY TIGHTEN
THE SCREWS.
We found it helpful to use one
door (D) to hold the shelf in
place as shown to right.
Advertisement
Table of Contents

Related Manuals for L.L.Bean MISSION ENTERTAINMENT STAND


Summary of Contents for L.L.Bean MISSION ENTERTAINMENT STAND
- Page 1 STEP 1 STEP 7 Read through these instructions Mount magnet catch in predrilled thoroughly before you begin assembly. holes in underside of shelf (C) We have found this to be of great value using 1/2" #6 Pan screws when first assembling this product. provided.
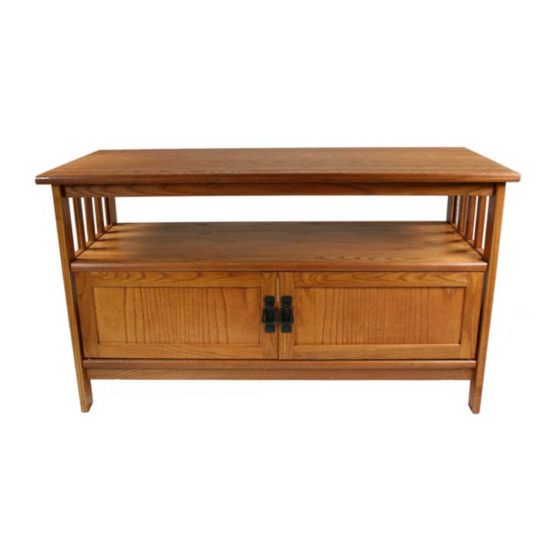
- Page 2 CARE Dust as needed with soft cloth. Clean with Thank you for purchasing our Mission Entertainment Stand. Assembly of this product damp cloth and mild solution of dish soap. requires a Phillips screwdriver and a hammer. We found it helpful to have a second Polish with soft cloth and polish that contains person assist with a couple of the steps.
Need help?
Do you have a question about the MISSION ENTERTAINMENT STAND and is the answer not in the manual?
Questions and answers