
Related Manuals for Dynamic Rhino


Summary of Contents for Dynamic Rhino
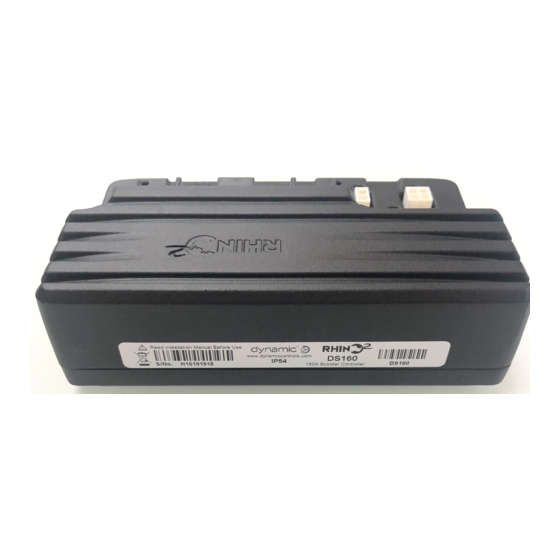
- Page 1 Rhino to HINO Conversion Guide Rhino to R 2 Conversion Guide Issue 1, December 2011 HINO...
-
Page 2: About
Controls. All other brand and product names, fonts, and company names and logos are trademarks or registered trademarks of their respective companies. DYNAMIC CONTROLS owns and will retain all trademark rights and DYNAMIC CONTROLS or its licensors own and will retain all copyright, trade secret and other proprietary rights, in and to the documentation. -
Page 3: Table Of Contents
Beeper Output .............................. 18 Speed Reduction Wiper ..........................18 Forward-reverse input..........................18 Status LED ..............................19 ..............................19 PEED ETTINGS ..............................19 PEED EDUCTION ......................19 CCELERATION AND ECELERATION ETTINGS ............................ 20 HROTTLE EUTRAL FFSET Rhino to RHINO2 Conversion Guide Page 3... -
Page 4: Introduction
Follow these instructions carefully. The ’s current capability is higher HINO than Rhino. Failure to follow these settings can result in damage to the scooter or serious injury to the user. Before you start! Make sure that you have a copy of the R 2 Installation Manual at hand. -
Page 5: Introducing The Rhino2
A separately available aluminium terminal cover provides increased protection to IP55 when fitted Compliant with EU Directive 2002/95/EC of 27 Jan. 2003 – restrictions on use of Hazardous Substances (RoHS) Optional single actuator output (with Wig-wag or dedicated switch activation). Rhino to RHINO2 Conversion Guide Page 5... -
Page 6: Procedure
Procedure The procedure for swapping a Rhino system to a R 2 system involves both adapting the cabling, HINO and programming some specific parameters. A summary is outlined below: Step 1 – Capture the Rhino’s existing profile Step 2 – Replace the Rhino controller with the... -
Page 7: Step 1 - Capture The Existing Rhino's Profile
Step 1 – Capture the existing Rhino’s profile Connect the existing Rhino system to a PC or laptop, and with the Wizard application, read the existing Rhino’s configuration profile. You will use some of the existing configured parameters to set up the R 2 controller in later steps. - Page 8 Warning: The motor and battery adaptor looms are only suitable for use with scooter wiring that uses genuine AMP/Tyco housings and terminals and/or genuine Dynamic housings as specified in the Rhino installation manual. Type Part No. 6-way 250 series Plug Housing...
- Page 9 GLM51981: Fit to RHINO2 park brake connector connector socket Note: Simply connect the DS52K, DS72K and DS112K do not require a battery adaptor loom. existing scooter battery connector directly into the R 2 controller’s battery connector. HINO Rhino to RHINO2 Conversion Guide Page 9...
- Page 10 GLM51984: Fit to R 2 actuator connector HINO socket Warning: Do not plug the scooter’s battery / actuator connector directly into the DS90-ACT as this will cause the actuator to be driven. Rhino to RHINO2 Conversion Guide Page 10...
- Page 11 2 park brake connector socket HINO connector Note: Simply connect the DS52K, DS72K and DS112K do not require a battery adaptor loom. existing scooter battery connector directly into the R 2 controller’s battery connector. HINO Rhino to RHINO2 Conversion Guide Page 11...
- Page 12 GLM51985: Fit connector to existing battery loom connector, and the ring terminals to RHINO2’s battery connectors. Note: The torque settings for the DS160 and DS160-ACT motor and battery terminals should be between 4.5Nm and 5.5Nm Rhino to RHINO2 Conversion Guide Page 12...
-
Page 13: Install The Logic Cable Adaptor
For more information, see the HINO Installation Manual, section 3.9 and the section in this guide. Logic connector GLM51987: Fit to R 2 tiller connector HINO GLM51987: Fit to existing Rhino 8-way tiller connector Rhino Function Active Slow To Latch Flash... -
Page 14: Step 4 - Set Up The Scooter Profile
Set R 2 Throttle Input (4.4.2.2) to “Single”. HINO Set Throttle Neutral Offset based on Rhino’s Speed Pot Neutral setting. Please see Throttle Neutral Offset (page 20) for more information. Note: Use the HHP to calibrate the unit instead of setting a value manually, see 'Throttle calibration' in section 4.1.1.3 of the RHINO2 Installation Manual for details. -
Page 15: Set Up Park Brake Management Parameters
Set up park brake management parameters Set R 2 Park Brake Testing (4.4.6.1) to “Driving” if the Rhino’s PB Open Circuit Drive Test HINO is set to “Yes”, otherwise, set it to “Pre-drive”. DO NOT set it to “None” as this will contravene an ISO7176 requirement. -
Page 16: Step 5 - Test Drive
16. Test all other hardware fitted. 17. Repeat testing until the scooter performs as expected. This is for guidance only. Low-current controllers may not be able to handle a 1:6 ramp at full load. Rhino to RHINO2 Conversion Guide Page 16... -
Page 17: Further Information
Further information Programming The Rhino can be programmed by simply plugging in the DS-HHP or Wizard cable directly into the round 5-pin programming connector socket on the Rhino DS52Kx, DS72K, DS72KA, DS112Kx or DS162Kx (the DS72KSPx is an exception). For programming the R... -
Page 18: Logic Connector
Logic connector Beeper Output Some Rhino controllers can be programmed so that the "beeper" output (pin 5 of the 8-pin Logic connector) performs a Brake Light function or a Reverse Light function. If this option is used and the Rhino needs to be replaced by a R... -
Page 19: Status Led
HINO Speed Reduction The Rhino has a Reduce Speed input, also known as the Turn input, which is pin 6 of its Logic connector. When asserted, this causes the speed demand to be limited to the value of Reduce Speed unless the Forward Speed or Reverse Speed parameter (depending on the direction of travel) already has a lower value. -
Page 20: Throttle Neutral Offset
Reverse Speed is lower than the corresponding Forward Speed to reduce the risk of the front wheels lifting when decelerating while reversing down a slope. Note that in the Rhino controllers, there is only one Acceleration rate and one Deceleration rate, but these rates are affected by the maximum speed in the Forward or Reverse direction so the effective Reverse Deceleration is automatically reduced with the Reverse Speed. - Page 21 Previous versions of Rhino used an integer range 0 – 255 to represent a voltage range 0 – 5V, where the value 128 would represent the centre position: Values either side of 128 indicated a voltage offset of 19.6mV per step. For example, if Speed Pot Neutral was set to 129, then this represented a +19.6mV offset, that is:...
- Page 22 Notes Rhino to RHINO2 Conversion Guide Page 22...
- Page 23 Notes Rhino to RHINO2 Conversion Guide Page 23...
- Page 24 Dynamic Controls was established in 1972 and is headquartered in New Zealand. Regional centres are located in Europe, United States, Asia, and Australasia. ISO 13485 certified – Dynamic Controls goes above and beyond industry standard expectations to ensure customers receive the best products possible.
Need help?
Do you have a question about the Rhino and is the answer not in the manual?
Questions and answers