Table of Contents
Advertisement
Quick Links
Advertisement
Table of Contents

Related Manuals for GYROZEN MicroCentrifuge mini


Summary of Contents for GYROZEN MicroCentrifuge mini
- Page 1 Personal Micro Centrifuge mini User’s Manual Manufacturer: GYROZEN Co., Ltd. 1F & 5F, 16 Arayuk-ro, Gimpo-si, Gyeonggi-do, KOREA Tel) +82-2-2274-1107, FAX) +82-2-3471-8174 info@gyrozen.com http://www.gyrozen.com UM-mini(E)(Rev. ) MicroCentrifuge, mini...
-
Page 2: Table Of Contents
Content Meanings of Symbols & Safety Precautions....................3 Safety Labels on Instrument ........................3 Safety Precautions ............................. 3 Product Description & Technical Specifications .................... 5 Product Description ............................5 Technical Specifications ..........................5 Installation ................................... 6 Power On/Off and Door Release ....................... 6 3.1.1 Power On/Off ............................ -
Page 3: Meanings Of Symbols & Safety Precautions
(Permissible ambient temperature: +5°C ~ +35 °C, Relative humidity: ≤ 85%) Before connecting the power, check the rated voltage. Should not use unapproved rotors and associated accessories. Only use rotors from Gyrozen Co., Ltd. with appropriate centrifugal tubes and MicroCentrifuge, mini... - Page 4 suitable adaptors to embrace sample containers tightly enough inside rotors. Before operating the instrument, check if the rotor and the rotor lid are securely fastened. Should operate the instrument with a rotor properly installed and secured to the motor shaft. Mount the rotor on the motor shaft properly, check it with spinning manually.
-
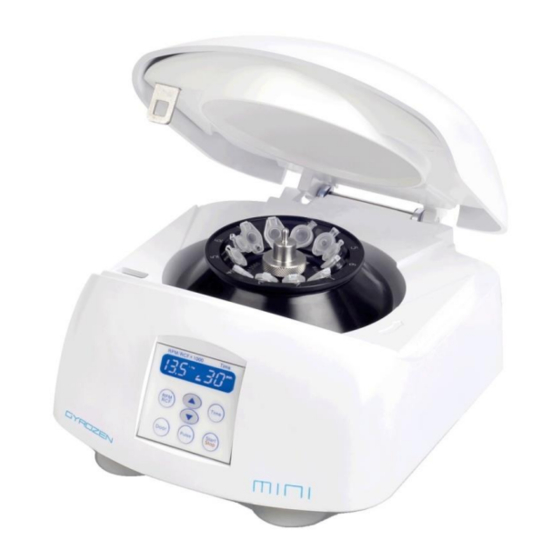
Page 5: Product Description & Technical Specifications
2. Product Description & Technical Specifications 2.1 Product Description 2.2 Technical Specifications 13,500 rpm/ 12,300 xg 6,000 rpm/ 1,850 xg Max. RPM/RCF (GRF-m2.0-12) (GRA-s0.2-32) Max. capacity 12 x 2.0 ml tubes 4 x 8-tube PCR strips Time control Pulse or timed ≤30 min RCF/RPM conversion Noise level (dependent on rotor) ≤56 dB... -
Page 6: Installation
Display Blue LCD Safety lid lock Automatic door release at completion Power supply (V/Hz) 220V/50~60Hz (110V optional) Power Requirement (VA) 110VA Dimension (W x D x H) 208 x 245 x 145 mm Weight without rotor 4.4 kg CE MARK Cat. -
Page 7: Door Release
Turn on the instrument by pressing the power switch on the back of the instrument. Turn on the switch [ I ]. 3.1.2 Door Release For door opening, [DOOR] button is used. Display shows the status of door (open , closed ... -
Page 8: Rotor Coupling And Disassembling
3.2 Rotor Coupling and Disassembling 3.2.1 Fixed Angle Rotor Action Before coupling a rotor, clean the motor shaft, rotor, and chamber with soft dry towel. ▶ If you find any foreign substances, they must be removed from the motor shaft, rotor and chamber. Mount a proper rotor into the motor shaft and fix it using Rotor Locking Nut. -
Page 9: Positioning Of Sample Tubes
3.3 Positioning of Sample Tubes Action Before loading sample tubes, check the water drop or dirt in the rotor hole or inner adaptor. ▶ If you find any water drops or dirt in the rotor hole or adaptor, remove them with soft and dry cloth. -
Page 10: Operation
4. Operation 4.1 Key Functions of Control Panel Display Window Shows speed, time, status of running and the status of door opening or closing. RPM/RCF Modes are displayed as rpm and rcf. While running, is flickering. appears when the Door is opened and appears when the Door is closed. -
Page 11: Setting The Rpm Value
4.2.1 Setting the RPM Value Action Press the [RPM/RCF] once. ▶ The RPM mode is activated by pressing [RPM/RCF]. ▶ If the RCF mode is selected, press [RPM/RCF] once more. ▶ The input RPM value flickers on the display window and can be set here. Press the [▲▼] buttons to change input value. -
Page 12: Setting The Rcf Value
4.2.2 Setting the RCF Value Action Press [RPM/RCF] twice. ▶ The RCF mode is activated by pressing [RPM/RCF] twice. ▶ If the RPM mode is selected, press [RPM/RCF] once more. ▶ The input RCF value flickers on the display window and can be set here. Press the [▲▼] buttons to change input value. -
Page 13: Setting The Time Value
4.3 Setting the Time Value Time control: 1 min. ~30 min. Time setting unit: 1min. Action Press the [TIME] button once. ▶ ‘min’ on LED is flickering. Press the [▲▼] buttons to change input value. ▶ After 5 seconds from pressing the input value, the setting value is saved. -
Page 14: Start/Stop
4.4 Start/Stop Action 1 After setting RPM/RCF and Time, press [Start/STOP] button. ▶ The running starts only when the door is closed. ▶ In case of pressing the [Start /Stop] button while running, the running is stopped 4.5 Pulse It is for quick spin down. ... -
Page 15: Emergency Door Open
4.6 Emergency Door Open When the door of the instrument is not opened automatically or by pressing the [Door] button due to an accidental power shut-off or any unexpected causes, users can manually open the door by following the instruction. Action Check if the rotor in the centrifuge is completely stopped. -
Page 16: Maintenance
If the rotor cannot be easily removed from the shaft, do not pull the rotor by force and call a service engineer authorized by GYROZEN Co., Ltd. 5.4 Rotor If any parts become contaminated, clean them with soft wet cloth and keep the rotor dry. -
Page 17: Trouble Shooting
Remove the dirt at the door latch and keep the door completely closed. Can’t close the door. If the door is not closed by any reasons, please contact GYROZEN service team. Please check if the table and the instrument keep level. -
Page 18: Error Code
Check whether the motor is normally working or not. If the error message does not disappear, please contact a Service Engineer of your local GYROZEN’s partner. If the door opens while spinning or has any trouble in the door sensor, this message may come up. - Page 19 If the error message does not disappear, please contact a Service Engineer of your local GYROZEN’s partner. If the installed software has any bugs, this message may come up. Contact a Service Engineer of your local GYROZEN’s ...
-
Page 20: Ordering Information For Rotors & Accessories
7. Ordering Information for Rotors & Accessories MicroCentrifuge, mini...
Need help?
Do you have a question about the MicroCentrifuge mini and is the answer not in the manual?
Questions and answers