Table of Contents

Related Manuals for GYROZEN 1848R


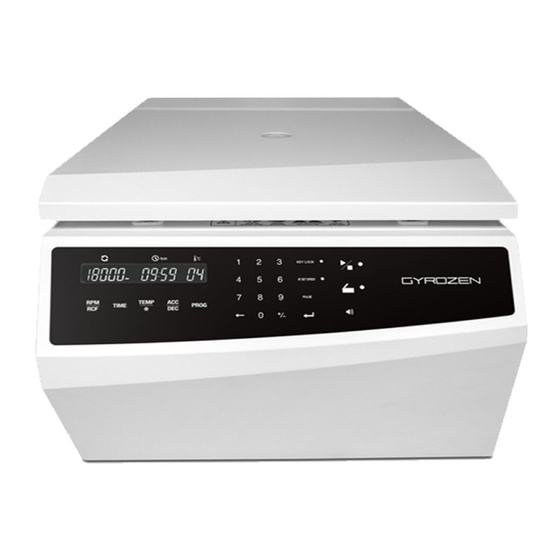
Summary of Contents for GYROZEN 1848R
- Page 1 Refrigerated Centrifuge 1848R User Manual Manufacturer: GYROZEN Co., Ltd. 1F & 5F, 16 Arayuk-ro, Gimpo-si, Gyeonggi-do, KOREA Tel: +82-2-2274-1107 Fax: +82-2-3471-8174 info@gyrozen.com http://www.gyrozen.com DOC. No.: UM-1848R(E)(Rev.0)
-
Page 2: Table Of Contents
5-1. Outer part of Instrument ........................... 18 5-2. Chamber ............................... 18 5-3. Shaft ................................18 5-4. Rotor ................................18 6. Trouble Shooting ..........................6-1. Check List ..............................19 6-2. Error Code..............................19 Rotors and accessories ........................Refrigerated Micro Centrifuge 1848R... -
Page 3: Warning Signs & Safety Precautions
ALWAYS position the instrument with enough space on each side of instrument to ensure proper air circulation. ALWAYS install the instrument within a temperature and humidity controlled environment. (Permissible ambient temperature: +5°C ~ +35 °C, Relative humidity: ≤ 85%) Refrigerated Micro Centrifuge 1848R... - Page 4 Before connecting the power, check the rated voltage. DO NOT use unapproved rotors and accessories. ONLY USE rotors from GYROZEN Co., Ltd. with appropriate centrifugal tubes and suitable adaptors to embrace sample containers tightly enough inside rotor tubes. Before operating the instrument, check if the rotor and the rotor lid are securely fastened.
- Page 5 DO NOT use the instrument if the power input is more than +/- 10% of the recommended voltage or fluctuates frequently to avoid malfunction and serious damage. Install the instrument away from any kind of corrosive substances. Refrigerated Micro Centrifuge 1848R...
-
Page 6: Product Description & Technical Specifications
Temp. range (℃) -12 ~ +40 FAST cool button Time control Timed < 10 hr or continuous Time counting modes Selectable, at set speed or from starting RPM/RCF conversion Noise level (dB) <60dB ACC/DEC 9/10 steps Refrigerated Micro Centrifuge 1848R... -
Page 7: Installation
Turn on the power switch from [ I / O] to ON [ I ] on the right side of the instrument. The set value is displayed with a beep sound. The default values of the instrument are Max. RPM, 10 min for each rotor. Refrigerated Micro Centrifuge 1848R... -
Page 8: Lid Release
Remove dirt and dust around hooks at the rotor and bucket hinges. Spin the rotor manually to check if the buckets swing freely enough. If they do not swing freely, apply the provided Lubricant (grease) to the linking area. Refrigerated Micro Centrifuge 1848R... -
Page 9: Loading Sample Tubes
Use the sample tube after checking the proper sample capacity for centrifugal force strength (Max RCF) and material of tubes. Fill the tubes with identical weight and density. Arrange the tube with equal space, in symmetry. Refrigerated Micro Centrifuge 1848R... -
Page 10: Operation
To count the run time once the actual run speed reaches to the set speed value □ To use pulse mode □ To complete data setting □ To start and stop operation □ To open instrument lid □ To adjust number of beeps and speaker volume Refrigerated Micro Centrifuge 1848R... -
Page 11: Setting Rpm/Rcf Value
09:59 or continuous operation (set 00 minutes and 00 seconds) 4.3.1. Setting the AT SET SPEED mode Touch the [AT SET SPEED] button once. AT SET SPEED MODE → lamp light turns on (Counting the time after reaching the set speed Refrigerated Micro Centrifuge 1848R... - Page 12 Touch [ENTER] → final save of time Input mode Time setting unit: 1 hour. Not touching the number button for more than 15 seconds will clear settings. To make correction, touch [] button and re-input the values. Refrigerated Micro Centrifuge 1848R...
-
Page 13: Setting Temperature And Fast Cool
For fast cooling, the instrument is refrigerated down to the set temperature in a short time. During the fast cooling, the rotor runs at low speed (1,000 rpm). The passed time flashes in the display. Refrigerated Micro Centrifuge 1848R... -
Page 14: Acceleration / Deceleration
DEC 9 step regardless of the setup step. 4.6.3 Emergency stop 1. Press the [Start/Stop] button twice to exit. Touch the [Start/Stop] button during slow down to decelerate the instrument rapidly to Refrigerated Micro Centrifuge 1848R... -
Page 15: Pulse
The display shows the set values (speed, time, temperature, value/decrease, etc.) of the called program. Not touching the number button for 15 seconds will clear the setting. 3. To make correction, touch [ ] button and re-input the values. Refrigerated Micro Centrifuge 1848R... -
Page 16: Setting Key Lock/Unlock
2. To adjust the number of end alarms, enter the set value using the number plate and touch [Enter]. Touch [Enter] → Save number of end alarm. Number of end alarm → 0 ~ 99 (0: no alarm, 99: 99 times) Refrigerated Micro Centrifuge 1848R... -
Page 17: Emergency Lid-Lock Release
The lid opens manually with the sound of the gear motor. Perform manual opening only when spinning completely stops to prevent harmful damage to the samples and operators. After manually opening the lid, it is recommended to not close it until normal electricity is restored. Refrigerated Micro Centrifuge 1848R... -
Page 18: Maintenance
Be careful not to make scratches inside or on the surface of rotors. Any small scratches can cause corrosion of the rotor and big damage to the instrument. If you do not use the instrument, keep the rotor separately from the motor shaft and place it upside down. Refrigerated Micro Centrifuge 1848R... -
Page 19: Trouble Shooting
-Shut off power supply for an hour with the lid opened. Then turn on the power switch to check the instrument. - Shown when the power supply (V/Hz) input is 10% less than Error 4 Low Voltage required. Refrigerated Micro Centrifuge 1848R... - Page 20 - This message will be cleared by coupling an appropriate rotor (Refer Rotor ID or RPM to 3-4. Rotor Insert and Removal.) Error 9 Sensor - If the error code persists, please call GYROZEN Field Service Engineer. - Shown when the instrument does not reach the setting temperature Chamber Temp.
-
Page 21: Rotors And Accessories
7. Rotor and accessories Refrigerated Micro Centrifuge 1848R... - Page 22 Refrigerated Micro Centrifuge 1848R...
- Page 23 Refrigerated Micro Centrifuge 1848R...
- Page 24 Refrigerated Micro Centrifuge 1848R...
Need help?
Do you have a question about the 1848R and is the answer not in the manual?
Questions and answers