
Related Manuals for ThermoFisher Scientific thermo scientific Heraeus Multifuge X1R


Summary of Contents for ThermoFisher Scientific thermo scientific Heraeus Multifuge X1R
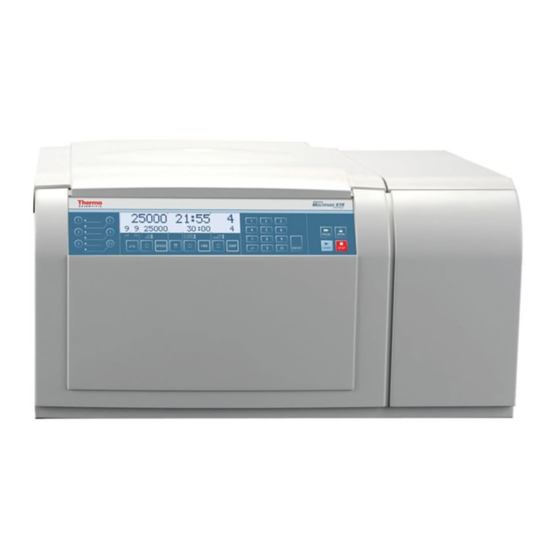
- Page 1 Thermo Scientific Heraeus Multifuge X1R Centrifuge Instruction Manual 50156623-b • 03 / 2020 Visit us online to register your warranty: thermofisher.com/labwarranty...
-
Page 3: Table Of Contents
Accident prevention .........................iv Precautions ..........................v Chapter 1 Introduction and description ....................1-1 Characteristics of the Thermo Scientific Heraeus Multifuge X1R ......1-2 Technical data ......................1-3 Directives, standards and guidelines ..................1-4 Functions and features ......................1-4 Mains supply ......................1-4 Rotor selection ...................... - Page 4 Contents Chapter 5 System menu ........................... 5-1 Description ......................5-2 Chapter 6 Maintenance and care ......................6-1 ..........................6-2 Cleaning intervals ....................6-2 Cleaning ........................6-2 Disinfection ......................6-4 Decontamination ..................... 6-5 Autoclaving ......................6-5 Service of Thermo Fisher Scientific ................6-6 Chapter 7 Troubleshooting ......................
-
Page 5: Preface
Preface Before starting to use the centrifuge, read through this instruction manual carefully and follow the instructions. The information contained in this instruction manual is the property of Thermo Fisher Scientific; it is forbidden to copy or pass on this information without explicit approval. Failure to follow the instructions and safety information in this instruction manual will result in the expiration of the sellers warranty. -
Page 6: Intended Use
Intended use • This centrifuge is designed to separate sample mixtures of different densities like chemicals, environmental samples and other non-human body samples. Accident prevention WARNING Plug the centrifuge only into sockets which have been properly grounded. WARNING If a hazardous situation occurs, turn off the power supply to the centrifuge and leave the area immediately. -
Page 7: Precautions
Precautions In order to ensure safe operation of the Heraeus Multifuge X1R, the following general safety regulations must be followed: • The centrifuge should be operated by trained specialists only. • The centrifuge is to be used for its intended use only. •... - Page 8 • Especially when working with corrosive samples (salt solutions, acids, bases), the accessory parts and vessel have to be cleaned carefully. • Always balance the samples. Centrifuging hazardous substances: • Do not centrifuge explosive or flammable materials or substances which could react violently with one another.
- Page 9 Introduction and description Contents “Characteristics of the Thermo Scientific Heraeus Multifuge X1R” page 1-2 • • “Technical data” page 1-3 “Directives, standards and guidelines” page 1-4 • • “Functions and features” page 1-5 “Mains supply” page 1-5 • • “Rotor selection”...
-
Page 10: Chapter 1 Introduction And Description
Introduction and description Characteristics of the Thermo Scientific Heraeus Multifuge X1R Characteristics of the Thermo Scientific Heraeus Multifuge X1R This centrifuge is designed to separate sample mixtures using different rotors according to application needs. The set speed is reached within seconds. The maintenance-free induction motor ensures quiet and low-vibration operation even at high speeds, and guarantees a very long lifetime. -
Page 11: Technical Data
Introduction and description Technical data Technical data The technical data of the Heraeus Multifuge X1R is listed in the following table. Table 1-1. Technical Data Heraeus Multifuge X1R Feature Heraeus Multifuge X1R Environmental conditions -Use in interior spaces -Altitudes of up to 2,000m above sea level -max. -
Page 12: Directives, Standards And Guidelines
Introduction and description Directives, standards and guidelines Directives, standards and guidelines Table 1-2. Directives, standards and guidelines Standards Tension / frequency 220-230 V, 50 / 60 Hz IEC 61010-1 IEC 61010-2-020 EN 61326-1 Class B EN ISO 9001 Functions and features The following table gives an overview of the important functional and performance characteristics of the Heraeus Multifuge X1R. -
Page 13: Rotor Selection
Introduction and description Rotor selection Rotor selection The Heraeus Multifuge X1R of the is supplied without arotor. Various Thermo Scientific rotors are available to choose from. TX-400 75003181 with round buckets 75003655 TX-200 75003658 with round buckets 75003659 BIOShield 75003183 M-20 75003624 Microliter 30 x 2... -
Page 14: Before Use
Before use Contents “Before setting up” page 2-2 • • “Transporting the centrifuge” page 2-2 “Location” page 2-2 • • “Aligning the centrifuge” page 2-3 “Mains Connection” page 2-3 • • “Storage” page 2-4 Heraeus Multifuge X1R Thermo Scientific... -
Page 15: Before Setting Up
Before use Before setting up Before setting up 1. Check the centrifuge and the packaging for any shipping damage. Inform the shipping company and Thermo Fisher Scientific immediately if any damage is discovered. 2. Remove the packaging. 3. Check the order for completeness (see “Scope of supply”... -
Page 16: Aligning The Centrifuge
Before use Aligning the centrifuge • The centrifuge should not be exposed to heat and strong sunlight. WARNING UV rays reduce the stability of plastics. Do not subject the centrifuge, rotors and plastic accessories to direct sunlight. • The set-up location must be well-ventilated at all times. Aligning the centrifuge The horizontal alignment of the centrifuge must be checked every time after moving it to a different location. -
Page 17: Storage
Before use Storage Storage • Before storing the centrifuge and the accessories it must be cleaned and if necessary disinfected and decontaminated. • Store the centrifuge in a clean, dust-free location. • Be sure to place the centrifuge on its feet. •... -
Page 18: Control Panel
Control panel Contents “Control panel” page 3-2 • • “Keys” page 3-2 Heraeus Multifuge X1R Thermo Scientific... -
Page 19: Keys
Control panel Control panel Control panel The control panel contains the keys and displays of the centrifuge (only the power switch is located on the back of the device). All parameters can be selected and changed during operation. Program selection keys Display PULSE OPEN... -
Page 20: Operation
Operation Contents “Switch on centrifuge” page 4-2 • • “Door opening” page 4-2 “Rotor installation” page 4-2 • • “Entering parameters” page 4-4 “Centrifugation” page 4-10 • • “Temperature adaptation during standstill” page 4-11 “Short-term centrifugation” page 4-11 • • “Removing the rotor”... -
Page 21: Switch On Centrifuge
Operation Switch on centrifuge Switch on centrifuge 1. Turn on the power switch on the back of the device. The device performs a self-check of its software. a. When the centrifuge lid is closed the following display shows: The top line shows the speed and the time. Both lines display 0. The temperature indicator displays the current temperature inside the rotor chamber. - Page 22 Operation Rotor installation CAUTION Unapproved or incorrectly combined accessories can cause serious damage to the centrifuge. The centrifuge is equipped with a Thermo Scientific Auto-Lock locking system. This system is used to automatically lock the rotor to the centrifuge spindle. The rotor does not have to be bolted on to the centrifuge spindle.
-
Page 23: Entering Parameters
Operation Entering parameters 4. If available close the rotor with the rotor lid. Be sure to check all sealings before starting any aeorsol-tight applications. See the information in the rotor instruction manual. 5. The display shows: Entering parameters Acceleration curve The Heraeus Multifuge X1R offers you a total of 9 acceleration and 10 braking curves with which samples and gradients can be centrifuged. - Page 24 Operation Entering parameters 2. Enter the desired value using the numeric pad. The digits show in sequential order. 3. Confirm your entry by pressing Your entry will be automatically confirmed if you do not press any key for 5 seconds. Note If an extremely low RCF value has been selected, it will be corrected automatically if the resulting speed is less than 300 rpm.
- Page 25 Operation Entering parameters 3. Enter the desired runtime using the numeric pad. The digits show in sequential order. 4. Confirm your entry by pressing Your entry will be automatically confirmed if you do not press any key for 5 seconds. While the centrifuge is in operation, two different values can be displayed.
- Page 26 Operation Entering parameters SAMPLE When SAMPLE is lit, the temperature of the sample will be controlled. To set the temperature, proceed as follows: 1. Press the key in order to open the temperature selection menu. The display shows the messages Temperature. Depending on the display mode setting, the value shown corresponds either to the sample temperature or to the inside chamber temperature.
- Page 27 Operation Entering parameters 5. Press the key. The rotor chamber is cooled down or heated up to the preset temperature. 6. Press the key. The display shows the current temperature. Bucket selection Bucket selection is only possible for swing-out rotors. The bucket code corresponds to the last four digits of the bucket catalog number.
- Page 28 Operation Entering parameters 3. Press to confirm the new radius Setting up a program 1. Enter the program parameters. 2. As described above, please enter braking and acceleration profile, speed/ RCF value, run time, temperatures, bucket code and bucket radius. 3.
-
Page 29: Centrifugation
Operation Centrifugation The display restores the current values. Return to step 1. Centrifugation Once the rotor has been properly installed, the main switch has been turned on and the lid has been closed, you can start centrifuging. Starting centrifuge program Press the key on the control panel. -
Page 30: Temperature Adaptation During Standstill
Operation Temperature adaptation during standstill Continuous operation If you selected continuous operation (see “Continuous operation” on page 4-6), you will have to stop the centrifuge manually. Press the key on the cont rol panel. The centrifuge will be decelerated at the designated rate. -
Page 31: Aerosol-Tight Rotors
Operation Aerosol-tight rotors Figure 4-2. Press Auto-Lock key Aerosol-tight rotors When using an aerosol tight lid the rotor can only be removed with the lid closed. This is to protect you and the samples. CAUTION Rotors supplied with a lid for aerosol-tight applications come with a mandrel, which belongs to the Auto-Lock. -
Page 32: Chapter 5 System Menu
System menu Enter system menu? STOP START English Language 1.. 7: 7 Deutsch Deutsch ENTER Française Español End of run beep? Italiano Nederlands ENTER к Росс ий Keypad beep? ENTER LCD powersave? ENTER STOP ____ Lid passcode? Set lid passcode ENTER Program passcodes? ENTER... -
Page 33: Description
System menu Description Description Enter system menu To enter the system menu hold down any of the keys when switching the centrifuge on. Press the key in order to navigate through the system menu. Press the key to quit the system menu. Language In order to change the language in the display, press the number next to the desired language in the diagram on the numeric pad. - Page 34 System menu Description Auto lid open Press 1 (yes) on the numeric pad if the centrifuge should open after the run. Otherwise press 0 (no). Press key to confirm. Software ID Here you fine the current software version. Press key to confirm. Cycle counter Here you fine the current numbers of cycles.
-
Page 35: Maintenance And Care
Maintenance and care Contents “Cleaning intervals” page 6-2 • • “Cleaning” page 6-2 “Disinfection” page 6-4 • • “Decontamination” page 6-5 “Autoclaving” page 6-5 • • “Service of Thermo Fisher Scientific” page 6-6 Heraeus Multifuge X1R Thermo Scientific... -
Page 36: Cleaning Intervals
Maintenance and care CAUTION During maintenance operations, always disconnect the centrifuge from the power. Cleaning intervals For the sake of personal, environmental, and material protection, it is your duty to clean and if necessary disinfect the centrifuge on a regular basis. Maintenance Recommended interval Cabinet / Housing... - Page 37 Maintenance and care Cleaning • After cleaning, treat the entire surface of aluminum parts with corrosion protection oil (70009824). Also treat the cavities with oil. • Store the aluminum parts at room temperature or in a cold-storage room with the cavities pointing down.
-
Page 38: Disinfection
Maintenance and care Disinfection Disinfection Disinfect the centrifuge immediately whenever infectious material has spilled during centrifugation. WARNING Infectious material can get into the centrifuge when a tube breaks or as a result of spills. Keep in mind the risk of infection when touching the rotor and take all necessary precautions. -
Page 39: Decontamination
Maintenance and care Decontamination Decontamination Decantaminate the centrifuge immediately whenever radioactive material has spilled during centrifugation. WARNING Radioactive material can get into the centrifuge when a tube breaks or as a result of spills. Keep in mind the risk of infection when touching the rotor and take all necessary precautions. -
Page 40: Service Of Thermo Fisher Scientific
Maintenance and care Service of Thermo Fisher Scientific • The maximum permissible autoclave cycle is 20 minutes at 121 °C. Note No chemical additives are permitted in the steam. CAUTION Never exceed the permitted temperature and duration when autoclaving. If the rotor shows signs of corrosion or wear, it must be replaced. Service of Thermo Fisher Scientific Thermo Fisher Scientific recommends having the centrifuge and accessories serviced once a year by an authorized service technician. -
Page 41: Troubleshooting
Troubleshooting Contents “Mechanical emergency lid release” page 7-2 • • “Troubleshooting by user” page 7-3 “When to contact customer service” page 7-6 • Heraeus Multifuge X1R Thermo Scientific... -
Page 42: Mechanical Emergency Lid Release
Troubleshooting Mechanical emergency lid release Mechanical emergency lid release During a power failure, you will not be able to open the centrifuge lid with the regular electric lid release. A mechanical override is provided to allow sample recovery in the case of an emergency. However, this should be used only in emergencies and after the rotor has come to a complete stop. -
Page 43: Troubleshooting By User
Troubleshooting Troubleshooting by user Troubleshooting by user If problems occur other than those listed in this table, the authorized customer service representative must be contacted. Failure message Problem with centrifuge Possible causes and cures Chamber overtemp The centrifuge cannot be operated. Overheating in chamber. - Page 44 Troubleshooting Troubleshooting by user Failure message Problem with centrifuge Possible causes and cures Error lid lock The centrifuge cannot be operated. The lid opens while the device is running. The run does not start or the centrifuge runs Close the lid and restart the centrifuge. down without being braked.
- Page 45 Troubleshooting Troubleshooting by user Failure message Problem with centrifuge Possible causes and cures E-25-E-27 The centrifuge cannot be operated. Time has expired for the lid lock drive while opening the lid. The run does not start or the centrifuge runs Restart the centrifuge.
-
Page 46: When To Contact Customer Service
Troubleshooting When to contact customer service When to contact customer service If you need to contact customer service, please provide the order no. and the serial no. of your device. This information can be found on the back near the inlet for the power supply cable. To identify the software version, proceed as follows: 1. -
Page 47: Chemical Compatibility Chart
Chemical compatibility chart CHEMICAL 2-mercaptoethanol S S U - S M S - S U S S U S S - S S S S U S S S S S S U U - M U U U M M - M S U - Acetaldehyde Acetone... - Page 48 Chemical compatibility chart CHEMICAL Cesium Bromide M S S - S S S - S S S S S S S - S S S S S S M S S S Cesium Chloride M S S U S S S - S S S S S S S - S S S S S S M S S S M S S -...
- Page 49 Chemical compatibility chart CHEMICAL Formaldehyde (40%) M M M S S S S M S S S S M S S S U S S M S S S M S M U Glutaraldehyde S S S S - S S S S S S S - S S S - S S S - M S S -...
- Page 50 Chemical compatibility chart CHEMICAL N-Butyl Phthalate S S U - S S S - S U U S U U U M - U U S U S M M S U S N, N-Dimethylformamide S S S U S M S - S S U S U S U U - S S U U S M S S S U M S S S S S S S S S S U S S S S -...
- Page 51 Chemical compatibility chart CHEMICAL Nitric Acid (50%) U S U M S U U - S U S U U M M U M M M S S S U S S M S Nitric Acid (95%) U U - U U - U U U U M U U U U M U U S U S S - U U M S S S U -...
- Page 52 Chemical compatibility chart Chemical resistance data is included only as a guide to product use. No organized chemical resistance data exists for materials under the stress of centrifugation. When in doubt we recommend pretesting sample lots. Heraeus Multifuge X1R Thermo Scientific...
- Page 53 Index Acceleration curve ........... 4-4 Imbalance indicator ........4-10 Accident prevention .......... iv Aerosol-tight rotors ........4-12 Aligning the centrifuge ........2-3 Keys ..............3-2 Autoclaving ............. 6-5 Location ............2-2 Braking curve ..........4-4 Bucket radius ..........4-8 Bucket selection ..........4-8 Mains Connection ...........2-3 Mains supply ..........1-5, 2-4 Maintenance ...........6-1 Care ..............6-1...
- Page 54 Index: Safety features ..........1-2 Safety zone ............2-2 Select program ..........4-9 Short-term centrifugation ......4-11 Starting centrifuge program ......4-10 Stopping the centrifugation program ..... 4-10 Storage ............2-4 Switch on centrifuge ........4-2 Technical Data ..........1-3 Temperature adaptation ........4-11 Transporting the centrifuge ......2-2 Troubleshooting ..........
- Page 55 Thermo Electron LED GmbH Zweigniederlassung Osterode Am Kalkberg, 37520 Osterode am Harz Germany thermofisher.com/centrifuge © 2020 Thermo Fisher Scientific Inc. All rights reserved. All trademarks are the property of Thermo Fisher Scientific Inc. and its subsidiaries unless otherwise indicated. Heraeus is a registered trademark of Heraeus Holding GmbH licensed to Thermo Fisher Scientific. Delrin, TEFLON, and Viton are registered trademarks of DuPont.
Need help?
Do you have a question about the thermo scientific Heraeus Multifuge X1R and is the answer not in the manual?
Questions and answers