Table of Contents
Advertisement
Quick Links
Advertisement
Table of Contents
Troubleshooting

Related Manuals for ThermoFisher Scientific Megafuge 8 Series


Summary of Contents for ThermoFisher Scientific Megafuge 8 Series
- Page 1 Thermo Scientific Megafuge 8 Series Instruction Manual 50143328-i • 2022-11...
-
Page 2: Table Of Contents
Contents Preface � � � � � � � � � � � � � � � � � � � � � � � � � � � � � � � � � � � � � � � � � � � � � � � � � � � � � � � � � � � � � � � � � 6 Intended Use �... - Page 3 2� 10� 2� Fill Level � � � � � � � � � � � � � � � � � � � � � � � � � � � � � � � � � � � � � � � � � � � � � � � � � � � � � � � � � � � � � � � � � 23 2�...
- Page 4 7� 2� 1� Items Supplied � � � � � � � � � � � � � � � � � � � � � � � � � � � � � � � � � � � � � � � � � � � � � � � � � � � � � � � � � � � � � 44 7�...
- Page 5 7� 11� Microliter 48 x 2 � � � � � � � � � � � � � � � � � � � � � � � � � � � � � � � � � � � � � � � � � � � � � � � � � � � � � � � 64 7�...
-
Page 6: Preface
Preface Before starting to use the centrifuge, read through these instructions for use carefully and follow the instructions. The information contained in these instructions for use is the property of Thermo Fisher Scientific; it is prohibited to copy or pass on this information without explicit approval in writing by its owner. Failure to follow the instructions and safety information in these instructions for use will result in the expiration of the seller’s warranty. -
Page 7: Symbols Used In The Instruction Manual
Symbols used in the Instruction Manual Observe the information contained in the instruction manual to keep yourself and your environment safe. General hazard Electrical hazard Biological hazard Danger of cuts Hazard caused by flammable materials Risk of crushing Indicates information considered Hazard caused by hot surface. - Page 8 Risk from handling hazardous substances� Especially when working with corrosive samples (salt solutions, acids, bases), the accessories and the centrifuge have to be cleaned thoroughly. WA R N I NG Do not centrifuge explosive or flammable materials or substances. Extreme care should be taken with highly corrosive substances that can cause damage and impair the mechanical stability of the rotor.
- Page 9 The magnets built into the rotors can have a negative effect on active implants, such as cardiac pacemakers. The magnets are mounted on the bottom of the rotor. WA R N I NG Always keep a distance of 20 cm between the rotor and the active implant, as the product generates permanent magnetic fields.
-
Page 10: 1� Transport And Set Up
Transport and Set Up 1. Transport and Set Up The shipping box should be inspected upon delivery. When received, carefully examine for any shipping damage before unpacking. If damage is discovered, the delivering carrier should specify and sign for the damage on your copy of the delivery receipt. -
Page 11: 1� 3� Transporting
Transport and Set Up The set up location must be well ventilated at all times. ƒ The main switch and power supply plug must be easily accessible at all times. The grounded electrical socket should ƒ be well accessible and located outside of the safety zone. Do not use this device in close proximity to sources of strong electromagnetic radiation (e.g. -
Page 12: 1� 4� Mains Connection
Transport and Set Up WARNING Always lift the centrifuge on both sides. Never lift the centrifuge by its front or back. The centrifuge is heavy. [à 2 Assign a minimum of 4 persons to lift and carry a refrigerated centrifuge. Assign a minimum of 2 persons to lift and carry a ventilated centrifuge. -
Page 13: 2� Operation
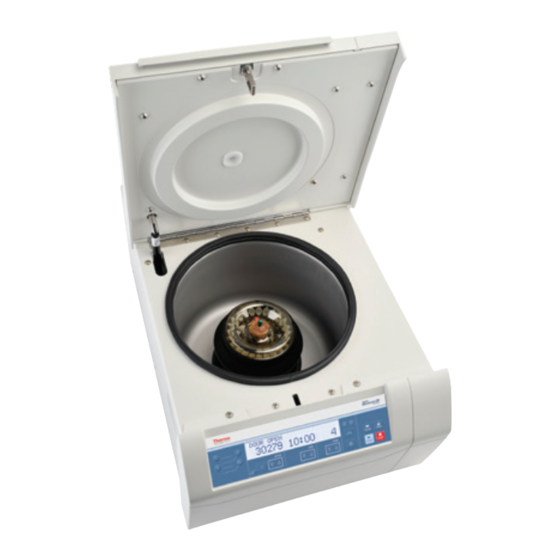
Operation 2. Operation 2. 1. Control Panel The control panel contains the keys and displays of the centrifuge (only the power switch is located on the right side (refrigerated model) or on the backside (ventilated model) of the device). Item Description Status The status of the centrifuge is displayed here. -
Page 14: 2� 2� Power On / Off The Centrifuge
Operation 2. 2. Power on / off the Centrifuge NOTICE Only display pictures of a refrigerated centrifuge are shown. The display of a ventilated centrifuge only misses the details for temperature. 2. 2. 1. To power on the centrifuge Push on the mains switch of the centrifuge to “1” to power it on. The device performs a self-check of its software. -
Page 15: 2� 4� How To Operate A Rotor
Operation NOTICE The centrifuge door should audibly click into place. Centrifuge door gas spring The functionality of a centrifuge door gas spring declines with the time and frequency of use. Pay attention on the functionality of the centrifuge door gas spring. How to check the functionality of the centrifuge door gas spring: Open the centrifuge door and check if the centrifuge door stays open. -
Page 16: 2� 5� Load The Rotor
Operation Supplementary Information WARNING If the rotor cannot be properly locked in place after several attempts, then the Auto-Lock is defective and you are not permitted to operate the rotor. Check for any damage to the rotor: Damaged rotors must not be used. Keep the drive shaft area of the rotor clear of objects. - Page 17 Operation Figure 7: Correct loading examples for swinging bucket rotors Incorrect Loading ✕ Figure 8: Incorrect loading examples for fixed angle rotors Figure 9: Incorrect loading examples for swinging bucket rotors Before Loading a Rotor Before loading a Rotor Inspect the rotor and all accessory parts for damage, such as cracks, scratches, or traces of corrosion. Inspect the centrifugation chamber, drive shaft and Auto-Lock device for damage, such as cracks, scratches, or traces of corrosion.
-
Page 18: Rcf Value Explained
Operation Always use identical bucket types in opposite positions. Make sure that opposite buckets CAUTIO N are of the same weight class, if a weight class is labeled on the buckets. Tubes may open and break during centrifugation because they do not fit properly to the CAUTIO N cavities. -
Page 19: 2� 6� Entering Centrifugation Parameters
Operation 2. 6. Entering Centrifugation Parameters 2. 6. 1. Acceleration / Decelaration Profiles The centrifuge offers you 2 profiles: standard and soft. The setting is displayed above the Acceleration / Deceleration Profiles key. Press the Acceleration / Deceleration Profiles key to cycle through and set the available profiles. The LEDs show the chosen settings. -
Page 20: 2� 6� 4� Continuous Operation
Operation 2. 6. 4. Continuous Operation Press either ARROW keys until HOLD is displayed. Press the START key to accept or wait 4 seconds until the centrifuge automatically saves the chosen values. During continuous operation, the centrifuge will continue running until you stop it manually. 2. -
Page 21: 2� 7� Programs
Operation 2. 7. Programs The centrifuge is able to save up to 99 programs. It is only possible to save a program if the centrifuge is in standstill. Loading or saving of programs is not possible if a rotor is spinning. 2. -
Page 22: Starting Centrifugation
Operation Starting Centrifugation Press START on the control panel. The centrifuge accelerates to the preset speed with the time display active. If no action is taken, the centrifuge will decelerate until stop, then the centrifuge door should be opened and the rotor checked. If the speed setting is higher than the maximum permissible speed or RCF-value for the particular rotor, then after starting the display will show the message “Limit”... -
Page 23: 2� 10� Aerosol-Tight Applications
Operation 2. 10. Aerosol-tight Applications 2. 10. 1. Basic Principles Make sure that the sample containers are well suited for the desired centrifugation process. ƒ The temperature in ventilated centrifuges can reach 15 °C above room temperature. ƒ Aerosol-tight rotors and tubes may only be opened in an approved safety workbench when CAUTIO N centrifuging dangerous samples. -
Page 24: 2� 10� 4� Aerosol-Tight Rotor Buckets
Operation 2. 10. 4. Aerosol-Tight Rotor Buckets Aerosol-tight Closure with ClickSeal If necessary, grease the lid joint before closing the lid. Use rubber seal grease (76003500) for this. Raise the latch. The cap can now be easily placed on the bucket. Lower the latch to close the bucket aerosol-tight;... - Page 25 Operation Leaks can be detected by escaping water or the sound of escaping gas. Replace the seals if you detect any leaks. Then repeat the test. Dry the rotor, rotor lid and the cover seal. CAUTION Prior to each use, the seals in the rotor are to be inspected in order to assure that they are correctly seated and are not worn or damaged.
-
Page 26: 3� System Menu
System Menu 3. System Menu To get into the system menu, press and hold any key on the front panel turning on the centrifuge. Keep this key pressed until “ENTER USER MENU?” appears in the display. Navigate through the system menu using the TIME arrow keys. Flowchart System Menu The system menu can be navigated using the SPEED arrow keys. -
Page 27: 4� Maintenance And Care
Maintenance and Care 4. Maintenance and Care 4. 1. Cleaning Intervals For the sake of personal, environmental, and material protection, you must clean and if necessary disinfect the centrifuge and its accessories on a regular basis. 4. 2. Basics Use warm water with a neutral detergent that is suitable for use with the materials. If in doubt contact the manufacturer ƒ... -
Page 28: 4� 2� 2� Cycles Of Rotors And Buckets
Maintenance and Care Slide Coated Rotors Rotor crosses are provided with an anti-friction and corrosion resistant finish. The following procedure is for rotor crosses and rotor trunnion bolts: Regular cleaning of contact area between the rotor and buckets (rotor cross trunnions and bucket grooves) is ƒ... -
Page 29: Cleaning The Filter Mat
Maintenance and Care Cleaning the Filter Mat It is recommended that you clean the filter mat (50141352) regularly every six weeks. Depending on the environmental conditions it may be necessary to clean it more often. How to clean the filter mat: Benchtop Centrifuge Unscrew the ventilation grid placed on the right side of the centrifuge. -
Page 30: 4� 6� Autoclaving
Maintenance and Care 4. 6. Autoclaving As preparation always separate rotor, buckets, lids, tubes and sealing rings to allow thorough cleaning. If installed, remove lids from rotors, buckets and tubes. If not stated otherwise on the parts themselves, all parts can be autoclaved at 121 °C for 20 min. Only exceptions are the hematocrit rotor at 134 °C and the Microliter 48 x 2 rotor at 138 °C for 20 min. -
Page 31: 4� 10� Storage
Maintenance and Care 4. 10. Storage Before storing the centrifuge and the accessories it must be clean and if necessary disinfected and decontaminated. ƒ Centrifuge, rotors, buckets and accessories have to be fully dry before storage. Keep the centrifuge in a clean, dry and dust-free location. ƒ... -
Page 32: 5� Troubleshooting
Troubleshooting 5. Troubleshooting 5. 1. Mechanical Emergency Lid Release During a power failure, you will not be able to open the centrifuge lid with the regular electric lid release. A mechanical override is provided to allow sample recovery in the case of an emergency. However, this should be used only in emergencies and after the rotor has come to a complete stop. -
Page 33: 5� 2� Ice Formation
Troubleshooting Push the release cord back into the centrifuge and mount the plug. Reconnect the centrifuge once the power has been restored. Switch on the centrifuge. Press the OPEN key to have the centrifuge door locks operative again. Serious injuries can occur if you touch a spinning rotor with your hands or tools. A rotor can still be spinning after a power failure occurs. -
Page 34: 5� 3� 1� Information For The Customer Service
Troubleshooting Error Description Solutions E-025; Read Manual Check, if the centrifuge door is blocked. E-027 Restart the centrifuge. If the error message still shows, contact a service technician. E-029; Read Manual Check, if a rotor is installed. E-045 Check, if the rotor is qualified for the centrifuge. [à 2 Restart the centrifuge. -
Page 35: 6� Technical Specifications
Technical Specifications 6. Technical Specifications 6. 1. List of Centrifuges Article No. Centrifuge 75007210 Megafuge 8, 120 V ±10 %, 60 Hz 75007211 Megafuge 8, 220–230 V ±10 %, 50 / 60 Hz 75007213 Megafuge 8R, 120 V ±10 %, 60 Hz 75007214 Megafuge 8R, 220–230 V ±10 %, 50 / 60 Hz Table 2: List of Centrifuges... -
Page 36: 6� 3� Technical Data
Technical Specifications 6. 3. Technical Data Thermo Scientific Megafuge 8 Speed Range (depending on the rotor) 300–16 000 rpm RCF Value at max. Speed 24 328 x g Running Time 99 h 59 min 50 sec, hold Noise Level at max. Speed <... -
Page 37: Thermo Scientific Megafuge 8R
Technical Specifications Thermo Scientific Megafuge 8R Speed Range (depending on the rotor) 300–17 850 rpm RCF Value at max. Speed 30 279 x g Running Time 99 h 59 min 50 sec, hold Noise Level at max. Speed < 56 dB (A) with a TX-150 rotor 1 m in front of the unit at 1.6 m height Maximum Kinetic Energy 10.1 kNm... -
Page 38: 6� 3� 1� Directives And Standards
Technical Specifications 6. 3. 1. Directives and Standards Region Directive Standards Europe (EU) 2017/746 EN 61010-1 In Vitro Diagnostics Medical Devices 220-230 V, 50 / 60 Hz EN 61010-2-020 2006/42/EC 230 V, 50 / 60 Hz EN 61010-2-011 Machinery Directive EN 61010-2-101 2014/35/EU EN 61326-2-6... -
Page 39: 6� 3� 2� Mains Supply
Technical Specifications 6. 3. 2. Mains Supply Article No. Centrifuge Voltage Frequency Rated Current Power Equipment Building Consumption Fuse Fuse 75007210 Megafuge 8 120 V ±10 % 60 Hz 310 W 10 AT 15 AT 75007211 Megafuge 8 220–230 V ±10 % 50 / 60 Hz 310 W 5 AT... -
Page 40: 7� Rotor Specifications
Rotor Specifications 7. Rotor Specifications 7. 1. TX-150 7. 1. 1. Items Supplied Item Article No. Quantity TX-150 Rotor 75005701 Bolt Grease 75003786 Table 9: Items Supplied TX-150 Rotor 7. 1. 2. Technical Data With Round Buckets Weight (empty) 2.9 kg Maximum Permissible Load 4 x 190 g Maximum Number of Cycles... - Page 41 Rotor Specifications Ventilated Centrifuges – TX-150 Rotor with round buckets Voltage 230 V 120 V 100 V Sample Heating at max speed, 23 °C ambient temperature, 5 °C 5 °C 5 °C 60 min running time Refrigerated Centrifuges – TX-150 Rotor with round buckets Voltage 230 V 120 V...
-
Page 42: 7� 1� 4� Accessories
Rotor Specifications 7. 1. 4. Accessories Article No� Description Rotor Capacity Max Tube Dimensions (places x volume, mL) (Ø x L, mm) 75005703 50 mL Conical Buckets (unsealed, no adapter needed) (set 8 x 50 29.5 x 120 of 4) 75005702 Round Buckets (set of 4) 4 x 145... -
Page 43: 7� 1� 5� Biocontainment Certificate
Rotor Specifications 7. 1. 5. Biocontainment Certificate 43 / 78... -
Page 44: 7� 2� Tx-100S
Rotor Specifications 7. 2. TX-100S 7. 2. 1. Items Supplied Item Article No. Quantity TX-100S Rotor 75005704 Bolt Grease 75003786 Table 14: Items Supplied TX-100S Rotor 7. 2. 2. Technical Data Weight (empty) 3.1 kg Maximum Permissible Load 8 x 25 g Maximum Number of Cycles 50 000 Radius (max. - Page 45 Rotor Specifications 7. 2. 4. Accessories Article No� Description Rotor Capacity Max Tube Dimensions (places x volume, mL) (Ø x L, mm) Adapters for TX-100S Clinical Rotor (each) Direct fit 10 mL Blood Collection Tube 16/8 x 10 16 x 100 11172596 5/7 mL BD Hemogard™/BD Vacutainer™...
- Page 46 Rotor Specifications 7. 3. TX-100 7. 3. 1. Items Supplied Item Article No. Quantity TX-100 Rotor 75005705 Bolt Grease 75003786 Table 18: Items Supplied TX-100 Rotor 7. 3. 2. Technical Data Weight (empty) 3.3 kg Maximum Permissible Load 16 x 25 g Maximum Number of Cycles 50 000 Radius (max.
- Page 47 Rotor Specifications 7. 3. 4. Accessories Article No� Description Rotor Capacity Max Tube Dimensions (places x volume, mL) (Ø x L, mm) Adapters for TX-100 Rotor (each) Direct fit 13 mL Urine Tube 16/8 x 13 17 x 110 Direct fit 10 mL Blood Collection Tube 16/8 x 10 16 x 100...
- Page 48 Rotor Specifications 7. 4. M10 7. 4. 1. Items Supplied Item Article No. Quantity M10 Rotor 75005706 Bolt Grease 75003786 Rubber Seal Grease 76003500 Table 22: Items Supplied M10 Rotor 7. 4. 2. Technical Data With Standard Carriers Weight (empty) 2.9 kg Maximum Permissible Load 2 x 125 g...
- Page 49 Rotor Specifications Refrigerated Centrifuges – M10 Rotor with Standard Carriers Voltage 230 V 120 V 100 V Maximum Speed 4400 rpm 4400 rpm 4400 rpm Maximum RCF-Value 2 576 x g 2 576 x g 2 576 x g K-Factor at n 5 189 5 189 5 189...
- Page 50 Rotor Specifications 7. 4. 5. Biocontainment Certificate 50 / 78...
- Page 51 Rotor Specifications 7. 5. MT-12 7. 5. 1. Items Supplied Item Article No. Quantity MT-12 Rotor 75005600 Table 27: Items Supplied MT-12 Rotor 7. 5. 2. Technical Data Weight (empty) 1.8 kg Maximum Permissible Load 12 x 4 g Maximum Number of Cycles 50 000 Radius (max.
- Page 52 Rotor Specifications 7. 5. 4. Accessories Article No� Description Rotor Capacity Max Tube Dimensions (places x volume, mL) (Ø x L, mm) 75005730 Replacement ClickSeal Biocontainment Lid (each) 75005726 Replacement Sealings (set of 2 with grease) Table 30: Accessories MT-12 Rotor 52 / 78...
- Page 53 Rotor Specifications 7. 6. HIGHConic III 7. 6. 1. Items Supplied Item Article No. Quantity HIGHConic II Rotor 75005709 Sealing Set 75005726 Rubber Seal Grease 76003500 Table 31: Items Supplied HIGHConic III Rotor 7. 6. 2. Technical Data Weight (empty) 2.7 kg Maximum Permissible Load 6 x 75 g...
- Page 54 Rotor Specifications Refrigerated Centrifuges – HIGHConic III Rotor Voltage 230 V 120 V 100 V Sample Temperature at max. Speed, Ambient Temperature 50 Hz: < 4 °C 50 Hz: < 4 °C 60 Hz: < 4 °C of 23 °C, Run Time 90 min 60 Hz: <...
- Page 55 Rotor Specifications 7. 6. 5. Biocontainment Certificate 55 / 78...
- Page 56 Rotor Specifications 7. 7. CLINIConic 7. 7. 1. Items Supplied Item Article No. Quantity CLINIConic Rotor 75003623 Table 35: Items Supplied CLINIConic Rotor 7. 7. 2. Technical Data Weight (empty) 4.7 kg Maximum Permissible Load 30 x 30 g Maximum Number of Cycles 50 000 Radius (max.
- Page 57 Rotor Specifications 7. 7. 4. Accessories Article No� Description Rotor Capacity Max Tube Dimensions (places x volume, mL) (Ø x L, mm) Adapters for CLINIConic Rotor (each) Direct fit 15 mL Round/Conical Bottom Tube 30 x 15 16.5 x 131 75008817 10 mL Round Bottom Tube 30 x 10...
- Page 58 Rotor Specifications 7. 8. MicroClick 18 x 5 7. 8. 1. Items Supplied Item Article No. Quantity MicroClick 18 x 5 Rotor 75005765 Sealing Set 75005726 Rubber Seal Grease 76003500 Table 39: Items Supplied MicroClick 18 x 5 Rotor 7. 8. 2. Technical Data Weight (empty) 1.7 kg Maximum Permissible Load...
- Page 59 Rotor Specifications 7. 8. 5. Biocontainment Certificate 59 / 78...
- Page 60 Rotor Specifications 7. 9. MicroClick 24 x 2 7. 9. 1. Items Supplied Item Article No. Quantity MicroClick 24 x 2 Rotor 75005715 Sealing Set 75003405 Rubber Seal Grease 76003500 Table 43: Items Supplied MicroClick 24 x 2 Rotor 7. 9. 2. Technical Data Weight (empty) 1.2 kg Maximum Permissible Load...
- Page 61 Rotor Specifications 7. 9. 4. Accessories Article No� Description Rotor Capacity Max Tube Dimensions (places x volume, mL) (Ø x L, mm) 75005725 Replacement ClickSeal Biocontainment Lid (each) 75003405 Replacement Sealing for Lid (each) Adapters for MicroClick 24 x 2 Rotor (sets of 30) 75005752 0.2 mL PCR Tube 24 x 0.2...
- Page 62 Rotor Specifications 7. 10. MicroClick 30 x 2 7. 10. 1. Items Supplied Item Article No. Quantity MicroClick 30 x 2 Rotor 75005719 Sealing Set 75005726 Rubber Seal Grease 76003500 Table 47: Items Supplied MicroClick 30 x 2 Rotor 7. 10. 2. Technical Data Weight (empty) 1.5 kg Maximum Permissible Load...
- Page 63 Rotor Specifications 7. 10. 4. Accessories Article No� Description Rotor Capacity Max Tube Dimensions (places x volume, mL) (Ø x L, mm) 75005730 Replacement ClickSeal Biocontainment Lid (each) 75005726 Replacement Sealing for Lid (each) Adapters for MicroClick 30 x 2 Rotor (sets of 30) 75005752 0.2 mL PCR Tube 30 x 0.2...
- Page 64 Rotor Specifications 7. 11. Microliter 48 x 2 7. 11. 1. Items Supplied Item Article No. Quantity Microliter 48 x 2 Rotor incl. Rotor Lid 75003602 Rubber Seal Grease 76003500 Table 51: Items Supplied Microliter 48x 2 Rotor 7. 11. 2. Technical Data Weight (empty) 2.4 kg Maximum Permissible Load...
- Page 65 Rotor Specifications 7. 11. 4. Accessories Article No� Description Rotor Capacity Max Tube Dimensions (places x volume, mL) (Ø x L, mm) 70904727 Replacement Biocontainment Lid (each) 75003349 O-Ring Set Adapters for Microliter 48 x 2 Rotor (each) 76003758 0.5 mL Microtube 48 x 0.5 8 x 44 76003759...
- Page 66 Rotor Specifications 7. 12. 8 x 8 PCR Strip 7. 12. 1. Items Supplied Item Article No. Quantity 8 x 8 PCR Strip Rotor 75005720 Sealing Set 75005726 Rubber Seal Grease 76003500 Table 55: Items Supplied TX-100S Rotor 7. 12. 2. Technical Data Weight (empty) 1.4 kg Maximum Permissible Load...
- Page 67 Rotor Specifications Refrigerated Centrifuges – 8 x 8 PCR Strip Rotor Voltage 230 V 120 V 100 V Sample Temperature at max. Speed, Ambient Temperature 50 Hz: < 4 °C 50 Hz: < 4 °C 60 Hz: < 4 °C of 23 °C, Run Time 90 min 60 Hz: <...
- Page 68 Rotor Specifications 7. 13. 8 x 50 mL Individually Sealed 7. 13. 1. Items Supplied Item Article No. Quantity 8 x 50 mL Individually Sealed Rotor 75003694 Table 59: Items Supplied TX-100S Rotor 7. 13. 2. Technical Data Weight (empty) 3.3 kg Maximum Permissible Load 8 x 189 g...
- Page 69 Rotor Specifications 7. 13. 4. Accessories Article No� Description Rotor Capacity Max Tube Dimensions (places x volume, mL) (Ø x L, mm) 75003011 Replacement Biocontainment Lids (set of 2) 75003789 Replacement O-ring Kit Adapters for 8 x 50 Individually Sealed Rotor (each) Direct fit 50 mL Round Bottom Tube 6 x 50...
- Page 70 Chemical Compatibility Viton™ Tygon™ Titanium Stainless Steel Silicone Rubber Rulon A™, Teflon™ Polyvynil Chloride Polysulfone Polypropylene Polyethylene Polythermide Polyester, Glass Thermoset Polycarbonate Polyallomer PET¹, Polyclear™,Clear Crimp™ Nylon Noryl™ Neoprene Glass EPDM rubber Delrin™ Composite Carbon Fiber/Epoxy Polyurethane Rotor Paint Cellulose Acetate Butyrate Buna N Anodic Coating for Aluminum Aluminium...
- Page 71 Chemical Compatibility Viton™ Tygon™ Titanium Stainless Steel Silicone Rubber Rulon A™, Teflon™ Polyvynil Chloride Polysulfone Polypropylene Polyethylene Polythermide Polyester, Glass Thermoset Polycarbonate Polyallomer PET¹, Polyclear™,Clear Crimp™ Nylon Noryl™ Neoprene Glass EPDM rubber Delrin™ Composite Carbon Fiber/Epoxy Polyurethane Rotor Paint Cellulose Acetate Butyrate Buna N Anodic Coating for Aluminum Aluminium...
- Page 72 Chemical Compatibility Viton™ Tygon™ Titanium Stainless Steel Silicone Rubber Rulon A™, Teflon™ Polyvynil Chloride Polysulfone Polypropylene Polyethylene Polythermide Polyester, Glass Thermoset Polycarbonate Polyallomer PET¹, Polyclear™,Clear Crimp™ Nylon Noryl™ Neoprene Glass EPDM rubber Delrin™ Composite Carbon Fiber/Epoxy Polyurethane Rotor Paint Cellulose Acetate Butyrate Buna N Anodic Coating for Aluminum Aluminium...
- Page 73 Chemical Compatibility Viton™ Tygon™ Titanium Stainless Steel Silicone Rubber Rulon A™, Teflon™ Polyvynil Chloride Polysulfone Polypropylene Polyethylene Polythermide Polyester, Glass Thermoset Polycarbonate Polyallomer PET¹, Polyclear™,Clear Crimp™ Nylon Noryl™ Neoprene Glass EPDM rubber Delrin™ Composite Carbon Fiber/Epoxy Polyurethane Rotor Paint Cellulose Acetate Butyrate Buna N Anodic Coating for Aluminum Aluminium...
- Page 74 Chemical Compatibility Viton™ Tygon™ Titanium Stainless Steel Silicone Rubber Rulon A™, Teflon™ Polyvynil Chloride Polysulfone Polypropylene Polyethylene Polythermide Polyester, Glass Thermoset Polycarbonate Polyallomer PET¹, Polyclear™,Clear Crimp™ Nylon Noryl™ Neoprene Glass EPDM rubber Delrin™ Composite Carbon Fiber/Epoxy Polyurethane Rotor Paint Cellulose Acetate Butyrate Buna N Anodic Coating for Aluminum Aluminium...
- Page 75 Chemical Compatibility Viton™ Tygon™ Titanium Stainless Steel Silicone Rubber Rulon A™, Teflon™ Polyvynil Chloride Polysulfone Polypropylene Polyethylene Polythermide Polyester, Glass Thermoset Polycarbonate Polyallomer PET¹, Polyclear™,Clear Crimp™ Nylon Noryl™ Neoprene Glass EPDM rubber Delrin™ Composite Carbon Fiber/Epoxy Polyurethane Rotor Paint Cellulose Acetate Butyrate Buna N Anodic Coating for Aluminum Aluminium...
- Page 76 Chemical Compatibility Viton™ Tygon™ Titanium Stainless Steel Silicone Rubber Rulon A™, Teflon™ Polyvynil Chloride Polysulfone Polypropylene Polyethylene Polythermide Polyester, Glass Thermoset Polycarbonate Polyallomer PET¹, Polyclear™,Clear Crimp™ Nylon Noryl™ Neoprene Glass EPDM rubber Delrin™ Composite Carbon Fiber/Epoxy Polyurethane Rotor Paint Cellulose Acetate Butyrate Buna N Anodic Coating for Aluminum Aluminium...
- Page 77 Index Microliter 48 x 2 MT-12 Open / Close the Centrifuge Lid Aerosol-tight Applications Operation Autoclaving 8 x 8 PCR Strip Care Power on / off Centrifugation Chemical Compatibility Clamps Cleaning Refrigerants Cleaning Intervals Rotor Specifications CLINIConic Control Panel Safety Instructions Service Directives Shipping...
- Page 78 Thermo Electron LED GmbH Zweigniederlassung Osterode Am Kalkberg, 37520 Osterode am Harz Germany Thermo Scientific Megafuge 8 Thermo Scientific Megafuge 8R 50143328 is the original instruction manual. thermofisher.com © 2014–2022 Thermo Fisher Scientific Inc. All rights reserved. All trademarks are the property of Thermo Fisher Scientific Inc. and its subsidiaries unless otherwise indicated. Not all products are available in all countries.
Need help?
Do you have a question about the Megafuge 8 Series and is the answer not in the manual?
Questions and answers