Table of Contents
Advertisement
Quick Links
Advertisement
Table of Contents

Related Manuals for ThermoFisher Scientific MiniAmp


Summary of Contents for ThermoFisher Scientific MiniAmp
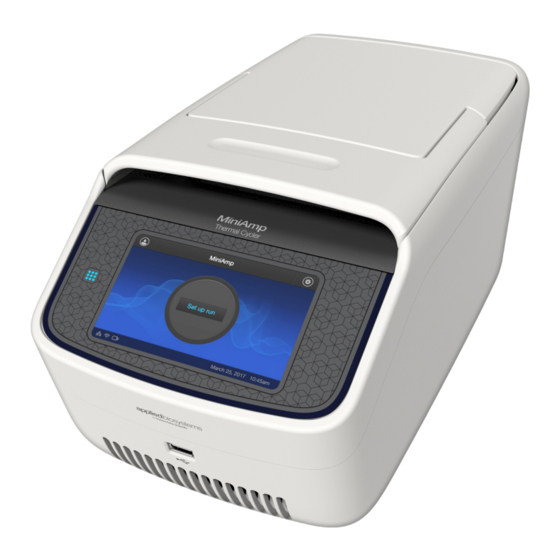
- Page 1 MiniAmp and MiniAmp Plus Thermal Cycler ™ ™ INSTALLATION, USE, AND MAINTENANCE for use with Invitrogen and Applied Biosystems PCR reagents ™ ™ Catalog Numbers A37834, A37835 Publication Number MAN0017492 Revision C.0 For Research Use Only. Not for use in diagnostic procedures.
- Page 2 For descriptions of symbols on product labels or product documents, go to thermofisher.com/symbols-definition. Revision history: MAN0017492 C.0 (English) Revision Date Description 15 December The catalog numbers for the MiniAmp and MiniAmp Plus thermal cyclers were updated. ™ ™ 2022 17 June 2021 The information on Fleet Control with InstrumentConnect was added and the password setup procedure was updated.
-
Page 3: Table Of Contents
Required materials not provided ..........8 Set up the MiniAmp or MiniAmp Plus Thermal Cycler . - Page 4 Manage users (Administrator profile only) ........52 MiniAmp and MiniAmp Plus Thermal Cycler User Guide ™...
- Page 5 Biological hazard safety ............86 MiniAmp and MiniAmp Plus Thermal Cycler User Guide ™...
- Page 6 Limited product warranty ............87 MiniAmp and MiniAmp Plus Thermal Cycler User Guide ™...
-
Page 7: Chapter 1 Product Information
It is also compatible with the Applied Biosystems Thermal Cycler Fleet Control ™ Software. Instrument overview The MiniAmp Thermal Cycler (Cat. No. A37834) and MiniAmp Plus Thermal Cycler (Cat. No. A37835) ™ ™ allows you to: • Optimize your PCR with the help of the Veriflex... -
Page 8: Chapter 2 Start, Sign On, And Configure The Instrument
· Power line regulator (100–240 V) · Surge protector/line conditioner (10-kVA) · Uninterruptible power supply (1.5-kVA) Set up the MiniAmp or MiniAmp Plus Thermal ™ ™ Cycler IMPORTANT! Save the packing materials and box in case you need to ship the instrument in for service. - Page 9 Chapter 2 Start, sign on, and configure the instrument Set up the MiniAmp or MiniAmp Plus Thermal Cycler ™ ™ 5. Connect the instrument to a power outlet. a. Connect the power cord to the instrument. Power cord port b. Install any desired electrical protective devices.
-
Page 10: Touchscreen Controls
Go to Settings screen Indicates whether the Wi-Fi is on or off. Indicates whether a USB device is inserted into the instrument. Indicates whether the instrument is connected to the network. MiniAmp and MiniAmp Plus Thermal Cycler User Guide ™ ™... -
Page 11: Enter Text
When you press a field that requires a numerical input, the numeric editor, as seen in the following figure, opens. Enter a number Delete or enter decimal, colon or infinity Close and save Close without saving MiniAmp and MiniAmp Plus Thermal Cycler User Guide ™ ™... -
Page 12: Chapter 3 Connect The Instrument For Remote Monitoring (Optional)
Connect the instrument for remote monitoring (Optional) Set up the wired connection See “Set up the MiniAmp or MiniAmp Plus Thermal Cycler” page 8. Set up the system for ™ ™ instructions on connecting the instrument to the network. To set up the wired connection: 1. - Page 13 Primary DNS Server, and the Secondary DNS Server using the numeric editor. Addresses are in the form of X.X.X.X, where each X is a 3- digit number, from 001 to 255. MiniAmp and MiniAmp Plus Thermal Cycler User Guide ™ ™...
-
Page 14: Set Up The Wireless Connection
6. Press OK to save the changes and go back to the Network Connection screen or press Cancel to exit the screen without saving the changes. Set up the wireless connection See “Set up the MiniAmp or MiniAmp Plus Thermal Cycler”... -
Page 15: Create A User Profile On The Pcr Instrument
(Sign In) > Sign In, then select the Administrator profile. 2. Log in. (The default password for the Administrator profile is "password<last four digits of instrument serial number>"). You will then be redirected back to the home screen. MiniAmp and MiniAmp Plus Thermal Cycler User Guide ™ ™... -
Page 16: Connect By Pc
3. Select (Add an Instrument) from the top navigation strip. 4. Select MiniAmp from the drop down menu, then click Next. 5. Enter the linking code generated by the instrument in the text box, then click Send. Upon successful authentication, the instrument is linked to Connect. -
Page 17: Chapter 4 Methods
1. In the Home screen, press Set Up Run. 2. In the Setup Run screen, press (Open Template). 3. Select a folder , then select an appropriate template from the Method Name list. MiniAmp and MiniAmp Plus Thermal Cycler User Guide ™ ™... -
Page 18: Create A Custom Method
, then select an appropriate template from the Method Name list. Note: At least one method must have previously been set up in order for the list to be populated. MiniAmp and MiniAmp Plus Thermal Cycler User Guide ™ ™... -
Page 19: Edit A Method
5. (Optional) Press Next4Start Run. Edit a Method 1. Press Edit or anywhere on the graphical temperature profile to start editing the parameters. MiniAmp and MiniAmp Plus Thermal Cycler User Guide ™ ™... - Page 20 % * ? | ; : , ! @ # $ . ( ) < > / \ " ' ` ~ { } [ ] = + & ^ (tab) dashes 3. Press , then select the destination folder where you want to save the run method, then press Save. MiniAmp and MiniAmp Plus Thermal Cycler User Guide ™ ™...
-
Page 21: Manage Protocols And Advanced Options
Rates, and Simulation Mode parameters. VeriFlex block ™ 1. Press VeriFlex to edit the VeriFlex block parameter. ™ ™ 2. Press the icon to choose the steps to apply VeriFlex temperature control. ™ MiniAmp and MiniAmp Plus Thermal Cycler User Guide ™ ™... - Page 22 5. Enter the DELTA temperature and/or time. Press the '-' and '+' toggle button to set the DELTA values to be either negative or positive, respectively. 6. (Optional) Press Remove AutoDelta to remove the AutoDelta setting. MiniAmp and MiniAmp Plus Thermal Cycler User Guide ™ ™...
- Page 23 3. Press Done to save the selection or Cancel to exit the screen. Note: If a simulation mode is set, then the ramp rate will be locked and unavailable for editing. MiniAmp and MiniAmp Plus Thermal Cycler User Guide ™...
- Page 24 Chapter 4 Methods Create/Edit Method Simulation mode 1. Press Simulation Mode to set the simulation mode. Table 3 Simulation modes available on the MiniAmp and MiniAmp Plus Thermal ™ ™ Cycler MiniAmp Thermal Cycler MiniAmp Plus Thermal Cycler ™ ™ • No Simulation (default) •...
-
Page 25: Manage Methods And Folders
Create a New Folder 1. In the instrument Home screen, press Set Up Run. 2. In the Setup Run screen, press (Open Method). 3. In the Open Method screen, press New Folder. MiniAmp and MiniAmp Plus Thermal Cycler User Guide ™ ™... - Page 26 If the instrument has been connected to Connect, it will automatically display Cloud as one of the folder options. 1. In the instrument Home screen, press Set Up Run. 2. In the Setup Run screen, press (Open Method). MiniAmp and MiniAmp Plus Thermal Cycler User Guide ™ ™...
- Page 27 IMPORTANT! Back up your method files to a USB drive frequently, or before sending in your instrument for service. Note: Methods can be copied to an existing folder or a new folder. MiniAmp and MiniAmp Plus Thermal Cycler User Guide ™ ™...
-
Page 28: Open And Run Method
8. Press Done to save the changes and return to the Open Method screen. Open and run Method Load samples into the instrument Note: Refer to PCR Starter Kit For MiniAmp and MiniAmp Plus PCR systems (Pub. No. 100070431) ™... -
Page 29: Perform A Run
(Open Template), see “Create a new Method” on page 17 • (Open Method), see “Create a custom method” on page 18 • (Incubate) 3. Press Next, to display the Run Parameters screen. MiniAmp and MiniAmp Plus Thermal Cycler User Guide ™ ™... - Page 30 Run screen. See “Perform a run” on page 29 5. In the Start Run screen, press Scan. Note: The Scan button appears in the Start Run screen when you enable the multi-instrument run. MiniAmp and MiniAmp Plus Thermal Cycler User Guide ™ ™...
-
Page 31: Monitoring A Run
Chapter 4 Methods Open and run Method Note: The instrument starts scanning for all available MiniAmp and MiniAmp Plus Thermal ™ ™ Cycler instruments on the same network which have the "Make Visible" setting enabled. All available instruments are displayed in a table in the Multi-Instrument Run screen. - Page 32 • Monitor the run progress in the Run Monitoring screen by pressing the Home screen dial. Note: The Run Monitoring screen shows the run method profile and additional information that does not appear in the Dial on the Home screen. MiniAmp and MiniAmp Plus Thermal Cycler User Guide ™ ™...
- Page 33 Stop run to stop the run. Stop a run 1. Press the dial in the center of the screen. 2. Press Stop Run4OK. 3. Remove the samples and press Done after the run has finished. MiniAmp and MiniAmp Plus Thermal Cycler User Guide ™ ™...
-
Page 34: View And Export The Run Report
Grasp the sample tray/retainer assembly or reaction plate firmly with both hands (or by using MicroAmp Multi Removal Tool, Cat. No. 4313950) and gently rock it back and forth until the tubes ™ (or plate) are free. MiniAmp and MiniAmp Plus Thermal Cycler User Guide ™ ™... -
Page 35: Chapter 5 Maintenance
3. Remove the sample tray from the sample block(s) and set it aside. 4. Use a cotton swab soaked in isopropanol to clean the sample wells thoroughly. Make certain that the isopropanol has evaporated completely before reloading a sample tray. MiniAmp and MiniAmp Plus Thermal Cycler User Guide ™ ™... -
Page 36: Decontaminate The Sample Wells
1:10 v/v dilution of 5.25% sodium ® hypochlorite (Clorox bleach), then wipe the cover with a damp cloth. MiniAmp and MiniAmp Plus Thermal Cycler User Guide ™ ™... -
Page 37: Replace The Fuses
You will need a USB memory device and, if your instrument requires login, the login details to upgrade the firmware. 1. Press (Settings) > About Instrument. 2. View current firmware version. MiniAmp and MiniAmp Plus Thermal Cycler User Guide ™ ™... -
Page 38: Download New Firmware
1. Go to thermofisher.com from your web browser. 2. Click Product Support > Technical Resources > Product Support Software, Patches & Updates. 3. Select MiniAmp and MiniAmp Plus Thermal Cycler in the list, then click Updates & Patches. ™ ™... -
Page 39: Self Verification Test
Note: The test takes about 10 minutes. Once the test is completed the test results will be displayed in the form of a report. 3. Press Export to save the test report to a USB drive or Close to exit the screen. MiniAmp and MiniAmp Plus Thermal Cycler User Guide ™ ™... -
Page 40: Appendix A Troubleshooting
In Instrument Name screen, change Allow Instrument Name screen set Remote Runs to Yes. to No. No screen display Blown fuse. Check fuses. Screen display missing LCD screen failure. Request service. characters or is illegible. MiniAmp and MiniAmp Plus Thermal Cycler User Guide ™ ™... -
Page 41: Return An Instrument For Service
3. Complete and sign a copy of the Certificate of Instrument Decontamination. 4. Fax the Certificate of Instrument Decontamination to the customer care center. MiniAmp and MiniAmp Plus Thermal Cycler User Guide ™ ™... - Page 42 Note: Repairs for instruments without the Certificate of Instrument Decontamination are delayed. 6. Affix the provided postage to the box, then ship the instrument to the designated facility. The repair process requires 2 to 3 weeks. MiniAmp and MiniAmp Plus Thermal Cycler User Guide ™ ™...
-
Page 43: Appendix B Set Up Mobile Connectivity On A Mobile Device
Play by searching for Instrument ™ Connect by Thermo Fisher Scientific. 3. Log in to the instrument connect mobile application using your Connect login and password (See page 12 for details). MiniAmp and MiniAmp Plus Thermal Cycler User Guide ™ ™... -
Page 44: Appendix C Recommended Instrument Settings
Recommended instrument settings Recommended instrument settings Press (Settings) and access the Settings screen to configure the instrument. Note: Manage Users is only visible when signed in as an administrator. MiniAmp and MiniAmp Plus Thermal Cycler User Guide ™ ™... -
Page 45: Instrument Settings
– Select the Time Zone field to set the time zone. – Select the Date/Format field to choose the date format and set the date. – Select the Time/Format field to activate the numeric editor to set the time. MiniAmp and MiniAmp Plus Thermal Cycler User Guide ™ ™... - Page 46 • Printer configuration Select the Remote Printer IP Address field to activate the numeric editor, then enter the IP address of the printer to be connected to the instrument. • Network configuration MiniAmp and MiniAmp Plus Thermal Cycler User Guide ™ ™...
- Page 47 Use the toggle to enable/disable automatic sign out of a user when no activity is detected on the instrument for a selected period of time. • Brightness settings Use the slider to adjust screen brightness. MiniAmp and MiniAmp Plus Thermal Cycler User Guide ™ ™...
-
Page 48: Restore Factory Settings (Administrator Profile Only)
• Press About Instrument to find out more about the instrument (e.g., firmware version and instrument statistics). • Press EULA to view the End User License Agreement. You can also save the EULA document to a USB drive. MiniAmp and MiniAmp Plus Thermal Cycler User Guide ™ ™... -
Page 49: Run History
• Press Export to save the run details to a USB memory device, or Print to print the run details. Note: If you are signed in with the Administrator profile, you can use Manage Runs function to perform functions like deleting a run history. MiniAmp and MiniAmp Plus Thermal Cycler User Guide ™ ™... -
Page 50: Maintenance And Services
• Select the shortcuts to be displayed when a USB memory device is inserted. • Select Show Shortcuts to display the selected shortcuts when a USB memory device is inserted. MiniAmp and MiniAmp Plus Thermal Cycler User Guide ™ ™... - Page 51 Note: Backup/Restore is only available when signed in as administrator. When a USB memory device is plugged into the USB port, a pop-up dialog box with the pre-selected options is displayed. MiniAmp and MiniAmp Plus Thermal Cycler User Guide ™ ™...
-
Page 52: Manage Users (Administrator Profile Only)
• Manage Accounts is used to edit the administrator account information. Press a row with the account name to edit the account information. – Press Delete Account to delete an account. – Press Reset Password to reset a password. MiniAmp and MiniAmp Plus Thermal Cycler User Guide ™ ™... -
Page 53: Appendix D Ordering Information
Ordering information Instrument part numbers Contact your regional sales office to order kits, accessories, consumables, and spare parts for the MiniAmp Thermal Cycler (Cat. No. A37834) and the MiniAmp Plus Thermal Cycler (Cat. No. A37835). ™ ™ Consumables Product Cat. No. - Page 54 4333183 ™ MicroAmp Multi Removal Tool 4313950 ™ MicroAmp Cap Installing Tool 4330015 ™ MicroAmp 96-Well Base N8010531 ™ MicroAmp Splash-Free 96-Well Base 4312063 ™ MicroAmp Centrifuge Adapter N8013822 ™ MiniAmp and MiniAmp Plus Thermal Cycler User Guide ™ ™...
-
Page 55: Appendix E Instrument Specification And Layout
Typical environments with a Pollution Degree II rating are laboratories and sales and commercial areas. Altitude The safety of instrument use was tested for altitudes up to 6000 ft. MiniAmp and MiniAmp Plus Thermal Cycler User Guide ™ ™... -
Page 56: Technical Specifications
Appendix E Instrument specification and layout Technical specifications Technical specifications Feature Specification • MiniAmp: 3.0°C/sec Maximum block ramp rate • MiniAmp Plus: 3.5°C/sec • MiniAmp: 2.2°C/sec Maximum sample ramp rate • MiniAmp Plus: 2.7°C/sec Temperature accuracy ±0.25°C (35–99.9°C) Temperature range for protocol run 0.0–100.0°C... -
Page 57: System Specifications
10/100 Fast Ethernet port for connecting to a network USB v2.0 port for connecting to an external network drive, jump drive, or other USB storage device USB v2.0 port for connecting to USB-enabled Wi-Fi Card MiniAmp and MiniAmp Plus Thermal Cycler User Guide ™ ™... -
Page 58: Location Of Power Point And Ports On The Instrument
The following graphic displays the location of the power cord insertion point as well as the various ports provided in the instrument. Ethernet port USB port Main power switch Power cable port MiniAmp and MiniAmp Plus Thermal Cycler User Guide ™ ™... -
Page 59: Appendix F Predefined Run Methods
Direct PCR Run ™ • BigDye Kit Fast Run ™ • BigDye Kit Standard Run ™ • Time Release Run Optimization • Touchdown PCR Run RT-PCR SuperScript III 1-Step System ™ MiniAmp and MiniAmp Plus Thermal Cycler User Guide ™ ™... - Page 60 Reaction volume (µL) Cover temp. (°C) Cycles — 105.0 Step 1 Ramp Rate 3.5/3.0 3.5/3.0 3.5/3.0 — Temperature 94.0 94.0 Hold Time Infinite Step 2 Ramp Rate — 3.5/3.0 — — MiniAmp and MiniAmp Plus Thermal Cycler User Guide ™ ™...
- Page 61 Stage Cycle/Step Reaction volume (µL) Cover temp. (°C) Step 2 Temperature — 68.0 — — 105.0 Hold Time Values for MiniAmp /MiniAmp Plus Thermal Cycler. ™ ™ AccuPrime PFX 3-Step Method ™ Stage Cycle/Step Reaction volume (µL) Cover temp. (°C) Cycles —...
- Page 62 Reaction volume (µL) Cover temp. (°C) Step 3 Ramp Rate — 3.5/3.0 — — 105.0 Temperature 68.0 Hold Time Values for MiniAmp /MiniAmp Plus Thermal Cycler. ™ ™ AccuPrime Taq High Fidelity Method ™ Stage Cycle/Step Reaction volume (µL) Cover temp. (°C) Cycles —...
- Page 63 — Infinite — 105.0 Step 3 Ramp Rate — 3.5/3.0 — — Temperature 72.0 Hold Time Values for MiniAmp /MiniAmp Plus Thermal Cycler. ™ ™ AmpliTaq Gold 360 Method ™ Stage Cycle/Step Reaction volume (µL) Cover temp. (°C) Cycles —...
- Page 64 — 105.0 Hold Time Infinite Step 3 Ramp Rate — 3.5/3.0 — — Temperature 68.0 Hold Time Values for MiniAmp /MiniAmp Plus Thermal Cycler. ™ ™ AmpliTaq Gold Method ™ Stage Cycle/Step Reaction volume (µL) Cover temp. (°C) Cycles —...
- Page 65 55.0 Hold Time Infinite Step 3 Ramp Rate — 3.5/3.0 — — Temperature 72.0 Hold Time Values for MiniAmp /MiniAmp Plus Thermal Cycler. ™ ™ Basic PCR Taq Method Stage Cycle/Step Reaction volume (µL) Cover temp. (°C) Cycles — 105.0...
- Page 66 Temperature 50.0 Hold Time Step 3 Ramp Rate — — — 3.5/3.0 — Temperature 60.0 Hold Time Values for MiniAmp /MiniAmp Plus Thermal Cycler. ™ ™ BigDye Direct PCR Run Method ™ Stage Cycle/Step Reaction volume (µL) Cover temp. (°C) Cycles —...
- Page 67 — Temperature 50.0 Hold Time Step 3 Ramp Rate — 3.5/3.0 — — Temperature 60.0 Hold Time Values for MiniAmp /MiniAmp Plus Thermal Cycler. ™ ™ BigDye Kit Standard Method ™ Stage Cycle/Step Reaction volume (µL) Cover temp. (°C) Cycles —...
- Page 68 — — Temperature 60.0 Hold Time Step 3 Ramp Rate — 3.5/3.0 — — Temperature 72.0 Hold Time Values for MiniAmp /MiniAmp Plus Thermal Cycler. ™ ™ Elongase 2-Step Method ™ Stage Cycle/Step Reaction volume (µL) Cover temp. (°C) Cycles —...
- Page 69 — Temperature 55.0 Hold Time Step 3 Ramp Rate — 3.5/3.0 — — Temperature 68.0 Hold Time Values for MiniAmp /MiniAmp Plus Thermal Cycler. ™ ™ General PCR Method Stage Cycle/Step Reaction volume (µL) Cover temp. (°C) Cycles — 105.0...
- Page 70 — Temperature 72.0 Hold Time Step 3 Ramp Rate — — — — Temperature Hold Time Values for MiniAmp /MiniAmp Plus Thermal Cycler. ™ ™ Phusion Flash PCR Master Mix 3-Step ™ Stage Cycle/Step Reaction volume (µL) Cover temp. (°C) Cycles 105.0...
- Page 71 — Temperature 72.0 Hold Time Step 3 Ramp Rate — — — — Temperature Hold Time Values for MiniAmp /MiniAmp Plus Thermal Cycler. ™ ™ Phusion High Fidelity DNA Polymerase 3-Step ™ Stage Cycle/Step Reaction volume (µL) Cover temp. (°C) Cycles 105.0...
- Page 72 94.0 94.0 Hold Time Infinite Step 2 Ramp Rate — 3.5/3.0 — — Temperature 68.0 Hold Time Values for MiniAmp /MiniAmp Plus Thermal Cycler. ™ ™ Platinum PFX 3-Step Method ™ Stage Cycle/Step Reaction volume (µL) Cover temp. (°C) Cycles —...
- Page 73 Temperature 55.0 Hold Time Step 3 Ramp Rate — 3.5/3.0 — — Temperature 72.0 Hold Time Values for MiniAmp /MiniAmp Plus Thermal Cycler. ™ ™ Platinum Taq High Fidelity Method ™ Stage Cycle/Step Reaction volume (µL) Cover temp. (°C) Cycles —...
- Page 74 Temperature 55.0 Hold Time Step 3 Ramp Rate — 3.5/3.0 — — Temperature 72.0 Hold Time Values for MiniAmp /MiniAmp Plus Thermal Cycler. ™ ™ SuperScript III 1-Step System Method ™ Stage Cycle/Step Reaction volume (µL) Cover temp. (°C) Cycles —...
- Page 75 55.0 Hold Time Infinite Step 3 Ramp Rate — 3.5/3.0 — — Temperature 72.0 Hold Time Values for MiniAmp /MiniAmp Plus Thermal Cycler. ™ ™ TargetSeq Exome Enrichment Method ™ Stage Cycle/Step Reaction volume (µL) Cover temp. (°C) 2 3 4 Cycles –...
- Page 76 Cover temp. (°C) Step 2 Temperature 65.0 55.0 105.0 Hold Time — — AutoDelta Temperature -0.5 — AutoDelta Starting Cycle — Values for MiniAmp /MiniAmp Plus Thermal Cycler. ™ ™ MiniAmp and MiniAmp Plus Thermal Cycler User Guide ™ ™...
-
Page 77: Appendix G About The Thermal Cycler Fleet Control Software
PCR instruments through a single user interface. The software is compatible with all Applied Biosystems Thermal Cyclers. The Thermal Cycler Fleet Control Software ™ can be purchased separately, and is not included with the MiniAmp or MiniAmp Plus Thermal Cycler. ™... -
Page 78: Appendix H Safety
Symbol English Français Caution, risk of danger Attention, risque de danger Consult the manual for further safety Consulter le manuel pour d’autres renseignements information. de sécurité. MiniAmp and MiniAmp Plus Thermal Cycler User Guide ™ ™... -
Page 79: Safety Alerts On This Instrument
MISE EN GARDE ! Déchets dangereux. Lire Refer to SDS(s) and local regulations les fiches signalétiques (FS) et la réglementation lo for handling and disposal. cale associées à la manipulation et à l’élimination des déchets. MiniAmp and MiniAmp Plus Thermal Cycler User Guide ™ ™... -
Page 80: Location Of Safety Labels On The Instrument
Safety alerts on this instrument Location of safety labels on the instrument Figure 2 Location of the safety label on the rear panel of the instrument Figure 3 Location of the safety label on the 96-Well Sample Block MiniAmp and MiniAmp Plus Thermal Cycler User Guide ™ ™... -
Page 81: China Rohs Compliance
✕: 表示该有害物质至少在该部件的某一均质材料中的含量超出 GB/T26572 规定的限量要. ✕: Indicates that said hazardous substance contained in at least one of the homogenous materials used for this part is above the limit requirement of GB/T 26572. MiniAmp and MiniAmp Plus Thermal Cycler User Guide ™ ™... -
Page 82: Safety Information For Instruments Not Manufactured By Thermo Fisher Scientific
WARNING! Power Supply Line Cords. Use properly configured and approved line cords for the power supply in your facility. WARNING! Disconnecting Power. To fully disconnect power either detach or unplug the power cord, positioning the instrument such that the power cord is accessible. MiniAmp and MiniAmp Plus Thermal Cycler User Guide ™ ™... -
Page 83: Cleaning And Decontamination
Safety requirements for electrical equipment for measurement, control and laboratory use – Part 2-081: Particular requirements for automatic and semi- EN 61010-2-081 automatic laboratory equipment for analysis and other purposes UL 61010-1-2-081 CSA C22.2 No. 61010-2-081 MiniAmp and MiniAmp Plus Thermal Cycler User Guide ™ ™... -
Page 84: Emc
SJ/T 11364-2014 “China RoHS” Standard—Marking for the Restricted Use of Hazardous Substances in Electronic and Electrical Products For instrument specific certificates, visit our customer resource page at www.thermofisher.com/us/en/home/technical-resources/rohs-certificates.html. MiniAmp and MiniAmp Plus Thermal Cycler User Guide ™ ™... -
Page 85: Chemical Safety
Ensure that the waste is stored, transferred, transported, and disposed of according to all local, state/provincial, and/or national regulations. · IMPORTANT! Radioactive or biohazardous materials may require special handling, and disposal limitations may apply. MiniAmp and MiniAmp Plus Thermal Cycler User Guide ™ ™... -
Page 86: Biological Hazard Safety
U.S. Department of Health and Human Services, Biosafety in Microbiological and Biomedical Laboratories (BMBL), 5th Edition, HHS Publication No. (CDC) 21-1112, Revised December 2009; found at: https://www.cdc.gov/labs/pdf/CDC-BiosafetymicrobiologicalBiomedicalLaboratories-2009- P.pdf · World Health Organization, Laboratory Biosafety Manual, 3rd Edition, WHO/CDS/CSR/LYO/2004.11; found at: www.who.int/csr/resources/publications/biosafety/Biosafety7.pdf MiniAmp and MiniAmp Plus Thermal Cycler User Guide ™ ™... - Page 87 Life Technologies Corporation and/or its affiliate(s) warrant their products as set forth in the Life Technologies' General Terms and Conditions of Sale at www.thermofisher.com/us/en/home/ global/terms-and-conditions.html. If you have any questions, please contact Life Technologies at www.thermofisher.com/support. MiniAmp and MiniAmp Plus Thermal Cycler User Guide ™ ™...
- Page 88 MiniAmp and MiniAmpPlus UG_MAN0017492-v5-GUID-6F078928-CA6D-4459-8B58- F95F33633F90-2022/12/15 18:43:18 en 18:49:54.703Z thermofisher.com/support | thermofisher.com/askaquestion thermofisher.com 15 December 2022...
Need help?
Do you have a question about the MiniAmp and is the answer not in the manual?
Questions and answers