Table of Contents
Advertisement
Quick Links
Advertisement
Table of Contents

Related Manuals for ThermoFisher Scientific QuantStudio 12K Flex OpenArray AccuFill System


Summary of Contents for ThermoFisher Scientific QuantStudio 12K Flex OpenArray AccuFill System
- Page 1 ™ ™ ™ QuantStudio 12K Flex OpenArray AccuFill System USER GUIDE Use and maintenance for use with: OpenArray ™ AccuFill ™ Instrument ™ ™ OpenArray AccuFill Software v2.0 Catalog Number 4471021 Publication Number MAN0025669 Revision A.0 For Research Use Only. Not for use in diagnostic procedures.
- Page 2 Life Technologies Holdings Pte Ltd | Block 33 | Marsiling Industrial Estate Road 3 | #07-06, Singapore 739256 For descriptions of symbols on product labels or product documents, go to thermofisher.com/symbols-definition. The information in this guide is subject to change without notice. DISCLAIMER: TO THE EXTENT ALLOWED BY LAW, THERMO FISHER SCIENTIFIC INC.
-
Page 3: Table Of Contents
Contents ■ CHAPTER 1 Product information ..........7 Product description . - Page 4 Contents ■ CHAPTER 5 Map plates ............25 Overview of Map Plates features .
- Page 5 Contents ■ ™ APPENDIX A Cleaning and maintenance of the OpenArray ™ AccuFill Instrument ............. . 63 Cleaning schedule and instructions .
- Page 6 Contents View the instrument log ............84 Copy or export the instrument log .
-
Page 7: Chapter 1 Product Information
Product information ■ Product description ..............7 ■... -
Page 8: About The Instrument
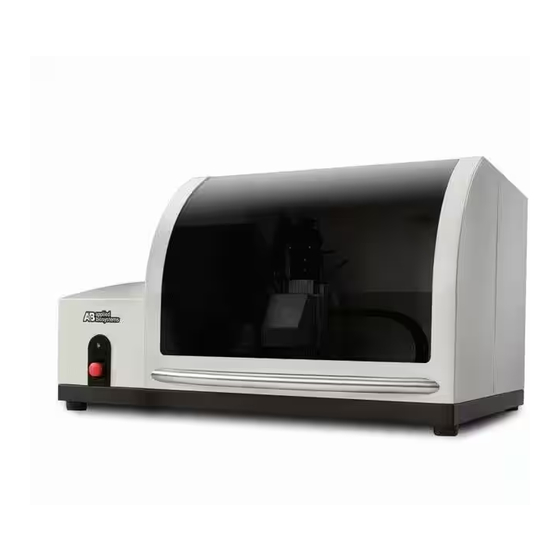
Chapter 1 Product information About the instrument About the instrument Overview of the instrument ™ The instrument draws the PCR master mix and sample across the surface of an OpenArray Plate. The PCR master mix and sample do not need to be dispensed in specific volumes because the ™... - Page 9 Chapter 1 Product information About the instrument Figure 2 Instrument deck Tip box holders (2); tip box installed in left holder Sample plate holder with sample plate installed ™ OpenArray Plate holders (4) Waste bin Figure 3 Left side panel Power switch Power cord outlet USB port...
-
Page 10: About The Software
Chapter 1 Product information About the software About the software Network and password security requirements Network configuration and security The network configuration and security settings of your laboratory or facility (such as firewalls, anti- virus software, network passwords) are the sole responsibility of your facility administrator, IT, and security personnel. -
Page 11: File Formats
Chapter 1 Product information About the software ™ ™ ™ ™ IMPORTANT! OpenArray AccuFill Software v1.2 and OpenArray AccuFill Software v2.0 cannot be installed on the same computer at the same time. File formats ™ ™ The following file formats are used or generated by OpenArray AccuFill Software v2.0. - Page 12 Chapter 1 Product information About the software (continued) File Description • Contains the information in the original TPF file, plus the sample Loaded TPF (XML format) information • Generated by the instrument during a run, based on the original TPF file •...
-
Page 13: Workflow
Chapter 1 Product information Workflow Workflow OpenArray ™ AccuFill ™ Software v2.0 workflow Initialize the system (page 18) (Optional) Download or prepare TPF or SPF files (page 23) (Optional) Map plates (page 25) ™ • (Optional) Create an OpenArray Plate file (CSV) •... -
Page 14: Chapter 2 Basic Operations And One-Time Procedures
Basic operations and one-time procedures ■ Basic instrument operations ............14 ■... -
Page 15: Important Guidelines For Handling An Openarray ™ Plate
Chapter 2 Basic operations and one-time procedures Important guidelines for handling an OpenArray ™ Plate ™ Important guidelines for handling an OpenArray Plate • ™ IMPORTANT! Do not use an OpenArray Plate that is past its expiry date. • Wear gloves that are one size smaller than the size you typically wear, to help prevent excess glove material from contacting the plate while handling. -
Page 16: Set The Plate Mapping Defaults (Full Run Workflow)
Chapter 2 Basic operations and one-time procedures Set the preferences 3. Click Change, then select the folder for the following items. Folder Description OpenArray Plate File Folder The folder that is opened when a TPF or SPF file is imported to set up a run. (TPF or SPF files) The folder where a new TPF or SPF file is saved when it is downloaded or created from a template. - Page 17 Chapter 2 Basic operations and one-time procedures Set the preferences 5. Select the Pipettor. • Fixed • Adjustable 6. Click Save. QuantStudio ™ 12K Flex OpenArray ™ AccuFill ™ System User Guide...
-
Page 18: Start The System
Initialize the system ■ Start the system ..............18 ■... -
Page 19: Chapter 3 Initialize The System
Chapter 3 Initialize the system Set up the system Set up the system IMPORTANT! To safely operate the instrument, keep the deck clear and have enough room in the waste bin to eject the used pipette tips. 1. Open the instrument door, empty the waste bin, then place the waste bin back on the instrument deck. - Page 20 Chapter 3 Initialize the system Perform a system self-test To start a system self-test manually, see “Perform a system self-test (manual start)” on page 1. In the Deck screen, click one of the following options: • Quick Run • Full Run •...
-
Page 21: Overview Of The Deck Screen
Chapter 3 Initialize the system Overview of the Deck screen Overview of the Deck screen The Deck screen shows the location and status of the items in the instrument. Use the toolbar to navigate to any of the screens (see Figure 5 on page 21). -
Page 22: Reconnect The Instrument
Chapter 3 Initialize the system Reconnect the instrument Figure 6 System ready Figure 7 Busy Figure 8 Disconnected Reconnect the instrument The Deck screen displays Disconnected in the status bar if the instrument has been disconnected. 1. Check the cables that connect the computer with the software to the instrument. 2. -
Page 23: Chapter 4 Download Or Prepare Tpf Or Spf Files
Download or prepare TPF or SPF files ■ Download TPF or SPF files ............23 ■... -
Page 24: Create Tpf Or Spf Files From A Template
Chapter 4 Download or prepare TPF or SPF files Create TPF or SPF files from a template 4. (Custom Gene Expression plates only) Select one of the following options: • With microbial target names • Without microbial target names Note: The microbial target name selection is not displayed if inventoried products are selected. 5. -
Page 25: Chapter 5 Map Plates
Map plates ■ Overview of Map Plates features ............25 ■... - Page 26 Chapter 5 Map plates Configure the experiment design to map the plates 2. In the Plate format section, select a value. The values in the Plate format section depend on the plate format that was chosen in step 1. The Plate format is not displayed if 3-sample fixed panel or 4-sample fixed panel was chosen in step 1.
-
Page 27: Sample Plate Layouts
Chapter 5 Map plates Configure the experiment design to map the plates Sample plate layouts Example 384-well sample plate layout Figure 9 Example 384-well sample plate layout ™ Each section of the 384-well plate corresponds to one OpenArray Plate. In this example, each section contains one sample. - Page 28 Chapter 5 Map plates Configure the experiment design to map the plates Sample mapping for two samples per subarray Sample Plate Sample 1 Sample 49 Sample 48 Sample 96 Load 1 Load 2 Subarray A1 Sample 1 Sample 49 OpenArray Plate Sample 48 Subarray D12 Sample 96...
- Page 29 Chapter 5 Map plates Configure the experiment design to map the plates Sample mapping for three samples per subarray Sample 1 Sample 49 Sample 48 Sample 96 Sample Plate Load 1 Load 2 Sample 97 Sample 144 Subarray A1 Load 3 Sample 1 Sample 49 Sample 97...
-
Page 30: Map A 384-Well Plate From 96-Well Plates
Chapter 5 Map plates Map a 384-well plate from 96-well plates Map a 384-well plate from 96-well plates If the sample plate file was imported, the sample names are displayed. The sample plate layout defined in the sample plate file can be edited. If the sample plate file was not imported, the samples must be added manually. - Page 31 Chapter 5 Map plates Map a 384-well plate from 96-well plates Figure 12 Mapping with a fixed pipette 96-well plate with sample 1 (S1) in row A 96-well plate with sample 2 (S2) in row B 384-well plate with sample 1 and sample 2 in alternating wells of row A QuantStudio ™...
- Page 32 Chapter 5 Map plates Map a 384-well plate from 96-well plates Figure 13 Mapping with an adjustable pipette 96-well plate with sample 1 (S1) in row A 96-well plate with sample 2 (S2) in row B 384-well plate with sample 1 in each well of row A 384-well plate with sample 2 in each well of row B QuantStudio ™...
- Page 33 Chapter 5 Map plates Map a 384-well plate from 96-well plates 2. (For Gene Expression 224 and Genotyping 256 plate formats) In the 96-well plate, select a sample run. • Sample Run 1 • Sample Run 2 If Sample Run 1 is selected, the top half of the 96-well plate is defined with the samples. If Sample Run 2 is selected, the bottom half of the 96-well plate is defined with the samples.
- Page 34 Chapter 5 Map plates Map a 384-well plate from 96-well plates Figure 15 Sample Run 2 Wells in the bottom half of the 96-well plate are defined 3. In the 384-well plate, click Swap. This moves the samples from the top half of the 384-well plate to the bottom half of the 384-well plate.
-
Page 35: Set Up A 384-Well Sample Plate
Chapter 5 Map plates Set up a 384-well sample plate Proceed to “Export plate files” on page Set up a 384-well sample plate If the sample plate file was imported, the sample names are displayed. The sample plate layout defined in the sample plate file can be edited. -
Page 36: Options To View A Plate Layout
Chapter 5 Map plates Options to view a plate layout Figure 16 384-well plate before Rotate data is clicked Figure 17 384-well plate after Rotate data is clicked Proceed to “Export plate files” on page Options to view a plate layout The toolbar in the Map plates pane allows you to adjust the view. - Page 37 Chapter 5 Map plates Options to view a plate layout The plates can be viewed in a plate view or a well table view. The current view is displayed in blue in the toolbar. The plate view shows each well on a plate. It displays the sample name and is color-coded based on ™...
-
Page 38: Export Plate Files
Chapter 5 Map plates Export plate files Figure 20 Well table view Export plate files Complete the mapping of the plates (see “Map a 384-well plate from 96-well plates” on page 30 or “Set up a 384-well sample plate” on page 35). - Page 39 Chapter 5 Map plates Export plate files QuantStudio ™ 12K Flex OpenArray ™ AccuFill ™ System User Guide...
-
Page 40: Chapter 6 Set Up And Start The Run With The Quick Run Workflow
Set up and start the run with the quick run workflow ■ Overview of the quick run workflow ........... . . 40 ■... -
Page 41: Overview Of The Quick Run Screens
Chapter 6 Set up and start the run with the quick run workflow Overview of the Quick Run screens Overview of the Quick Run screens Figure 21 Configure run pane (with sample plate information) Load plate with sample information radio button Tip box status Sample plate file name Sample plate (to confirm foil is removed) -
Page 42: Before You Begin-Quick Run Workflow
Chapter 6 Set up and start the run with the quick run workflow Before you begin—quick run workflow Figure 22 Configure run pane (without sample plate information) Load plate without sample information radio button Tip box status Sample plate name or serial number Sample plate (to confirm foil is removed) ™... -
Page 43: Configure The Run-Quick Run Workflow
Chapter 6 Set up and start the run with the quick run workflow Configure the run—quick run workflow • Load the tip boxes, then remove the tip box covers. Do not stack the tip boxes. ™ • Place the OpenArray Plate in the plate holders. -
Page 44: Configure The Run Without Sample Plate Information
Chapter 6 Set up and start the run with the quick run workflow Configure the run—quick run workflow ™ During the run, the instrument fills the OpenArray Plate with the samples from the corresponding section of the sample plate. ™ The OpenArray Plate position displays the color that corresponds to the section of the sample plate. -
Page 45: Verify The Run Setup And Start The Run-Quick Run Workflow
Chapter 6 Set up and start the run with the quick run workflow Verify the run setup and start the run—quick run workflow 3. In the OpenArray Plate name and position field, enter information to identify the OpenArray ™ Plate. ™... - Page 46 Chapter 6 Set up and start the run with the quick run workflow Verify the run setup and start the run—quick run workflow Section of the tip box is full Section of the tip box is empty 2. Select the first section of the sample plate that will be used to fill the OpenArray ™...
-
Page 47: Chapter 7 Set Up And Start A Run With The Full Run Workflow
Set up and start a run with the full run workflow ■ Overview of the full run workflow ............47 ■... -
Page 48: Overview Of The Full Run Screens
Chapter 7 Set up and start a run with the full run workflow Overview of the Full Run screens Overview of the Full Run screens Figure 23 Configure design pane Experiment type section Plate format section Only displayed for gene expression and genotyping experiments. Pipettor section Add your OpenArray plate serial numbers section Add your input sample files section... - Page 49 Chapter 7 Set up and start a run with the full run workflow Overview of the Full Run screens Figure 24 Map plates pane 96-well plates 384-well plates The sample plates are color-coded based on the section of the sample plate. QuantStudio ™...
-
Page 50: Before You Begin-Full Run Workflow
Chapter 7 Set up and start a run with the full run workflow Before you begin—full run workflow Figure 25 Start run pane Tip box status Section of sample plate to extract samples Confirm foil is removed from the selected plate checkbox ™... -
Page 51: Configure The Experiment Design For The Full Run Workflow
Chapter 7 Set up and start a run with the full run workflow Configure the experiment design for the full run workflow • Allow the instrument to perform a self-test if the run is being started after the software is launched (see “Perform a system self-test”... -
Page 52: Add Or Edit Sample Names-Full Run Workflow
Chapter 7 Set up and start a run with the full run workflow Add or edit sample names—full run workflow The format of the sample plate file is validated. For information about the required format, see “File formats” on page The name of the file is displayed in the Select file field. - Page 53 Chapter 7 Set up and start a run with the full run workflow Verify the run setup and start the run—full run workflow Section of the tip box that is full Section of the tip box that is empty 2. (Optional) Click Auto-fill tip boxes. The status of all section of the tips boxes is set to full.
- Page 54 Chapter 7 Set up and start a run with the full run workflow Verify the run setup and start the run—full run workflow 6. Click Start Run. The run does not begin under any of the following conditions: • The waste bin is not in position •...
-
Page 55: Chapter 8 Monitor Run Progress
Monitor run progress ■ Deck screen during a run ............. . 55 ■... -
Page 56: Run Progress
Chapter 8 Monitor run progress Run progress Run progress See Figure 26 on page The blue box in the Deck screen shows the location of the tip handler. The following steps are displayed in the Deck screen as the run progresses on the instrument: 1. -
Page 57: Instrument Disconnection During Run
Chapter 8 Monitor run progress Instrument disconnection during run Instrument disconnection during run If the instrument is disconnected from the computer during a run, the run is stopped. The status bar displays Disconnected (see Figure 4 on page 21). Reconnect the instrument to the computer (see “Reconnect the instrument” on page 22). -
Page 58: Chapter 9 Prepare The Openarray ™ Plate For Pcr
™ Prepare the OpenArray Plate for ■ ™ Remove the OpenArray Plate from the instrument ........58 ■... - Page 59 Chapter 9 Prepare the OpenArray ™ Plate for PCR ™ Remove the OpenArray Plate from the instrument Figure 29 Remove plate dialog box ™ OpenArray Plate to remove from the instrument 1. Open the instrument door and remove the OpenArray ™...
- Page 60 Chapter 9 Prepare the OpenArray ™ Plate for PCR ™ Remove the OpenArray Plate from the instrument 5. Click Done. The run does not proceed under any of the following conditions: • The waste bin is not in position • The sample plate is not in position ™...
-
Page 61: Seal The Openarray ™ Plate
Chapter 9 Prepare the OpenArray ™ Plate for PCR ™ Seal the OpenArray Plate ™ Seal the OpenArray Plate ™ ™ IMPORTANT! Throughout this procedure, handle the OpenArray Plate and the OpenArray Case only by the edges. ™ ™ ™ Note: The OpenArray Case consists of the sealed OpenArray Plate and the OpenArray... - Page 62 Chapter 9 Prepare the OpenArray ™ Plate for PCR ™ Seal the OpenArray Plate The syringe tip must be in front of the array when filling the case with immersion fluid. 7. While holding the case vertically, remove the syringe tip, insert the screw end of the OpenArray ™...
-
Page 63: Instrument
Cleaning and maintenance of the ™ ™ OpenArray AccuFill Instrument ■ Cleaning schedule and instructions ........... . . 63 ■... -
Page 64: Spill Accidents
Appendix A Cleaning and maintenance of the OpenArray ™ AccuFill ™ Instrument Spill accidents Spill accidents ™ ™ If liquids or other materials spill inside the OpenArray AccuFill Instrument, turn off the instrument by pressing the power switch on the left side of the instrument. Unplug the power cord from the electrical ™... -
Page 65: Appendix B Required Materials Not Supplied
Required materials not supplied Unless otherwise indicated, all materials are available through thermofisher.com. "MLS" indicates that the material is available from fisherscientific.com or another major laboratory supplier. Catalog numbers that appear as links open the web pages for those products. Item Source Instruments, software, and equipment... - Page 66 Appendix B Required materials not supplied Spill accidents (continued) Item Source Sample DNA See the user guide or application guide for your assays. PCR master mix See the user guide or application guide for your assays. Ethanol, 100% (molecular biology grade) DNA ExitusPlus Reagent (Optional) 100% Compressed nitrogen gas, filtered, or residue-free compressed air canister...
-
Page 67: Appendix C Site Requirements
Site requirements ■ Dimensions and weights ............. . 67 ■... -
Page 68: Components (Unpackaged)
Appendix C Site requirements Configured system dimensions and connections Components (unpackaged) Ensure that the installation site bench space can accommodate the dimensions and support the weights of the components. Component Height Length (depth) Width Weight Instrument 50 cm (20 in.) 70 cm (27.5 in.) 80 cm (31.5 in.) 80 kg (176 lbs) -
Page 69: Component Clearances Required For Installation And Maintenance
Appendix C Site requirements Component clearances required for installation and maintenance ™ ™ ™ Figure 31 Dimensions of the typical layout of the QuantStudio 12K Flex OpenArray AccuFill System Monitor and keyboard Computer tower Electrical outlet ™ ™ OpenArray AccuFill Instrument Component clearances required for installation and maintenance... -
Page 70: Environmental Requirements
Appendix C Site requirements Environmental requirements • The system is within 2 m (6.6 ft) of a standard electrical outlet. • There is sufficient space for the power cord to be easily unplugged or disconnected from the system. • The location is not near heaters, cooling ducts, or in direct sunlight. Fluctuations between day temperatures and night temperatures can cause instrument instability. -
Page 71: Electrical Requirements
Appendix C Site requirements Electrical requirements (continued) Condition Acceptable range Transient category Installation categories II Overvoltage category Installation categories II Vibration The instrument is not adjacent to strong vibration sources, such as a centrifuge, pump, or compressor. Excessive vibration will affect instrument performance. Pollution degree Install the instrument in an environment that has nonconductive pollutants such as dust particles or wood chips. -
Page 72: Electrical Protective Devices
Appendix C Site requirements Electrical protective devices Circuit Rated Device Rated voltage Rated power required frequency Instrument 100–240 ±10% VAC 50/60 Hz 75 W Computer (laptop) 100–240 ±10% VAC 10 A 50/60 Hz 90 VA Computer (desktop) 125 VA 100–240 ±10% VAC 10 A 50/60 Hz Monitor... -
Page 73: Network Requirements
Appendix C Site requirements Network requirements (continued) Recommended devices Uninterruptible power supply (UPS) • 1.5-kVA uninterruptible power supply (UPS) • Use in areas prone to power failure. • Power failures and other events that abruptly terminate the function of the instrument and computer can corrupt data and possibly damage the system. -
Page 74: Safety Requirements
Appendix C Site requirements Safety requirements Safety requirements Safety practices A safety representative from your facility must ensure that: • Personnel establish and follow all applicable safety practices and policies to protect laboratory personnel from potential hazards. • All applicable safety devices and equipment are available at all times. Required safety equipment Your laboratory has specific safety practices and policies designed to protect laboratory personnel from potential hazards that are present. -
Page 75: Computer Requirements
Appendix C Site requirements Computer requirements Computer requirements The computer that is provided with the system has the following minimum specifications: ™ • Windows 10 operating system (64-bit) • 8 GB RAM • 800 MB hard drive capacity • Default screen resolution of 1,440 × 900 pixels Antivirus software requirements We recommend that the computer that is provided with the system is dedicated to running the ™... -
Page 76: Appendix D Manage The Service Settings
Manage the service settings ■ View the instrument statistics ............76 ■... -
Page 77: Copy Or Save The Instrument Statistics
Appendix D Manage the service settings Copy or save the instrument statistics • Number of Failed Sample Pickups • Number of Attempted Tip Injections • Number of Failed Tip Injections • Number of Plate Holder Locks • Number of Door Locks •... -
Page 78: Enable Or Disable The Presence Sensors
Appendix D Manage the service settings Enable or disable the presence sensors (continued) Sensor type Color Status Actuators (tip ejection magnet, Black The sensor for the item is plate holder lock) enabled but the object is not detected. Axes Blue The tip handler reaches the edge of the axis. -
Page 79: Perform A Motion Test
Appendix D Manage the service settings Perform diagnostics tests 3. Select or deselect the Interactive Test checkbox. If the checkbox is selected, the test includes a step to manually open and close the door. If the checkbox is not selected, the test is completed without the door being manually opened and closed. -
Page 80: Perform A Tip Ejection Test
Appendix D Manage the service settings Perform diagnostics tests Perform a tip ejection test The ability of the robotic tip handler to eject tips is tested. 1. Click Service4Diagnostics. 2. Select the Tip Ejection Test tab. 3. Enter a number in the Run 1 of field. The number specified in this field is the total number of times that the instrument performs the tip ejection test sequentially. -
Page 81: Perform A Plate Holder Test
Appendix D Manage the service settings Perform diagnostics tests If more than one run was specified, the number in the Run 1 of field is updated, for example, Run 2 of, Run 3 of. Empty the waste bin after the test is complete. If the test fails, contact Service. - Page 82 Appendix D Manage the service settings Perform diagnostics tests 3. Select a value from the Loading Mode dropdown list. Option Description Do Not Pause Loading The instrument moves through the full sequence of the test without pausing. Pause Loading Between OpenArray Plates The instrument pauses after the tips are ejected, ™...
-
Page 83: View Loading History Log
Appendix D Manage the service settings View loading history log 9. If any pauses were defined in step 3, click Continue in the Instrument Paused dialog box. 10. Follow the instructions to remove the OpenArray ™ Plate from the instrument and remove the foil from the next section of the sample plate. -
Page 84: View The Instrument Log
Appendix D Manage the service settings View the instrument log View the instrument log Click Service4Instrument Log. The instrument log is displayed. Copy or export the instrument log View the instrument log (see “View the instrument log” on page 84). 1. -
Page 85: Appendix E Safety
Safety ■ Symbols on this instrument ............85 ■... -
Page 86: Standard Safety Symbols
Appendix E Safety Symbols on this instrument Standard safety symbols Symbol and description CAUTION! Risk of danger. Consult the manual for further safety information. Symbole et description MISE EN GARDE ! Risque de danger. Consulter le manuel pour d’autres renseignements de sécurité. -
Page 87: Control And Connection Symbols
Appendix E Safety Symbols on this instrument Control and connection symbols Symbols and descriptions On (Power) Off (Power) Standby On/Off Earth (ground) terminal Protective conductor terminal (main ground) Direct current Alternating current Both direct and alternating current Conformity symbols Conformity mark Description Indicates conformity with safety requirements for Canada and U.S.A. - Page 88 Appendix E Safety Symbols on this instrument (continued) Conformity mark Description Indicates conformity with the WEEE Directive 2012/19/EU. CAUTION! To minimize negative environmental impact from disposal of electronic waste, do not dispose of electronic waste in unsorted municipal waste. Follow local municipal waste ordinances for proper disposal provision and contact customer service for information about responsible disposal options.
-
Page 89: Safety Information For Instruments Not Manufactured By Thermo Fisher Scientific
Appendix E Safety Safety information for instruments not manufactured by Thermo Fisher Scientific Safety information for instruments not manufactured by Thermo Fisher Scientific Some of the accessories provided as part of the instrument system are not designed or built by Thermo Fisher Scientific. - Page 90 Appendix E Safety Instrument safety ™ ™ Specific alerts for the OpenArray AccuFill Instrument WARNING! PHYSICAL INJURY HAZARD. Moving parts can crush and cut. Keep hands clear of moving parts while operating the instrument. CAUTION! PHYSICAL INJURY HAZARD. Do not attempt to lift or move the instrument without the assistance of others, the use of appropriate moving equipment, and proper lifting techniques.
-
Page 91: Physical Injury
Appendix E Safety Instrument safety Physical injury CAUTION! Moving and Lifting Injury. The instrument is to be moved and positioned only by the personnel or vendor specified in the applicable site preparation guide. Improper lifting can cause painful and permanent back injury. Things to consider before lifting or moving the instrument or accessories: ·... - Page 92 Appendix E Safety Instrument safety Workstation safety Correct ergonomic configuration of your workstation can reduce or prevent effects such as fatigue, pain, and strain. Minimize or eliminate these effects by configuring your workstation to promote neutral or relaxed working positions. CAUTION! MUSCULOSKELETAL AND REPETITIVE MOTION HAZARD.
-
Page 93: Electrical Safety
Appendix E Safety Instrument safety Electrical safety WARNING! Ensure appropriate electrical supply. For safe operation of the instrument: · Plug the system into a properly grounded receptacle with adequate current capacity. · Ensure the electrical supply is of suitable voltage. ·... -
Page 94: Cleaning And Decontamination
Appendix E Safety Safety and electromagnetic compatibility (EMC) standards Cleaning and decontamination CAUTION! Cleaning and Decontamination. Use only the cleaning and decontamination methods that are specified in the manufacturer user documentation. It is the responsibility of the operator (or other responsible person) to ensure that the following requirements are met: ·... -
Page 95: Safety Standards
Appendix E Safety Safety and electromagnetic compatibility (EMC) standards Safety standards Reference Description EU Directive 2014/35/EU European Union “Low Voltage Directive” IEC 61010-1 Safety requirements for electrical equipment for measurement, control, and laboratory use – Part 1: General requirements EN 61010-1 UL 61010-1 CAN/CSA C22.2 No. -
Page 96: Environmental Design Standards
Appendix E Safety Safety and electromagnetic compatibility (EMC) standards Environmental design standards Reference Description Directive 2012/19/EU European Union “WEEE Directive”—Waste electrical and electronic equipment Directive 2011/65/EU European Union “RoHS Directive”—Restriction of hazardous substances in electrical and electronic equipment SJ/T 11364-2014 “China RoHS”... -
Page 97: Chemical Safety
Appendix E Safety Chemical safety Chemical safety WARNING! GENERAL CHEMICAL HANDLING. To minimize hazards, ensure laboratory personnel read and practice the general safety guidelines for chemical usage, storage, and waste provided below. Consult the relevant SDS for specific precautions and instructions: ·... -
Page 98: Biological Hazard Safety
Appendix E Safety Biological hazard safety · Veiller à utiliser des récipients à déchets primaire et secondaire. (Le récipient primaire contient les déchets immédiats, le récipient secondaire contient les fuites et les écoulements du récipient pri‐ maire. Les deux récipients doivent être compatibles avec les matériaux mis au rebut et conformes aux exigences locales, nationales et communautaires en matière de confinement des récipients.) ·... -
Page 99: Appendix F Documentation And Support
Documentation and support Related documentation Document Publication number QuantStudio ™ 12K Flex OpenArray ™ AccuFill ™ System Site Preparation 4457095 Guide ™ ™ OpenArray AccuFill Software v2.0 Quick Run Workflow Without MAN0025835 Sample Information Quick Reference ™ ™ OpenArray AccuFill Software v2.0 Full Run Workflow Quick MAN0025836 Reference... -
Page 100: Limited Product Warranty
Appendix F Documentation and support Limited product warranty Limited product warranty Life Technologies Corporation and/or its affiliate(s) warrant their products as set forth in the Life Technologies' General Terms and Conditions of Sale at www.thermofisher.com/us/en/home/ global/terms-and-conditions.html. If you have any questions, please contact Life Technologies at www.thermofisher.com/support. -
Page 101: Index
Index 2 samples per subarray 28 3 samples per subarray 29 fixed pipette, map 30 384-well plate folder defaults 15 map from 96-well plate 30 full run swap 30 configure experiment design 51 384-well sample plate, set up 35 overview 47 96-well plate, map to 384-well plate 30 plate mapping defaults 16 screens 48... - Page 102 Index add or edit, full run 52 sample plate, place in holder 14 OA.csv 11 sample plate file 11 open array plate, place in holder 14 sample plate layout, view 36 openarray plate, remove from instrument 58 sample plate orientation 42, 50 ordering information 65 set up 384-well sample plate 35 overview, software 10...
- Page 103 OpenArray AccuFill System v2.0_UG_MAN0025669-v4-GUID-DCCD1A3A-EDDF-4207- B597-18073A9A59D8-2021/11/30 19:02:59 en 23:29:37.262Z thermofisher.com/support | thermofisher.com/askaquestion thermofisher.com 30 November 2021...
Need help?
Do you have a question about the QuantStudio 12K Flex OpenArray AccuFill System and is the answer not in the manual?
Questions and answers